Month: June 2024

résolution de problème 3e année pdf gratuit

Problem-solving skills are essential for 3rd graders, fostering critical thinking and math confidence. Free PDF resources offer training, synthesis, and in-depth exercises, preparing students for real-world applications;

1.1 Importance of Problem-Solving Skills in Early Education

Developing problem-solving skills in early education is crucial for fostering critical thinking and logical reasoning. These skills help students approach challenges confidently and methodically. By introducing problem-solving at the 3rd-grade level, educators lay a strong foundation for future academic success. Problem-solving enhances math fluency, encourages creativity, and builds perseverance. It also promotes collaboration and communication, essential for teamwork. Early exposure to problem-solving prepares students to tackle real-world scenarios effectively. Free PDF resources, such as those for 3rd-grade problem-solving, provide accessible tools for practice. These materials often include word problems and interactive exercises, making learning engaging. By mastering problem-solving, students develop a deeper understanding of mathematical concepts and their practical applications, setting them up for long-term academic and personal growth.

1.2 Overview of Math Problem Types for 3rd Graders

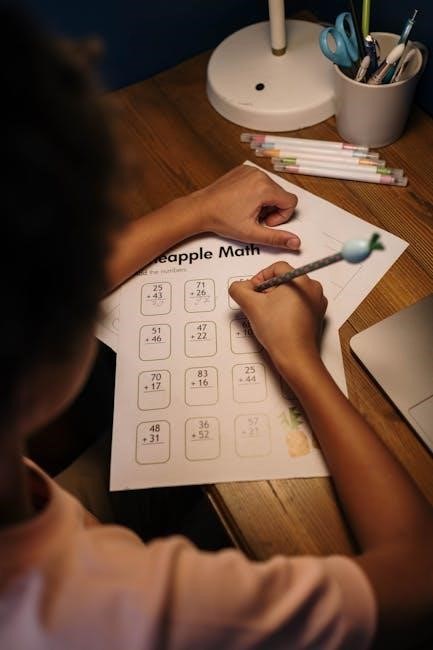
Third graders encounter various math problem types that build foundational skills. These include basic arithmetic operations, word problems, and real-world applications. Addition, subtraction, multiplication, and division are central, often presented in interactive formats. Word problems introduce storytelling, requiring students to translate narratives into mathematical equations. PDF resources offer exercises like “Omar partage 28 caramels mous avec Octave,” teaching fair distribution. Real-world applications, such as calculating distances or quantities, connect math to daily life. These problem types prepare students for higher-level thinking, ensuring a smooth transition to more complex concepts. Accessible tools and engaging exercises make learning enjoyable and effective, fostering a strong math foundation.

Types of Exercises for Problem Solving

Exercises include training, synthesis, and in-depth problems. Training builds basic skills, synthesis combines concepts, and in-depth challenges promote advanced thinking and application of math principles creatively.

2.1 Training Exercises

Training exercises are foundational, focusing on basic math operations and problem-solving strategies. They include drills in addition, subtraction, multiplication, and division, as well as simple word problems. These exercises help students build confidence and fluency in core skills, preparing them for more complex challenges. Free PDF resources provide structured practice sheets, ensuring mastery of essential concepts. Regular practice through these exercises enhances speed and accuracy, laying a solid groundwork for advanced problem-solving. Examples include sharing tasks, like Omar distributing caramels, or calculating distances, such as a hiker’s journey. These exercises are designed to reinforce classroom lessons and establish a strong mathematical foundation.

2.2 Synthesis Exercises

Synthesis exercises challenge students to combine multiple skills and concepts, promoting deeper understanding and application. These exercises often involve multi-step problems, requiring the use of various strategies and operations. For example, students might solve word problems involving time intervals or mixed operations, such as calculating the total distance traveled over several days. Free PDF resources provide diverse scenarios, like determining the number of boys and girls in a class or solving real-world situations involving money and measurements. These exercises encourage logical thinking and the ability to break down complex problems into manageable parts. By integrating different math areas, synthesis exercises prepare students for advanced problem-solving and real-life applications, fostering independence and mathematical reasoning.

2.3 In-Depth Exercises

In-depth exercises are designed to challenge students with complex, multi-step problems that require advanced critical thinking and mathematical reasoning. These exercises often involve real-world scenarios, such as calculating distances traveled over several days or determining the number of boys and girls in a class. They encourage students to apply multiple concepts learned in training and synthesis exercises, fostering a deeper understanding of problem-solving strategies. For example, a problem might involve time intervals or mixed operations, requiring students to break down the problem into smaller, manageable parts. Free PDF resources provide diverse and engaging in-depth exercises, helping students develop analytical skills and prepare for more advanced mathematical challenges. These exercises emphasize the importance of thorough thinking and precision, ensuring students are well-equipped for future academic success.

Strategies for Effective Problem Solving

Effective problem-solving strategies for 3rd graders include breaking down problems into steps, using visual aids, and applying mental math techniques. These approaches enhance critical thinking and math fluency, enabling students to tackle challenges confidently and accurately.

3.1 Basic Strategies for Math Problem Solving

Basic strategies for 3rd graders include reading problems carefully, identifying key numbers, and choosing the right operation. PDF resources provide exercises focusing on addition, subtraction, and mental math. These tools help students break down problems into manageable steps, promoting a clear understanding of mathematical concepts. By practicing these foundational skills, students build confidence and improve their ability to approach various problem types effectively. Regular practice with these exercises ensures a strong math foundation, preparing them for more complex challenges in the future.

3.2 Using Visual Aids for Better Understanding

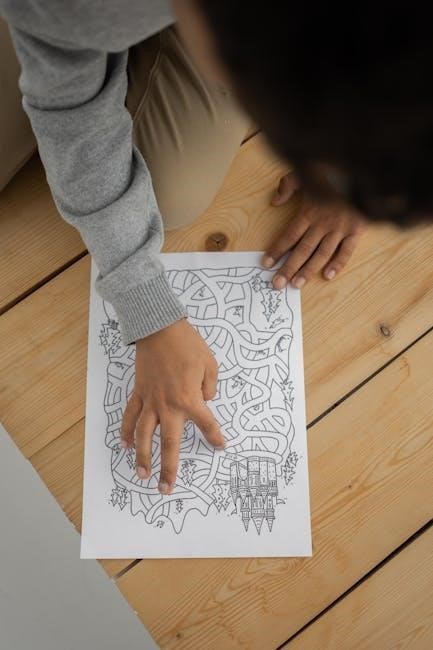
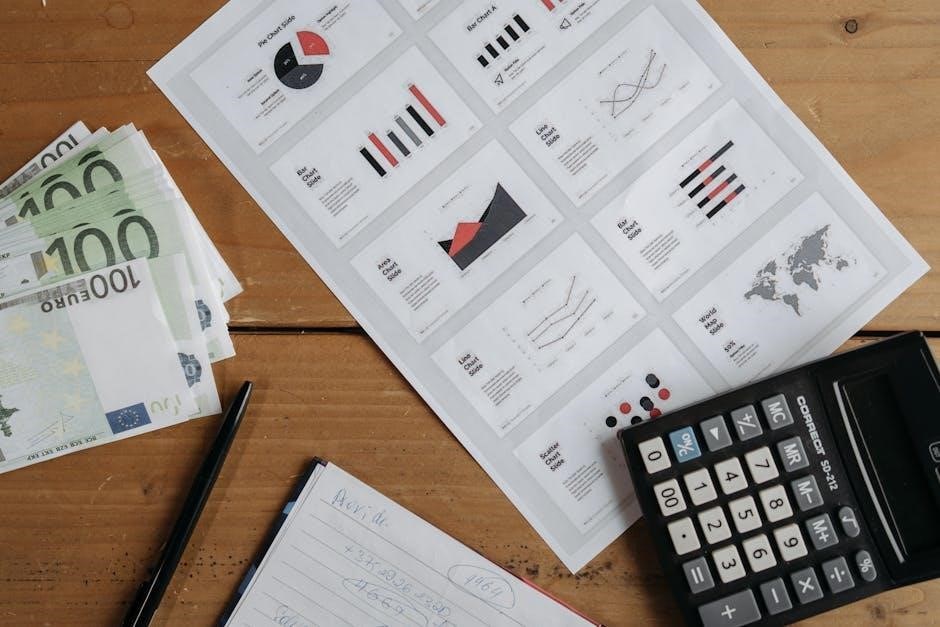
Visual aids, such as diagrams, graphs, and bar models, play a crucial role in helping 3rd graders comprehend math problems. PDF resources often include exercises that incorporate these tools to simplify complex concepts. For instance, visual representations of addition and subtraction problems help students identify patterns and relationships between numbers. Word problems are also made easier with images or charts, allowing learners to visualize the scenario and break it down into manageable parts. Interactive tools, such as number lines and counting blocks, further enhance understanding by providing hands-on experiences. These visual strategies not only improve problem-solving skills but also make math more engaging and accessible for young learners, fostering a deeper connection to the material.

3.3 Interactive Tools for Engaging Students

Interactive tools are powerful resources for engaging 3rd graders in problem-solving activities. Math puzzles, quizzes, and simulations encourage active participation and make learning fun. For example, interactive number lines and counting blocks help students visualize math concepts, while problem-solving games introduce friendly competition. These tools often include immediate feedback, allowing students to track their progress and understand their mistakes. Additionally, many free PDF resources incorporate interactive elements, such as clickable exercises and drag-and-drop features, to create a dynamic learning experience. By leveraging these tools, teachers can cater to different learning styles and keep students motivated. Interactive resources not only enhance understanding but also foster a sense of independence and confidence in young learners, making problem-solving more enjoyable and effective. Regular use of these tools can significantly improve math skills and overall academic performance.

Interactive Resources for Practice

Interactive resources, such as math games, quizzes, and simulations, provide engaging ways for 3rd graders to practice problem-solving skills. Many free PDFs include interactive elements like clickable exercises and puzzles, designed to make learning fun and effective. These tools often feature visual aids and real-world applications, helping students connect math to everyday situations. Teachers and educational websites offer a variety of these resources, catering to different learning styles and keeping students motivated. Regular use of interactive tools enhances problem-solving abilities and builds confidence in young learners.

4.1 Word Problems for 3rd Graders

Word problems are a fundamental part of math education for 3rd graders, helping them apply numerical skills to real-life scenarios. These problems often involve basic operations like addition, subtraction, multiplication, and division, presented in a narrative format. For example, scenarios might include shopping, sharing toys, or measuring ingredients for a recipe. Visual aids like images or diagrams frequently accompany these problems to enhance understanding. Word problems also improve reading comprehension and critical thinking, as students must interpret the situation and determine the appropriate mathematical operation to use. Free PDF resources offer a variety of word problems tailored to 3rd graders, covering topics such as time, money, and spatial relationships. Regular practice with these exercises helps build confidence and a solid foundation for more complex math concepts in the future.

4.2 Math Competitions and Challenges

Math competitions and challenges are engaging ways to enhance problem-solving skills in 3rd graders. These activities foster a competitive spirit while promoting teamwork and critical thinking. Many free PDF resources offer specially designed exercises for math competitions, including speed tests, logic puzzles, and creative problem-solving tasks. Students can participate in individual or group challenges, such as solving word problems, mental math exercises, or completing math-themed games. Competitions often include timers or scoring systems to make learning fun and motivating. These resources help students build confidence, improve their math fluency, and develop a growth mindset. Regular participation in math challenges prepares students for higher-level problem-solving and encourages a lifelong love for mathematics.

4.3 Real-World Applications of Math Problems

Real-world applications of math problems help 3rd graders connect learning to everyday life. Free PDF resources offer exercises like calculating meal portions, understanding weather patterns, or determining the number of students in a classroom. These scenarios make math relatable and fun. For example, problems involving sharing candies or measuring distances encourage practical thinking. Students learn to apply operations like addition, subtraction, and multiplication to solve real-life challenges. These exercises build a strong foundation for understanding how math is used in daily activities. By solving problems rooted in real-world contexts, students develop a deeper appreciation for mathematics and improve their ability to apply it to future challenges. This approach fosters independence and confidence in using math to solve practical problems.

Free PDF resources for 3rd-grade problem-solving foster math confidence and critical thinking. Interactive exercises and real-world applications prepare students for future challenges, making learning engaging and effective.

5.1 Summary of Key Points

Free PDF resources for 3rd-grade problem-solving offer a variety of exercises, including training, synthesis, and in-depth activities. These tools enhance critical thinking and math skills, preparing students for real-world challenges. Word problems, interactive exercises, and competitions provide engaging ways to practice. Teachers can use these materials to create structured lessons, ensuring a strong foundation in problem-solving. The resources are designed to be accessible and effective, catering to different learning styles. By incorporating these exercises, students develop confidence and proficiency in math, making them better equipped for future academic success. The combination of practical applications and fun activities ensures a well-rounded approach to learning.

5.2 Final Tips for Mastering Problem Solving

  • Practice Regularly: Consistent practice helps build problem-solving skills and math fluency.
  • Break Down Problems: Tackle complex problems by dividing them into simpler, manageable steps.
  • Use Visual Aids: Incorporate diagrams, charts, and images to better understand and solve problems.
  • Apply Math to Real Life: Connect problem-solving to everyday situations to see its practical value.
  • Seek Assistance: Don’t hesitate to ask for help when facing challenges.
  • Stay Organized: Keep work tidy and review mistakes to learn from them effectively.

wm4000hba manual

Welcome to the LG WM4000HBA manual, your comprehensive guide to understanding and operating the washer. This manual ensures safe, efficient, and proper use of the appliance, covering installation, features, troubleshooting, and maintenance.

1.1 Overview of the WM4000HBA Washer

The LG WM4000HBA is a high-quality washing machine designed for efficient and reliable performance. With a capacity of up to 4.5 kg, it offers ample space for daily laundry needs. The washer features advanced cycles and smart technology to ensure optimal cleaning while minimizing energy consumption. Its sleek design and quiet operation make it a practical addition to any home. The WM4000HBA is part of the WM4000H A Series, known for its durability and innovative features. This model is engineered to provide consistent results, making it a trusted choice for households seeking a balance of power and efficiency.

1.2 Importance of Reading the Manual

Reading the LG WM4000HBA manual is essential for safe and effective operation. It provides detailed instructions for installation, usage, and troubleshooting, ensuring optimal performance. The manual highlights safety precautions, such as proper grounding and installation requirements, to prevent accidents. By understanding the washer’s features and cycles, users can maximize efficiency and extend its lifespan. Additionally, the manual includes error codes and reset procedures, helping users resolve issues quickly. Familiarizing yourself with the manual ensures compliance with warranty terms and enables you to take full advantage of the washer’s advanced capabilities, making it a crucial resource for homeowners.

Installation Instructions

Reading the LG WM4000HBA manual is crucial for safe and effective operation. It provides essential guidelines for installation, troubleshooting, and maintenance, ensuring optimal performance and warranty compliance;

2.1 Pre-Installation Requirements

Before installing the LG WM4000HBA washer, ensure the site meets all specified requirements. The floor must be level, sturdy, and able to support the machine’s weight. Ensure proper ventilation and proximity to water and electrical supplies. Disconnect power before starting installation to avoid risks. Follow grounding procedures as outlined in the manual to prevent electrical hazards. Check for any damage during delivery and ensure all parts are included. Adhere to the manufacturer’s guidelines to ensure safe and correct installation, preventing potential issues and maintaining warranty validity. Proper preparation is essential for optimal performance and safety.

2.2 Step-by-Step Installation Guide

Carefully unpack the washer and ensure all components are included. 2. Position the machine on a level, stable surface. 3. Connect the water supply lines to the appropriate inlets, ensuring no leaks. 4. Plug the power cord into a grounded outlet. 5. Follow the manual’s leveling instructions to balance the washer. 6; Test the machine by running a short cycle to check for proper function. 7. Ensure all connections are secure and adhere to safety guidelines. Proper installation ensures optimal performance, safety, and warranty compliance. Refer to the manual for detailed diagrams and specific instructions.

Key Features of the LG WM4000HBA

The LG WM4000HBA offers a 4.5 kg capacity, advanced washing cycles, and energy-efficient performance, ensuring excellent cleaning results while minimizing water and energy consumption.

3.1 Capacity and Efficiency

The LG WM4000HBA features a spacious 4.5 kg capacity, allowing you to wash larger loads efficiently. Its advanced design optimizes water and energy usage, ensuring eco-friendly performance while maintaining superior cleaning results. The washer’s efficient motor and smart sensors work together to minimize energy consumption without compromising on wash quality. This makes it an ideal choice for households seeking both convenience and sustainability. With its balanced capacity and energy-saving technology, the WM4000HBA delivers a cost-effective and environmentally responsible solution for your laundry needs.

3.2 Advanced Washing Cycles

The LG WM4000HBA offers a variety of advanced washing cycles designed to cater to different fabric types and soil levels. From the Normal cycle for everyday laundry to the Heavy Duty cycle for heavily soiled items, this washer provides tailored cleaning solutions. The Delicate cycle gently cares for fragile fabrics, while the Quick Wash option ensures faster cleaning for less soiled clothes. Additionally, smart sensors detect load size and soil level, optimizing water and detergent usage. The TurboWash 3D technology ensures a powerful yet efficient clean, making it ideal for busy households seeking versatility and performance.

Operating the Washer

Operating the LG WM4000HBA is straightforward. Add detergent, load laundry, select desired cycles, and start. Refer to the manual for optimal settings and performance.

4.1 Starting the Washing Machine

To start the LG WM4000HBA, ensure proper installation and follow manual guidelines. Add detergent to the dispenser, load laundry, and close the lid. Select the desired cycle using the control panel, then press the Start button. The machine will begin operation automatically. Always refer to the manual for specific cycle recommendations and safety precautions to ensure optimal performance and longevity of the appliance. Proper usage enhances efficiency and prevents damage. Regular checks and adherence to instructions are essential for smooth operation.

4.2 Selecting the Right Cycle

Selecting the right cycle on the LG WM4000HBA is crucial for optimal washing results. Choose from options like Normal, Heavy Duty, or Delicates based on fabric type and soil level. Use the control panel to navigate through cycles, ensuring proper care for your laundry. Always check the fabric labels for specific washing instructions. For heavily soiled items, select the Heavy Duty cycle with hot water. For delicate fabrics, opt for the Gentle or Hand-Wash cycle. Adjust settings like spin speed and temperature as needed. Proper cycle selection ensures efficient cleaning and prevents damage to your clothes. Refer to the manual for detailed cycle descriptions and recommendations.

Troubleshooting Common Issues

Identify and resolve common issues with your LG WM4000HBA washer. Check error codes, ensure proper installation, and refer to the manual for resetting and diagnosing problems effectively.

5.1 Identifying Error Codes

LG WM4000HBA error codes help diagnose issues. Common codes include OE (drainage problems), PE (sensor issues), and FE (overfilling). Refer to the manual for code meanings and solutions. If an error appears, check the drain pump filter, ensure proper water supply, or restart the washer. For persistent issues, consult the troubleshooting section or contact LG support. Always follow the manual’s guidance to resolve errors safely and effectively, ensuring optimal performance of your washer.

5.2 Resetting the Washer

To reset the LG WM4000HBA washer, unplug it from the power source and wait for 30 seconds. Plug it back in and run a test cycle. If issues persist, ensure the drain pump filter is clean and the door is properly closed. Resetting can resolve minor glitches without advanced troubleshooting. Always refer to the manual for detailed reset procedures. If problems continue, contact LG support for professional assistance. Regular resets can help maintain optimal performance and address unforeseen errors effectively.

Maintenance and Care

Regularly clean the washer’s gasket and drain pump filter to prevent odor buildup. Avoid using harsh chemicals and leave the door open after use to dry. Run a cleaning cycle monthly for optimal performance and freshness.

6.1 Cleaning the Washer

Regular cleaning is essential to maintain your LG WM4000HBA washer’s performance and hygiene. Run a cleaning cycle monthly using a washing machine cleaner to remove detergent residue and odors. After each use, leave the door open to dry the interior. Clean the gasket and drain pump filter regularly to prevent mold and mildew buildup. Avoid using harsh chemicals, as they may damage the washer. For optimal results, ensure the tub is dry and free of debris after cleaning cycles. Refer to the manual for specific cleaning instructions to keep your washer in prime condition and ensure fresh, clean laundry every time.

6.2 Regular Maintenance Tips

Regular maintenance ensures your LG WM4000HBA washer operates efficiently and lasts longer. Check and clean the drain pump filter after each use to prevent clogs. Inspect hoses monthly for cracks or damage and replace them every 5 years. Ensure the washer is level to prevent vibration and noise. Leave the door open after use to dry the interior and prevent mold. Run a cleaning cycle monthly to remove detergent buildup. Check for software updates to ensure optimal performance. Refer to the manual for detailed maintenance schedules and procedures to keep your washer in excellent working condition and maintain its warranty coverage.

Warranty and Support

The LG WM4000HBA is backed by a comprehensive warranty. For support, contact LG through their official website or customer service. Proper installation ensures warranty validity.

7.1 Understanding Your Warranty

Your LG WM4000HBA warranty provides coverage for parts and labor under specific conditions. The warranty period varies by region, typically covering one year for parts and labor from the purchase date. Proper installation by an authorized technician is essential to maintain warranty validity. Damage caused by misuse, improper installation, or unauthorized repairs is not covered. For detailed terms, refer to the warranty section in your manual or visit LG’s official website. Keep your proof of purchase handy for any warranty claims. Regular maintenance, as outlined in the manual, ensures optimal performance and warranty compliance.

7.2 Contacting LG Support

To contact LG support, visit their official website and navigate to the “Support” section. Select your product model, WM4000HBA, to access specific resources, including manuals, troubleshooting guides, and warranty information. For direct assistance, call LG’s customer service hotline or use the live chat feature on their website. Additionally, you can submit inquiries via email through the provided forms. Ensure you have your model number and purchase details ready for efficient support. For app-related issues, download the LG ThinQ app for remote troubleshooting and maintenance tips. Visit LG.com for more details.

guide d’élaboration du plan d’intervention

Intervention plan development involves creating structured strategies to address specific challenges. It ensures systematic approaches to problem-solving‚ utilizing tools like SWOT analysis and Gantt charts for effective implementation and monitoring.

1.1 Understanding the Purpose of an Intervention Plan

An intervention plan is a strategic framework designed to address specific challenges systematically. Its primary purpose is to outline actionable steps‚ allocate resources‚ and ensure accountability among stakeholders. By identifying problems‚ setting clear objectives‚ and leveraging tools like SWOT analysis‚ the plan provides a structured approach to achieving desired outcomes. It serves as a contractual instrument‚ detailing commitments from all parties involved‚ such as service providers and beneficiaries‚ ensuring alignment and effective implementation.

1.2 Key Concepts and Definitions

Key concepts in intervention planning include problem identification‚ objective setting‚ and resource allocation. A problem refers to a specific issue requiring action. Objectives are measurable goals guiding interventions. Resources encompass materials‚ funding‚ and personnel. Strategies are methods to achieve objectives. Monitoring ensures progress tracking‚ while evaluation assesses outcomes. These elements form the foundation of effective intervention planning‚ ensuring structured and efficient problem-solving processes.

The Seven-Step Approach to Developing an Intervention Plan

The seven-step approach includes problem identification‚ objective setting‚ resource allocation‚ strategy development‚ implementation‚ evaluation‚ and reporting‚ ensuring a comprehensive and structured intervention plan.

2.1 Step 1: Problem Identification and Analysis

Problem identification and analysis is the foundation of intervention planning. It involves defining the issue‚ understanding its scope‚ and identifying root causes. This step ensures a clear understanding of the challenge‚ enabling the development of targeted strategies. Stakeholders collaborate to gather data‚ assess needs‚ and prioritize concerns. Effective analysis tools‚ such as SWOT analysis‚ are often used to evaluate strengths‚ weaknesses‚ opportunities‚ and threats. This step is crucial for creating a well-defined intervention plan that addresses the core issues effectively.

  • Define the problem clearly.
  • Analyze root causes and impacts.
  • Engage stakeholders for diverse perspectives.

2.2 Step 2: Setting Clear Objectives

Setting clear objectives is essential for a focused intervention plan; Objectives should be specific‚ measurable‚ achievable‚ relevant‚ and time-bound (SMART). They guide actions and ensure alignment with the identified problem. This step involves defining short- and long-term goals‚ prioritizing outcomes‚ and establishing key performance indicators. Clear objectives help stakeholders stay aligned and ensure resources are used effectively. Regular reviews and adjustments are necessary to maintain relevance and track progress toward desired outcomes.

  • Define SMART objectives for clarity.
  • Align goals with the identified problem.
  • Involve stakeholders in goal setting.
  • Use measurable outcomes to track progress.

2.3 Step 3: Resource Allocation and Budgeting

Resource allocation and budgeting ensure the intervention plan is feasible and cost-effective. This step involves identifying necessary resources‚ such as personnel‚ materials‚ and technology‚ and assigning them to specific tasks. Budgeting requires estimating costs‚ securing funding‚ and prioritizing spending. Tools like spreadsheets or financial software can help track expenses and ensure transparency. Regular reviews of resource use and budget adherence are essential to avoid waste and maintain efficiency. Effective allocation ensures objectives are met without exceeding financial limits.

  • Identify and allocate necessary resources.
  • Estimate costs and secure funding.
  • Prioritize spending based on objectives.
  • Monitor resource use and budget adherence.

2.4 Step 4: Developing Intervention Strategies

Developing intervention strategies involves creating actionable plans tailored to address identified problems. This step uses tools like SWOT analysis to design effective approaches. Strategies should align with objectives‚ consider risks‚ and leverage available resources. They must be adaptable to changing circumstances and include measurable outcomes. Collaboration with stakeholders ensures diverse perspectives are incorporated‚ enhancing the plan’s effectiveness. Clear‚ realistic strategies are essential for successful implementation and achieving desired results.

  • Design actionable plans tailored to problems.
  • Use SWOT analysis for strategic insights.
  • Ensure alignment with objectives and adaptability.
  • Incorporate stakeholder input for diverse perspectives.

2.5 Step 5: Implementation and Monitoring

Implementation involves executing the developed strategies‚ ensuring all actions align with the intervention plan. Monitoring tracks progress‚ identifies deviations‚ and enables timely adjustments. Using tools like Gantt charts helps visualize timelines and task completion. Regular updates and performance metrics are essential to assess effectiveness. This step ensures accountability‚ transparency‚ and continuous improvement‚ ultimately leading to successful outcomes and achievement of objectives.

  • Execute strategies according to the plan.
  • Monitor progress using Gantt charts and metrics.
  • Identify and address deviations promptly.
  • Ensure accountability and transparency.

2.6 Step 6: Evaluation and Adjustment

Evaluation assesses the effectiveness of the intervention plan by comparing outcomes with objectives. Adjustments are made based on feedback and performance metrics to enhance results. This iterative process ensures continuous improvement‚ addressing unforeseen challenges and optimizing strategies. Documentation of lessons learned supports future planning and fosters accountability. Regular reviews and stakeholder input are crucial for refining the approach and achieving long-term success.

  • Assess outcomes against objectives.
  • Gather feedback for informed adjustments.
  • Document lessons for future reference.
  • Ensure iterative improvement.

2.7 Step 7: Final Reporting and Documentation

Final reporting and documentation consolidate the intervention plan’s outcomes‚ detailing achievements‚ challenges‚ and lessons learned. This step ensures transparency and accountability‚ providing stakeholders with a comprehensive overview. Reports are archived for future reference‚ aiding in organizational memory and improving future interventions. Clear documentation also facilitates compliance with regulatory requirements and supports knowledge transfer across teams.

  • Summarize activities‚ outcomes‚ and challenges.
  • Document lessons learned for future planning.
  • Ensure reports are archived and accessible.
  • Facilitate knowledge transfer and accountability.

Tools and Templates for Effective Intervention Planning

Essential tools include SWOT analysis for strategic planning and Gantt charts for scheduling. Templates like risk assessment forms and progress trackers ensure organized and efficient intervention development.

3.1 Using SWOT Analysis for Strategy Development

A SWOT analysis is a powerful tool for identifying strengths‚ weaknesses‚ opportunities‚ and threats. It helps in strategic planning by evaluating internal and external factors. Strengths and weaknesses are internal‚ while opportunities and threats are external. This analysis enables the creation of balanced strategies‚ ensuring resources are allocated effectively. By understanding these elements‚ intervention plans become more realistic and actionable‚ leading to successful outcomes and alignment with objectives.

3.2 Gantt Charts for Project Scheduling

Gantt charts are essential tools for visualizing project timelines and task dependencies. They provide a clear overview of the sequence and duration of activities‚ facilitating better planning and coordination. By breaking down the intervention plan into manageable tasks‚ Gantt charts help allocate resources efficiently and track progress in real-time. This visual representation ensures accountability and transparency‚ making it easier to identify delays or bottlenecks.

Regular updates to the Gantt chart allow for dynamic adjustments‚ ensuring the intervention plan remains aligned with its objectives. This tool is indispensable for maintaining organization and focus throughout the implementation phase.

3.3 Risk Assessment Templates

Risk assessment templates are critical for identifying potential challenges in intervention plans. They help evaluate the likelihood and impact of risks‚ enabling proactive mitigation strategies. By systematically analyzing threats‚ these templates enhance preparedness and minimize disruptions. Regular updates ensure adaptability to evolving circumstances‚ making them indispensable for maintaining project stability and achieving objectives effectively.

These tools are integral to ensuring safety‚ reducing delays‚ and promoting compliance with regulatory standards throughout the intervention process.

Case Studies and Examples

Successful intervention plans in healthcare‚ emergency management‚ and education demonstrate effective strategies. These case studies provide practical insights and lessons learned‚ enhancing the guide’s applicability across various sectors.

4.1 Successful Intervention Plans in Healthcare

Healthcare intervention plans have proven effective in managing epidemics and improving patient outcomes. For instance‚ the African Union’s adoption of intervention plans for Mpox demonstrates structured approaches to disease control. These plans often involve resource allocation‚ stakeholder collaboration‚ and clear objectives. By integrating tools like SWOT analysis‚ healthcare organizations ensure comprehensive strategies. Such examples highlight the importance of systematic planning in addressing health crises‚ showcasing how intervention plans can save lives and enhance healthcare systems’ resilience and responsiveness to emergencies.

4.2 Examples from Emergency Management

In emergency management‚ intervention plans are critical for coordinating responses to crises. For instance‚ the French Ministry of the Interior’s Guide to Developing a Specific Intervention Plan (PPI) provides a framework for emergency preparedness. These plans often include risk assessments‚ resource allocation‚ and clear communication strategies. By using tools like Gantt charts‚ emergency teams ensure timely execution of rescue operations and resource distribution. Successful examples highlight how structured intervention plans minimize damage and save lives during natural disasters and other emergencies‚ demonstrating their vital role in crisis management.

4.3 Educational Intervention Plans

Educational intervention plans are designed to support students facing academic or behavioral challenges. These plans often involve collaboration between teachers‚ parents‚ and specialists to address specific needs. For instance‚ they may include tailored learning strategies or behavioral support. The guide emphasizes the importance of clear objectives‚ regular monitoring‚ and adaptability. By focusing on individual student needs‚ these plans help create a structured environment for improvement. Successful examples highlight how such interventions can enhance learning outcomes and student well-being‚ making them a valuable tool in education.

Legal and Regulatory Considerations

Intervention plans must comply with local and national regulations‚ ensuring ethical standards and data protection. Legal frameworks guide accountability and adherence to established norms for effectiveness.

5.1 Compliance with Local and National Regulations

Ensuring compliance with local and national regulations is critical for the validity and effectiveness of an intervention plan. Regulatory frameworks provide the foundation for legal and ethical standards‚ guiding the development and implementation of strategies. Non-compliance can lead to legal repercussions and undermine the plan’s credibility. Therefore‚ thorough knowledge of relevant laws and regulations is essential to align interventions with societal and governmental expectations‚ ensuring accountability and adherence to established norms.

5.2 Ensuring Ethical Standards

Ethical standards are paramount in intervention planning to ensure fairness‚ transparency‚ and respect for all stakeholders. Plans must adhere to moral principles‚ avoiding harm and promoting equity. Ethical considerations include confidentiality‚ informed consent‚ and cultural sensitivity. Regular reviews and stakeholder feedback help maintain integrity. Ethical guidelines also ensure that interventions are inclusive and unbiased‚ fostering trust and cooperation. By prioritizing ethical practices‚ intervention plans can achieve their objectives responsibly and sustainably‚ aligning with societal values and professional norms.

5.3 Data Protection and Privacy Laws

Data protection and privacy laws are essential to safeguard sensitive information in intervention plans. Compliance with regulations like GDPR and local privacy laws ensures personal data is handled securely. Organizations must implement measures to protect confidentiality‚ prevent unauthorized access‚ and ensure transparency in data usage. Regular audits and training help maintain adherence to these laws. Non-compliance can lead to legal penalties and reputational damage‚ emphasizing the need for robust data protection strategies in all intervention planning processes.

Effective intervention planning requires a structured approach‚ emphasizing strategy and continuous improvement. This guide provides essential tools and insights‚ ensuring plans address challenges comprehensively and adapt to future demands.

6.1 The Importance of Continuous Improvement

Continuous improvement is vital for refining intervention strategies and ensuring long-term success. It involves regularly assessing outcomes‚ incorporating feedback‚ and adapting to evolving challenges. By fostering a culture of learning‚ teams can enhance problem-solving capabilities and align interventions with changing needs. This iterative process supports sustainability and scalability‚ ensuring that plans remain effective over time. Tools like SWOT analyses and Gantt charts aid in identifying areas for refinement‚ making continuous improvement an integral part of successful intervention planning.

6.2 Future Trends in Intervention Planning

Future trends in intervention planning emphasize technology integration‚ such as AI and real-time data analytics‚ to enhance decision-making. There is a growing focus on sustainability and adaptive strategies to address evolving challenges. Collaborative approaches across sectors will become more prevalent‚ ensuring comprehensive solutions. Additionally‚ the use of digital tools like Gantt charts and risk assessment templates will streamline planning processes‚ making interventions more efficient and responsive to dynamic environments.

wicked audio wireless earbuds instructions

Unboxing and Initial Setup

The Wicked Audio wireless earbuds arrive in a compact box containing the earbuds, charging case, multiple ear tip sizes, and a micro-USB charging cable.

First, remove the earbuds from the case and ensure they automatically power on and sync. Follow the included manual for initial pairing and setup instructions.

What’s Included in the Box

The Wicked Audio wireless earbuds box includes the earbuds, a charging case, multiple sizes of soft ear tips for a secure fit, and a micro-USB charging cable.

An instruction manual is also provided to guide users through setup and troubleshooting. The compact case doubles as a charging station, ensuring convenience and portability.

First-Time Setup Instructions

To set up your Wicked Audio wireless earbuds, start by removing them from the charging case. They will automatically power on and sync to each other.

Open your device’s Bluetooth settings and select “Wicked Mojo 300” from the available options. The LED indicator will flash red and blue during pairing.

Once connected, you’ll hear a confirmation tone. Ensure your device’s volume is adjusted for optimal sound. Refer to the included manual for further guidance or troubleshooting tips.

Pairing and Connecting

Pair your Wicked Audio earbuds by enabling Bluetooth on your device and selecting “Wicked Mojo 300.” The LED will flash red and blue during pairing, confirming the connection with a tone.

How to Pair Wicked Audio Wireless Earbuds

To pair your Wicked Audio wireless earbuds, start by removing them from the charging case, which automatically powers them on and initiates pairing mode.

Open your device’s Bluetooth settings and locate “Wicked Mojo 300” in the available devices list. Select it to establish a connection, confirmed by a tone and LED flash.

If manual pairing is needed, press and hold both earbuds’ power buttons for 3-5 seconds until the LED flashes red and blue, indicating pairing readiness.

Once connected, your earbuds will automatically reconnect to the last paired device, ensuring a seamless experience each time you use them.

Troubleshooting Bluetooth Connection Issues

If your Wicked Audio wireless earbuds fail to connect, start by resetting them. Press and hold both earbuds’ power buttons for 3-5 seconds until the LED flashes red and blue, indicating a reset.

  • Ensure your device’s Bluetooth is enabled and search for available devices.
  • Restart your device and earbuds, then attempt pairing again.
  • Check for firmware updates, as outdated software may cause connection issues.
  • If problems persist, refer to the user manual or contact Wicked Audio support for assistance.

These steps should resolve most Bluetooth connectivity problems with your earbuds.

Switching Between Devices

To switch between devices with your Wicked Audio wireless earbuds, start by ensuring the earbuds are in pairing mode. Turn them off, then press and hold the power button until the LED flashes red and blue, indicating pairing mode.

  • Open your device’s Bluetooth settings and select the earbuds from the available devices list.
  • If switching to a new device, disconnect the earbuds from the current device first.
  • Repeat the pairing process with the new device, following the same steps as initial pairing.

This feature allows seamless transitions between your phone, tablet, or computer, enhancing your listening experience across multiple devices.

Charging and Battery Care

Charge the earbuds in the case using the micro-USB cable. LED indicators show charging status. Avoid partial charges and store the earbuds properly to maximize battery life.

Charging the Earbuds and Case

To charge the Wicked Audio wireless earbuds, place them in the charging case and connect the case to a USB port using the provided micro-USB cable. The LED indicators on the case will show the charging status: red for charging and blue when fully charged. Ensure the earbuds are properly seated in the case to maintain contact with the charging pins. Avoid partial charging to preserve battery health. Store the earbuds in the case when not in use to protect them and maintain charge.

Maximizing Battery Life

To maximize the battery life of your Wicked Audio wireless earbuds, ensure they are stored properly in the charging case when not in use. Avoid partial charging and allow the battery to drain before recharging. Keep the earbuds clean, as dirt or debris can impact performance. Lowering the volume helps conserve battery life, as higher volumes consume more power. Additionally, turn off the earbuds when not in use or return them to the case to prevent unnecessary power drain. Regularly updating firmware can also optimize battery efficiency.

Understanding Charging Indicators

The Wicked Audio wireless earbuds feature LED indicators to show charging status. When charging, the LED on the case will typically flash red, turning green or stopping once fully charged. The earbuds themselves may also display a red LED while charging and turn off when complete. A flashing red light on the earbuds indicates low battery. Ensure the case is charged properly, as indicated by its LED, to maintain optimal power levels for your earbuds. Always refer to the manual for specific LED patterns and their meanings.

Sound Quality and Customization

Volume Control and Limitations

Adjust volume via the earbuds’ controls or your device. Ensure balanced sound by not exceeding maximum volume to protect hearing and maintain audio clarity.

Adjusting EQ Settings for Optimal Sound

The Wicked Audio wireless earbuds offer customizable EQ settings through their companion app, allowing users to tweak bass, treble, and mid-range frequencies for a tailored listening experience.

Open the app, select the EQ option, and choose from preset profiles or manually adjust the sliders to enhance specific sound elements according to your preference.

Experiment with different configurations to find the perfect balance that complements your music genres, ensuring a rich and immersive audio experience with every track;

Ensuring Proper Fit for Best Audio

The Wicked Audio wireless earbuds come with multiple ear tip sizes to ensure a secure and comfortable fit. Experiment with the included tips to find the size that seals your ear canal best, as this directly impacts sound quality and noise isolation. Proper fit prevents audio leakage and enhances bass response. For optimal comfort, wear the earbuds with the stem pointing upwards and gently twist them into place. A snug, well-aligned fit ensures a more immersive listening experience and better performance overall.

The Wicked Audio wireless earbuds allow for seamless volume adjustments through intuitive touch controls or connected device settings. Be mindful of maximum volume levels to preserve audio quality and protect hearing. While the earbuds deliver robust sound at higher volumes, excessive levels may cause distortion. It’s recommended to keep volumes moderate for the best listening experience. Additionally, some devices may have volume limiting features to prevent auditory damage, ensuring a safe yet satisfying audio experience for users.

Maintenance and Support

Regularly clean earbuds to prevent wax buildup. Store in the case to avoid damage. Update firmware for optimal performance. Contact support for troubleshooting or repairs.

Cleaning the Earbuds

Regular cleaning preserves sound quality and prevents damage. Use a soft, dry cloth to wipe the earbuds and charging case.

Gently remove earwax with a cotton swab, avoiding moisture or harsh chemicals, which can damage the internal components.

Updating Firmware

Regular firmware updates ensure optimal performance and new features for your Wicked Audio wireless earbuds. To update, connect the earbuds to your device via Bluetooth and open the Wicked Audio app or visit their official website for the latest software version.

Download and install the update, ensuring the earbuds are fully charged. Follow on-screen instructions to complete the process, which may take a few minutes. Updates improve sound quality, connectivity, and overall functionality, keeping your earbuds up-to-date with the latest advancements.

Contacting Customer Support

For any inquiries or issues with your Wicked Audio wireless earbuds, visit the official Wicked Audio website and navigate to the support section. Here, you’ll find product manuals, troubleshooting guides, and a knowledge base to address common concerns.

If additional assistance is needed, contact customer support directly via email or phone. Ensure to have your product details ready for faster resolution. Wicked Audio’s support team is available to help with warranty claims, technical issues, or any questions about your earbuds.

segerstrom seating chart pdf

The Segerstrom Center for the Arts is a renowned cultural hub in Costa Mesa‚ offering world-class performances‚ including musicals like Hamilton and The Book of Mormon.

Its state-of-the-art venues and new plaza with shaded seating enhance the audience experience‚ making it a must-visit destination for arts enthusiasts seeking enriching cultural experiences.

Overview of the Venue and Its Cultural Significance

The Segerstrom Center for the Arts is a cultural cornerstone in Costa Mesa‚ offering a diverse array of performances and events that cater to a wide audience.

Known for its state-of-the-art facilities‚ the center hosts world-class musicals‚ jazz performances‚ and revivals‚ making it a vibrant hub for artistic expression and community engagement.

Recent enhancements‚ such as the addition of a new plaza with shaded seating and Wi-Fi‚ further elevate the venue’s appeal‚ providing a welcoming space for visitors to gather and enjoy cultural experiences.

The center’s commitment to accessibility and inclusivity ensures that all guests can participate fully‚ fostering a sense of connection and shared enjoyment of the arts.

With its rich history and innovative offerings‚ the Segerstrom Center continues to be a vital part of the region’s cultural landscape‚ inspiring audiences and enriching lives through the power of performance.

Upcoming Events and Performances

The Segerstrom Center for the Arts is set to host an exciting lineup of events this season‚ featuring highly acclaimed musicals such as Hamilton and The Book of Mormon.

Music lovers can enjoy jazz performances and revivals that showcase exceptional talent and artistic brilliance.

The center’s new plaza will also serve as a vibrant venue for outdoor events‚ offering shaded seating and picnic areas where visitors can relax and enjoy live performances.

With a mix of Broadway shows‚ musical revivals‚ and community-centric events‚ the Segerstrom Center continues to be a hub for diverse cultural experiences.

These events highlight the center’s commitment to providing world-class entertainment and fostering a sense of community through the arts.

Whether you’re a fan of theater‚ music‚ or outdoor gatherings‚ there’s something for everyone at the Segerstrom Center for the Arts this season.

Understanding the Segerstrom Seating Chart

The Segerstrom seating chart provides a detailed layout of the venue‚ including row and seat numbers‚ to help attendees plan their visit effectively.

It is available as a downloadable PDF and offers interactive maps for specific events‚ ensuring a seamless experience for all guests.

Layout and Venue Structure

The Segerstrom Center for the Arts features a modern and expansive layout designed to enhance the audience experience. The main concert hall boasts multiple seating levels‚ including orchestra‚ mezzanine‚ and balcony sections‚ ensuring optimal acoustics and visibility.

The venue incorporates state-of-the-art facilities‚ such as adjustable seating arrangements and cutting-edge technology‚ to accommodate a wide range of performances. Additionally‚ the outdoor Argyros Plaza offers flexible seating options‚ including shaded areas and picnic spaces‚ creating a versatile space for diverse events.

The center’s design emphasizes accessibility and comfort‚ with clear pathways and amenities like cafes and observation decks. This thoughtful structure ensures that every attendee can enjoy a seamless and memorable visit to the Segerstrom Center for the Arts.

Row and Seat Numbering System

The Segerstrom Center for the Arts employs a clear and organized row and seat numbering system to ensure easy navigation for attendees. Rows are typically labeled alphabetically‚ while seats are numbered sequentially from left to right.

For example‚ seat numbers may range from 1 to 30 in a single row‚ depending on the venue’s layout. Wheelchair-accessible seats are clearly marked and distributed throughout the venue to ensure inclusivity. It’s important to note that some rows‚ such as AA or EE‚ may not be available for certain performances or may be added later based on demand.

Referencing the Segerstrom seating chart PDF provides a detailed visual guide‚ helping patrons locate their seats and understand the venue’s structure for a seamless experience.

Most Desirable Seats and Their Locations

The most desirable seats at Segerstrom Center for the Arts are often located in the center orchestra section‚ offering an unobstructed view of the stage and an immersive experience.

Seats near the front rows provide direct eye contact with performers‚ enhancing the emotional impact of the performance. Additionally‚ seats closer to the aisle allow for easier access and a more comfortable viewing angle.

For events with complex staging‚ such as musicals or symphonies‚ seats in the first few rows of the mezzanine or balcony can also offer a stunning panoramic view. The seating chart PDF highlights these prime locations‚ helping attendees choose seats that align with their preferences for optimal enjoyment of the performance.

Accessible Seating Options

Segerstrom Center offers wheelchair-accessible seats and removable seating options to ensure inclusivity. Detailed information is available in the seating chart PDF for specific event accommodations.

Wheelchair-Accessible Seats and Availability

The Segerstrom Center for the Arts provides wheelchair-accessible seating options to ensure an inclusive experience for all attendees. Specific seats‚ such as 110‚ 117‚ 120‚ 127‚ 130‚ 137‚ 140‚ 147‚ 150‚ 157‚ 160‚ 167‚ 170‚ 177‚ 180‚ and 183‚ are designated as wheelchair-accessible. Availability may vary depending on the event and venue configuration. Guests are advised to review the seating chart PDF for specific event layouts and accessible seat locations. Additionally‚ removable seating arrangements can be made for wheelchairs‚ though certain rows like AA and EE may not always be available. It is recommended to contact the box office for detailed information and to reserve accessible seats in advance to ensure accommodations are met. This ensures a seamless and enjoyable experience for all patrons.

Family and Companion Seating Arrangements

The Segerstrom Center for the Arts offers family and companion seating arrangements to ensure everyone can enjoy performances together. These arrangements often include adjacent seating options‚ making it easier for families or groups to sit together. The venue also provides accommodations for companions of guests with accessibility needs. By referring to the seating chart PDF‚ attendees can identify suitable sections for family or companion seating. It is advisable to contact the box office for personalized assistance in selecting seats that meet specific needs. This ensures a welcoming and inclusive experience for all visitors‚ allowing everyone to fully enjoy the cultural and artistic offerings at the Segerstrom Center.

Downloading the Segerstrom Seating Chart PDF

The Segerstrom seating chart PDF is easily accessible online‚ providing detailed venue layouts and seat locations. It also includes interactive maps for specific events‚ aiding attendees in planning their visits efficiently.

Step-by-Step Guide to Accessing the PDF

To access the Segerstrom seating chart PDF‚ visit the official website and navigate to the “Seating Chart” section; Select the specific venue or event to view the corresponding chart.

Click the “Download PDF” option to retrieve the detailed seating layout. Ensure your device has a PDF viewer installed to open and review the file.

For events at Argyros Plaza‚ note that seating is limited and clearly marked. Check the PDF for wheelchair-accessible seats‚ such as tables 110‚ 117‚ and others.

Interactive maps within the PDF provide color-coded seat information‚ helping you identify desirable locations. Downloading the PDF is a convenient way to plan your visit and choose optimal seats.

Regularly check for updates‚ as seating configurations may change; This guide ensures a seamless experience in accessing and utilizing the Segerstrom seating chart PDF.

Interactive Seating Maps for Specific Events

The Segerstrom Center offers interactive seating maps tailored to each event‚ ensuring a personalized experience for attendees. These maps provide detailed layouts‚ highlighting seat availability and pricing;

Visitors can explore the venue virtually‚ zooming in on sections like Orchestra‚ Mezzanine‚ and Balcony. Color-coded zones indicate different ticket tiers‚ helping users quickly identify their preferred seats.

For performances at Argyros Plaza‚ maps showcase shaded seating areas and picnic spots. Wheelchair-accessible seats are clearly marked‚ along with family and companion seating arrangements.

By using these interactive tools‚ guests can efficiently plan their visit‚ ensuring optimal seating choices. Regular updates reflect changes in seating configurations‚ providing the most accurate information.

This feature enhances the overall planning experience‚ making it easier for attendees to navigate and enjoy events at the Segerstrom Center for the Arts.

Additional Tips for Attendees

Arrive early to explore the venue and check prohibited items. Stay informed about event updates and navigate easily with clear signage and accessible seating options available.

Arrival and Safety Recommendations

Plan to arrive at least 30 minutes before your event to navigate parking and security checks. Familiarize yourself with the venue layout to avoid delays. Note that bag checks and metal detectors are in place for safety. Ensure you review the list of prohibited items beforehand to avoid entry issues. Take advantage of accessible seating options if needed‚ and stay informed about any event-specific updates through official channels. For a smooth experience‚ check the seating chart PDF to locate your seats and plan your route. Enjoy your time at the Segerstrom Center for the Arts with ease and confidence.

Navigating the Venue with Ease

Navigating the Segerstrom Center for the Arts is straightforward with its well-designed layout and clear signage. Upon arrival‚ guests can use digital screens or downloaded seating charts to locate their seats quickly. The venue’s main entrances are easily accessible‚ with staff available to assist. Familiarize yourself with the interactive seating map to explore the various levels and sections. The Renée and Henry Segerstrom Concert Hall features tiered seating‚ while the outdoor Argyros Plaza offers flexible arrangements. Take advantage of the observation deck and outdoor café for orientation. Accessible routes are clearly marked‚ ensuring smooth movement for all attendees. With prior planning and a seating chart PDF‚ visitors can effortlessly find their way around and enjoy the event without stress.

Planning your visit to the Segerstrom Center for the Arts is seamless with the seating chart PDF‚ ensuring a memorable cultural experience in Costa Mesa.

Final Thoughts on Planning Your Visit

Planning your visit to the Segerstrom Center for the Arts is an exciting process‚ made easier with the seating chart PDF available for download.

This resource provides a detailed layout of the venue‚ helping you choose the perfect seats for an unforgettable experience. Whether you’re attending a Broadway musical‚ a jazz performance‚ or a special event on the Argyros Plaza‚ knowing the seating arrangement in advance ensures a seamless and enjoyable time. By reviewing the PDF‚ you can familiarize yourself with the venue’s structure‚ including accessible seating options and desirable locations. This preparation allows you to focus on the event itself‚ making your visit to the Segerstrom Center a truly memorable one.

Staying Informed About Updates and Changes

Staying informed about updates and changes is crucial for a smooth and enjoyable experience at the Segerstrom Center for the Arts. The venue regularly updates its seating charts and event details‚ so it’s essential to check the official website or download the latest seating chart PDF for the most accurate information.

Subscribers to the Segerstrom Center’s newsletter receive timely updates on new performances‚ seating arrangements‚ and venue improvements. Additionally‚ following the center on social media provides real-time notifications about any changes or special announcements. By staying connected‚ attendees can make informed decisions and plan their visits effectively‚ ensuring they don’t miss out on any exciting developments or updates.

graphing piecewise functions worksheet with answers pdf

Piecewise functions are mathematical models defined by multiple expressions over specific domains. They are essential for modeling real-world phenomena with varying behaviors. Worksheets with answers provide structured practice, helping learners master graphing and analyzing these functions effectively.

What Are Piecewise Functions?

Piecewise functions are mathematical functions defined by multiple sub-functions, each applicable to specific intervals of the domain. They allow modeling of complex behaviors by combining simpler functions. For example, f(x) = {2x+3 for x < 2, 5x-1 for x ≥ 2}. Worksheets with answers provide practice in graphing, identifying domains, and evaluating these functions accurately.

Importance of Graphing Piecewise Functions

Graphing piecewise functions helps visualize how different rules apply across the domain, revealing key features like discontinuities and transitions. It enhances understanding of function behavior, aids in identifying domain restrictions, and prepares students for more complex mathematical concepts. Worksheets with answers provide guided practice, ensuring accuracy and reinforcing foundational skills in function analysis.

Steps to Graph Piecewise Functions

Break down the function into defined pieces. Analyze each piece’s domain; Graph separately. Identify discontinuities; Mark open or closed circles at transition points. Ensure accuracy in plotting.

Identifying the Pieces of the Function

Start by analyzing the function to determine its segments. Each piece is defined by its own rule within a specific domain. For example, one piece might be linear, while another could be constant. Identifying these sections is crucial for accurate graphing. Use the given domain restrictions to separate and label each piece clearly in your worksheet.

Determining the Domain for Each Piece

Each piece of the function operates within its own domain. Identify the intervals where each rule applies, such as x < 1 or x ≥ 2. These intervals dictate where each piece begins and ends. Accurately noting these domains ensures that each piece is graphed correctly, avoiding overlaps or gaps in the function's representation.

Graphing Each Piece Separately

Graph each piece of the function independently within its domain. For example, plot linear segments, identify key points, and extend lines as needed. This method ensures clarity and prevents the complexity of the entire function from overwhelming the graphing process. Use distinct colors or styles for each piece to enhance visualization and maintain organization.

Identifying Points of Discontinuity

Points of discontinuity occur where the function’s definition changes. Check the function at domain boundaries by evaluating left-hand and right-hand limits. If the limits differ or the function is undefined, mark the point with an open circle. Use closed circles for included endpoints to accurately represent the function’s behavior at these critical points.

Marking Open and Closed Circles

Open circles indicate excluded points, while closed circles mark included endpoints. For each piece, examine the domain restrictions. If a piece starts at a value, use a closed circle. If it ends before another begins, use an open circle. This ensures the graph accurately reflects the function’s continuity and discontinuity at specific points.

Completing a Table of Values

A table of values organizes x and f(x) pairs, simplifying graph plotting. It helps identify patterns and discontinuities, ensuring accuracy in function representation. Worksheets provide structured tables for practice, reinforcing understanding of piecewise functions and their graphical interpretation.

How to Fill Out the Table

To fill out a table for graphing piecewise functions, identify the function’s pieces and their domains. Choose x-values across the domain, including breakpoints. For each x, calculate f(x) using the corresponding piece. Note whether points are included or excluded to mark open or closed circles accurately. Ensure calculations are precise, especially at breakpoints, to avoid errors. This systematic approach helps in plotting points accurately for a clear graph representation.

Using the Table to Plot Points

Using the table, plot each calculated point on the graph. For open circles, leave the point hollow; for closed circles, fill them in. Ensure alignment with the correct piece of the function. Pay attention to discontinuities, marking them appropriately. This step-by-step plotting creates an accurate visual representation of the piecewise function, making it easier to analyze and interpret the behavior across different intervals.

Ensuring Accuracy in Calculations

Double-check each calculation for precision. Verify that input values fall within the correct domain intervals. Compare results with the function rules to avoid errors. Use a calculator if necessary, and ensure consistency in units and signs. Accuracy in calculations is crucial for correctly plotting points and interpreting the behavior of the piecewise function across its entire domain.

Domain and Range

The domain is the set of all x-values for which the function is defined. The range is the set of all possible y-values the function can produce. Understanding these concepts is crucial for accurately graphing and interpreting piecewise functions, as they determine the function’s behavior and output.

Determining the Domain from the Function Definition

The domain of a piecewise function is found by identifying all real numbers x for which the function is defined. This involves examining each piece of the function and noting any restrictions. For example, if a piece includes a denominator, the domain excludes values that make the denominator zero. The domain is typically expressed in set notation or interval notation, representing all valid inputs for the function. By carefully analyzing each piece, you can determine the overall domain by combining the domains of individual pieces. This step is essential for accurately graphing and interpreting piecewise functions, as it defines the set of all possible x-values that the function can accept. Always ensure to specify whether endpoints are included (closed circles) or excluded (open circles) to maintain precision in your domain description. This attention to detail helps in avoiding common errors and ensures the function behaves as intended across its entire domain. Properly identifying the domain is the foundation for understanding the function’s behavior and is a critical skill for working with piecewise functions effectively.

Identifying the Range from the Graph

To determine the range of a piecewise function from its graph, identify the set of all possible y-values. Examine the highest and lowest points on the graph and consider the behavior of each piece. Note any restrictions caused by open or closed circles. The range is the collection of all output values (y-values) the function can produce, expressed in set or interval notation. This step ensures a clear understanding of the function’s output capabilities, complementing the domain analysis for a comprehensive view of the function’s behavior.

Points of Discontinuity

Points of discontinuity occur where the function isn’t continuous, such as jumps, breaks, or undefined points. They can be removable, jump, or infinite, and are identified by open circles or breaks in the graph, ensuring clarity in understanding the function’s behavior.

Jump Discontinuities

Jump discontinuities occur when a function approaches different left and right limits at a point. In graphs, these are marked with open circles on either side, indicating the function’s value “jumps” between two distinct points. Worksheets often include exercises to identify and plot these points accurately, reinforcing understanding of function behavior at discontinuities.

Removable Discontinuities

Removable discontinuities happen when a function has different left and right limits, but the two limits are the same. These are often “holes” in the graph. Worksheets typically include problems where students identify and correct these by redefining the function at the discontinuity point, ensuring continuity. This concept is crucial for smooth function behavior.

Infinite Discontinuities

Infinite discontinuities occur where a function approaches infinity or negative infinity, creating vertical asymptotes. These are typically found in rational functions where the denominator approaches zero. Worksheets often include identifying these points, as they significantly impact the graph’s appearance. Understanding infinite discontinuities is vital for accurately sketching piecewise functions and interpreting their behavior.

Evaluating the Function at Specific Points

Evaluating a piecewise function involves substituting x-values into the appropriate expression based on the domain. This ensures accurate plotting of points and consistency with the function’s definition.

Plugging in Values from the Domain

To evaluate a piecewise function at specific points, identify the interval containing the x-value and use the corresponding expression. For example, if f(x) = 2x + 1 (x < 3) and f(x) = x² (x ≥ 3), then f(2) = 5 and f(4) = 16. Ensure correct expression selection and attention to boundary conditions for accurate results.

Interpreting the Results

After plugging in domain values, interpret the results to understand function behavior. Compare calculated outputs with expected values to verify correctness. This step ensures comprehension of how the function operates across different intervals, aiding in identifying patterns, discontinuities, or specific features crucial for further analysis or graphing.

Checking for Consistency

Consistency in piecewise functions ensures smooth transitions between pieces. Verify that each segment aligns with its domain and that there are no gaps or overlaps in the function’s definition. This step is crucial for accurate graphing and ensures the function behaves as intended across its entire domain.

Matching Functions with Their Graphs

Matching functions with their graphs involves analyzing key features such as breaks, jumps, and continuity. By identifying these elements, learners can accurately associate each function definition with its visual representation, enhancing understanding and graphing skills through structured worksheet exercises.

Identifying Key Features

Identifying key features involves pinpointing points of discontinuity, breaks, and transitions between function pieces. By examining these elements, learners can determine the behavior of each segment and accurately map them to their corresponding graphs, ensuring a clear understanding of how the function behaves across its entire domain through detailed worksheet analysis.

Comparing Function Definitions

Comparing function definitions involves analyzing the structure and domain restrictions of each piece. Worksheets guide learners to match function rules with their graphical representations, ensuring alignment between algebraic expressions and visual plots. This step reinforces understanding of how different function pieces contribute to the overall behavior of the piecewise function accurately.

Verifying the Match

Verifying the match involves checking if the function’s graph aligns with its definition. By plotting key points and ensuring continuity or discontinuity as defined, learners confirm the accuracy of their function-to-graph pairing. This step ensures a deep understanding of how function pieces translate into visual representations, reinforcing graphing skills and conceptual knowledge effectively.

Troubleshooting Common Errors

Common errors include misidentifying domain restrictions, mixing up function pieces, and overlooking discontinuities. Carefully reviewing each piece and its domain ensures accurate graphing and avoids mistakes.

Misidentifying the Domain Restrictions

Misidentifying domain restrictions is a common error when graphing piecewise functions. It occurs when the domain for each piece is incorrectly assigned, leading to incorrect function behavior. To avoid this, carefully review the domain specified for each piece and ensure the function is applied only within its designated interval. Double-checking with a table of values can help prevent such mistakes and ensure accurate graphing.

Mixing Up the Function Pieces

Mixing up function pieces is a frequent error where the wrong expression is applied to a specific domain interval. This leads to incorrect graphing and inconsistencies. To prevent this, carefully map each piece to its corresponding domain and use a table of values to verify the function’s behavior at key points, ensuring each piece aligns with its defined interval and expression.

Overlooking Discontinuities

Overlooking discontinuities is a common mistake when graphing piecewise functions. Discontinuities occur at domain boundaries where function pieces meet. Forgetting to identify or incorrectly marking these points can distort the graph. Always check boundary points, use open or closed circles as needed, and verify continuity or jumps to ensure the graph accurately represents the function’s behavior at these critical points.

Practice Exercises with Answers

Practice exercises with answers provide structured worksheets and step-by-step solutions. They include sample graphs, domain and range identification, and function evaluation. These resources help students assess their understanding and improve graphing skills through detailed feedback and self-assessment.

Sample Worksheets

Sample worksheets provide diverse exercises, including graphing linear and nonlinear pieces, evaluating functions at specific points, and identifying discontinuities. They offer structured problems with answers, covering domain and range identification, function matching, and troubleshooting common errors. These resources cater to various skill levels, ensuring comprehensive practice for mastery of piecewise functions.

  • Graphing linear and nonlinear pieces
  • Evaluating functions at specific points
  • Identifying discontinuities
  • Domain and range identification
  • Function matching exercises

Step-by-Step Solutions

Step-by-step solutions guide learners through graphing piecewise functions, ensuring clarity and accuracy. Each problem is broken down into manageable parts, from identifying function pieces to marking discontinuities. Detailed explanations accompany every step, helping to resolve common errors and deepen understanding of complex concepts.

  1. Identify function pieces and their domains
  2. Graph each piece separately
  3. Mark points of discontinuity
  4. Evaluate the function at specific points

Self-Assessment

Self-assessment involves reviewing your work to ensure accuracy and understanding. Compare your graphs and answers with provided solutions to identify mistakes. Check for correct domain identification, proper handling of discontinuities, and accurate plotting of points. Reflect on areas where errors occurred and revisit those concepts to strengthen your grasp of piecewise functions.

  • Verify open and closed circles
  • Check for points of discontinuity
  • Ensure domain and range accuracy
  • Use answer keys for validation

Mastering piecewise functions is crucial for understanding complex behaviors in mathematics. Regular practice with worksheets ensures proficiency in graphing and analyzing these functions, enhancing problem-solving skills and conceptual clarity.

Recap of Key Concepts

Key concepts include identifying function pieces, determining domain restrictions, and accurately graphing each segment. Points of discontinuity and open/closed circles are crucial. Tables of values aid in plotting points, ensuring precision. Understanding domains, ranges, and function behavior at specific points enhances overall mastery of piecewise functions.

Encouragement for Further Practice

Consistent practice with worksheets and real-world applications strengthens understanding. Exploring various piecewise functions and their graphs builds confidence. Utilizing online resources and interactive tools enhances problem-solving skills, ensuring mastery and readiness for advanced mathematical concepts.

kodiak cakes mixing instructions

Kodiak Cakes are a beloved breakfast option, known for their delicious, convenient, and wholesome recipes. Made with whole grains, they offer a homemade taste in minutes. Proper mixing ensures the perfect fluffy texture, making them a family favorite for a quick yet satisfying meal.

1.1 Overview of Kodiak Cakes and Their Popularity

Kodiak Cakes have become a household name, celebrated for their wholesome, hearty recipes and ease of preparation. Their popularity stems from offering a convenient yet nutritious breakfast option, appealing to both families and health-conscious individuals. With a variety of flavors and mix-ins, Kodiak Cakes provide endless customization, making them a versatile choice for any meal. Their commitment to quality and taste has solidified their place as a favorite in many kitchens.

1.2 Importance of Proper Mixing Instructions

Proper mixing is crucial for achieving the ideal texture and flavor in Kodiak Cakes. Overmixing can lead to dense, tough cakes, while undermixing may result in a lumpy batter. Following the instructions ensures a smooth, even consistency, which is essential for fluffy and tender pancakes. Taking the time to mix correctly enhances the overall quality, making it a key step in preparing a delicious and satisfying breakfast.

Gather Ingredients and Tools

Gathering all necessary ingredients and tools beforehand ensures a smooth mixing process. Measure cups, bowls, and utensils are essential for accurate preparation and efficient mixing of Kodiak Cakes.

2.1 Ingredients Required for Kodiak Cakes

  • 1 cup Kodiak Cakes Pancake Mix
  • 1 cup water (adjustable for consistency)
  • 1 tablespoon sugar or sweetener (optional)
  • 1 egg (optional for extra fluffiness)
  • 1/4 cup buttermilk or milk (optional for tangy flavor)
  • Butter or oil for greasing the pan

These ingredients ensure a classic, delicious batch of Kodiak Cakes, with optional additions for customization.

2.2 Essential Tools for Mixing Kodiak Cakes

  • A large mixing bowl for combining ingredients
  • A whisk or spoon for stirring the batter
  • A measuring cup for accurate ingredient proportions
  • A skillet or griddle for cooking
  • Cooking spray or oil for preventing sticking
  • A spatula for flipping the cakes

These tools ensure a smooth mixing and cooking process, helping you achieve perfectly cooked Kodiak Cakes every time;

Understanding the Mixing Process

Mixing Kodiak Cakes requires gentle folding to avoid overmixing, ensuring a light and fluffy texture. Allow the batter to rest briefly for optimal results.

3.1 Step-by-Step Mixing Instructions

Start by combining Kodiak Cakes mix with water in a bowl. Add any optional ingredients like eggs or melted butter, then mix until just combined. Avoid overmixing to prevent a dense texture. Let the batter rest for a few minutes to allow the flour to absorb moisture evenly. Heat a skillet or griddle over medium heat and lightly grease it. Pour batter to desired size and cook until bubbles form on the surface. Flip and cook the other side until golden brown. Serve immediately for the best flavor and texture.

3.2 Tips for Achieving the Right Batter Consistency

Achieving the perfect batter consistency is key for fluffy Kodiak Cakes. Start by adding water gradually, mixing until just combined. Overmixing leads to a dense texture. For thicker cakes, use less water; for thinner, add a little more. Letting the batter rest for 2-3 minutes allows flour to absorb moisture evenly. For extra fluff, substitute water with buttermilk or add a tablespoon of vinegar. Adjust as needed to ensure a smooth, even pour.

Common Mistakes to Avoid

Avoid overmixing, which creates dense cakes. Use accurate measurements to ensure balance. Don’t skip letting the batter rest for proper hydration and aeration. Avoid excessive water.

4.1 Overmixing the Batter

Overmixing is a common mistake that leads to dense, tough cakes. It develops excess gluten, stripping the batter of its fluffiness. Stop mixing once ingredients are just combined. Avoid vigorous stirring or over-blending, as this destroys the delicate balance needed for a light texture. Instead, gently fold wet and dry ingredients until no visible lumps remain. This ensures Kodiak Cakes retain their signature airy, tender quality. Proper mixing technique is key to achieving the best results.

4.2 Incorrect Measurement of Ingredients

Incorrectly measuring ingredients can significantly affect the final texture of Kodiak Cakes. Using too much or too little flour, water, or mix can result in batter that’s either too thick or too runny. Always use a digital scale for precise measurements, especially for flour, as volume measurements can vary. For liquids, ensure the measuring cup is level to avoid over- or under-pouring. Accurate measurements are critical for achieving the right consistency and ensuring the cakes are light and fluffy, not dense or dry.

4.3 Not Allowing the Batter to Rest

Not allowing the batter to rest is a common mistake that can lead to dense, tough cakes. Resting enables the flour to absorb liquids fully and leavening agents to activate, ensuring a fluffy texture. Skipping this step disrupts gluten development and air incorporation, resulting in poor rise and an unpleasant mouthfeel. For optimal results, let the batter sit 3-5 minutes before cooking to enhance tenderness and structure, guaranteeing light, airy Kodiak Cakes every time.

Cooking Instructions

Cook Kodiak Cakes on a preheated griddle or skillet at medium heat. Pour batter, cook until bubbles form, then flip. Adjust heat to prevent burning for golden, fluffy results.

5.1 Cooking Temperatures and Timing

For optimal results, preheat your griddle or skillet to 375°F (190°C). Pour 1/4 cup of batter for each pancake. Cook for 2-3 minutes until bubbles form on the surface. Flip gently and cook for an additional 1-2 minutes until golden brown. Adjust heat as needed to prevent burning. Proper timing ensures a fluffy interior and a crispy exterior. Always use a thermometer to maintain consistent temperature for even cooking.

5.2 Tips for Flipping and Serving

Flip Kodiak Cakes when bubbles appear on the surface and edges look dry. Use a spatula to gently lift and turn for an even golden brown. Serve immediately with butter, syrup, fresh fruit, or whipped cream. For extra crispiness, cook until edges are slightly golden before flipping. Experiment with toppings like chocolate chips, nuts, or honey for added flavor. Proper flipping ensures a fluffy interior and a delicious presentation every time.

Customization Ideas

Customize Kodiak Cakes with fresh fruits, nuts, or spices for added flavor. Try blueberries, chocolate chips, or cinnamon for a personal touch. Adjust recipes to suit dietary needs, ensuring delicious and varied breakfast options.

6.1 Adding Flavorings and Mix-Ins

Kodiak Cakes can be enhanced with various flavorings and mix-ins for added taste and texture. Common additions include fresh or dried fruits, nuts, spices, or even cocoa powder. For example, blueberries or chocolate chips create a sweet twist, while cinnamon or nutmeg add warmth. Nuts like walnuts or pecans provide a satisfying crunch. Seeds, such as chia or flax, offer nutritional benefits. These mix-ins can be folded into the batter before cooking, allowing for endless customization to suit any preference or dietary need.

6.2 Adjusting for Dietary Preferences

Kodiak Cakes can be tailored to suit various dietary needs. For gluten-free options, substitute the mix with a gluten-free alternative or add gluten-free flours like almond or coconut flour. Vegans can replace eggs with flaxseed or mashed banana and use plant-based milk. Low-carb diets can incorporate protein powder or almond flour. Dairy-free versions benefit from non-dairy milk and vegan butter. These adjustments ensure everyone can enjoy Kodiak Cakes while adhering to their dietary preferences or restrictions.

Storing and Reheating

Proper storage and reheating techniques maintain the freshness and texture of Kodiak Cakes. Store batter in an airtight container in the fridge for up to 3 days. Cooked cakes can be refrigerated for 5 days or frozen for 2 months. For reheating, use a skillet over medium heat, a toaster, or microwave for a quick warm-up. Ensure cakes are thoroughly heated for the best taste and texture.

7.1 Proper Storage of Batter and Cooked Cakes

Kodiak Cakes batter should be stored in an airtight container in the refrigerator for up to 3 days. For cooked cakes, cool them completely before storing in an airtight container in the fridge for up to 5 days or freeze for up to 2 months. Label containers with dates to ensure freshness. When freezing, place cakes in a single layer or separate with parchment paper to prevent sticking. This ensures optimal texture and flavor when reheated.

7.2 Best Practices for Reheating

For reheating Kodiak Cakes, use a toaster or toaster oven at 350°F for 2-3 minutes. Alternatively, microwave for 20-30 seconds, covering with a damp cloth to retain moisture. For a crispy texture, reheat in a skillet over medium heat with a small amount of butter or oil. Reheating frozen cakes may require an extra 1-2 minutes. Avoid overcrowding the pan or microwave to ensure even heating. Refrigerated cakes can be reheated directly, while frozen ones should thaw slightly first for best results.

Troubleshooting Common Issues

Common issues like dense or tough cakes often result from overmixing or incorrect measurements. Adjusting batter consistency and cooking time can resolve most problems effectively.

8.1 Dealing with Dense or Tough Cakes

Dense or tough cakes often occur due to overmixing the batter, which develops too much gluten. To fix this, mix wet and dry ingredients separately and gently fold them together until just combined. Avoid over-stirring, as this leads to a dense texture. Also, ensure not to overcook the cakes, as this can make them tough. Adjusting the ratio of liquid to dry ingredients can also help achieve a lighter consistency.

8.2 Solutions for Sticking Cakes

Sticking cakes can be prevented by ensuring the pan or griddle is properly heated and greased. Use a small amount of butter or oil to coat the surface evenly. Avoid overcrowding the pan, as this can lower the temperature and cause sticking. Non-stick pans or griddles are ideal for cooking Kodiak Cakes. If cakes do stick, gently loosen them with a spatula before flipping. Proper preheating and lubrication are key to achieving a smooth, even release.

Safety Tips

Always handle hot skillets or griddles with oven mitts to prevent burns. Ensure the cooking area is clear of children and flammable materials for a safe experience.

9.1 Handling Hot Skillets or Griddles

When working with hot skillets or griddles, always use oven mitts or tongs to prevent burns. Never leave cooking unattended, especially with children nearby. Ensure the cooking surface is stable and far from flammable materials. Allow the skillet to cool before cleaning to avoid accidental contact with hot surfaces. Proper handling ensures a safe and enjoyable cooking experience for everyone involved in preparing Kodiak Cakes.

9.2 Allergen Considerations

Kodiak Cakes contain wheat, milk, and eggs, which are common allergens. Always check the ingredient list for potential allergens and ensure all utensils and surfaces are cleaned thoroughly to prevent cross-contamination. For those with dietary restrictions, consider using gluten-free or dairy-free mixes. Inform anyone with severe allergies about the ingredients used. Proper handling and communication are key to ensuring a safe and inclusive cooking environment for everyone enjoying Kodiak Cakes.

Mastering Kodiak Cakes requires attention to mixing, cooking, and safety. Follow instructions carefully, avoid overmixing, and cook at the right temperature for fluffy, delicious results every time. Practice makes perfect!

10.1 Recap of Key Mixing Instructions

To achieve the perfect Kodiak Cakes, follow these essential steps: Start by combining dry ingredients in a bowl. Gradually add wet ingredients, mixing until just combined. Avoid overmixing to prevent dense cakes. Let the batter rest for a few minutes to allow the flour to absorb moisture evenly. Heat your skillet or griddle over medium heat, ensuring it’s evenly coated with oil or butter. Pour batter in appropriate amounts, cook until bubbles form, then flip and cook the other side until golden brown. Adjust heat as needed to prevent burning. Always preheat properly and keep the griddle clean for consistent results. Proper mixing and cooking techniques ensure fluffy, delicious pancakes every time. Keep all ingredients at room temperature for optimal consistency and texture. Remember, the key is to mix wet and dry ingredients separately and fold them gently to maintain airiness. This method ensures tender and flavorful cakes that your family will love. Don’t forget to let the batter rest—it makes a big difference in texture. Finally, experiment with add-ins like fruit or nuts to create unique flavor combinations. Happy cooking!

10.2 Final Tips for Perfect Kodiak Cakes

For the best results, always use room-temperature ingredients and avoid overmixing the batter. Let it rest briefly to ensure fluffiness. Preheat your griddle thoroughly and grease it lightly to prevent sticking. Cook on medium heat for even browning. Don’t overcrowd the griddle—cook in batches if necessary. Experiment with add-ins like fresh fruit or nuts for extra flavor. Store leftovers in an airtight container and reheat gently. These tips will help you achieve perfectly cooked, delicious Kodiak Cakes every time!

Page 3 of 3

Powered by WordPress & Theme by Anders Norén