Month: September 2024 Page 3 of 4

bartesian manual

The Bartesian Cocktail Maker is a sleek, innovative appliance designed to craft premium cocktails effortlessly at home. Using specialized capsules, it combines spirits with precise mixers, allowing for customizable strength and flavor profiles. Perfect for cocktail enthusiasts, it simplifies the mixing process while delivering professional-quality results, making it an essential addition to any home bar.

1.1 Overview of the Bartesian Pro Premium Cocktail Machine

The Bartesian Pro Premium is a high-end, pod-based cocktail maker designed for home use. It uses mixologist-crafted capsules to create over 50 classic and modern cocktails. With a sleek design and touchscreen interface, it allows users to customize drink strength and flavor profiles. The machine is self-cleaning, features dishwasher-safe glassware, and includes a removable water reservoir for easy maintenance, making it a convenient luxury for cocktail enthusiasts.

1.2 Benefits of Using the Bartesian Cocktail Maker

The Bartesian Cocktail Maker offers unparalleled convenience, creating professional-quality cocktails in seconds. It eliminates the need for extensive mixology knowledge, allowing anyone to craft perfect drinks. The machine’s customizable strength and flavor options cater to personal preferences, while its self-cleaning feature and dishwasher-safe parts simplify maintenance. Ideal for home entertaining, it transforms cocktail-making into a seamless, enjoyable experience with minimal effort required.

Unboxing and Initial Setup

Remove the Bartesian Cocktail Maker and components from the box, placing them on a sturdy surface. Wash all removable parts before first use to ensure cleanliness and hygiene.

2.1 Removing the Machine and Components from the Box

Start by carefully removing the Bartesian Cocktail Maker and all included components from the packaging. Place the machine on a flat, sturdy surface to ensure stability. Check that all parts, such as the water reservoir, spirit holders, and capsules, are included. Remove any protective covering from the machine and components to prepare for initial setup and cleaning.

2.2 Washing Removable Parts Before First Use

Before using your Bartesian Cocktail Maker, wash all removable parts, including the water reservoir and spirit holders, with warm, soapy water. Rinse thoroughly to ensure no soap residue remains. For best results, place dishwasher-safe components on the top rack of your dishwasher. Allow all parts to dry completely before reassembling and using the machine for the first time to maintain cleanliness and functionality.

Operating the Bartesian Cocktail Maker

The Bartesian operates seamlessly with a 3-step process: insert a cocktail capsule, select your desired drink strength, and let the machine craft a perfect cocktail instantly.

3.1 Inserting Cocktail Capsules and Selecting Strength

To start, open the lid and insert a cocktail capsule into the designated slot. The barcode scanner recognizes the capsule, displaying the cocktail name. Use the touchscreen to choose your preferred strength—light, standard, or strong. This customization ensures each drink is tailored to your taste, providing a personalized experience with every use.

3.2 Understanding the 3-Step Cocktail-Making Process

The Bartesian simplifies crafting cocktails into three easy steps. First, insert a cocktail capsule and select your preferred strength. Next, the machine automatically mixes the spirits and ingredients from the capsule with water to create your drink. Finally, pour and enjoy your perfectly balanced cocktail. This streamlined process ensures consistent, high-quality results with minimal effort required.

Parts and Features of the Bartesian Pro

The Bartesian Pro features a removable water reservoir, spirit holders, dispenser, and touchscreen control panel. These components work together to create a seamless and efficient cocktail-making experience.

4.1 Key Components: Lid, Water Reservoir, Dispenser, and Spirit Holders

The Bartesian Pro features a durable lid, a removable water reservoir with a secure lid, a precise dispenser, and spirit holders for gin, rum, vodka, and tequila. These components are designed for easy access and maintenance, ensuring smooth operation. The water reservoir is refillable, while the spirit holders securely store your preferred liquors, making the machine both functional and user-friendly for crafting perfect cocktails.

4.2 Navigating the Touchscreen Control Panel

The Bartesian Pro features an intuitive touchscreen control panel that simplifies cocktail creation. Users can easily select from pre-programmed cocktail options, adjust drink strength, and access maintenance settings; The interface is user-friendly, with clear prompts and a responsive design. It also includes options for rinsing the system and self-cleaning, ensuring optimal performance and hygiene with minimal effort.

Care and Cleaning Instructions

Regular cleaning ensures optimal performance. Dishwasher-safe glassware simplifies maintenance, while removable parts should be washed thoroughly. Use the rinse function for hygiene and self-cleaning features to maintain the machine.

5.1 Dishwasher-Safe Glassware and Cleaning Tips

All Bartesian glassware is dishwasher-safe, making cleaning convenient. Place glasses on the top rack for optimal results. Regularly wipe the machine’s exterior with a soft cloth to maintain its appearance. Empty and rinse the water reservoir frequently to prevent mineral buildup. Cleaning the dispenser and spirit holders with warm water ensures hygiene and proper function. Follow these tips to keep your Bartesian in prime condition;

5.2 Maintaining the Machine: Rinse Function and Self-Cleaning

The Bartesian features a convenient rinse function to remove residual mixers and spirits, preventing buildup. After each use, run the rinse cycle to clean the dispenser. The self-cleaning mode ensures internal components stay hygienic. Regularly using these functions maintains performance and prevents clogs. This effortless maintenance routine keeps your Bartesian in optimal condition for consistently great cocktails.

Troubleshooting Common Issues

Resolve issues like capsule recognition problems or water line priming by cleaning the barcode scanner or running the rinse function. Refer to the manual for detailed solutions to ensure optimal performance and address any operational hiccups promptly, keeping your Bartesian running smoothly and efficiently for perfect cocktails every time.

6.1 Barcode Scanner Not Recognizing Capsules

If the Bartesian fails to recognize a capsule, ensure the barcode is clean and free from moisture. Open the lid and gently wipe the barcode scanner with a soft cloth. Avoid touching the scanner to prevent smudging. If issues persist, restart the machine and reinsert the capsule. Ensure the capsule is properly aligned for accurate scanning. This simple maintenance ensures smooth operation and consistent cocktail quality. Always refer to the manual for troubleshooting steps to resolve such issues quickly. Proper care of the scanner and capsules guarantees optimal performance. Regular cleaning prevents water spots and fingerprints, ensuring reliable barcode detection. By following these steps, you can maintain your Bartesian’s efficiency and enjoy flawless cocktail-making experiences.

6.2 Priming the Water Line for First Use

To prime the water line, fill the reservoir with fresh water and ensure it’s properly seated. Use the rinse function to circulate water through the system. This step removes any airlocks and prepares the machine for operation. Repeat the rinse cycle if necessary to ensure smooth water flow. A well-primed system guarantees consistent performance and prevents issues during cocktail preparation. Always refer to the manual for detailed instructions.

Advanced Features and Customization

The Bartesian Cocktail Maker offers customizable options to tailor your drinking experience, including adjustable cocktail strength settings and the ability to use various spirits for personalized flavor profiles.

7.1 Adjusting Cocktail Strength and Flavor Profiles

The Bartesian Cocktail Maker allows users to customize their drinks by adjusting the strength of cocktails through the touchscreen interface, selecting from low, medium, or high strength. Additionally, flavor profiles can be personalized by switching out different spirits in the holders, enabling tailored taste experiences to suit individual preferences and creating unique cocktail variations effortlessly.

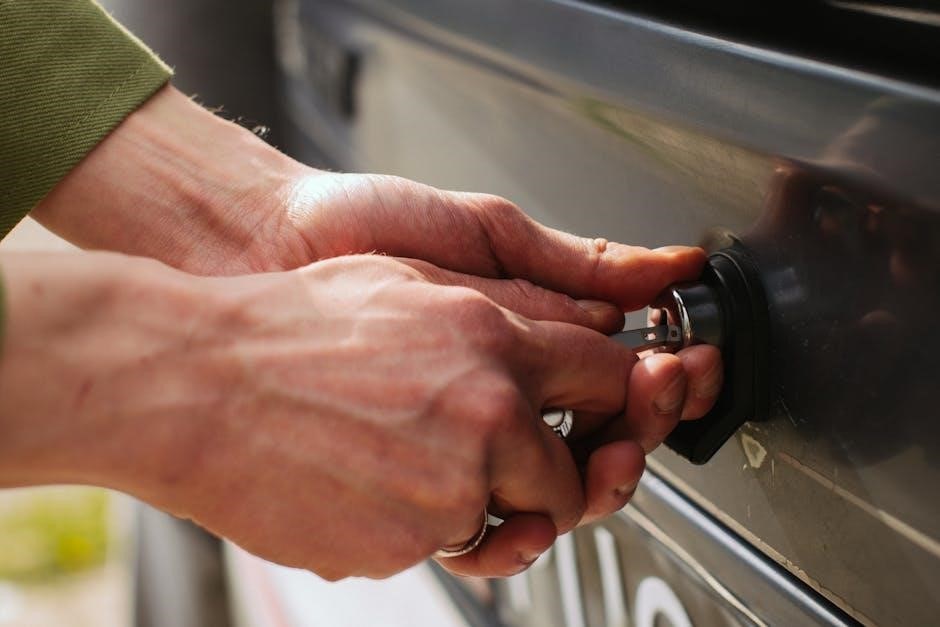
7.2 Switching Spirits: Step-by-Step Instructions

Switching spirits on the Bartesian is straightforward. Open the lid, remove the current spirit bottle, and replace it with the desired one. Close the lid and use the touchscreen to select the new spirit; The machine will guide you through the process, ensuring a seamless transition between different spirits for various cocktail creations.

Tips for Maximizing Performance

Use high-quality spirits for optimal flavor and ensure cocktail capsules are stored properly. Regularly clean the machine and rinse after use to maintain efficiency and longevity.

8.1 Using High-Quality Spirits for Optimal Flavor

Using high-quality spirits is essential for achieving the best flavor in your Bartesian cocktails. Premium spirits enhance the overall taste and aroma, ensuring a superior drinking experience. Avoid using low-quality or diluted spirits, as they can compromise the cocktail’s quality. The Bartesian’s precision mixing relies on the quality of the spirits to deliver authentic, bar-like results at home.

8.2 Storing Cocktail Capsules and Spirits Properly

Proper storage of cocktail capsules and spirits is crucial for maintaining their quality and shelf life. Store capsules in a cool, dry place away from direct sunlight to preserve flavors. Spirits should be kept upright in their holders to prevent leakage and contamination. Regularly check expiration dates and ensure all components are clean before use to guarantee optimal performance and taste.

Safety Precautions and Important Notes

Ensure the Bartesian is installed on a stable surface and used by adults of legal drinking age. Follow manual instructions carefully to avoid accidents and ensure optimal performance.

9.1 Installation and Location Guidelines

Place the Bartesian on a flat, sturdy surface away from direct sunlight and moisture. Ensure proper ventilation and keep it out of reach of children. Avoid placing near heat sources or flammable materials. Follow manual instructions for power cord placement and ensure the machine is level for optimal performance and safety.

9.2 Usage Restrictions for Adults of Legal Drinking Age

The Bartesian Cocktail Maker is designed for adults of legal drinking age only. Use by minors is strictly prohibited. Ensure responsible operation and supervision to prevent unauthorized access. Always adhere to local alcohol consumption laws and guidelines for safe and enjoyable use of the machine.

Accessories and Replacement Parts

Explore a range of accessories, including premium glassware and spirit holders, to enhance your Bartesian experience. Replacement parts and additional components can be ordered directly from the official website for convenience and authenticity.

10.1 Ordering Parts and Cocktail Capsules Online

Ordering parts and cocktail capsules for your Bartesian is straightforward. Visit the official Bartesian website to explore a variety of accessories, replacement components, and flavored capsules. Create an account, browse the selection, and complete your purchase securely. Payment options include credit cards and other online methods. Shipping details and delivery timelines are provided during checkout, ensuring a hassle-free experience to maintain and customize your machine.

10.2 Replacing the Power Cord and Other Components

To replace the power cord or other components, ensure the machine is unplugged. Visit the Bartesian website or contact customer support for genuine parts. Follow the provided instructions or consult the manual for specific guidance. If unsure, contact a qualified technician. Always handle electrical components with care to avoid damage or safety risks, ensuring proper function and longevity of your Bartesian Cocktail Maker.

The Bartesian Cocktail Maker offers a revolutionary way to enjoy premium cocktails at home with ease, combining innovative technology and simplicity for a perfect drinking experience.

11.1 Final Thoughts on the Bartesian Cocktail Maker

The Bartesian Cocktail Maker is a game-changer for home mixologists, offering effortless creation of premium cocktails with customizable strength and flavor. Its innovative use of capsules ensures consistency and quality, while the sleek design and dishwasher-safe parts make maintenance easy. With its user-friendly interface and self-cleaning features, it’s a must-have for anyone looking to elevate their home bar experience effortlessly.

11.2 Resources for Further Assistance and Support

For further assistance, visit Bartesian’s official website for comprehensive guides, FAQs, and contact information. Their support team is available to address any queries or concerns. Additionally, downloadable PDF manuals provide detailed instructions for troubleshooting and maintenance, ensuring optimal performance of your Bartesian Cocktail Maker.

powerflex 70 user manual

The PowerFlex 70 is a high-performance AC drive designed for versatile motor control across various industrial applications. It offers advanced features like dynamic braking and zero stacking, ensuring efficient operation and space-saving installation. Ideal for applications requiring precise speed control, it supports multiple motor types and is compatible with numerous network systems. The drive is known for its robust design, user-friendly interface, and compliance with global safety standards, making it a reliable choice for industrial automation.

1.1 Overview of PowerFlex 70 AC Drives

The PowerFlex 70 AC drives are high-performance, versatile motor control solutions designed for industrial applications. They offer advanced features like dynamic braking, zero stacking, and compact designs, enabling efficient operation and space-saving installation. These drives support multiple motor types and are compatible with various network systems, making them suitable for diverse automation needs. With robust construction and user-friendly interfaces, they ensure reliable performance across demanding environments, meeting global safety and efficiency standards.

1;2 Key Features and Applications

The PowerFlex 70 AC drives feature dynamic braking, zero stacking, and compact designs, optimizing performance and space. They support multiple motor types and network systems, making them ideal for industrial automation, material handling, and water treatment. With NEMA/UL Type 4X/12 ratings, they ensure durability in harsh environments. Their versatility and efficiency make them suitable for applications requiring precise speed control, high torque, and reliable operation in demanding industrial settings.

System Requirements and Compatibility

The PowerFlex 70 requires compatible hardware and software, including DeviceNet adapters, and operates within specified voltage ranges (e.g., 380-480V, three-phase). It meets UL and NEMA ratings.

2.1 Compatible Hardware and Software

The PowerFlex 70 is compatible with DeviceNet adapters and integrates seamlessly with Rockwell Automation systems, including RSLogix 5000. It supports various network protocols like EtherNet/IP and operates with multiple motor types. The drive is also compatible with user-friendly programming tools and software, ensuring efficient configuration and control. Proper hardware and software alignment ensures optimal performance and compatibility across industrial applications.

2.2 Operating Conditions and Environment

The PowerFlex 70 operates effectively in temperatures ranging from 0°C to 40°C and humidity up to 95% non-condensing. It is rated NEMA/UL Type 4X/12 (IP66/54), suitable for harsh industrial environments. Proper installation requires mounting in a clean, dry area with adequate airflow to prevent overheating. Avoid exposure to direct sunlight, vibrations, or corrosive substances. Ensure the environment meets these conditions for optimal performance and longevity of the drive.

Installation and Setup

Proper installation ensures optimal performance. Mount the drive securely, ensuring adequate airflow for cooling. Follow manual guidelines for wiring and connections. Verify all safety precautions before powering up.

3.1 Physical Installation Guidelines

Mount the PowerFlex 70 on a flat, stable surface to ensure proper operation. Ensure adequate airflow around the drive for cooling. Install in a clean, dry environment away from direct sunlight and extreme temperatures. The drive’s NEMA/UL Type 4X/12 rating allows for use in harsh conditions. Proper grounding is essential for safety and performance. Follow all manual guidelines for secure installation.

3.2 Initial Configuration Steps

Power up the drive and navigate to the menu system using the keypad. Set the motor nameplate parameters, including voltage, frequency, and power rating. Configure the speed reference source, such as analog input or keypad control. Review and adjust default settings as needed for your application. Ensure all I/O connections are properly secured. Save the configuration to prevent data loss during power cycles. Refer to the manual for detailed parameter descriptions and setup examples.

Operation and Control

The PowerFlex 70 offers intuitive control via keypad, software, or network interfaces. Real-time monitoring and precise speed regulation ensure efficient and reliable motor operation across applications.

4.1 Control Interface Overview

The PowerFlex 70 features a user-friendly control interface with multiple operation modes, including keypad, software, and network interfaces; Its intuitive design allows for easy navigation and real-time monitoring of drive parameters. The interface supports precise speed regulation and seamless integration with external control systems. Enhanced features like an LCD display and compatible software tools enable efficient configuration and monitoring, ensuring optimal drive performance for various industrial applications.

4.2 Navigating the Menu System

The PowerFlex 70 menu system offers a user-friendly interface for configuring and monitoring drive settings. The hierarchical menu structure allows easy navigation through main categories and subcategories. Use the navigation buttons to scroll up and down, select options, and return to previous screens. The interface includes shortcuts for quick access to frequently used parameters. Additionally, the menu features confirmation prompts to prevent unintended changes, ensuring safe and efficient operation.

Safety Precautions and Best Practices

Always disconnect power before performing maintenance. Wear protective gear like gloves and safety glasses. Follow proper lockout/tagout procedures to prevent accidental startups. Refer to the manual for detailed safety protocols to ensure safe operation and compliance with industry standards.

5.1 General Safety Guidelines

Always disconnect power before maintenance. Use lockout/tagout procedures to prevent accidental startups. Wear protective gear like gloves and safety glasses. Ensure the drive is installed in a well-ventilated area, away from flammable materials. Avoid overloading the system. Follow all local safety regulations and standards. Regularly inspect cables and connections for damage. Keep emergency stop devices readily accessible. Refer to the manual for specific safety protocols to ensure safe operation and compliance with industry standards.

5.2 Emergency Procedures

In case of an emergency, immediately disconnect power to the drive. Use the emergency stop button if available. Ensure the motor and connected equipment come to a safe stop. Do not restart the drive until the issue is resolved. If an error code appears, refer to the troubleshooting section in the manual. Contact Rockwell Automation technical support for assistance. Always follow proper shutdown and restart procedures to prevent further issues and ensure safe operation;

Troubleshooting Common Issues

Identify issues using error codes and system indicators. Refer to the error code list in the manual for detailed solutions and diagnostic guidance. Resolve promptly.

6.1 Identifying and Diagnosing Problems

Identify issues by reviewing error codes, LED indicators, and system alarms. Consult the user manual for code definitions and troubleshooting steps. Check for overvoltage, undervoltage, or motor overload conditions. Use the drive’s keypad or software tools to monitor status and fault history. Verify wiring connections and ensure proper installation. Address issues promptly to prevent downtime and ensure safe operation. Regular maintenance and updates can help mitigate recurring problems.

6.2 Error Codes and Solutions

Understand error codes for effective troubleshooting. Refer to the user manual for specific code meanings, such as F0001 (overvoltage) or F0002 (undervoltage). Solutions may include checking power supply, verifying motor parameters, or resetting the drive. For persistent issues, update firmware or contact Rockwell Automation support. Regular maintenance and parameter adjustments can prevent recurring errors. Always follow safety guidelines when addressing faults to ensure system reliability and operational safety. Consult the manual for detailed solutions and procedures.

Technical Specifications

PowerFlex 70 drives operate at 380-480V, 3-phase, with NEMA/UL Type 4X/12 (IP66/54) ratings. They comply with UL and IEC safety standards, ensuring reliability in harsh environments.

7.1 Electrical Ratings and Performance

PowerFlex 70 AC drives are rated for 380-480V, three-phase input, delivering efficient motor control. They offer high-performance torque regulation and precise speed control, suitable for demanding applications. The drives support multiple motor types and provide advanced braking capabilities, ensuring minimal energy loss. Their robust design meets global safety certifications, making them reliable for industrial use in diverse environments and conditions.

7.2 Compliance and Certifications

PowerFlex 70 drives meet global safety and environmental standards, including NEMA/UL Type 4X/12 and IP66/54 ratings. They comply with CE and UL emissions regulations, ensuring safe operation in hazardous environments. The drives are certified for use in various industrial settings, adhering to international safety and performance norms. This ensures reliability and compliance across diverse applications and regions, meeting stringent regulatory requirements.

Advanced Features

PowerFlex 70 offers dynamic braking resistor configuration and zero stacking, enabling compact designs and side-by-side mounting without air gaps, optimizing panel space and system efficiency.

8.1 Dynamic Braking Resistor Configuration

The PowerFlex 70 supports dynamic braking resistor configuration, enhancing operational efficiency by dissipating excess energy during motor deceleration. This feature is crucial for applications requiring frequent starts and stops, as it prevents damage to the drive and motor. Proper configuration ensures smooth operation, reduces wear on mechanical components, and optimizes energy use. Refer to the user manual for specific setup guidelines and parameters to achieve optimal performance in your application. Always follow safety protocols when configuring this feature to avoid potential hazards and ensure reliable operation. Dynamic braking resistor configuration is a key advanced feature that sets the PowerFlex 70 apart in industrial automation, providing precise control and protection for demanding environments. By integrating this functionality, the drive delivers enhanced reliability and extends equipment lifespan, making it a robust solution for various industrial needs. Additionally, the drive’s design allows for seamless integration with existing systems, ensuring compatibility and ease of use. This feature is particularly beneficial in applications where energy efficiency and motor protection are paramount, ensuring that the PowerFlex 70 meets the highest standards of performance and durability.

8.2 Zero Stacking and Compact Design

The PowerFlex 70 features a compact design with zero stacking, allowing drives to be mounted side by side without air gaps, saving valuable panel space. This innovative design enhances installation flexibility while maintaining high performance. The drive’s rugged construction ensures reliability in demanding environments, making it ideal for applications where space is limited. Zero stacking simplifies system integration and reduces overall footprint, providing a cost-effective solution for industrial automation needs. This design ensures efficient use of space while delivering robust functionality, meeting the demands of modern industrial applications. The compact form factor does not compromise on performance, offering the same advanced features as larger models. This makes the PowerFlex 70 a versatile choice for a wide range of motor control applications, ensuring optimal performance in minimal space. The zero-stacking capability is a key advantage, enabling seamless integration into existing systems without additional hardware requirements, thus streamlining installation processes and reducing costs. This feature underscores the drive’s adaptability and efficiency in industrial settings, making it a preferred option for many users. Overall, the zero-stacking design of the PowerFlex 70 is a testament to its innovative engineering, providing a practical solution for space-constrained applications while maintaining high operational standards. By minimizing physical dimensions without sacrificing functionality, the PowerFlex 70 stands out as a reliable and efficient AC drive in its class. Its compact and space-saving design ensures that users can achieve their automation goals without compromising on performance or reliability, making it a valuable asset in various industrial environments. The drive’s ability to be mounted closely together reduces the overall system size, allowing for more efficient use of control panels and reducing the need for additional enclosures or components. This not only saves space but also simplifies system design and maintenance, contributing to lower overall costs and increased productivity. Additionally, the zero-stacking feature ensures that the drives operate efficiently even in densely packed environments, maintaining consistent performance and reliability; This makes the PowerFlex 70 an excellent choice for applications where both space and performance are critical factors. The compact design and zero-stacking capability are among the key reasons why the PowerFlex 70 is widely adopted in industries requiring precise motor control and efficient system integration. By addressing space constraints without compromising on functionality, the PowerFlex 70 delivers a comprehensive solution for modern industrial automation needs, ensuring that users can achieve their goals effectively and efficiently. The drive’s innovative design and robust construction make it a reliable and long-lasting solution, providing years of trouble-free operation in demanding environments. With its zero-stacking feature, the PowerFlex 70 continues to set new standards in AC drive technology, offering unparalleled performance and convenience for users worldwide. This feature is a prime example of how advanced engineering can address real-world challenges, providing practical solutions that enhance productivity and efficiency. The zero-stacking design of the PowerFlex 70 is a significant advancement in motor control technology, enabling users to optimize their systems while maintaining high performance levels. It is a clear demonstration of the drive’s versatility and adaptability, making it a preferred choice for a broad spectrum of industrial applications. By combining a compact form factor with powerful functionality, the PowerFlex 70 meets the diverse needs of modern industries, ensuring that users can achieve their automation objectives with ease and precision. The zero-stacking capability is a key factor in the drive’s popularity, as it addresses a common challenge in industrial automation: the efficient use of space. This feature, along with the drive’s robust construction and advanced features, solidifies the PowerFlex 70’s position as a leading AC drive in the market. The drive’s ability to be mounted closely together not only saves space but also simplifies system design, reducing the complexity and costs associated with traditional installation methods. This makes the PowerFlex 70 an attractive option for industries looking to streamline their operations and improve overall efficiency. Furthermore, the zero-stacking design ensures that the drive operates reliably in environments where space is at a premium, making it suitable for a wide range of applications. The PowerFlex 70’s innovative design and advanced features make it a valuable asset for any industrial automation system, providing a practical and efficient solution for motor control needs. With its zero-stacking capability and compact design, the PowerFlex 70 continues to be a preferred choice for industries worldwide, delivering exceptional performance and reliability in demanding environments. This feature is a testament to the drive’s versatility and adaptability, ensuring that it meets the evolving needs of modern industrial applications. By addressing space constraints and maintaining high performance, the PowerFlex 70 sets a new benchmark for AC drives, offering users a reliable and efficient solution for their automation requirements. The drive’s zero-stacking design is a prime example of how innovative engineering can provide practical solutions to real-world challenges, enhancing productivity and efficiency in industrial settings. With the PowerFlex 70, users can achieve their automation goals with ease, knowing that their systems are optimized for both performance and space efficiency. The zero-stacking feature, combined with the drive’s robust construction and advanced functionality, makes the PowerFlex 70 an indispensable component in modern industrial automation systems. Its ability to be mounted closely together without compromising performance ensures that users can maximize their system’s potential while minimizing physical space requirements. This makes the PowerFlex 70 a versatile and reliable choice for a wide range of applications, from simple motor control to complex industrial automation systems. The drive’s compact design and zero-stacking capability are among the key factors that contribute to its popularity, as they provide a practical solution to common challenges in industrial automation. By delivering high performance in a space-efficient package, the PowerFlex 70 meets the diverse needs of users worldwide, ensuring that their systems operate efficiently and reliably. The zero-stacking design is a significant advancement in AC drive technology, enabling users to optimize their systems while maintaining high performance levels. It is a clear demonstration of the drive’s versatility and adaptability, making it a preferred choice for a broad spectrum of industrial applications. With its innovative design and robust construction, the PowerFlex 70 continues to set new standards in motor control technology, offering unparalleled performance and convenience for users worldwide. This feature is a prime example of how advanced engineering can address real-world challenges, providing practical solutions that enhance productivity and efficiency. The zero-stacking design of the PowerFlex 70 is a testament to its innovative engineering, providing a practical solution for space-constrained applications while maintaining high operational standards. By minimizing physical dimensions without sacrificing functionality, the PowerFlex 70 stands out as a reliable and efficient AC drive in its class, ensuring that users can achieve their automation goals effectively and efficiently. The drive’s ability to be mounted closely together reduces the overall system size, allowing for more efficient use of control panels and reducing the need for additional enclosures or components. This not only saves space but also simplifies system design and maintenance, contributing to lower overall costs and increased productivity. Additionally, the zero-stacking feature ensures that the drives operate efficiently even in densely packed environments, maintaining consistent performance and reliability. This makes the PowerFlex 70 an excellent choice for applications where both space and performance are critical factors. The compact design and zero-stacking capability are among the key reasons why the PowerFlex 70 is widely adopted in industries requiring precise motor control and efficient system integration. By addressing space constraints without compromising on functionality, the PowerFlex 70 delivers a comprehensive solution for modern industrial automation needs, ensuring that users can achieve their goals effectively and efficiently. The drive’s innovative design and robust construction make it a reliable and long-lasting solution, providing years of trouble-free operation in demanding environments. With its zero-stacking feature, the PowerFlex 70 continues to set new standards in AC drive technology, offering unparalleled performance and convenience for users worldwide. This feature is a prime example of how advanced engineering can address real-world challenges, providing practical solutions that enhance productivity and efficiency. The zero-stacking design of the PowerFlex 70 is a significant advancement in motor control technology, enabling users to optimize their systems while maintaining high performance levels. It is a clear demonstration of the drive’s versatility and adaptability, making it a preferred choice for a broad spectrum of industrial applications. By combining a compact form factor with powerful functionality, the PowerFlex 70 meets the diverse needs of modern industries, ensuring that users can achieve their automation objectives with ease and precision. The zero-stacking capability is a key factor in the drive’s popularity, as it addresses a common challenge in industrial automation: the efficient use of space. This feature, along with the drive’s robust construction and advanced features, solidifies the PowerFlex 70’s position as a leading AC drive in the

Warranty and Compliance Information

Programming and Parameter Configuration

Programming the PowerFlex 70 involves configuring parameters for motor control and operation. Refer to the user manual for step-by-step guidance, ensuring proper setup and optimization of drive functions.

rent a manual car

Renting a manual car offers a cost-effective, fuel-efficient, and engaging driving experience․ It’s ideal for those familiar with manual transmissions, providing better control and often lower rental costs․

  • Manual cars are widely available in many countries․
  • They suit drivers who prefer a more hands-on driving experience․
  • Ensure you have the necessary license and skills before booking․
  • Benefits of Renting a Manual Car

    Renting a manual car offers cost savings, better fuel efficiency, and a more engaging driving experience․ It’s often cheaper than automatics and provides greater control․

    • Cost-effective option with lower rental fees․
    • Higher fuel efficiency for long trips․
    • Greater control and driving satisfaction․
    • 2․1․ Cost-Effectiveness

      Renting a manual car is often more budget-friendly compared to automatics․ Many rental companies offer lower rates for manual transmissions due to higher availability and lower demand․ Additionally, manual cars generally have better fuel efficiency, reducing petrol costs during your trip․ This makes them a cost-effective choice for travelers, especially in regions where manual cars are more common․ Savings can add up, making manual rentals a practical option for budget-conscious drivers․

      • Lower rental fees compared to automatics․
      • Higher fuel efficiency reduces long-term costs․
      • Ideal for regions where manuals are standard․
      • 2․2․ Better Fuel Efficiency

        Renting a manual car often provides better fuel efficiency compared to automatics․ Manual transmissions typically achieve higher miles per gallon, reducing fuel costs during your trip․ This is especially advantageous for long drives or in regions with higher petrol prices․ The ability to control gear shifts allows drivers to optimize engine performance, further enhancing fuel economy․ This makes manual cars a practical choice for those seeking to minimize expenses and reduce their environmental impact․

        • Manual cars generally achieve better MPG․
        • Optimized gear control reduces fuel consumption․
        • Cost-effective for long-distance travel․
        • 2․3․ Driving Experience and Control

          Renting a manual car offers a more engaging and enjoyable driving experience․ With a manual transmission, drivers have greater control over acceleration and gear shifts, allowing for smoother maneuvering, especially on winding roads․ This connection between the driver and the vehicle enhances the overall driving pleasure․ Additionally, manual cars often provide better responsiveness, making them ideal for those who appreciate a more hands-on approach to driving․

          • Manual transmissions provide precise control․
          • Enhanced driving engagement and responsiveness․
          • Perfect for drivers who enjoy a hands-on experience․
          • Drawbacks of Renting a Manual Car

            Renting a manual car may have limitations, such as limited availability in certain regions, requiring more driving effort, and potential fatigue on long journeys․

            • Limited availability in some countries․
            • More effort required for city driving․
            • Potential driver fatigue on long trips․
            • 3․1․ Availability in Certain Countries

              Manual cars are more common in Europe and developing countries but scarce in regions like the U․S․, where automatics dominate․ Availability varies globally, with some areas offering limited manual options․

              • In countries like Romania, manuals are widespread․
              • In the U․S․, manual rentals are rare and often found only at local agencies․
              • Travelers should verify availability before booking, especially in regions where automatics prevail․
              • 3․2․ Steeper Learning Curve

                Mastering a manual car requires practice and coordination, making it challenging for beginners․ The process involves learning to operate the clutch, accelerator, and gearshift simultaneously, which can be daunting․ Stalling is common during the initial learning phase, and improper gear shifting can lead to discomfort or even damage․ Patience and consistent practice are essential to overcome the steep learning curve and enjoy the benefits of driving a manual car․

                • Clutch control is crucial for smooth starts and gear transitions․
                • Coordinating clutch release with accelerator input takes time to master․
                • Stalling is a common issue for new drivers but improves with practice․
                • 3․3․ Fatigue on Long Drives

                  Driving a manual car on long trips can be physically demanding due to constant gear shifting and clutch operation․ This repetitive motion can lead to fatigue, especially in heavy traffic or hilly terrain․ The need to remain focused and actively engage with the vehicle increases mental and physical strain, making automatic cars a more relaxed choice for extended journeys․

                  • Manual cars require constant driver engagement, which can be tiring over time․
                  • Long drives in heavy traffic or uphill routes amplify fatigue․
                  • Regular breaks and proper gear management can help reduce strain․
                  • How to Rent a Manual Car: A Step-by-Step Guide

                    Renting a manual car involves researching companies, comparing prices, and ensuring you meet the license requirements․ Book the car, pick it up after inspection, and return it on time for a smooth experience․

                    • Research companies offering manual cars in your location․
                    • Ensure you meet the rental requirements and have proper documentation․
                    • Inspect the car before pickup and return it as agreed․
                    • 4․1․ Researching Rental Companies

                      Start by comparing car rental companies that offer manual transmission vehicles․ Check their availability, pricing, and customer reviews․ Look for companies with a wide range of manual cars and flexible rental policies․ Use online platforms to compare rates and ensure the company operates in your desired location․ Verify if they provide additional services like insurance or GPS․ Manual cars are often more cost-effective, but availability varies by region, so research thoroughly to find the best option for your needs․

                      • Compare prices and availability across multiple companies․
                      • Check customer reviews for reliability and service quality․
                      • Ensure the company offers manual cars in your location․
                      • 4․2․ Checking Requirements and Licenses

                        Before renting a manual car, verify the rental company’s requirements․ Most companies require a valid driver’s license, often unrestricted, to rent a manual vehicle․ Ensure your license is accepted in the rental country․ Some countries may require an international driving permit․ Additionally, check if the company has age restrictions or requires a credit card․ Confirm that your license is valid for manual transmission cars, as some countries differentiate between automatic and manual licenses․ Ensure all documentation is in order before finalizing your booking․

                        • Valid driver’s license is typically mandatory․
                        • International driving permit may be required in some countries․
                        • Check for age restrictions and payment requirements․
                        • 4․3․ Booking the Car

                          Booking a manual car requires careful comparison of prices and availability across rental companies․ Use online platforms to filter options by manual transmission and select your preferred model․ Ensure the car suits your travel needs, such as fuel efficiency or passenger capacity․ Review the rental terms, including mileage limits and insurance coverage․ Complete the booking process by providing necessary details and payment information․ Double-check the reservation confirmation for accuracy․

                          • Compare prices and availability online․
                          • Select a model that fits your travel needs․
                          • Review rental terms and conditions thoroughly․
                          • 4․4․ Picking Up the Car

                            When picking up your manual car, arrive at the rental location with all required documents, including your driver’s license and rental confirmation․ Inspect the vehicle for any damage and ensure it matches your booking․ Review the rental agreement for accuracy and ask questions if needed․ Familiarize yourself with the car’s features, such as the clutch and gearshift, before driving away․ Ensure the fuel level and mileage are correctly noted․

                            • Bring all necessary documents for verification․
                            • Inspect the car for pre-existing damage․
                            • Confirm rental details and ask questions․
                            • 4․5․ Returning the Car

                              Returning a manual car rental involves several key steps to avoid additional charges․ First, check the fuel level to ensure it matches the rental agreement․ Return the car by the agreed time to prevent late fees․ Inspect the vehicle for any new damages and report them to the rental company․ Finally, ensure all personal belongings are removed and return the car keys to the appropriate staff or drop-off location to complete the process smoothly and safely․

                              • Check fuel level to match the rental agreement․
                              • Return the car by the agreed time to avoid late fees․
                              • Inspect for new damages and report them․
                              • Remove personal belongings and return keys properly․

                              Choosing the Right Manual Car for Your Needs

                              Assess your needs and budget to select the ideal manual car․ Consider size, fuel efficiency, and ease of handling․ Compact models like the Fiat 500 or Citroën C3 are ideal for city driving, offering excellent mileage and affordability․ Research popular models that align with your travel plans․

                              • Compact cars for city driving․
                              • Larger models for comfort on long trips․
                              • Check fuel efficiency and transmission ease․

                              5․1․ Factors to Consider

                              When selecting a manual car, consider your destination’s terrain, your driving experience, and budget․ Assess whether the car’s size and fuel efficiency meet your needs․ Ensure the transmission is smooth and easy to manage, especially for long drives; Check the car’s features, such as air conditioning or luggage space, to suit your travel plans․ Prioritize reliability and comfort to enhance your driving experience․

                              • Terrain and road conditions․
                              • Driving experience with manual transmissions․
                              • Budget and rental duration․

                              5․2․ Popular Manual Car Models for Rent

                              Popular manual car models for rent include the Fiat 500, known for its compact size and fuel efficiency, and the Citroën C3, offering a smooth driving experience․ The Ford Focus and Toyota Corolla are also favorites, combining reliability with ease of handling․ These models are widely available and suitable for both city and countryside driving, making them ideal choices for renters seeking a practical and enjoyable manual transmission vehicle․

                              • Fiat 500: Compact and fuel-efficient․
                              • Citroën C3: Smooth and easy to handle․
                              • Ford Focus: Reliable and responsive․
                              • Toyota Corolla: Durable and economical․

                              Tips for Driving a Manual Car

                              Mastering a manual car requires practice․ Start by getting comfortable with neutral gear, pressing the clutch, and shifting smoothly․ Always use the clutch fully to avoid wear and tear on the transmission․

                              1. Shift gears smoothly to maintain control․
                              2. Use the clutch fully to prevent damage․
                              3. Practice in a safe, open area․

                              6․1․ Basic Driving Techniques

                              Mastering basic techniques is essential for driving a manual car․ Start by shifting into first gear, pressing the clutch fully, and easing off the brake․ Accelerate gently while shifting through gears smoothly․ Always match your gear to your speed, and avoid “riding the clutch” to prevent wear․ Practice starting on flat ground before tackling hills or busy roads․

                              • Start in neutral gear before turning the ignition․
                              • Shift gears smoothly to maintain control․
                              • Use the clutch fully to avoid damaging the transmission․

                              6․2․ Mastering Uphill and Downhill Driving

                              When driving uphill, shift to a lower gear to maintain power and control․ For steep inclines, use first or second gear․ On descents, downshift to control speed and avoid brake overheating․ Always match your gear to the terrain’s demands to ensure smooth, safe driving․ Practice these techniques to build confidence and mastery over varied landscapes․

                              • Shift to lower gears uphill to maintain power․
                              • Use proper gear selection for incline steepness․
                              • Downshift before descending to control speed naturally․

                              6․3․ Driving in Urban vs․ Rural Areas

                              Urban driving requires frequent gear shifts due to traffic stops, while rural driving allows for higher gears and smoother acceleration․ In cities, focus on smooth clutch control to avoid stalling in heavy traffic․ In rural areas, use lower gears for hills and uneven terrain․ Adjust your driving style to the environment for optimal control and efficiency․ Practice shifting techniques to navigate both settings confidently․

                              • Urban areas demand quick gear changes and clutch mastery․
                              • Rural roads often require higher gears for steady speed․
                              • Adapt your driving style to terrain and traffic conditions․

                              Resources for Learning to Drive a Manual Car

                              Utilize online guides, driving tutorials, and practice sessions with rental cars to master manual driving․ Many rental companies offer resources and tips for learning․

                              • Online tutorials provide step-by-step instructions․
                              • Practice with rental cars before your trip․
                              • Some companies offer driving guides and tips․

                              7․1․ Finding Manual Driving Lessons

                              Locate manual driving lessons through local schools, online platforms, or rental companies․ Many instructors specialize in teaching manual transmission skills, offering tailored sessions for beginners․

                              • Check online platforms like Craigslist for local tutors․
                              • Some rental companies provide practice vehicles for lessons․
                              • Driving schools often include manual transmission training․

                              Mastering manual driving opens up more rental options and lower costs worldwide․

                              7․2․ Online Guides and Tutorials

                              Online guides and tutorials provide step-by-step instructions for mastering manual car driving․ Websites like Rentalmoose offer comprehensive resources, including tips for renting manual cars and driving techniques․

                              • Find tutorials on YouTube and driving school websites․
                              • Learn basic shifting, clutch control, and uphill/downhill driving․
                              • Interactive lessons help beginners practice virtually․

                              These tools are essential for building confidence and skills in manual driving․

miranda rights in spanish pdf

Miranda Rights in Spanish ensure Spanish-speaking individuals understand their constitutional rights during detention․ The rights include remaining silent and consulting an attorney‚ crucial for legal protection and fairness․

1․1․ Overview of Miranda Rights

Miranda Rights are constitutional protections ensuring individuals under custody understand their rights․ They include the right to remain silent‚ the right to an attorney‚ and the warning that statements can be used in court․ These rights‚ established by the 1966 Miranda v․ Arizona case‚ are crucial for preventing self-incrimination and ensuring fair legal proceedings․ Spanish translations of Miranda Rights are essential for non-English speakers‚ though variations exist across jurisdictions‚ highlighting the need for accurate and uniform interpretations to uphold legal fairness and clarity․

1․2․ Importance of Spanish Translation

The accurate translation of Miranda Rights into Spanish is vital for ensuring non-English speakers understand their constitutional protections․ Over 870‚000 Spanish-speaking individuals are detained annually in the U․S․‚ making clear and precise translations essential to prevent misunderstandings and legal disputes․ The Spanish translation must reflect the exact legal meaning of the rights‚ including the right to remain silent and the right to an attorney․ Accurate translations ensure fairness and uphold the constitutional guarantees for all individuals‚ regardless of language barriers․

Historical Background of Miranda Rights

Miranda Rights originated from the 1966 Supreme Court case Miranda v․ Arizona‚ ensuring individuals are informed of their right to silence and legal counsel during custodial interrogations․

2․1․ The Landmark Case: Miranda v․ Arizona (1966)

The landmark case of Miranda v․ Arizona (1966) established that individuals in custody must be informed of their right to remain silent and consult an attorney․ The Supreme Court ruled that statements made without these warnings are inadmissible in court‚ safeguarding the Fifth Amendment right against self-incrimination․ This decision fundamentally changed police procedures and ensured constitutional protections for all detainees‚ including Spanish-speaking individuals‚ necessitating accurate translations of Miranda warnings to maintain fairness and legality in legal proceedings․

2․2․ Evolution of Miranda Rights Over Time

Since the landmark Miranda v․ Arizona case in 1966‚ Miranda rights have evolved to ensure constitutional protections for all individuals‚ including Spanish-speaking detainees․ The Supreme Court’s decision emphasized the necessity of clear warnings in a language defendants understand․ Over time‚ challenges arose regarding accurate Spanish translations‚ leading to variations across jurisdictions․ Efforts to standardize Miranda warnings in Spanish have grown‚ recognizing the importance of uniformity to prevent misunderstandings and ensure legal protections․ This evolution underscores the ongoing commitment to fairness and accessibility in the justice system for non-English speakers․

Key Components of Miranda Rights in Spanish

Miranda Rights in Spanish include the right to remain silent‚ the right to an attorney‚ and the warning that statements may be used against them․

3․1․ The Right to Remain Silent

The right to remain silent‚ as outlined in Miranda Rights‚ protects individuals from self-incrimination․ Spanish-speaking individuals must be informed they can stay quiet and refuse to answer questions․ This safeguard ensures that statements made under duress or without understanding are not used in court․ It is a fundamental principle of due process‚ guaranteeing that suspects are aware of their legal protections from the moment of detention or interrogation․ Proper translation of this right is essential for fairness in legal proceedings․

3․2․ The Right to an Attorney

The right to an attorney‚ as detailed in Miranda Rights‚ ensures individuals can consult legal counsel during questioning․ Spanish-speaking detainees must be informed of this right in their language to ensure comprehension․ This protection‚ rooted in the Fifth and Sixth Amendments‚ safeguards against coercion and ensures fair representation․ Accurate translation of this right in Spanish Miranda Rights documents is vital to prevent legal disparities and guarantee equal access to justice for non-English speakers․ Proper communication of this right is essential for upholding constitutional protections․

3․3․ Consequences of Waiving Miranda Rights

Waiving Miranda Rights means individuals relinquish their right to remain silent and consult an attorney․ Statements made thereafter can be used as evidence in court․ This decision must be voluntary and informed‚ with clear understanding of the rights being surrendered․ For Spanish-speaking individuals‚ accurate translation of waiver documents is critical to ensure comprehension․ Failure to provide proper translation can lead to legal challenges․ Law enforcement must ensure the waiver is knowingly and willingly made‚ avoiding any coercion or misunderstanding․

Challenges in Translating Miranda Rights into Spanish

Translating Miranda Rights into Spanish faces challenges like variations in translations‚ lack of uniformity‚ and ensuring legal accuracy․ This can lead to misunderstandings and legal complications if not done correctly․

4․1․ Variations in Spanish Translations Across Jurisdictions

Different jurisdictions often use varying Spanish translations of Miranda Rights‚ leading to inconsistencies․ Some versions may omit or misphrase key legal concepts‚ potentially causing confusion for Spanish-speaking individuals․ Law enforcement agencies across the U․S․ and its territories may adopt their own translations‚ resulting in a lack of uniformity․ This variability can undermine the clarity and effectiveness of the rights‚ particularly for non-English speakers relying on accurate information to understand their legal protections․ Such discrepancies highlight the need for standardized translations to ensure fairness and legal precision․

4․2․ Ensuring Accuracy and Uniformity

Ensuring the accuracy and uniformity of Miranda Rights in Spanish is crucial for legal fairness․ Collaboration between legal experts and linguists can help standardize translations‚ avoiding regional discrepancies․ A consistent script across jurisdictions prevents misunderstandings and ensures clarity․ Regular audits and updates to legal standards further enhance reliability․ By maintaining precise and uniform translations‚ the rights of Spanish-speaking individuals are protected‚ minimizing legal challenges and ensuring equitable treatment under the law․

The Importance of Miranda Rights in Spanish PDF Format

Miranda Rights in Spanish PDF ensures accessibility for non-English speakers‚ providing clear legal protections and compliance with constitutional requirements‚ essential for fairness and understanding in legal proceedings․

5․1․ Accessibility for Non-English Speakers

Miranda Rights in Spanish PDF format are crucial for ensuring non-English speakers understand their legal protections․ Over 870‚000 Latinos annually face detention without fluent English‚ making accurate Spanish translations vital․ These documents provide clear‚ standardized information about the right to remain silent and consult an attorney․ Uniformity in translations ensures fairness and prevents misunderstandings․ Accessibility in Spanish upholds constitutional rights and fosters trust in the legal system‚ emphasizing equality for all individuals‚ regardless of language proficiency․

5․2․ Legal Requirements for Spanish-Language Materials

The legal system mandates that Spanish-language Miranda Rights materials must be accurate and uniform to ensure compliance with constitutional rights․ The Supreme Court’s Miranda v․ Arizona ruling requires clear communication of rights‚ including the Fifth Amendment protection against self-incrimination․ Providing precise Spanish translations is essential to avoid legal challenges and potential case dismissals․ Law enforcement agencies must ensure these materials are accessible and understood‚ upholding due process and equal protection under the law for all individuals‚ regardless of language barriers․

How to Obtain a Miranda Rights Spanish PDF

Download the Miranda Rights in Spanish PDF from official law enforcement or legal websites․ Verify the document’s accuracy to ensure compliance with legal standards and proper translation․

6․1․ Downloading from Official Sources

Miranda Rights in Spanish PDFs can be downloaded from official law enforcement or legal websites․ Ensure the source is reliable‚ such as government or court-affiliated platforms․ These documents are often provided to guarantee accuracy and compliance with legal standards․ Users can search for “Miranda Rights Spanish PDF” on official portals or legal databases․ Always verify the source to avoid incorrect or incomplete versions‚ ensuring the document meets legal requirements and is properly translated for clarity and understanding․

6․2․ Verifying the Accuracy of the Document

Verifying the accuracy of a Miranda Rights Spanish PDF is crucial to ensure legal validity․ Compare the document with official versions from trusted sources‚ such as court websites or legal databases․ Check for proper translation of legal terms and consistency with the English version․ Ensure all rights‚ including the right to remain silent and consult an attorney‚ are clearly stated․ Consult legal experts or use official templates to confirm the document’s authenticity and compliance with legal standards․ Accuracy prevents potential legal challenges and ensures proper understanding of rights․

Consequences of Not Providing Miranda Rights in Spanish

Failure to provide Miranda Rights in Spanish can lead to legal challenges‚ case dismissals‚ and violations of constitutional rights‚ undermining the fairness of legal proceedings․

7․1․ Potential for Misunderstandings

When Miranda Rights are not accurately provided in Spanish‚ detainees may misunderstand their rights‚ leading to confusion about silence and attorney privileges․ Inaccurate translations or incomplete information can result in detainees unintentionally waiving their rights․ This misunderstanding can compromise the legality of statements obtained during interrogation․ Ensuring precise and uniform translations is critical to avoid such issues‚ as non-English speakers must fully comprehend their constitutional protections․ Miscommunication can undermine the fairness of legal proceedings and jeopardize the validity of confessions․ Standardized Spanish versions are essential to prevent these errors․

7․2․ Legal Implications and Case Dismissals

Failing to provide accurate Miranda Rights in Spanish can lead to legal consequences‚ including case dismissals․ Inaccurate translations may render confessions inadmissible‚ undermining prosecution evidence․ Courts often dismiss cases where rights were not properly conveyed‚ as this violates due process․ Additionally‚ violations can result in appeals and overturning of convictions‚ highlighting the importance of precise translations․ Without proper documentation‚ such as a Miranda Rights Spanish PDF‚ legal challenges are more likely‚ emphasizing the need for standardized materials to prevent judicial setbacks and ensure fair proceedings for Spanish-speaking defendants․

Case Studies and Examples

Historical cases like Miranda v․ Arizona (1966) established the foundation for Miranda Rights․ Modern examples highlight challenges in Spanish translations‚ impacting case outcomes and defendant protections significantly․

8․1․ Historical Cases Involving Spanish-Speaking Defendants

The landmark case of Miranda v․ Arizona (1966) set the precedent for Miranda Rights‚ emphasizing the necessity of informing detainees of their rights․ Spanish-speaking defendants have historically faced challenges due to inadequate translations of these rights‚ leading to legal disputes and misunderstandings․ Cases have highlighted the importance of accurate Spanish translations to ensure fairness and constitutional protections․ Over time‚ courts have increasingly recognized the need for precise Miranda warnings in Spanish‚ addressing the unique needs of non-English speakers in the justice system․

8․2․ Modern Applications and Challenges

Today‚ Miranda Rights in Spanish remain critical for ensuring justice for non-English speakers․ Modern challenges include non-uniform translations across jurisdictions‚ leading to legal disputes․ Over 870‚000 Latinos annually face detention without precise Miranda warnings‚ risking constitutional violations․ Courts now emphasize accurate translations to prevent misunderstandings․ Despite progress‚ inconsistencies persist‚ highlighting the need for standardized Spanish Miranda Rights to guarantee fair treatment for all detainees‚ particularly vulnerable populations like immigrants․

Miranda Rights in Spanish are vital for ensuring justice and constitutional protections․ Accurate translations and accessibility remain crucial to uphold rights for Spanish-speaking individuals effectively․

9․1․ Summary of Key Points

Miranda Rights are fundamental to ensuring justice and protecting individuals’ constitutional rights․ Providing these rights in Spanish is essential for non-English speakers to understand their legal protections․ Accurate translations are crucial to avoid misunderstandings and ensure fairness in legal proceedings․ Variations in translations across jurisdictions highlight the need for uniformity․ Access to Miranda Rights in Spanish PDF formats promotes accessibility and compliance with legal requirements․ Ensuring these rights are clearly communicated is vital for upholding justice and safeguarding the rights of Spanish-speaking individuals in the United States․

9․2․ Future Directions for Miranda Rights in Spanish

Future efforts should focus on standardizing Miranda Rights translations to ensure clarity and consistency nationwide․ Technological advancements‚ such as digital tools and AI‚ can aid in creating accurate and accessible versions; Collaboration between legal experts and language professionals is essential to refine translations․ Additionally‚ expanding outreach and education about these rights can empower Spanish-speaking communities․ Ensuring uniformity and updating materials regularly will help address evolving legal and linguistic needs‚ promoting fairness and justice for all individuals․

tarkettna.com installation instructions

Welcome to Tarkettna.com’s installation guide, designed to help you successfully install your flooring. This comprehensive resource provides step-by-step instructions, ensuring proper preparation and execution for a flawless finish.

Whether you’re a professional or a DIY enthusiast, these guidelines will walk you through the process, covering tools, materials, and best practices for a long-lasting, attractive floor installation.

Pre-Installation Requirements

Ensure the subfloor is clean, dry, and level. Acclimate flooring materials for at least 24 hours. Maintain a room temperature of 15°C to 27°C (59°F to 81°F) and controlled humidity levels for optimal results.

2.1 Subfloor Preparation

Proper subfloor preparation is essential for a successful installation. Ensure the subfloor is clean, dry, and free from debris, old adhesives, or paint. Inspect for cracks or unevenness and fill them with a suitable leveling compound. Allow the compound to dry completely before proceeding.

Check the subfloor for moisture damage or water seepage. Use a moisture meter to ensure the moisture level is within acceptable limits. If necessary, apply a moisture barrier to prevent future issues.

The subfloor must be level and even. Use a spirit level to verify flatness. Sand or grind high spots and fill low areas with a self-leveling compound. Ensure the surface is smooth and stable before installation.

Additionally, ensure the subfloor is structurally sound and securely fastened to the floor joists to avoid movement during installation. Allow the subfloor to acclimate to room temperature and humidity for at least 24 hours before proceeding.

Finally, vacuum the subfloor thoroughly to remove dust and particles. This ensures proper adhesion of the flooring material. Follow these steps to create an ideal surface for your flooring installation.

2.2 Acclimation Period

Before installation, flooring materials must acclimate to the room’s environmental conditions. Place all flooring boxes in the installation area, ensuring they remain in their original packaging.

The acclimation period typically ranges from 24 to 48 hours, allowing materials to adjust to temperature and humidity levels. Maintain a consistent room temperature between 15°C and 20°C during this time.

For certain materials, such as linoleum, the temperature should not drop below 15°C. Check specific product guidelines for exact requirements.

Humidity levels should also be controlled to prevent material expansion or contraction. Avoid exposing flooring to direct sunlight or extreme environmental changes during acclimation.

Once acclimated, carefully unpack the flooring, ensuring it is ready for installation. Proper acclimation prevents post-installation issues like warping or gaps.

Follow manufacturer instructions for specific acclimation periods, as durations may vary depending on material type and environmental conditions.

Tools and Materials Needed

To ensure a successful installation, gather the necessary tools and materials beforehand. Essential tools include a utility knife, measuring tape, pencil, chalk line, carpenter’s square, and a notched trowel for adhesive application.

A rubber mallet, tapping block, and pull bar are useful for aligning and securing planks. Safety gear, such as gloves and goggles, is also recommended.

For materials, use Tarkett-recommended adhesives and underlayment to ensure compatibility and durability. A plywood or cement-based underlayment is ideal for uneven subfloors.

Additional materials include transition strips for seamless floor transitions and silicone sealant for edges. Ensure all products are stored in a dry, temperature-controlled environment before use.

Refer to Tarkett’s product specifications for exact material quantities and compatibility. Proper preparation and the right tools will ensure a professional-grade installation.

Step-by-Step Installation Guide

Begin by unpacking and acclimating the flooring. Lay the first plank along the longest wall, ensuring alignment with chalk lines. Secure it firmly, then proceed to install subsequent planks, using a tapping block and mallet for tight fits.

Maintain expansion gaps around edges and cut planks as needed. Complete the process by sealing edges with silicone sealant and installing transition strips for a polished finish.

4.1 Unpacking and Layout

Start by carefully unpacking the flooring planks, ensuring they are free from damage. Open multiple boxes to ensure a natural color variation distribution across the room.

Lay the planks in a staggered pattern to enhance the visual appeal and structural integrity. Use a chalk line to mark the starting point along the longest wall, ensuring the first plank aligns perfectly.

Allow the planks to acclimate to the room’s temperature and humidity for at least 24 hours prior to installation. This step is crucial for preventing post-installation issues like warping or shrinking.

Before proceeding, inspect the subfloor for any irregularities and ensure it is clean, dry, and level. Address any unevenness to guarantee a smooth installation process.

Finally, double-check the layout plan, considering the room’s dimensions and the direction of natural light to achieve an aesthetically pleasing result.

4.2 Securing the First Plank

Begin by aligning the first plank along the chalk line, ensuring it is straight and level. Use a spirit level to double-check the alignment and secure the plank with adhesive or fasteners as recommended.

Cut the first plank to fit the room dimensions using a utility knife or saw. Apply the adhesive evenly, following the manufacturer’s instructions, and press the plank firmly into place.

Use a tapping block to gently tap the plank into position, ensuring it is flush with the subfloor. Avoid applying too much pressure, which could damage the plank or underlying surface.

Leave a 1/4 inch expansion gap around the perimeter to accommodate thermal movement. Use shims to maintain this gap and ensure the plank is securely fastened.

Double-check the fit and alignment before moving on to the next plank. This step sets the foundation for the rest of the installation, so precision is key.

4.3 Installing Subsequent Planks

After securing the first plank, begin installing subsequent planks by aligning their edges with the previous plank; Use a tapping block to ensure a snug fit and avoid damaging the flooring.

Apply adhesive to the subfloor as specified, spreading it evenly with a notched trowel. Press each plank firmly into place, starting from the long edge and working across the width.

For floating installations, snap the planks together by angling them slightly and pressing down. Ensure the tongue-and-groove joints are fully engaged for a secure fit.

If cutting planks to fit around obstacles, use a utility knife or saw and leave a 1/4 inch gap around fixed objects.

Use shims to maintain even spacing and prevent buckling. Continue installing planks row by row, alternating the starting point of each row for a staggered, professional appearance.

Double-check each plank’s alignment and fit before moving on. Proper installation of subsequent planks ensures a smooth, even surface and long-lasting durability.

Specialized Installation Scenarios

This section addresses unique challenges, such as installing over existing floors and handling obstacles. Proper preparation and additional materials may be required to ensure a secure and visually seamless installation.

5.1 Installing Over Existing Floors

Installing Tarkett flooring over existing floors requires careful preparation to ensure a stable and even surface. Begin by removing all old floor coverings and cleaning the subfloor thoroughly. Check for any unevenness or damage and address these issues before proceeding.

If the existing floor is uneven, consider using a self-leveling compound to create a smooth base. Ensure the surface is dry and free from old adhesives or debris, as this can interfere with the new flooring’s adhesion.

For vinyl or linoleum floors, verify that the existing surface is securely attached and in good condition. If installing over wooden subfloors, ensure they are properly secured and level.

Acclimate the flooring material in the installation area for at least 24 hours before starting. Use recommended underlayment materials to enhance stability and sound reduction. Follow the manufacturer’s guidelines for adhesive application and plank placement.

By following these steps, you can achieve a professional-looking installation even over existing floors. Always refer to Tarkettna.com for the most up-to-date instructions.

5.2 Handling Obstacles and Irregularities

When installing Tarkett flooring, encountering obstacles such as heating vents, pipes, or irregularly shaped rooms requires careful planning. Begin by measuring the obstacle accurately to ensure precise cuts.

Use a utility knife or jigsaw to cut planks around these areas, leaving a small gap for expansion. For rounded edges, consider using a template or compass to achieve a smooth finish.

For uneven subfloors, apply self-leveling compound to create a stable surface. If the floor has old adhesive residue, scrape it off thoroughly before proceeding.

When dealing with angled or slanted walls, use a chalk line to mark the plank’s edge, ensuring alignment. Always acclimate materials before cutting and fit planks tightly around obstacles.

By addressing these challenges methodically, you can achieve a seamless and professional-looking installation. Always refer to Tarkettna.com for detailed guidance.

Post-Installation Care and Maintenance

Proper care and maintenance are essential to preserve the beauty and durability of your Tarkett flooring. Begin with a thorough cleaning immediately after installation to remove dust and debris. Use a neutral pH cleaner and warm water, avoiding abrasive materials that could scratch the surface.

For routine maintenance, sweep or vacuum daily to prevent dirt buildup. Damp mop with a recommended cleaning solution, avoiding excessive water to prevent damage. For stubborn stains, apply a Tarkett-approved cleaning product and rinse thoroughly.

Protect your flooring by placing felt pads under furniture legs to prevent scratching. Avoid dragging heavy objects, as this can cause damage. Regularly inspect and replace worn-out pads to maintain protection.

For long-term care, ensure the room temperature remains stable, as extreme changes can affect the flooring. Avoid using harsh chemicals or wax-based products, as they may damage the finish.

By following these care and maintenance tips, you can enjoy your Tarkett flooring for years to come. Always refer to Tarkettna.com for specific product recommendations and detailed guides.

Troubleshooting Common Issues

During and after installation, common issues may arise that require attention. One of the most frequent problems is gapping between planks, often caused by improper acclimation or uneven subfloor preparation. To resolve this, ensure the flooring has acclimated correctly and check the subfloor for levelness.

If planks are not securing properly, inspect the locking mechanism for dirt or debris. Clean the edges and retry installation. For buckling or unevenness, verify that the subfloor is dry and flat, as moisture or irregularities can cause these issues.

For adhesive-related problems, ensure the subfloor is clean and dry before applying adhesive. If bubbles appear, use a roller to press them out. Always refer to Tarkettna.com for specific troubleshooting guides tailored to your product.

Addressing issues promptly will ensure the longevity and appearance of your flooring. Regular maintenance and inspections can prevent many common problems from escalating.

evenflo revolve 360 manual

The Evenflo Revolve 360 is a innovative, 3-in-1 rotating car seat designed for convenience and safety, offering 360-degree rotation for easy child access and installation.

Overview of the Evenflo Revolve 360 Car Seat

The Evenflo Revolve 360 is a versatile, 3-in-1 car seat featuring 360-degree rotation for effortless child loading and unloading. Designed for extended use, it accommodates infants, toddlers, and booster-ready children. With a focus on safety, it includes a secure harness system and side impact protection. Available in Standard, Slim, and Extend models, the Revolve 360 offers convenience, durability, and adaptability, making it a practical choice for growing families seeking long-term safety and comfort for their children.

Importance of the Manual for Safe Usage

The manual is essential for ensuring the safe and correct installation and use of the Evenflo Revolve 360. It provides detailed instructions for proper setup, harness adjustment, and rotation mechanisms. Following the guidelines helps prevent potential safety hazards and ensures compliance with car seat regulations. The manual also includes troubleshooting tips and maintenance advice, crucial for maintaining the seat’s functionality and longevity. Always refer to the manual to guarantee optimal safety and performance for your child.

Product Variants and Models

The Evenflo Revolve 360 is available in three models: Standard, Slim, and Extend. Each offers unique features like compact design, extended use, or added convenience, catering to different family needs and preferences.

Evenflo Revolve360 Standard Model

The Evenflo Revolve360 Standard Model is the original version of the rotational car seat, offering 360-degree rotation for easy access and installation. Designed as a 3-in-1 seat, it accommodates rear-facing, forward-facing, and booster modes, growing with your child from infancy to youth. Its robust construction includes a secure harness system and side impact protection for enhanced safety. The manual provides detailed instructions for proper installation and usage, ensuring a safe and convenient experience for parents and children alike.

Evenflo Revolve360 Slim Model

The Evenflo Revolve360 Slim Model is a compact, lightweight version of the rotational car seat, designed for smaller vehicles or families needing a space-saving solution. It retains the 360-degree rotation feature for easy child access and installation. The Slim Model supports rear-facing, forward-facing, and booster modes, growing with your child. Its streamlined design reduces bulk while maintaining safety features like a secure harness system and side impact protection. The manual provides specific guidance for its unique dimensions and installation requirements.

Evenflo Revolve360 Extend Model

The Evenflo Revolve360 Extend Model is designed for extended use, accommodating children from infancy through booster stages. It features a 360-degree rotation for easy access and installation. This model emphasizes longevity, with a higher weight and height capacity compared to other variants. The Extend Model includes advanced safety features like a robust harness system and enhanced side impact protection. Its extended expiration period and versatile design make it a practical choice for growing families, with the manual providing detailed guidance for its multi-mode functionality.

Installation and Setup

Proper installation ensures safety and functionality. Follow the manual for vehicle preparation, alignment, and securing the seat with a seatbelt or LATCH system for a secure fit.

Vehicle Preparation for Installation

Before installing the Evenflo Revolve 360, ensure your vehicle is ready. Consult your vehicle’s manual to locate the seatbelt or LATCH connectors. Clean and clear the seating area of any debris. If using LATCH, identify the anchors in your vehicle. For seatbelt installation, familiarize yourself with the belt path. Proper vehicle preparation is crucial for a secure and correct installation, ensuring your child’s safety while traveling.

Car Seat Positioning and Alignment

Position the Evenflo Revolve 360 in your vehicle, ensuring it is level and aligned properly. Use the built-in level indicator to confirm correct positioning. The car seat base should fit snugly against the vehicle seat. Align the seatbelt or LATCH connectors correctly, following the manual’s guidance. Proper alignment ensures the car seat functions as intended and provides optimal safety for your child. Always double-check the seat’s placement before securing your child.

Securing the Car Seat with Seatbelt or LATCH

Secure the Evenflo Revolve 360 using either the vehicle seatbelt or LATCH system. For seatbelt installation, route the belt through the designated path and tighten until the seat is snug. For LATCH, attach the connectors to the vehicle’s anchors, ensuring a firm fit. Always refer to the manual for specific guidance. Test the seat’s stability by tugging gently to ensure it’s properly secured. Correct installation is crucial for your child’s safety.

Rotating the Seat for Installation

To rotate the Evenflo Revolve 360, lift the rotation handle located on the side of the headrest and gently turn the seat to the desired position. Ensure the seat is fully locked into place after rotation. This feature allows easy access for loading or unloading your child. Always verify the seat’s stability by tugging it after rotation to confirm it’s securely positioned. Proper rotation ensures safe and convenient use, enhancing the overall installation process.

Safety Features and Mechanisms

The Evenflo Revolve 360 features a 360-degree rotation for easy access, a secure harness system, and advanced side impact protection for optimal child safety and comfort.

360-Degree Rotation for Easy Access

The Evenflo Revolve 360’s 360-degree rotation provides unparalleled convenience, allowing parents to easily load and unload their child without strain. This feature simplifies daily use, ensuring a safer experience.

Harness System for Secure Fit

The Evenflo Revolve 360 features an adjustable harness system designed to provide a secure and comfortable fit for your child. The no-rethread harness allows for easy height adjustments without removing the seat, ensuring proper positioning as your child grows. The padded straps and buckle offer added comfort, while the secure tightening mechanism ensures your child stays safely in place during rides. This system is designed to accommodate various growth stages, making it a reliable choice for long-term use.

Side Impact Protection

The Evenflo Revolve 360 is equipped with advanced side impact protection, featuring a robust frame and energy-absorbing materials to shield your child from collision forces. The seat’s design distributes crash energy effectively, ensuring maximum safety. Additional padding and structural reinforcements enhance protection, meeting rigorous safety standards. This feature provides peace of mind, knowing your child is well-protected in the event of a side collision, making it a reliable choice for parents seeking superior safety.

Maintenance and Care

Regularly clean the Revolve 360’s fabric with mild detergent and water. Store it in a dry, cool place. Avoid extreme temperatures and replace after expiration date.

Cleaning Instructions for Fabrics and Surfaces

To maintain the Evenflo Revolve 360, clean fabrics with mild detergent and water. Avoid bleach or harsh chemicals. Gently scrub stains, rinse thoroughly, and air dry. For surfaces, wipe with a damp cloth. Avoid extreme heat or abrasive cleaners. Regular cleaning ensures longevity and hygiene. Always follow manual guidelines for specific fabric types. Proper care prevents damage and keeps the seat safe for your child. Regular maintenance is essential for optimal performance and safety.

Storage and Transportation Guidelines

Store the Evenflo Revolve 360 in a cool, dry place, away from direct sunlight. Avoid extreme temperatures and moisture. When transporting, secure the seat in the vehicle to prevent movement. Ensure all parts are properly attached and nothing is loose. Do not store the car seat in the car for extended periods. Always check for damage before reuse. Follow manual instructions for disassembling and reassembling. Proper storage ensures safety and longevity of the product.

When to Replace the Car Seat

Replace the Evenflo Revolve 360 if it exceeds its expiration date, usually 10 years from manufacture. If involved in a crash, replace it immediately, even if no visible damage. Check for worn-out or damaged parts regularly. If the seat no longer fits your child or meets safety standards, replace it. Always follow the manual’s guidelines for replacement and ensure compliance with current safety regulations to guarantee your child’s protection.

Troubleshooting Common Issues

Resolve rotation issues by lubricating the mechanism or adjusting alignment. For harness problems, ensure proper tightening and refer to the manual. If seatbelt installation fails, consult guides or contact Evenflo support for assistance.

Resolving Rotation Mechanism Problems

If the rotation mechanism is stuck or not functioning smoothly, check for obstructions and ensure the seat is properly aligned. Lubricate the mechanism lightly if needed. For persistent issues, refer to the manual or contact Evenflo customer support for guidance. Regular maintenance, like cleaning the rotating parts, can prevent such problems. Always follow the manufacturer’s instructions to ensure safe and effective operation of the Revolve 360 car seat.

Adjusting the Harness System Correctly

Ensure the harness fits snugly around your child, with the chest clip at armpit level. Tighten the straps evenly, checking for proper fit. If the harness feels loose, adjust the tension by pulling the strap at the bottom. For taller children, use the height-adjustable feature to customize the fit. Always refer to the manual for specific guidance on adjusting the harness system for your child’s safety and comfort in the Revolve 360 car seat.

Accessories and Add-Ons

The Evenflo Revolve 360 offers various accessories to enhance functionality, including extra padding, storage options, and add-ons for improved comfort and convenience during use.

Included Accessories with Purchase

The Evenflo Revolve 360 comes with essential accessories to enhance convenience and comfort. These include a Quick Clean Cover for easy maintenance, removable head and body pillows for support, and a cup holder for keeping items within reach. Additionally, a storage bag is provided for organizing accessories when not in use. These included items are designed to improve the overall user experience, ensuring safety, comfort, and practicality for both parents and children.

Optional Accessories for Enhanced Functionality

Optional accessories for the Evenflo Revolve 360 include a second cup holder, window shades, and a seat liner for added comfort. These accessories can be purchased separately to enhance the car seat’s functionality. The second cup holder provides extra storage for snacks or drinks, while window shades help block sunlight. The seat liner offers additional cushioning and style. These optional items are available on the Evenflo website or through authorized retailers, allowing parents to customize their car seat experience.

Warranty and Customer Support

Evenflo offers a comprehensive warranty for the Revolve 360, covering defects in materials and workmanship. Customer support is available through their website and dedicated helpline.

Warranty Details and Coverage Period

The Evenflo Revolve 360 car seat comes with a limited warranty covering manufacturing defects in materials and workmanship. The warranty period typically lasts for one year from the date of purchase. This coverage ensures that any defective parts are repaired or replaced free of charge, provided the product is used as intended and in accordance with the instructions outlined in the manual. Proper registration and adherence to maintenance guidelines are recommended to uphold warranty benefits.

Customer Support and Service Options

Evenflo provides comprehensive customer support for the Revolve 360 car seat, including a dedicated toll-free phone line for assistance. Online resources, such as FAQs and troubleshooting guides, are available on their official website. Additionally, customers can access live chat or email support for inquiries. The company emphasizes resolving issues promptly to ensure safe and proper use of the product, aligning with their commitment to customer satisfaction and child safety.

Online Resources and Community Support

Evenflo offers extensive online resources, including downloadable manuals, FAQs, and installation guides for the Revolve 360. Their website features tutorials and troubleshooting tips to address common issues. Additionally, a supportive community forum and social media groups provide platforms for parents to share experiences and seek advice. These resources ensure users can maximize the car seat’s functionality while maintaining safety standards for their children.

The Evenflo Revolve 360 stands out for its innovative design, offering 360-degree rotation, enhanced safety features, and ease of use, making it a top choice for parents seeking a secure and stress-free car seat solution.

The Evenflo Revolve 360 offers a 360-degree rotation mechanism, simplifying child loading and unloading. It features a secure harness system, side impact protection, and multiple modes to accommodate growth. The seat is designed for extended use, from infancy to booster stages, ensuring long-term safety and comfort. Its slim and extend models cater to different vehicle sizes, while the quick clean cover enhances maintenance. This car seat combines innovation, durability, and practicality, making it a reliable choice for parents.

Final Tips for Optimal Usage and Safety

Always follow the manual for proper installation and adjustment. Ensure the car seat is securely fastened using the seatbelt or LATCH system. Regularly check the harness fit and tighten as needed. Avoid aftermarket accessories not approved by Evenflo. Clean the seat according to guidelines to maintain safety and hygiene. Stay informed about recalls and updates. Rotate the seat only when the vehicle is stationary. Refer to the manual for troubleshooting common issues promptly.

keurig k40 user manual

Safety Precautions

Always follow safety precautions when using your Keurig K40. Ensure adult supervision for children, avoid hot surfaces, and keep the brewer out of reach of kids. Never submerge the device in water or operate it near flammable materials. Read the user manual thoroughly before first use.

1.1 General Safety Guidelines

Adhere to general safety guidelines to ensure safe operation of your Keurig K40. Place the brewer on a stable, flat surface away from water sources and flammable materials. Avoid damaging the power cord or placing it near hot surfaces. Be cautious of hot water dispensing during use. Never modify internal components without authorization. Regular maintenance as per the user manual is highly essential for optimal performance and safety.

1.2 Child Safety Precautions

Ensure child safety by supervising minors when the Keurig K40 is in use. Children should not operate the brewer, as it dispenses hot water. Keep them away during brewing to avoid burns. Do not let children handle hot cups or sharp K-Cup edges. Store the brewer out of reach to prevent accidental operation. Teach children not to play with buttons or cords to avoid potential hazards.

Setting Up Your Keurig K40 Brewer

Begin by carefully unboxing and inspecting the brewer. Place it on a flat, stable surface and ensure proper power connection for safe operation.

2.1 Unboxing and Initial Setup

Begin by carefully unboxing your Keurig K40 Brewer and inspecting for any damage. Inside, you’ll find the brewer, a power cord, and a user manual. Wash your hands before handling the device. Place the brewer on a flat, stable surface and ensure all components are accounted for. Read the manual thoroughly to understand the parts and features before proceeding with setup.

2.2 Placing the Brewer on a Flat Surface

Place your Keurig K40 Brewer on a flat, stable surface to ensure proper operation. Avoid uneven or slanted areas, as this may cause the machine to malfunction. Choose a location away from direct sunlight and water sources to prevent damage. Ensure the surface is heat-resistant and large enough to accommodate the brewer comfortably. Clean the area before placement to avoid dust or debris interfering with performance.

2.3 Connecting to a Power Source

Plug your Keurig K40 Brewer into a grounded electrical outlet rated at 120V AC, 60Hz. Ensure the outlet is nearby and easily accessible. Avoid using extension cords or multiple plugs, as this may cause electrical issues. The brewer’s power cord is designed for safe operation, so keep it away from water or moisture. Do not submerge the cord or brewer in liquid. Ensure the outlet is not overloaded to prevent damage or fire hazards.

Operating Your Keurig K40 Brewer

Familiarize yourself with the controls and indicators to brew coffee effortlessly. Select desired brew sizes and options, and follow the manual for optimal performance and safety.

3.1 Understanding the Controls and Indicators

The Keurig K40 features a user-friendly interface with clear controls and indicators. The power button turns the brewer on/off, while the brew size options allow you to choose between 6, 8, or 10 oz. The water reservoir level indicator ensures you know when to refill. Familiarize yourself with these components to operate the brewer efficiently and safely.

3.2 Selecting Brew Sizes and Options

The Keurig K40 allows you to choose from three convenient brew sizes: 6 oz, 8 oz, and 10 oz. Simply lift the handle, insert your K-cup, and select your desired size using the corresponding buttons. For a smaller cup, use the 6 oz option, while the 10 oz size is ideal for larger mugs or travel cups. Press the brew button to start and enjoy your perfectly sized coffee.

3.3 Brewing Your First Cup

Start by ensuring the water reservoir is filled and the brewer is plugged in. Turn it on and allow it to preheat. Lift the handle, insert your K-cup, and close the lid. Select your desired brew size (6, 8, or 10 oz) using the buttons. Press the brew button to begin. The Keurig will dispense your coffee into your cup; Allow it to complete the cycle before removing your cup and enjoying your freshly brewed coffee.

Maintenance and Care

Regularly clean the brewer, descale it to prevent mineral buildup, and replace the water filter every 6 months to ensure optimal performance and longevity of your Keurig K40.

4.1 Cleaning the Brewer Regularly

  • Turn off and unplug the brewer before cleaning to ensure safety.
  • Wipe the exterior with a damp cloth and mild soap, avoiding electrical components.
  • Clean the water reservoir and lid with warm, soapy water, then rinse thoroughly.
  • Run a cleaning cycle if available or a vinegar solution through the brewer to remove mineral buildup and odors.
  • Regular cleaning prevents bacterial growth and maintains the brewer’s performance and hygiene.

4.2 Descaling the Brewer

Descaling your Keurig K40 is essential to remove mineral buildup and prevent performance issues. Use a Keurig-approved descaling solution or a vinegar-based alternative. Run the solution through the brewer as described in the user manual. After descaling, rinse thoroughly by running fresh water through the machine multiple times to remove any lingering taste. Regular descaling ensures optimal functionality and water quality. Perform this process every 3-6 months or as needed.

4.3 Replacing Water Filters

To ensure optimal water quality and machine performance, replace the water filter every 6 months or as indicated by the brewer. Turn off the power, locate the filter in the water reservoir, and remove it. Insert a new Keurig-compatible filter, ensuring it clicks into place. Flush the system by running 2-3 water cycles without a K-cup to remove any debris. Reset the filter indicator light to maintain accurate tracking. Regular replacement enhances taste and prevents scaling issues.

Troubleshooting Common Issues

Check the power connection if the brewer doesn’t turn on. Ensure water flow by descaling regularly. Consult the user manual or contact support for unresolved issues.

5.1 Identifying Error Indicators

Check for blinking lights or error messages on the control panel. Common indicators include low water levels, scaling issues, or machine malfunction. Refer to the user manual for specific error codes and their meanings. If an error occurs, turn the brewer off, unplug it, and restart after a few minutes. Persistent issues may require descale or professional assistance. Always follow troubleshooting steps before contacting support.

5.2 Resolving Common Operational Problems

If the brewer doesn’t turn on, ensure it’s properly plugged in. For weak coffee, adjust the brew size or strength setting. If water doesn’t dispense, check for kinks in the tubing or ensure the water reservoir is filled. Descale regularly to prevent mineral buildup. Refer to the troubleshooting guide in the user manual for detailed solutions to common issues and maintain optimal performance.

Parts and Accessories

The Keurig K40 includes essential parts like the water reservoir, K-cup holder, and brew head. Accessories such as water filters and descale solutions are recommended for maintenance. Using genuine Keurig parts ensures optimal performance and safety.

6.1 Understanding the Keurig K40 Parts Diagram

The Keurig K40 parts diagram is a visual guide to understanding the brewer’s components. It highlights key parts like the water reservoir, brew head, and K-cup holder. This diagram helps users identify and locate parts for maintenance, troubleshooting, or replacement. Referencing it ensures proper assembly and operation, making it easier to diagnose issues or order genuine Keurig accessories. Familiarizing yourself with the diagram is essential for optimal use and longevity of the brewer.

Additional Resources

Visit Keurig’s official website for support pages, FAQs, and downloadable manuals. Access troubleshooting guides and how-to videos for optimal use and maintenance of your Keurig K40 Brewer.

7.1 Accessing Online Support

Visit Keurig’s official website to access online support resources for your K40 Brewer. Explore the FAQ section, troubleshooting guides, and downloadable manuals for detailed assistance. Utilize the search function to find specific solutions or watch how-to videos for maintenance and operation tips. Contact Keurig’s customer support directly for personalized help. These resources ensure you can resolve issues and optimize your brewing experience effortlessly.

7.2 Downloading the Full User Manual

To download the complete Keurig K40 user manual, visit Keurig’s official website. Navigate to the support section, select your model, and choose the PDF manual option. Save the file to your device for easy access. The manual includes detailed instructions, diagrams, and troubleshooting tips. Ensure you download the correct version for your K40 model to avoid confusion. This resource is essential for optimal use and maintenance of your brewer.

Energy Efficiency and Cost-Saving Tips

Optimize energy usage by turning off the brewer when not in use; Use the Auto-Off feature to conserve power. Regular descaling maintains efficiency and reduces energy consumption.

8.1 Optimizing Energy Usage

To optimize energy usage with your Keurig K40, turn off the brewer when not in use. Utilize the Auto-Off feature to conserve power automatically. Regular descaling ensures efficient operation and reduces energy consumption. Unplug the brewer during extended periods of inactivity to avoid standby power use. Consider using energy-efficient settings and adjusting brew size to minimize energy waste. These practices help reduce energy consumption and lower utility costs effectively.

Frequently Asked Questions

Common questions about the Keurig K40 include how to resolve error indicators, optimal water filter replacement, and troubleshooting brewing issues. Users often inquire about descaling frequency and how to adjust brew strength. For detailed answers, refer to the user manual or contact Keurig support. Regular maintenance ensures optimal performance and longevity of your brewer. Always follow guidelines for safety and energy efficiency.

zinus metal bed frame instructions

The Zinus Metal Bed Frame Instructions provide a comprehensive guide for easy assembly‚ ensuring durability and style. Follow the step-by-step manual for a hassle-free setup experience.

Overview of the Assembly Process

The assembly process for the Zinus Metal Bed Frame is designed to be straightforward and efficient. It typically involves unboxing the components‚ assembling the side rails‚ attaching the slats‚ and securing the center support. The process is streamlined to ensure that even those with limited DIY experience can complete it without hassle. Most models come with pre-drilled holes and labeled parts‚ making it easier to follow along. The instructions often include diagrams to guide you through each step‚ ensuring that everything aligns properly. By following the sequence provided‚ you can expect a stable and durable bed frame. The entire process is designed to be quick‚ with many users completing it in under an hour. Proper assembly ensures both safety and longevity of the product.

Importance of Following the Instructions

Failing to follow the Zinus Metal Bed Frame instructions can lead to improper assembly‚ compromising the stability and safety of the bed. The provided manual ensures that each part is correctly aligned and securely fastened‚ preventing issues like wobbling or structural weakness. Clear diagrams and step-by-step guidance help avoid confusion‚ while labeled components simplify the process. Skipping steps or ignoring warnings may result in a bed frame that is not only unstable but also unsafe. Proper assembly also extends the product’s lifespan and maintains its aesthetic appeal. By adhering to the instructions‚ you ensure a sturdy‚ durable‚ and visually appealing bed frame that meets its intended purpose.

Tools and Parts Needed for Assembly

The Zinus Metal Bed Frame requires basic tools like an Allen wrench‚ screwdriver‚ and provided hardware. Ensure all components‚ including side rails‚ slats‚ and bolts‚ are accounted for.

Required Tools for the Assembly

Assembling the Zinus Metal Bed Frame typically requires basic tools such as an Allen wrench‚ screwdriver‚ and occasionally pliers or a rubber mallet. Most models come with an Allen wrench and screws‚ but ensure you have these tools handy. For some Zinus frames‚ like the Quick Snap models‚ no additional tools are needed. However‚ for standard metal frames‚ a screwdriver is essential for securing bolts and slats. Double-check the instruction manual to confirm the specific tools required for your model. Having the right tools ready ensures a smooth and efficient assembly process without delays.

Identifying the Components and Hardware

Before starting the assembly‚ carefully unpack and organize all components to ensure nothing is missing. The Zinus Metal Bed Frame typically includes side rails‚ slats‚ support legs‚ bolts‚ and screws. Familiarize yourself with the hardware‚ such as Allen wrenches‚ wing nuts‚ and bracket connectors‚ as these are essential for securing the frame. Refer to the instruction manual for labeled diagrams to match each part with its corresponding section. Properly identifying and sorting the components will streamline the assembly process and prevent confusion. Double-checking the hardware against the provided list ensures all pieces are accounted for‚ allowing you to proceed confidently with building your bed frame.

Preparation Before Assembly

Clear a large‚ flat workspace and ensure all components are unpacked and organized. Refer to the instruction manual for a detailed list of parts and tools needed.

Clearing the Workspace and Safety Precautions

Begin by clearing a large‚ flat workspace to ensure ample room for assembly. Cover the area with a soft cloth or mat to prevent scratching the frame during assembly. Unpack all components and organize them according to the instruction manual. Wear gloves and protective eyewear to avoid injuries from sharp edges or heavy parts. Ensure the floor is free from clutter to prevent tripping hazards. Double-check that all tools and hardware are readily accessible. Assembling on a soft surface‚ like a carpet‚ can help prevent damage to the frame. Always follow safety guidelines to avoid accidents and ensure a smooth assembly process.

Unpacking and Organizing the Components

Start by carefully opening the packaging and removing all components. Lay out the parts on a clean‚ flat surface to avoid losing any hardware. Use the instruction manual’s diagram to identify each piece‚ ensuring all items are accounted for. Separate the metal frame sections‚ slats‚ support legs‚ and hardware into labeled groups for easy access. Place screws‚ bolts‚ and other small parts in sealed bags to prevent them from getting misplaced. Organize larger components‚ such as side rails and brackets‚ in a logical order based on the assembly sequence. Handling components with care will prevent damage and ensure a smooth assembly process. Cross-reference the manual to confirm all parts are correctly identified before proceeding.

Step-by-Step Assembly Instructions

Follow the clear‚ numbered steps in the Zinus manual to assemble the metal bed frame efficiently. Attach side rails‚ secure slats‚ and align parts correctly for a sturdy structure.

Assembling the Side Rails and Frame

Begin by unpacking and identifying the side rails‚ frame components‚ and hardware. Use the provided Allen wrench to secure the rails to the frame using the bolts and washers. Ensure all parts are matched correctly according to the manual; Align the pre-drilled holes and tighten firmly but avoid overtightening. Next‚ attach the frame supports to enhance stability. Place the frame on a soft surface to prevent scratching. Follow the step-by-step guide to connect all sections seamlessly. Double-check each connection to ensure a sturdy base for the mattress. Proper alignment and tightness are crucial for safety and durability. Once the side rails and frame are assembled‚ proceed to attach the slats and support legs for added reinforcement.

Attaching the Slats and Support Legs

After assembling the side rails and frame‚ proceed to attach the slats. Lay the slats evenly across the frame‚ ensuring they fit securely into the pre-designed slots. Use the provided screws to fasten them tightly. Once the slats are in place‚ focus on installing the support legs. Align each leg with the designated holes on the frame and screw them in firmly. Ensure all slats and legs are evenly spaced and tightly secured for optimal support. Double-check the alignment to prevent any wobbling or instability; Proper installation of slats and support legs is essential for distributing weight evenly and ensuring the bed frame’s durability. Follow the manual’s guidance for precise placement and tightening.

Securing the Center Support and Final Adjustments

Once the slats and support legs are securely attached‚ locate the center support bar. Position it evenly between the side rails and align the pre-drilled holes. Use the provided bolts to fasten it tightly‚ ensuring it sits level and stable. Tighten all bolts firmly to avoid any movement. After securing the center support‚ inspect the entire frame for stability. Make sure all connections are snug and even. If necessary‚ adjust the legs or slats to ensure the frame is perfectly level. Double-check all hardware for tightness and verify that the bed frame is sturdy. Finally‚ ensure all components are properly aligned and securely fastened before placing the mattress. This step ensures optimal support and prevents potential instability.

Attaching the Headboard and Footboard

Align the headboard with the frame’s mounting brackets and secure it using the provided bolts. Repeat the process for the footboard‚ ensuring a tight and even attachment.

Aligning and Securing the Headboard

To align the headboard‚ position it against the bed frame’s mounting brackets‚ ensuring it is level and evenly spaced. Use the provided bolts to secure it tightly. Once aligned‚ tighten the bolts firmly using the mini wrench included in the toolkit. Double-check the alignment to ensure the headboard is straight and properly attached. If necessary‚ refer to the instruction manual for specific bolt locations and torque requirements. Properly securing the headboard ensures stability and prevents wobbling. The process is straightforward‚ but precision is key for a sturdy and lasting connection. With the headboard securely in place‚ the bed frame will provide optimal support and maintain its sleek appearance.

Tips for a Hassle-Free Assembly

Follow the instruction manual closely‚ organize all components beforehand‚ and use the provided tools to ensure a smooth and efficient assembly process.

Following the Instruction Manual Closely

Following the Zinus metal bed frame instruction manual closely is essential for a successful assembly. Start by thoroughly reading the manual to understand each step and identify all components. Ensure that all parts are matched to their corresponding numbers or letters‚ as indicated in the guide. This prevents mismatches and ensures stability. Pay attention to diagrams‚ which provide visual guidance for aligning pieces correctly. Avoid skipping steps‚ even if they seem minor‚ as this could lead to structural issues. Use the provided hardware and tools exclusively‚ as they are designed for specific tasks. Double-check each connection before moving forward to guarantee a secure and durable setup. By adhering strictly to the instructions‚ you can achieve a hassle-free assembly and enjoy your bed frame for years to come.

Using the Provided Tools and Hardware

Using the tools and hardware provided with your Zinus metal bed frame is crucial for a smooth assembly process. The kit typically includes Allen wrenches‚ screws‚ and bolts designed specifically for the frame. Ensure all hardware is accounted for by cross-referencing the parts list in the manual. Avoid using substitute tools‚ as they may damage the components or strip screws. Pay attention to the labels on the hardware bags‚ as they are often color-coded or numbered to match the instructions. This system ensures that each piece is used in the correct sequence. By sticking exclusively to the provided tools and hardware‚ you can assemble the bed frame efficiently and avoid potential issues. Proper use of these items guarantees a secure and stable final product.

jabberwocky pdf

Welcome to our exploration of Lewis Carroll’s Jabberwocky, a whimsical poem filled with invented language and enduring charm, now widely available in PDF for easy reading.

1.1 Overview of the Poem

Jabberwocky by Lewis Carroll is a celebrated nonsense poem from Through the Looking-Glass (1872). It follows a young hero’s quest to slay the monstrous Jabberwock, blending invented words and whimsical imagery. The poem’s unique language, such as “slithy” and “vorpal,” creates a fantastical world. Available in PDF formats, readers can explore Carroll’s original text, often accompanied by illustrations. This whimsical tale remains a timeless classic, captivating readers with its imaginative storytelling and linguistic brilliance, now easily accessible in digital editions for modern audiences.

1.2 Historical Context and Publication

Lewis Carroll’s Jabberwocky was first published in 1872 within Through the Looking-Glass and What Alice Found There, a sequel to Alice’s Adventures in Wonderland. This nonsensical poem gained immediate popularity for its inventive language and whimsical storytelling. The poem’s original publication included no illustrations, but later editions featured iconic artwork. Today, Jabberwocky is widely available in PDF formats, including editions with illustrations by artists like Santore. The poem’s enduring appeal lies in its unique blend of fantasy and linguistic creativity.

The Unique Language of “Jabberwocky”

Lewis Carroll crafted Jabberwocky with invented words like “slithy” and “mome,” creating a fantastical linguistic world. These unique terms evoke wonder and curiosity, making the poem timeless.

2.1 Invented Words and Their Meanings

Lewis Carroll’s Jabberwocky is renowned for its inventive language, featuring words like “slithy,” “gyre,” and “mome,” which blend sounds and meanings to evoke vivid imagery. While these terms lack formal definitions, they create a fantastical atmosphere, allowing readers to interpret them contextually; For instance, “slithy” suggests a mix of slimy and lithe, while “gyre” implies spinning motion. Carroll’s playful approach to language makes the poem a masterpiece of nonsense verse, challenging readers to engage creatively with its whimsical world.

2.2 Nonsense Poetry and Its Impact

Jabberwocky exemplifies nonsense poetry, a genre that defies conventional logic and meaning. By employing absurd words and illogical scenarios, Carroll challenges readers to embrace creativity and interpretation. This poetic style has inspired writers to experiment with language, influencing modern literature. Its whimsical nature democratizes meaning, allowing personal connections. The poem’s enduring popularity, enhanced by its availability in PDF, continues to captivate audiences, proving nonsense poetry’s lasting relevance and artistic value. Carroll’s masterpiece remains a cornerstone of imaginative expression.

Plot and Structure of the Poem

The poem follows a young hero’s quest to slay the monstrous Jabberwock, filled with invented language and a clear narrative structure, available in PDF.

3.1 The Quest of the Young Hero

The young hero embarks on a perilous journey to slay the fearsome Jabberwock, guided by his father’s warnings. Armed with a vorpal sword, he faces fantastical creatures and overcomes daunting challenges. His quest symbolizes courage and determination, making him a timeless symbol of bravery. The narrative unfolds with vivid imagery and invented language, creating a unique reading experience. Available in PDF, the poem’s structure and rhythm are preserved, allowing readers to fully immerse themselves in the hero’s epic adventure and the whimsical world Carroll crafted.

3.2 The Battle with the Jabberwock

The battle with the Jabberwock is the poem’s climax, showcasing the hero’s courage and skill. Armed with a vorpal sword, he confronts the monstrous creature, whose terrifying features include biting jaws and sharp claws. The encounter is both chaotic and mesmerizing, highlighting the hero’s determination to fulfill his quest. The fight concludes with the hero’s victory, symbolizing triumph over evil. This iconic scene is vividly portrayed in various PDF editions, preserving the poem’s imaginative language and Carroll’s unique storytelling style for readers to enjoy.

Themes and Symbolism

Jabberwocky explores themes of good vs. evil, with the Jabberwock symbolizing evil and the hero embodying courage. The poem’s fantastical elements highlight the struggle between light and darkness, while the vorpal sword represents determination and strength in overcoming adversity, making it a timeless allegory for courage and morality.

4.1 Good vs. Evil in the Poem

The poem Jabberwocky vividly portrays the theme of good vs. evil through its fantastical imagery. The fearsome Jabberwock embodies evil, with its terrifying claws and jaws, while the young hero represents courage and virtue. The battle between these forces symbolizes the universal struggle between light and darkness. Carroll’s use of invented words like “vorpal” and “manxome” enhances the mythical quality of this conflict. Ultimately, the poem celebrates the triumph of bravery over malevolence, offering a moral lesson wrapped in whimsical nonsense. Its enduring appeal lies in this timeless dichotomy.

4.2 Coming of Age and Courage

The young hero’s journey in Jabberwocky symbolizes a coming of age, as he faces daunting challenges to prove his valor. Armed with a vorpal sword, he confronts the monstrous Jabberwock, embodying the essence of courage and self-discovery. The poem highlights the transition from innocence to maturity, as the protagonist overcomes fear and emerges victorious. This theme resonates deeply, making the poem a timeless allegory for personal growth and the triumph of bravery over adversity, appealing to readers across generations through its PDF editions and illustrations.

Cultural and Literary Significance

Jabberwocky holds a revered place in literary history, inspiring countless adaptations and influencing modern poetry. Its PDF editions ensure accessibility, preserving its whimsical charm for future generations.

5.1 Illustrations and Adaptations

Jabberwocky has inspired numerous adaptations, including illustrated editions that bring its fantastical creatures to life. Notable illustrators like Santore have created visually stunning PDF versions, blending whimsy with intricate art. These adaptations enhance the poem’s mystical appeal, making it a treasure for both readers and art enthusiasts. The Jabberwocky PDF editions often feature vibrant designs, capturing the essence of Carroll’s imaginative world. Such adaptations ensure the poem remains a timeless classic, accessible and engaging for modern audiences worldwide. The fusion of art and text enriches the reading experience, preserving its cultural legacy.

5.2 Influence on Modern Literature

Lewis Carroll’s Jabberwocky has profoundly influenced modern literature, inspiring authors with its inventive language and imaginative storytelling. The poem’s nonsensical yet structured approach has shaped fantasy and children’s literature, encouraging writers to experiment with language. Its availability in PDF formats has made it easily accessible, ensuring its ideas continue to inspire new generations. Many modern works, from fantasy novels to poetic collections, reflect the creative freedom and whimsy first showcased in Jabberwocky, solidifying its legacy as a foundational text in literary innovation.

“Jabberwocky” in PDF Format

Lewis Carroll’s Jabberwocky is widely available in PDF format, offering readers a convenient way to access this classic nonsense poem. Popular editions include illustrations and annotations.

6.1 Where to Find and Download the PDF

Lewis Carroll’s Jabberwocky is widely available in PDF format across various platforms. Readers can download it from the Internet Archive, Google Books, or Project Gutenberg. Many editions are free for personal use and include the full text of the poem. Some versions also feature illustrations by renowned artists, enhancing the reading experience. Additionally, popular eBook platforms offer PDF downloads of Jabberwocky as part of larger collections of Carroll’s works. Ensure to download from trusted sources to avoid copyright issues.

6.2 Features of Popular PDF Editions

Popular PDF editions of Jabberwocky often include high-quality illustrations, enhancing the whimsical nature of the poem. Many feature the original artwork from historic publications, while others offer modern interpretations. Some editions are bundled with Alice in Wonderland, providing context to the poem’s origins. Additionally, annotated versions include explanations of Carroll’s invented words, enriching readers’ understanding. These PDF editions are optimized for readability on both desktop and mobile devices, ensuring a seamless experience for readers of all ages.

Analysis and Interpretation

Jabberwocky captivates with its whimsical language and symbolic depth. The poem explores themes of courage, identity, and the battle between good and evil, resonating universally through its inventive storytelling.

7.1 Symbolism of the Jabberwock

The Jabberwock represents the embodiment of evil and chaos, with its fearsome claws and jaws symbolizing destruction and fear. Its presence in the poem serves as a test for the young hero, challenging him to confront his darker impulses and emerge victorious. The creature’s mysterious nature, enhanced by Carroll’s invented language, adds layers of complexity, making it a universal symbol of the unknown dangers that must be overcome in life’s journey. This interpretation has captivated readers, making the Jabberwock an enduring figure in literature.

7.2 The Role of the Vorpal Sword

The Vorpal Sword is a central symbol in Jabberwocky, representing power, precision, and the hero’s determination. Its name, like many in the poem, is invented by Carroll, adding to its mystical allure. The sword’s ability to slay the monstrous Jabberwock underscores its significance as a tool of justice and courage. It also embodies the theme of ascension, as the young hero wields it to prove his worth. The Vorpal Sword’s legacy endures in popular culture, often symbolizing decisive action against overwhelming odds, making it an iconic element of the poem. Its presence elevates the narrative’s tension and triumph.

Jabberwocky remains a timeless masterpiece, its whimsical language and themes captivating readers. Available in PDF, it continues to inspire, blending nonsense with profound meaning, ensuring its lasting relevance.

8.1 Legacy of the Poem

Jabberwocky by Lewis Carroll stands as a literary masterpiece, celebrated for its inventive language and timeless themes. Its unique blend of nonsense and sense has inspired countless adaptations, from illustrations to stage productions. The poem’s legacy endures through its ability to captivate readers of all ages, offering both whimsy and depth. Available in PDF formats, it remains accessible to modern audiences, ensuring its relevance in an ever-changing literary landscape. Carroll’s creation continues to charm, solidifying its place in the canon of world literature.

8.2 Why “Jabberwocky” Remains Relevant

Jabberwocky remains relevant due to its universal themes and imaginative language. Its exploration of courage, coming-of-age, and the battle between good and evil resonates across generations. The PDF versions widely available today ensure accessibility, introducing the poem to new readers. Its nonsensical words and whimsical style continue to inspire creativity, making it a timeless classic. As a result, Jabberwocky stays fresh, offering insights into both the human condition and the power of imaginative storytelling.

marketing digital filetype:pdf

Digital marketing encompasses strategic practices across multiple channels, leveraging data to drive decisions and enhance customer engagement. It dynamically evolves, offering businesses innovative ways to connect and grow globally.

1.1. Definition and Scope of Digital Marketing

Digital marketing is a dynamic approach to promoting brands through digital channels, leveraging data and technology to engage audiences. Its scope includes SEO, content marketing, paid advertising, social media, and email marketing, enabling businesses to connect with consumers, drive conversions, and build brand loyalty across diverse online platforms.

1.2. Evolution of Digital Marketing

Digital marketing has evolved significantly, transitioning from basic website optimizations to sophisticated strategies. The rise of social media, mobile devices, and AI has reshaped the landscape, enabling personalized campaigns and real-time engagement. Advances in analytics tools have enhanced decision-making, while emerging technologies continue to redefine how businesses connect with their audiences, driving innovation and efficiency in reaching target markets effectively.

1.3. Key Channels in Digital Marketing

Digital marketing utilizes multiple channels to reach audiences effectively. SEO enhances visibility through search engines, while social media platforms foster engagement and brand awareness. Content marketing builds trust with valuable resources, and email marketing nurtures leads through personalized communication. Paid advertising drives immediate traffic and conversions. Each channel plays a unique role in creating a cohesive marketing strategy tailored to business goals.

1.4. Importance of Digital Marketing in Modern Business

Digital marketing is crucial for modern businesses as it enables global reach, real-time customer engagement, and measurable results. It allows precise targeting, enhancing ROI through data-driven strategies. Personalized experiences foster customer loyalty, while adaptability ensures relevance in a competitive landscape. Digital marketing empowers businesses to scale, innovate, and connect with diverse audiences, making it indispensable for sustainable growth and success in today’s fast-evolving market.

A/B Testing in Digital Marketing

A/B testing improves marketing ROI by comparing versions to identify top performers, ensuring data-driven decisions for optimal campaign outcomes and enhanced customer experiences.

2.1. What is A/B Testing?

A/B testing is a method of comparing two versions of a marketing element to determine which performs better. It involves splitting audiences to test variations, such as webpage layouts, email subject lines, or CTAs. By analyzing metrics like clicks or conversions, businesses can make data-driven decisions to optimize campaigns and improve user engagement effectively.

2.2. Role of A/B Testing in Optimizing Campaigns

A/B testing plays a crucial role in optimizing campaigns by identifying the most effective elements, such as messaging, CTAs, or visuals. It enables businesses to refine their strategies, ensuring higher engagement and conversions. By reducing risks and costs associated with launching untested campaigns, A/B testing helps marketers make informed decisions, ultimately enhancing customer satisfaction and aligning strategies with audience preferences.

2.3. Best Practices for Effective A/B Testing

For effective A/B testing, start with a clear hypothesis and test one variable at a time to isolate impacts. Ensure sufficient sample size and duration for statistically significant results. Use segmentation to target specific audience groups and continuously iterate based on insights. Avoid testing too many elements simultaneously and always analyze results to refine strategies and enhance campaign performance.

Bottom of Funnel Content

Bottom of funnel content is a strategic approach focused on conversion and driving sales, using targeted messaging to guide prospects towards making a purchase.

3.1. Understanding Bottom of Funnel Content

Bottom of funnel (BoFu) content targets prospects nearing a purchase decision, focusing on conversion. It includes case studies, testimonials, and detailed product demos to build trust and urgency, guiding leads toward finalizing a purchase by addressing specific needs and objections.

3.2. Strategies for Creating Effective Bottom of Funnel Content

Effective BoFu content requires personalization, addressing specific pain points, and showcasing clear value. Use testimonials, case studies, and demos to build trust. Offer free trials or consultations to reduce risk. Highlight unique selling points and create urgency with limited-time offers. Tailor messaging to segmented audiences to resonate deeply, ensuring content aligns with their final decision-making needs.

3.3. Case Studies and Success Stories

Case studies highlight real-world applications of BoFu content, showcasing measurable results. For example, companies like HubSpot use customer success stories to demonstrate product value. Similarly, e-commerce brands share detailed journey maps to illustrate buyer transformation. These narratives prove strategy effectiveness, offering actionable insights for marketers aiming to replicate success in their campaigns. Real outcomes build credibility and inspire confidence in digital strategies.

Avoiding Scams in Digital Marketing

Digital marketing scams often involve fake offers or misleading services. Identifying red flags like unrealistic promises and unsolicited requests is crucial. Always verify credibility and avoid rushing into commitments without proper research and due diligence to safeguard your business and personal information from fraudulent activities.

4.1. Identifying Common Scams in Digital Marketing

Digital marketing scams often involve fraudulent services promising unrealistic results. Common schemes include fake app downloads, phishing links, and misleading SEO guarantees. Scammers may also pose as influencers or agencies offering “guaranteed” success. Be cautious of unsolicited offers and requests for personal or financial information. Always verify credibility and read reviews before engaging with any service provider.

4.2. Red Flags to Watch Out For

Be cautious of unsolicited offers, pressure to act quickly, and requests for personal or financial information. Red flags include promises of “easy money,” fake app downloads, and phishing links. Scammers often push for communication on unrelated platforms like WhatsApp. Always verify credibility and avoid deals requiring upfront payments without clear benefits.

4.3. Protecting Yourself and Your Business

To safeguard against scams, educate yourself on common tactics and verify the credibility of offers. Avoid suspicious links, keep software updated, and enable security features. Regularly monitor accounts and report fraudulent activities. Use trusted tools for keyword research and SEO, ensuring compliance with legal standards. Stay informed about emerging threats to maintain a secure digital presence.

SEO and Keyword Research

SEO optimizes content for search engines, improving visibility and rankings. Keyword research identifies relevant terms, enabling targeted content creation to attract specific audiences and drive organic traffic effectively.

5.1. Understanding SEO Basics

SEO (Search Engine Optimization) is the process of improving website visibility on search engines through strategic techniques. It involves optimizing on-page elements like content and meta tags, technical aspects like site speed, and off-page factors such as backlinks. A well-executed SEO strategy enhances organic rankings, driving quality traffic and boosting online presence effectively for businesses.

5.2. Tools for Keyword Research

Keyword research tools like Google Keyword Planner, Ahrefs, SEMrush, and Ubersuggest help identify high-value keywords. These tools analyze search volume, competition, and trends, enabling precise targeting. They also uncover long-tail keywords and content gaps, aiding in refining SEO strategies and pinpointing opportunities to capture audience intent effectively for digital marketing success.

5.3. Optimizing Content for Search Engines

Optimizing content involves aligning it with user intent, using relevant keywords, and ensuring technical SEO best practices. Tools like Google Keyword Planner and SEMrush help identify high-value keywords. Quality, engaging content paired with proper meta tags and mobile-friendly designs enhances search engine rankings. Regular updates and adherence to SEO trends ensure sustained visibility and improved organic traffic in digital marketing strategies.

Social Media Marketing

Social media marketing connects brands with audiences through platforms like Facebook, Instagram, and LinkedIn, fostering engagement, brand awareness, and customer loyalty in the digital space effectively.

6.1. Role of Social Media in Digital Marketing

Social media plays a pivotal role in digital marketing by enabling brands to connect directly with their target audience. Platforms like Instagram, LinkedIn, and TikTok allow businesses to share content, build relationships, and drive engagement. Through social media, companies can enhance brand awareness, generate leads, and foster customer loyalty. It serves as a dynamic tool for real-time communication and feedback, making it indispensable in modern marketing strategies.

6.2. Platform-Specific Strategies

Effective social media marketing requires platform-specific strategies tailored to each audience. Instagram excels for visual storytelling, while LinkedIn is ideal for B2B content. TikTok thrives on short, engaging videos, and Facebook remains versatile for community building. Tailoring content to each platform’s strengths ensures maximum reach and engagement, making it crucial for a cohesive digital marketing plan. Analyzing platform analytics helps refine strategies for optimal results.

6.3. Measuring ROI in Social Media Campaigns

Measuring ROI in social media campaigns involves tracking key metrics like engagement, conversions, and sales. Using tools such as Google Analytics and platform insights, businesses can assess campaign performance. By comparing costs to revenue generated, companies can evaluate profitability and optimize strategies. Regular reporting and data analysis ensure informed decision-making, helping to refine campaigns for better outcomes and aligning social media efforts with broader business goals effectively.

Email Marketing

Email marketing is a powerful digital tool enabling businesses to deliver personalized messages directly to customers, fostering engagement, driving conversions, and building lasting relationships effectively;

7.1. Importance of Email Marketing

Email marketing is a cost-effective strategy that allows businesses to connect directly with their audience, fostering personalization and engagement. It provides measurable results, enabling companies to track campaign success and refine strategies. By delivering tailored messages, email marketing builds trust and drives conversions, making it a vital tool for nurturing customer relationships and achieving business objectives effectively.

7.2. Building an Email List

Building a quality email list is crucial for effective marketing. Use lead magnets, sign-up forms, and clear calls-to-action to attract subscribers. Offer value, such as exclusive content or discounts, to encourage sign-ups. Ensure compliance with privacy laws like GDPR by obtaining explicit consent. Segment your list to personalize campaigns, improving engagement and conversion rates. Regularly clean and update your list to maintain accuracy and performance.

7.3. Optimizing Email Campaigns

Optimizing email campaigns involves refining subject lines, content, and CTAs to boost engagement. Use A/B testing to identify top-performing elements. Personalize emails using recipient data and segment lists for relevance. Monitor analytics to track open rates, clicks, and conversions. Adjust sending times and frequency to maximize reach. Regularly clean your list to remove inactive users and improve deliverability, ensuring campaigns remain impactful and targeted.

Digital Marketing Analytics

Digital marketing analytics measures campaign performance through metrics like conversion rates, CTRs, and ROI. Tools like Google Analytics track user behavior, helping refine strategies and optimize outcomes effectively.

8.1. Key Metrics to Track

In digital marketing, tracking key metrics is crucial for assessing performance. Focus on conversion rates, click-through rates (CTR), return on investment (ROI), bounce rates, and customer lifetime value. These metrics provide insights into campaign effectiveness, helping optimize strategies and allocate resources efficiently for better outcomes and customer satisfaction. Regularly monitoring these indicators ensures data-driven decision-making and continuous improvement in marketing efforts.

8.2. Tools for Measuring Performance

Essential tools for measuring digital marketing performance include Google Analytics, Google Ads, SEMrush, and HubSpot. These platforms provide insights into website traffic, campaign metrics, and user behavior. They help track conversions, click-through rates, and ROI, enabling data-driven decisions. By leveraging these tools, marketers can refine strategies, optimize budgets, and enhance overall campaign effectiveness to achieve better business outcomes and improved customer engagement.

8.3. Using Data to Improve Campaigns

Data-driven insights are crucial for refining digital marketing campaigns. By analyzing metrics like engagement rates, conversions, and click-through rates, marketers can identify underperforming areas and optimize strategies. Utilizing tools, businesses can track user behavior, refine targeting, and personalize content. Continuous data analysis ensures campaigns remain aligned with goals, fostering improved outcomes and enhanced customer experiences through informed, iterative adjustments and measurable success tracking.

Future Trends in Digital Marketing

Digital marketing is evolving rapidly, with AI, voice search, and interactive content leading the charge. Personalized customer experiences and data-driven strategies will dominate future trends, enhancing engagement and efficiency.

9.1. Emerging Technologies

Emerging technologies like AI, machine learning, and voice search are revolutionizing digital marketing. Augmented reality (AR) and virtual reality (VR) create immersive experiences, while IoT and 5G enable faster, more connected campaigns. These innovations enhance personalization, automate tasks, and redefine customer interactions, driving the future of digital marketing strategies and consumer engagement.

9.2. Changing Consumer Behavior

Consumers increasingly demand personalized, seamless, and ethical experiences. Digital literacy and privacy concerns are rising, influencing purchasing decisions. Sustainability and transparency are key drivers, with younger audiences favoring brands that align with their values. The shift toward instant gratification and omnichannel engagement is reshaping how businesses approach marketing, emphasizing trust and relevance in every interaction.

9.3. Staying Ahead in the Digital Landscape

To stay ahead, businesses must embrace adaptability and innovation. Leverage emerging tools like AI and machine learning to enhance campaigns. Focus on personalized, data-driven strategies and agile execution. Continuously monitor trends and consumer insights to refine approaches. Invest in lifelong learning for teams and adopt a growth mindset to thrive in the fast-evolving digital ecosystem.

Page 3 of 4

Powered by WordPress & Theme by Anders Norén