Month: May 2025 Page 1 of 4

husqvarna pw3200 parts manual

The Husqvarna PW3200 parts manual is a comprehensive guide designed to help users understand, maintain, and repair their pressure washer effectively. It provides detailed diagrams, component identification, and essential maintenance tips to ensure optimal performance and longevity of the equipment. By following the manual, users can troubleshoot issues, replace parts, and perform routine care to keep their PW3200 operating at its best. This resource is invaluable for both novice and experienced users, offering clear instructions and safety guidelines to ensure safe and efficient operation.

Key Features of the Husqvarna PW3200 Pressure Washer

The Husqvarna PW3200 delivers 3200 PSI and 2.5 GPM, offering powerful cleaning performance. It features a reliable Briggs & Stratton 950 Series engine, durable construction, and a robust design for heavy-duty tasks.

2.1. Technical Specifications and Performance

The Husqvarna PW3200 operates at 3200 PSI and 2.5 GPM, delivering robust cleaning power. It features a Briggs & Stratton 950 Series engine, known for reliability and durability. The pressure washer includes a durable pump designed for heavy-duty use, ensuring consistent performance. With a thermal protection system, it prevents overheating during extended operation; The unit also supports a wide range of nozzles for different cleaning tasks. Its compact design and wheels enhance portability for various applications. The PW3200 is ideal for cleaning driveways, sidewalks, and other large surfaces efficiently. Regular maintenance, as outlined in the manual, ensures optimal performance and longevity. The engine’s oil system requires regular checks, and the fuel recommendations are specified to maintain peak efficiency. Overall, the PW3200 is engineered for demanding tasks, combining power and reliability for professional-grade results.

Understanding the Husqvarna PW3200 Parts Diagram

The Husqvarna PW3200 parts diagram provides a detailed visual layout of all components, enabling easy identification and location of parts for repairs, maintenance, and replacements. This guide is essential for understanding how the pressure washer is assembled and functions, ensuring accurate troubleshooting and efficient servicing. Regular reference to the diagram helps users familiarize themselves with key components, promoting proper care and extending the equipment’s lifespan. It is a crucial resource for both routine maintenance and complex repairs, ensuring the PW3200 operates at peak performance.

3.1. How to Identify Key Components

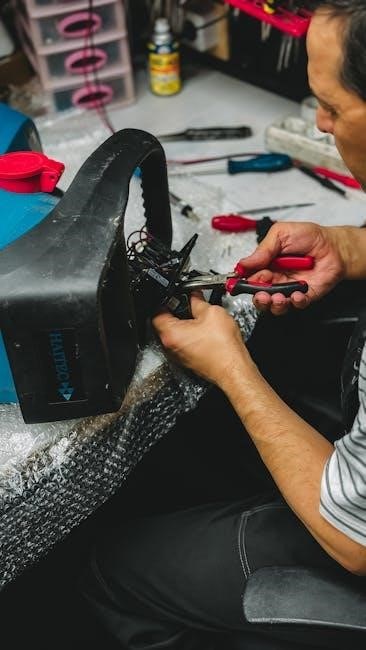
Identifying key components of the Husqvarna PW3200 is essential for maintenance and repairs. Start by locating the engine, pump, and spray gun, as these are the primary functional units. The engine, typically a Briggs & Stratton 950 Series, powers the pump, which generates the high-pressure water flow. The spray gun and nozzle are critical for directing the water stream. Use the parts diagram to cross-reference each component’s location and purpose. Pay attention to labels and descriptions, as they provide clarity on each part’s role. Familiarizing yourself with these components ensures you can perform routine checks, such as inspecting for wear or damage, and replace parts accurately when needed. Regular identification and inspection of key components are vital for maintaining optimal performance and extending the lifespan of your pressure washer.

Maintenance and Care Instructions

Regular maintenance ensures the Husqvarna PW3200 operates efficiently. Check oil levels, inspect hoses, and clean filters. Store the unit in a dry, protected area during off-season to prevent damage.

4.1. Oil and Fuel Recommendations

Proper oil and fuel management is crucial for the Husqvarna PW3200’s performance and longevity. Use high-quality oil, such as SAE 30, to lubricate the engine effectively. Always check the oil level before starting the pressure washer, ensuring it is on a level surface for an accurate reading. Refer to the engine operator’s manual for specific oil recommendations. For fuel, use fresh, unleaded gasoline with an octane rating of 87 or higher. Avoid using old or contaminated fuel, as it can damage the engine. Store fuel properly and drain it if the pressure washer will not be used for an extended period. Regularly inspect fuel lines and connections for leaks or damage. Proper oil and fuel maintenance ensures smooth operation and prevents costly repairs.

Troubleshooting Common Issues

Troubleshooting common issues with the Husqvarna PW3200 is essential for maintaining its performance and longevity. If the pressure washer fails to start, check the fuel level, oil level, and air filter for blockages or contamination. Low water pressure may indicate a clogged nozzle or pump issue. If the engine overheats, ensure proper cooling and check for any blockages in the cooling system. Leaks in the pump or hoses can be identified by inspecting connections and seals. For persistent problems, consult the parts manual or contact Husqvarna support. Regular maintenance, such as oil changes and filter cleaning, can prevent many of these issues. Always refer to the manual for detailed troubleshooting steps and safety guidelines to ensure effective resolution and safe operation.

Replacement Parts and Accessories

Replacement parts and accessories for the Husqvarna PW3200 ensure optimal performance and longevity. Use genuine Husqvarna parts for compatibility and reliability. The parts manual provides detailed diagrams to identify components accurately. Always consult the manual or contact authorized dealers for authentic replacements to maintain warranty and safety standards. Regularly updating worn-out parts prevents major repairs and extends the life of your pressure washer. Accessories like nozzles, hoses, and pumps are available for specific tasks, ensuring versatility in cleaning applications. Proper selection ensures seamless integration and continued efficiency, making the PW3200 a durable and reliable cleaning solution for years. Always choose genuine parts to uphold the quality and performance of your Husqvarna pressure washer;

6.1. Where to Find Genuine Husqvarna Parts

To ensure the longevity and performance of your Husqvarna PW3200, it is crucial to use genuine parts. These can be sourced directly from Husqvarna’s official website or through authorized dealers. Additionally, local Husqvarna retailers and hardware stores often carry a selection of genuine parts. The parts manual provides detailed part numbers, making it easier to identify and order the correct components. For convenience, online marketplaces like Amazon and eBay also offer genuine Husqvarna parts, but verify the seller’s authenticity to avoid counterfeit products. Always cross-reference the part numbers with the official Husqvarna database to ensure compatibility. Genuine parts are designed to meet specific safety and performance standards, ensuring your pressure washer operates efficiently and safely. Avoid third-party alternatives, as they may void warranties or compromise functionality. Regularly check Husqvarna’s support website for updated part listings and diagrams.

Safety Precautions and Guidelines

Always prioritize safety when operating the Husqvarna PW3200 pressure washer. Before use, thoroughly read the safety guidelines in the manual to understand potential hazards. Ensure the area is clear of obstacles and flammable materials. Wear protective gear, including safety goggles, gloves, and sturdy footwear, to prevent injury from high-pressure jets or debris. Never point the nozzle at people, pets, or delicate surfaces. Keep loose clothing and long hair tied back to avoid entanglement with moving parts. Avoid using the pressure washer in extreme weather conditions or on icy surfaces. Regularly inspect hoses and connections for damage or leaks to prevent accidents. Follow proper startup and shutdown procedures to maintain control of the equipment. Store the pressure washer in a dry, secure location out of reach of children. Adhere to all warnings and cautions provided in the manual to ensure safe and effective operation. Proper safety practices will help prevent accidents and prolong the life of your Husqvarna PW3200.

Assembly and Initial Setup Instructions

Proper assembly and initial setup of the Husqvarna PW3200 are crucial for safe and effective operation. Begin by carefully unboxing and inspecting all components for damage. Refer to the parts diagram in the manual to identify and organize the included accessories. Attach the nozzle extension to the spray gun, ensuring it is securely locked in place. Next, check the oil level in the engine and fill as needed, following the recommendations in the manual. Connect the high-pressure hose to both the pump and spray gun, making sure all fittings are tight. Finally, attach the detergent tank if required and ensure all safety guards are in place. Before first use, test the pressure washer at a low setting to ensure proper function. Always follow the step-by-step instructions in the manual for a correct and safe assembly process.

Warranty Information and Support

The Husqvarna PW3200 is backed by a 12-month limited warranty, providing coverage for manufacturing defects and ensuring peace of mind for users. This warranty period begins from the date of purchase and covers repairs or replacements of faulty parts or workmanship. For additional support, Husqvarna offers extensive resources, including downloadable manuals, parts diagrams, and troubleshooting guides, available on their official website. Users can also contact Husqvarna’s customer service for personalized assistance with specific inquiries. Proper maintenance, as outlined in the manual, is essential to uphold warranty terms. By following the recommended care and usage guidelines, users can maximize their warranty benefits and ensure the longevity of their pressure washer. This comprehensive support system reflects Husqvarna’s commitment to customer satisfaction and product reliability.

The Husqvarna PW3200 parts manual is an essential resource for anyone looking to maximize the performance and longevity of their pressure washer. By providing detailed diagrams, maintenance instructions, and troubleshooting tips, the manual empowers users to take control of their equipment’s care. Whether you’re a seasoned professional or a first-time owner, this guide offers the clarity and depth needed to keep your PW3200 operating at peak efficiency. Regular use of the manual ensures that you can address issues promptly, avoid costly repairs, and maintain safety standards. With its comprehensive coverage, the Husqvarna PW3200 parts manual is a vital companion for anyone seeking to get the most out of their investment. By following its guidelines, you can extend the lifespan of your pressure washer and enjoy consistent, reliable results for years to come.

bathroom plumbing materials names and pictures pdf

Bathroom plumbing materials are essential for durability and functionality. Common materials include PVC, PEX, and copper pipes, each offering unique benefits. Fixtures like faucets and toilets vary in design and composition, ensuring compatibility with modern plumbing systems. Understanding these materials is crucial for installation and maintenance, as they directly impact water efficiency and system longevity.

1.1 Overview of Plumbing Fixtures and Materials

Plumbing fixtures and materials are crucial components of modern bathrooms, ensuring functionality and aesthetics. Key fixtures include faucets, toilets, shower heads, and bathtubs, while materials like PVC, PEX, and copper pipes are commonly used for water supply and drainage. Fittings such as couplings, elbows, and adapters connect pipes, enabling efficient water flow. Additionally, CPVC and ABS materials are popular for their durability and resistance to corrosion. These components work together to create a reliable and long-lasting plumbing system, tailored to meet the needs of residential and commercial spaces.

1.2 Importance of Choosing the Right Plumbing Materials

Selecting appropriate plumbing materials is vital for a bathroom’s functionality and longevity. Correct materials prevent leaks, corrosion, and water damage. They ensure compliance with local plumbing codes and enhance water efficiency. Durable materials like PEX and copper resist wear and tear, reducing maintenance costs. Proper selection also improves safety, preventing water contamination. Choosing materials that align with the system’s requirements ensures optimal performance and extends the lifespan of bathroom plumbing, making it a cost-effective and sustainable decision for homeowners and builders alike.

Common Plumbing Pipe Materials for Bathrooms

Bathroom plumbing systems commonly use PVC, PEX, and copper pipes. Each material offers distinct advantages, ensuring durability and reliability for modern bathroom installations.

2.1 PVC Pipes

PVC pipes are a popular choice for bathroom plumbing due to their durability and resistance to corrosion. They are lightweight, easy to install, and cost-effective. PVC pipes are commonly used for drainage and water supply lines. Their smooth interior reduces the risk of mineral buildup, ensuring consistent water flow. Available in various sizes, PVC pipes are versatile and suitable for both underground and above-ground installations. They are also resistant to chemicals, making them ideal for bathroom applications. PVC pipes are widely recommended for their reliability and long-lasting performance in plumbing systems.

2.2 PEX Pipes

PEX pipes, or cross-linked polyethylene pipes, are highly flexible and resistant to freezing, making them ideal for bathroom plumbing. They can withstand extreme temperature changes and are less likely to burst. PEX pipes are easier to install compared to rigid materials like copper, reducing labor costs. Their flexibility allows for fewer fittings, minimizing potential leak points. PEX is also resistant to scale buildup and corrosion, ensuring long-term durability. They are widely used for hot and cold water supply lines in modern bathroom installations, offering a reliable and efficient solution for plumbing needs.

2.3 Copper Pipes

Copper pipes are a traditional and durable choice for bathroom plumbing, known for their excellent water conductivity and resistance to contamination. They are ideal for both hot and cold water supply lines and can last for decades with proper installation. Copper pipes are resistant to corrosion from water and are compatible with many fixtures. However, they can be more expensive and require skilled labor for installation. Regular maintenance is essential to prevent oxidation and leaks. Copper pipes remain a popular option due to their reliability and long lifespan in bathroom plumbing systems.

Bathroom Plumbing Fixtures

Bathroom plumbing fixtures include faucets, shower heads, toilets, bathtubs, and shower enclosures. Selecting the right materials and designs ensures functionality, water efficiency, and aesthetic appeal in bathroom spaces.

3.1 Faucets and Shower Heads

Faucets and shower heads are crucial bathroom fixtures, available in various materials like brass, stainless steel, and ceramic. Modern designs prioritize water conservation and durability. Touchless and low-flow options enhance efficiency. Installation requires compatible connectors and valves. Proper maintenance prevents leaks and mineral buildup. Choosing the right finish ensures aesthetic consistency. These fixtures are essential for both functionality and style, making them a key focus in bathroom plumbing systems.

3.2 Toilets and Urinals

Toilets and urinals are essential bathroom fixtures, typically made from ceramic or porcelain. Modern designs emphasize water efficiency, with low-flow options reducing consumption. Installation involves securing units with non-corrosive bolts and rubber gaskets to prevent leaks. Regular maintenance, such as checking flush valves and seals, ensures proper function. Urinals are often wall-mounted for space-saving and hygiene. Both fixtures require proper venting to maintain airflow and prevent odors. Selecting the right model and material ensures durability and alignment with bathroom aesthetics, making them vital components of a functional plumbing system.

3.3 Bathtubs and Shower Enclosures

Bathtubs and shower enclosures are key bathroom fixtures, offering both functionality and relaxation. Bathtubs are typically made of acrylic, fiberglass, or cast iron, each providing durability and aesthetic appeal. Shower enclosures, often constructed from glass and metal frames, enhance bathroom design while containing water spray. Proper installation ensures water tightness, with seals and gaskets preventing leaks. Regular cleaning and maintenance are essential to extend their lifespan. These fixtures are central to bathroom comfort, blending practicality with modern design trends to create a soothing environment for users.

Plumbing Fittings and Connectors

Plumbing fittings and connectors, such as couplings, adapters, elbows, and tees, are crucial components. They connect, divert, and seal pipe connections, ensuring a watertight seal. Essential for bathroom plumbing systems.

4.1 Couplings and Adapters

Couplings and adapters are vital connectors in bathroom plumbing. Couplings join two pipes of the same diameter, while adapters connect pipes of different sizes. They ensure secure, leak-free connections. Available in materials like PVC, CPVC, and copper, these fittings are durable and versatile. Adapters often feature threaded or push-fit ends, simplifying installation. Proper sizing and material selection are crucial to maintain water pressure and prevent corrosion. These components are indispensable in modern plumbing systems, ensuring reliability and longevity in bathroom setups. Their compatibility with various pipe materials makes them essential for both new installations and repairs.

4.2 Elbows and Tees

Elbows and tees are fundamental plumbing fittings used to change pipe direction or combine water flow. Elbows feature 90-degree angles, while tees create T-shaped connections. Available in materials like PVC, copper, and PEX, they offer durability and flexibility. Elbows are ideal for routing pipes around corners, while tees allow multiple pipes to merge. Both fittings are essential for creating complex bathroom layouts, ensuring efficient water distribution. Proper installation prevents leaks and maintains system integrity. Their versatility makes them indispensable in modern bathroom plumbing systems, supporting both hot and cold water lines effectively. Their compatibility with various materials ensures seamless integration into any setup. Elbows and tees are vital for routing and combining pipes, ensuring optimal water flow in bathrooms. Their durability and ease of installation make them a cornerstone of plumbing systems. By providing directional changes and branch connections, they facilitate efficient and reliable water distribution throughout the bathroom. Proper sizing and material selection are crucial to prevent leaks and corrosion, ensuring long-term performance. These fittings are essential for creating functional and durable bathroom plumbing systems.

Tools for Installing Bathroom Plumbing

Essential tools for bathroom plumbing include hacksaws, pipe cutters, brushes, and clamps. These tools facilitate cutting, joining, and securing pipes effectively during installation.

5.1 Essential Plumbing Tools

Essential plumbing tools include hacksaws for cutting pipes, pipe cutters for precise sizing, and brushes for cleaning pipe interiors. Clamps and adhesives secure connections, ensuring leak-free seals. Pliers and wrenches are vital for tightening fittings, while tubing benders help shape pipes without damaging them. These tools are fundamental for efficient and professional bathroom plumbing installations, enabling precise cuts, secure joins, and proper system maintenance. They are indispensable for both DIY projects and professional setups, ensuring durability and functionality in plumbing systems.

Visual Guide to Bathroom Plumbing Materials

This guide provides detailed diagrams and images of plumbing materials, including pipes, fixtures, and fittings, helping to identify and understand their uses and installations visually.

6.1 Identifying Pipe Types and Fittings

Identifying pipe types and fittings is crucial for proper installation and maintenance. PVC pipes are white or gray, while PEX pipes are flexible and color-coded. Copper pipes are metallic and often used for hot water. Fittings like couplings, elbows, and tees connect pipes, directing water flow. Visual guides often include labeled diagrams, showing pipe sizes, materials, and connection types. Color coding and markings on pipes indicate their purpose, such as blue for cold water and red for hot water. Understanding these visual cues helps in selecting the right materials for bathroom plumbing systems.

Best Practices for Bathroom Plumbing Installation

Plan carefully, use compatible materials, and follow local plumbing codes. Ensure proper connections and test systems before finalizing. Safety and efficiency are key to successful installation.

7.1 Safety Tips and Precautions

Always turn off the water supply before starting any plumbing work to prevent accidents. Wear protective gear like gloves and goggles to avoid injuries. Ensure proper ventilation when using adhesives or chemicals. Follow manufacturer guidelines for handling materials and tools. Use a bucket to catch water during disconnections to prevent spills. Keep a fire extinguisher nearby when soldering or welding pipes. Never overtighten connections to avoid damaging pipes or fixtures. Test the system gradually after installation to detect leaks early. Regularly inspect tools and materials for wear and tear to maintain safety standards.

Maintaining Bathroom Plumbing Systems

Regular inspections and prompt repairs prevent major issues. Clear drains monthly and check for leaks to avoid water damage. Maintain proper water pressure to ensure system longevity.

8.1 Common Issues and Solutions

Common bathroom plumbing issues include leaks, clogged drains, and low water pressure. Leaks often occur at faucets or pipes, requiring replacement of worn washers or O-rings. Clogs in drains can be cleared using plungers or drain snakes. Low water pressure may result from mineral buildup or faulty fixtures, which can be resolved by cleaning or replacing aerators. Regular inspections and maintenance help prevent these issues. Addressing problems promptly ensures efficient water flow and prevents damage to fixtures and materials, maintaining the overall integrity of the plumbing system.

Selecting the right bathroom plumbing materials is crucial for both functionality and aesthetics. From durable pipes like PVC and PEX to high-quality fixtures such as faucets and toilets, each component plays a vital role in ensuring long-lasting performance. Regular maintenance and addressing common issues promptly can prevent costly repairs. By understanding the benefits and limitations of various materials, homeowners can make informed decisions that enhance their bathroom’s efficiency and appeal. Proper installation and care ensure a reliable plumbing system for years to come.

squadron battle manual

The Squadron Battle Manual is a comprehensive guide standardizing squadron operations‚ ensuring efficiency and safety in mission executions. It covers strategies‚ tactics‚ and essential procedures for all personnel.

Purpose of the Manual

The Squadron Battle Manual serves as a standardized guide for squadron operations‚ ensuring efficiency‚ safety‚ and cohesion among team members. Its purpose is to provide clear directives for mission planning‚ tactical execution‚ and post-battle procedures. By addressing challenges such as limited aircraft numbers and AI limitations‚ it aims to enhance decision-making and communication. This manual ensures all personnel are aligned with best practices‚ fostering a culture of adaptability and continuous improvement in dynamic combat scenarios.

Key Definitions and Terminology

Squadron: A unit of aircraft grouped for operational or tactical purposes. Mission Planning: Strategic preparation for objectives‚ resource allocation‚ and execution. Wingmanship: Mutual support between pilots to enhance safety and effectiveness. Ordnance Management: Handling and deployment of weapons. Contingency Planning: Strategies for unforeseen scenarios. These terms are critical for understanding the manual’s framework and ensuring cohesive operations.

Pre-Battle Preparations

Pre-battle preparations involve intelligence gathering‚ strategy development‚ and squadron briefings. These steps ensure effective mission planning‚ resource allocation‚ and coordination among team members for optimal outcomes.

Intelligence Gathering and Reconnaissance

Intelligence gathering and reconnaissance are critical for identifying enemy positions‚ strengths‚ and weaknesses. Tools like EDDB aid in tracking shipments and resources‚ enabling informed strategic decisions. Squadrons must adapt to dynamic threats‚ ensuring accurate data collection for effective mission planning and execution‚ while addressing challenges like limited AI capabilities in reconnaissance.

Strategy Development and Mission Planning

Strategy development involves aligning squadron goals with broader force-building objectives‚ ensuring missions are planned with precision. Resource management‚ such as optimizing aircraft numbers and countering exaggerated AA abilities‚ is crucial. Missions must adapt to dynamic threats‚ balancing offensive and defensive tactics while addressing AI limitations. Contingency plans and threat assessments ensure flexibility‚ enabling squadrons to execute operations effectively under varying conditions.

Squadron Briefing and Coordination

Squadron briefing and coordination ensure all members understand their roles and objectives. Clear communication is vital to align strategies and tactics‚ while role distribution ensures accountability; Intelligence sharing and mission parameters are discussed to prepare for expected challenges. Coordination fosters teamwork‚ enabling seamless execution of plans and adaptability during operations‚ ultimately contributing to successful mission outcomes.

Tactics and Formations

Tactics and formations are critical for squadron effectiveness‚ promoting cohesion and adaptability. Proper execution enhances combat success‚ ensuring coordinated maneuvers and strategic positioning in dynamic scenarios.

Combat Formations: Line‚ Echelon‚ and Vic

Combat formations like Line‚ Echelon‚ and Vic are essential for squadron coordination. The Line formation maximizes firepower and situational awareness‚ while Echelon enhances maneuverability and flexibility. The Vic formation provides mutual support and balanced defense‚ allowing wingmen to cover each other effectively. These formations are tailored to mission objectives‚ ensuring adaptability and cohesion in dynamic battle scenarios.

Offensive and Defensive Maneuvers

Offensive maneuvers emphasize rapid‚ decisive actions to exploit enemy weaknesses‚ such as high-speed attacks and flanking. Defensive tactics focus on evasion‚ shield protection‚ and counterattacks. Pilots must master techniques like notching‚ dragging‚ and missile evasion to survive. Effective maneuvering requires precise coordination‚ situational awareness‚ and adaptability to maintain superiority in combat. These strategies ensure squadron survival and mission success in hostile environments.

Squadron Coordination and Communication

Squadron coordination and communication are critical for mission success‚ ensuring teamwork‚ clear protocols‚ and defined roles. Effective communication enhances situational awareness and mutual support in dynamic environments.

Command Structure and Roles

The squadron’s command structure ensures clear hierarchy and accountability‚ with defined roles for leaders and personnel. Squadron leaders oversee strategy and decision-making‚ while wingmen provide tactical support. Roles are assigned based on expertise‚ ensuring seamless coordination. This structure enhances discipline‚ accountability‚ and mission execution efficiency. Effective command fosters trust and adaptability‚ critical in dynamic battle scenarios.

Communication Protocols and Procedures

Effective communication is vital for squadron success. Standardized terminology ensures clarity‚ while established protocols govern transmission timing and content. Pre-flight briefings outline key phrases and signals. Acknowledgment protocols confirm receipt of critical information. Emergency codes‚ such as “Mayday” or “Pan-Pan‚” are used for urgent situations. Secure channels prevent interception‚ and post-mission debriefs review communication efficiency. Adherence to these protocols enhances coordination and reduces errors in high-stress environments.

Mutual Support and Wingmanship

Mutual support and wingmanship are cornerstone principles ensuring squadron cohesion. Wingmen provide cover‚ monitor surroundings‚ and assist in emergencies. Clear communication and situational awareness enable seamless teamwork. Protecting vulnerable aircraft during combat or damage is crucial. Shared responsibilities enhance mission success and reduce individual risk. Trust and coordination foster a united front‚ allowing the squadron to adapt and overcome challenges effectively. These practices are vital for achieving strategic objectives;

Weapon Systems and Ordnance

The squadron’s weapon systems and ordnance are critical for mission success. Effective use of armaments requires precise targeting and understanding of weapon capabilities. Ordnance management ensures safe handling and deployment‚ minimizing risks during operations. Target acquisition systems enhance accuracy‚ while jettison procedures prevent hazards in emergency situations. Proper training and maintenance are essential for optimal performance.

Types of Weapons and Their Effective Use

The squadron employs various weapon systems‚ including air-to-air missiles for engaging enemy aircraft and precision-guided bombs for ground targets. Missiles are effective in medium-range combat‚ while guns are reserved for close-range situations. Proper ordnance management ensures weapons are used strategically‚ minimizing waste. Targeting systems enhance accuracy‚ allowing for efficient resource use while reducing collateral damage. Understanding each weapon’s capabilities is crucial for mission success.

Target Acquisition and Engagement

Target acquisition involves identifying and tracking enemy assets using advanced sensors and radar systems. Real-time intelligence ensures accurate targeting‚ maximizing mission effectiveness. Effective engagement requires assessing threats‚ selecting the right weapons‚ and timing maneuvers to exploit vulnerabilities. Post-engagement‚ squads reassess to adapt strategies and maintain situational awareness‚ ensuring continuous operational success.

Ordnance Management and Jettison Procedures

Ordnance management ensures safe handling‚ storage‚ and deployment of weapons. Proper loading and arming procedures prevent accidental discharge. Jettison protocols are critical for emergency situations‚ allowing squads to shed excess weight or unstable ordnance. Crews must adhere to strict safety guidelines to avoid collateral damage. Post-mission‚ ordnance is accounted for‚ and unused munitions are securely stored‚ ensuring operational readiness and compliance with safety standards.

Adaptability in Dynamic Battle Scenarios

Adaptability is crucial for squadrons to respond effectively to changing battle conditions. Situational awareness and rapid decision-making enable units to adjust tactics‚ ensuring mission success and survival.

Flexibility in Tactics and Decision-Making

Flexibility in tactics and decision-making is vital for squadron success; Pilots must adapt strategies based on real-time intelligence and evolving threats‚ ensuring effective resource utilization.

This includes dynamic ordnance management and maneuver adjustments‚ balancing offensive and defensive actions to maintain superiority. Effective communication and situational awareness enable swift‚ informed decisions‚ enhancing mission outcomes and squadron resilience.

Situational Awareness and Threat Assessment

Situational awareness is critical for identifying threats and making informed decisions. Pilots must continuously monitor their environment‚ scanning for hostile aircraft‚ missile threats‚ and other hazards. Utilizing radar‚ sensors‚ and communication systems enhances early detection and response capabilities.

Threat assessment involves evaluating enemy strengths‚ weaknesses‚ and intentions. This enables squadrons to prioritize targets‚ adjust formations‚ and employ effective countermeasures. Maintaining situational awareness ensures proactive engagement‚ reducing vulnerabilities and improving mission success rates.

Contingency Planning and Emergency Procedures

Contingency planning ensures preparedness for unforeseen scenarios‚ such as system failures or enemy counterattacks. Emergency procedures‚ including evacuation protocols and damage control‚ must be rehearsed and understood by all squadron members. Quick decision-making and adherence to established guidelines are critical during crises to minimize risks and maintain operational integrity.

Standardized emergency protocols‚ such as jettisoning ordnance or executing evasive maneuvers‚ must be clearly defined. Coordination between pilots and ground support ensures effective response and recovery‚ safeguarding personnel and assets while maintaining mission objectives.

Post-Battle Procedures

Post-battle procedures involve debriefing‚ damage assessment‚ and securing the area. These steps ensure lessons are learned‚ repairs are initiated‚ and squadron readiness is maintained for future operations.

Debriefing and Performance Analysis

Debriefing involves reviewing mission execution to identify successes and areas for improvement. This process ensures lessons are learned and applied to future operations. Performance analysis evaluates individual and team effectiveness‚ highlighting strengths and weaknesses. Data collected during debriefs inform strategy adjustments and training needs‚ fostering continuous improvement and readiness for upcoming engagements. This systematic approach enhances squadron cohesion and operational effectiveness.

Damage Assessment and Repair

Damage assessment involves evaluating aircraft condition post-mission‚ identifying structural‚ system‚ or armament damage. Repairs prioritize restoring operational readiness‚ focusing on critical systems. Maintenance crews execute fixes‚ while non-essential damage is scheduled for later. Safety and functionality are paramount to ensure squadron assets remain combat-ready. This process minimizes downtime‚ enabling swift return to operational status and maintaining mission effectiveness.

Securing the Area and Victor Procedures

Post-battle‚ securing the area ensures safety and mission completion. Squadron members establish perimeter security‚ neutralize threats‚ and recover assets. Victor procedures include documenting successes‚ casualties‚ and lessons learned. Communication of outcomes to command is critical for operational debriefing. These steps ensure accountability‚ readiness for future missions‚ and proper recognition of achievements‚ maintaining squadron cohesion and effectiveness.

Continuous Improvement and Training

Continuous improvement ensures squadron readiness through regular performance reviews‚ targeted training exercises‚ and updates to the battle manual‚ fostering adaptability and enhanced mission effectiveness.

Performance Review and Lessons Learned

Performance reviews analyze mission outcomes to identify successes and areas for improvement. Lessons learned are documented and shared across the squadron‚ ensuring adaptive strategies and enhanced future operations.

Training Exercises and Drills

Regular training exercises and drills are essential for maintaining squadron proficiency. These include simulated combat scenarios‚ emergency procedures‚ and teamwork exercises. Pilots practice offensive and defensive maneuvers‚ improving situational awareness and adaptability. Communication drills ensure seamless coordination during missions. These exercises are conducted frequently to enhance readiness and ensure all members are well-prepared for dynamic battle scenarios‚ fostering a culture of continuous improvement and operational excellence.

Updating the Squadron Battle Manual

The Squadron Battle Manual undergoes regular revisions to reflect evolving strategies‚ technologies‚ and lessons learned. Updates incorporate feedback from squadron members‚ performance reviews‚ and advancements in military tactics. This ensures the manual remains relevant‚ addressing new challenges and optimizing operational effectiveness. The process is collaborative‚ involving subject matter experts to maintain accuracy and adaptability‚ ensuring the squadron stays ahead in dynamic and unpredictable environments.

ccna 200 301 official cert guide library

The CCNA 200-301 Official Cert Guide Library is a comprehensive resource designed to help candidates prepare for the CCNA 200-301 exam, combining detailed books and practical tools․

1․1 Overview of the CCNA 200-301 Certification

The CCNA 200-301 certification validates foundational networking skills, covering IP addressing, network fundamentals, and Cisco solutions․ It is a 120-minute exam testing knowledge in implementing and administering network systems․ This certification is essential for networking professionals, offering a comprehensive understanding of modern networking technologies and preparing candidates for real-world challenges in IT infrastructure․

1․2 Importance of the Official Cert Guide Library

The CCNA 200-301 Official Cert Guide Library is a valuable resource for exam preparation, offering a structured approach to mastering networking concepts․ It provides detailed explanations, practice questions, and real-world examples, ensuring comprehensive understanding․ This library is essential for candidates seeking to excel in the exam and gain practical skills for a successful networking career․

Structure of the CCNA 200-301 Official Cert Guide Library

The library is divided into two volumes, covering networking fundamentals and advanced topics․ It includes practice questions, labs, and tools like the Network Simulator Lite for hands-on learning․

2․1 Volume 1: Networking Fundamentals

Volume 1 focuses on core networking concepts such as IP addressing, subnetting, and network devices․ It provides a structured approach to understanding the basics, essential for building a strong foundation in networking․ This volume is designed to ensure a solid grasp of fundamental principles before advancing to more complex topics․

2․2 Volume 2: Advanced Topics and Practices

Volume 2 delves into advanced networking topics such as security, VPN, and advanced routing protocols․ It also includes real-world scenarios and practical exercises to reinforce learning․ This volume prepares candidates for complex networking challenges, ensuring they can apply their knowledge effectively in actual environments․ The inclusion of Network Simulator Lite enhances hands-on practice․

Key Features of the Official Cert Guide Library

The library offers a comprehensive review, practice questions, and exercises to enhance preparation․ It also includes the Network Simulator Lite for hands-on practice, ensuring thorough exam readiness․

3․1 Practice Questions and Exercises

The library includes a variety of practice questions and exercises designed to test knowledge and reinforce learning․ With over 300 unique practice exam questions, candidates can assess their understanding of key topics․ The exercises cover a wide range of networking concepts, from basic configurations to advanced troubleshooting, ensuring hands-on experience․ These resources help identify weak areas and improve problem-solving skills, providing a thorough preparation for the CCNA 200-301 exam․

3․2 Network Simulator Lite Software

The Network Simulator Lite Software is an essential tool within the library, offering a realistic environment to practice networking tasks․ It allows users to simulate configurations, troubleshoot issues, and experiment with advanced scenarios․ With access to a virtual lab, learners can gain hands-on experience, reinforcing theoretical knowledge․ This feature is particularly valuable for mastering complex topics like routing and switching, ensuring practical proficiency for the exam and real-world applications․

Study Strategies for the CCNA 200-301 Exam

Effective preparation involves structured routines, focusing on practice questions, and hands-on exercises․ Utilize the guide’s resources to reinforce networking concepts and ensure comprehensive understanding of exam topics systematically․

4․1 Creating a Study Plan

Creating a structured study plan is essential for effective preparation․ Set clear goals, allocate time for each topic, and prioritize hands-on practice․ Utilize the guide’s practice questions and exercises to reinforce learning․ Track progress regularly and adjust your plan to focus on weaker areas․ Consistency and dedication are key to mastering the material efficiently and ensuring readiness for the exam․

4․2 Using the Cert Guide for Effective Preparation

Leverage the CCNA 200-301 Official Cert Guide Library to enhance your exam readiness․ Utilize the structured approach, practice questions, and hands-on exercises to reinforce concepts․ The guide’s proven techniques and real-world examples help deepen understanding․ Regularly review and apply the material using the included Network Simulator Lite for practical experience․ Consistency in using these resources ensures comprehensive preparation and confidence for achieving exam success․

Exam Overview and Topics Covered

The CCNA 200-301 exam is a 120-minute assessment covering networking fundamentals, IP addressing, routing, switching, and security․ The guide ensures mastery of these critical topics for success․

5․1 Exam Structure and Format

The CCNA 200-301 exam is a 120-minute assessment consisting of multiple-choice questions, drag-and-drop activities, and simulation labs․ It evaluates knowledge of networking fundamentals, security, and automation․ The exam is administered by Pearson VUE, with candidates requiring a score of 825 or higher to pass․ The format ensures practical skill assessment alongside theoretical knowledge․

5․2 Detailed List of Exam Topics

The CCNA 200-301 exam covers networking fundamentals, including IP addressing, subnetting, and routing protocols․ It also includes network security, such as firewalls and VPNs, and automation using Python and REST APIs․ Additional topics range from LAN switching and wireless networking to DNS, DHCP, and device management, ensuring a comprehensive understanding of modern networking concepts and technologies․

Real-World Applications of the Guide

The guide bridges theory and practice, enabling professionals to apply networking concepts to real-world scenarios, enhancing their ability to configure, troubleshoot, and optimize networks efficiently․

6․1 Practical Labs and Scenarios

The guide includes practical labs and real-world scenarios, allowing learners to apply theoretical knowledge in simulated environments․ These exercises cover network configuration, troubleshooting, and optimization, preparing professionals for actual networking challenges; The labs reinforce key concepts, ensuring hands-on experience with Cisco devices and technologies, making the learning process immersive and effective for career advancement․

6․2 Applying Knowledge to Real Networking Issues

The guide bridges theory and practice by enabling learners to address real-world networking challenges․ It equips professionals with the skills to troubleshoot, configure, and optimize networks effectively․ Through hands-on exercises and scenarios, users gain practical insights, ensuring they can apply their knowledge to resolve actual networking problems in their careers with confidence and expertise․

Comparison with Other Study Resources

The Official Cert Guide Library stands out as the only Cisco-approved self-study resource, offering a comprehensive blend of theory, practice questions, and simulator tools, surpassing other materials in depth and accuracy․

7․1 Unique Benefits of the Official Cert Guide

The CCNA 200-301 Official Cert Guide Library is the only Cisco-approved self-study resource, combining two comprehensive volumes with practice questions, exercises, and the Network Simulator Lite software․ It provides in-depth coverage of all exam topics, ensuring a thorough understanding of networking concepts․ Its expert-level explanations and practical examples make it indispensable for candidates aiming to master the required skills for the CCNA certification․

7․2 How It Differs from Other Study Materials

The CCNA 200-301 Official Cert Guide Library stands out as the only Cisco-approved self-study resource, combining two detailed books with practice questions, exercises, and the Network Simulator Lite software․ Unlike other materials, it offers a complete, exam-focused preparation package with expert-level explanations and real-world examples, ensuring a deeper understanding of networking concepts and practical application․

Cost and Availability of the Cert Guide Library

The CCNA 200-301 Official Cert Guide Library is affordably priced, with options to purchase as a complete set or individual volumes․ It’s available on Amazon, Cisco’s official website, and other major retailers, often with discounts for bulk or digital purchases․

8․1 Pricing and Editions

The CCNA 200-301 Official Cert Guide Library is priced around $90 for the complete set, with individual volumes available at lower costs․ Digital editions are also offered for convenience․ Discounts are often available for bulk purchases or special promotions, making it an accessible option for exam preparation․ The guide is available in both hardcover and e-book formats to suit different preferences․

8․2 Where to Purchase the Guide

The CCNA 200-301 Official Cert Guide Library is available for purchase on the official Cisco Press website, as well as through major online retailers like Amazon and Barnes & Noble․ It can also be found in select technical bookstores․ The guide is available in both physical and digital formats, ensuring accessibility for all learners․ Purchasing from authorized sellers guarantees authenticity and quality․

User Feedback and Reviews

Users praise the CCNA 200-301 Official Cert Guide Library for its detailed explanations and comprehensive coverage․ Many consider it a valuable resource for exam preparation and real-world applications․

9․1 What Users Are Saying

Users highly praise the CCNA 200-301 Official Cert Guide Library for its detailed explanations and comprehensive coverage of exam topics․ Many highlight the practical labs and real-world scenarios as invaluable for understanding complex networking concepts․ The guide is often described as worth the investment, with users appreciating its structured approach to learning․ While some find the content dense, the overall feedback underscores its effectiveness for both exam preparation and practical application․

9․2 Overall Satisfaction and Recommendations

The CCNA 200-301 Official Cert Guide Library receives high satisfaction rates for its comprehensive and well-structured content․ It is highly recommended for both newcomers and experienced professionals seeking to enhance their networking knowledge․ The guide’s practical approach and detailed explanations make it a top choice for those aiming to excel in the CCNA exam and beyond․ Its effectiveness in exam preparation and real-world application solidifies its reputation as a valuable resource․

The CCNA 200-301 Official Cert Guide Library is a powerful tool for exam success, offering comprehensive coverage and practical resources․ Highly recommended for networking professionals, it ensures thorough preparation and real-world application, making it an essential resource for achieving certification and advancing your career in networking․

10․1 Final Thoughts on the CCNA 200-301 Official Cert Guide Library

The CCNA 200-301 Official Cert Guide Library is an indispensable resource for networking professionals․ Combining detailed books and practical tools, it provides a comprehensive path to mastering Cisco networking concepts․ Its structured approach and real-world applications make it a valuable investment for anyone aiming to excel in the CCNA exam and beyond․ Highly recommended for both beginners and experienced learners․

10․2 Encouragement to Use the Guide for Success

Embrace the CCNA 200-301 Official Cert Guide Library as your ultimate companion for networking mastery․ Its comprehensive coverage and practical tools empower you to excel in the CCNA exam and beyond․ Stay motivated, leverage the guide’s insights, and unlock your full potential in the dynamic field of networking․ Success starts here—commit to excellence with this indispensable resource․

viking oven cleaning instructions

Regular cleaning is essential to maintain your Viking oven’s performance and appearance. This guide provides safe and effective cleaning tips to keep your oven in top condition.

Essential Tips Before You Start

Always ensure the oven is cool, wear gloves, and avoid abrasive cleaners. Refer to your manual, remove racks, and prepare a gentle cleaning solution or damp cloth.

2.1 Safety Precautions

Before cleaning your Viking oven, allow it to cool completely to avoid burns. Wear protective gloves and goggles to shield yourself from harsh cleaners or debris. Never use abrasive cleaners, bleach, or steel wool, as they can damage the finish. Ensure the area is well-ventilated when using strong cleaning products. If using the self-cleaning feature, follow the manufacturer’s instructions precisely and keep children away during the process. Always refer to your Viking oven’s manual for model-specific safety guidelines to ensure a safe and effective cleaning experience.

2.2 Recommended Cleaning Products

For effective Viking oven cleaning, use gentle yet powerful products. Easy-Off Fume Free Max Oven Cleaner is highly recommended for the interior, as it tackles tough grease without harsh fumes. For exterior surfaces, especially stainless steel, use a mild dish soap or a specialized stainless steel cleaner to maintain the finish. Avoid abrasive cleaners like bleach or steel wool, as they can damage the surfaces. For a DIY approach, a mixture of baking soda and vinegar can be used to create a natural, non-toxic cleaning solution. Always follow product instructions to ensure safety and effectiveness.

Manual Cleaning Process

Start by removing racks and accessories for soaking. Apply recommended cleaners like Easy-Off to the interior and let it sit. Scrub gently and rinse thoroughly for a sparkling finish.

3.1 Cleaning the Oven Interior

Begin by removing racks and accessories for soaking. Apply Easy-Off Fume Free Max cleaner to the interior surfaces, avoiding heating elements. Let it sit as per instructions.

Use a damp sponge or soft brush to wipe down surfaces, focusing on stubborn stains. Avoid abrasive tools to prevent damage. Rinse thoroughly with clean water.

For tougher grease, mix baking soda and water to form a paste. Apply overnight and wipe clean in the morning. Ensure the oven is cool before starting.

3.2 Cleaning the Exterior

Use warm soapy water and a soft cloth to wipe down the exterior, focusing on areas around knobs and handles. For stainless steel surfaces, apply a specialized cleaner to remove fingerprints and smudges.

  • Dry with a microfiber cloth to prevent watermarks.
  • Avoid harsh chemicals or abrasive tools to protect the finish.
  • Regular cleaning maintains the oven’s polished appearance and durability.

3;3 Cleaning Oven Racks and Accessories

Soak racks and accessories in hot, soapy water for 1-2 hours. For tough stains, add vinegar to the water. Scrub gently with a soft sponge or brush, then rinse thoroughly and dry.

  • Regular soaking helps loosen grease and food residue.
  • Avoid abrasive cleaners to prevent scratching.
  • Thorough drying prevents rust and maintains hygiene.

Using the Self-Cleaning Function

Activate the self-cleaning cycle by following your oven’s manual instructions. Remove racks and accessories, lock the door, and let the oven handle tough grime and food residue.

4.1 Steps to Activate and Use the Self-Cleaning Cycle

Ensure the oven is cool and remove racks, accessories, and food debris.

Refer to your Viking oven’s manual for specific activation steps.

Set the self-cleaning cycle, typically involving a temperature knob or digital control.

Lock the oven door and let the cycle run (usually 2-4 hours).

After completion, allow the oven to cool before wiping down the interior with a damp cloth.

Ventilate the area to avoid fumes and ensure safety.

This process simplifies deep cleaning, leaving your Viking oven spotless and maintained.

Avoiding Common Mistakes

Avoid using abrasive cleaners, harsh chemicals, or aluminum foil, as they can damage surfaces. Never neglect the control panel and avoid using excessive water to prevent damage and ensure longevity.

5.1 Don’ts of Viking Oven Cleaning

When cleaning your Viking oven, there are several things to avoid to prevent damage. Never use abrasive cleaners, steel wool, or harsh scrubbing pads, as they can scratch surfaces. Avoid using aluminum foil inside the oven cavity, as it can melt and stick permanently. Do not use harsh chemicals or strong commercial cleaners, as they can damage finishes and leave harmful residues. Additionally, never neglect the control panel—clean it gently with a damp cloth to avoid damage. Lastly, avoid using excessive water, as it can seep into electrical components. By following these guidelines, you can ensure your Viking oven remains in excellent condition and functions properly for years to come.

Maintenance and Cleaning Schedule

Regular maintenance is key to keeping your Viking oven in prime condition. Clean up spills immediately after use to prevent tough stains. Wipe the interior with a damp cloth weekly and deep clean every 1-2 months, depending on usage. For heavy users, consider cleaning after every 20-30 hours of use. Schedule annual professional maintenance to ensure optimal performance. By following this routine, you’ll maintain your oven’s efficiency, appearance, and longevity, ensuring it remains a reliable cooking companion for years.

DIY Natural Cleaning Solutions

Use a mixture of baking soda, vinegar, and water for an eco-friendly clean. Apply the paste overnight, then wipe away grime effortlessly, leaving your oven fresh and chemical-free.

7.1 Using Baking Soda and Vinegar

Mix 1 cup of baking soda with 1 cup of water to form a paste. Apply it to the oven interior, avoiding heating elements. Let it sit overnight. The next day, dampen a sponge with white vinegar and wipe away the grime effortlessly. This natural solution is chemical-free and eco-friendly, leaving your oven clean and fresh without harsh fumes. For tougher stains, repeat the process or add vinegar directly to the baking soda paste for extra cleaning power. This method is gentle yet effective for maintaining your Viking oven’s condition.

Cleaning Specific Parts

Cleaning specific parts of your Viking oven ensures optimal performance and longevity. Focus on areas like racks, burners, and glass, using appropriate techniques and products for each section.

8.1 Burner Caps and Grates

Cleaning burner caps and grates is crucial for maintaining your Viking oven’s efficiency. Remove them and soak in hot, soapy water for 15-20 minutes. For tougher stains, add a cup of sudsy ammonia. Use a soft scrub brush or non-abrasive pad to gently scrub away grease and food residue. Rinse thoroughly and dry to prevent rust. Regular cleaning ensures proper gas flow and prevents grease buildup, which can lead to fires. Always refer to your Viking manual for specific care instructions.

8.2 Cleaning the Glass

Cleaning the glass on your Viking oven is essential for maintaining visibility and hygiene. For normal soil, apply a few drops of glass ceramic cleaning cream to the cool surface using a damp paper towel. Wipe gently until all residue is removed. For heavier stains, use a specialized glass or stainless steel cleaner, following the product instructions. Avoid abrasive materials that could scratch the surface. Regular cleaning prevents grime buildup and ensures a clear view during cooking. Dry the glass with a microfiber cloth to prevent streaks and maintain a polished appearance.

Troubleshooting Common Cleaning Issues

Common cleaning issues with Viking ovens include stubborn residue and damage from harsh cleaners. For tough stains, avoid abrasive scrubbers and instead use gentle products like baking soda and vinegar or specialized cleaners. If the self-cleaning feature malfunctions, ensure the door latch is functioning and consult the manual. Never use aluminum foil inside the oven, as it can melt and cause damage. For glass surfaces, avoid scratching by using soft cloths and gentle glass cleaners. Regular maintenance and adhering to manufacturer guidelines can prevent most cleaning-related problems and ensure optimal performance.

2017 ford f 150 owners manual

The 2017 Ford F-150 Owners Manual is a comprehensive 593-page guide in English, detailing essential information on engine options, safety features, and maintenance schedules to ensure optimal vehicle operation․

1․1 Importance of the Owners Manual

The 2017 Ford F-150 Owners Manual is essential for understanding and maintaining your vehicle․ It provides detailed information on safety features, maintenance schedules, and troubleshooting, ensuring optimal performance and longevity․ The manual also covers warranty details, proper usage of features, and guidelines for modifications, making it an indispensable resource for any F-150 owner․ Regularly consulting it can enhance your driving experience and prevent potential issues․

1․2 What’s Included in the Manual

The 2017 Ford F-150 Owners Manual includes detailed information on engine specifications, safety features, maintenance schedules, and troubleshooting guides․ It covers trim levels, transmission options, and tire care, as well as instructions for customizing and upgrading your vehicle․ The manual also provides quick reference guides, warranty details, and diagnostic tips to ensure optimal performance and longevity of your F-150․

1․3 How to Use the Manual Effectively

Start by reviewing the table of contents and index to navigate the manual efficiently․ Use quick reference guides for essential information․ Always refer to the manual before making modifications or troubleshooting․ Utilize the clickable online version or download the PDF for easy access․ Regularly check for updates to ensure you have the latest information for maintaining and optimizing your 2017 Ford F-150․

Key Features and Specifications of the 2017 Ford F-150

The 2017 Ford F-150 offers a range of engine options, including a 3․5L V6, and features part-time 4-wheel drive, making it a powerful full-size pickup truck․

2․1 Engine Options and Performance

The 2017 Ford F-150 offers a range of powerful engines, including a 3․5L V6 with 282 horsepower and 253 lb-ft of torque, and a high-performance 3․5L EcoBoost V6 producing 450 horsepower․ These engines deliver exceptional towing capacity, efficiency, and responsiveness, making the F-150 a versatile choice for both work and recreation․ The available part-time 4-wheel drive system enhances traction in challenging conditions․

2․2 Transmission and Drivetrain

The 2017 Ford F-150 features a smooth-shifting 10-speed automatic transmission, enhancing fuel efficiency and performance․ It is paired with either rear-wheel drive (RWD) or part-time four-wheel drive (4WD), offering versatility for various driving conditions․ The 4WD system includes a two-speed electronic shift-on-the-fly transfer case, providing optimal traction in challenging terrains while maintaining seamless operation in everyday driving scenarios․

2․3 Trim Levels and Configurations

The 2017 Ford F-150 is available in multiple trim levels, including XL, XLT, Lariat, King Ranch, and Platinum․ Each trim offers unique features, from basic functionality in the XL to luxury amenities in the Platinum․ Configurations include Regular Cab, SuperCab, and SuperCrew options, with varying bed lengths to suit different needs, ensuring a model for every lifestyle and work requirement․

Understanding the Owners Manual Structure

The 2017 Ford F-150 Owners Manual is structured to be user-friendly, with a detailed table of contents, visual aids, and important symbols to guide owners through essential information․

3․1 Table of Contents and Index

The 2017 Ford F-150 Owners Manual features a detailed table of contents and index, allowing users to quickly locate specific information․ The table of contents is divided into sections such as engine options, maintenance schedules, and safety features․ The index provides an alphabetical listing of topics, making it easy to find guidance on anything from tire pressure to advanced driving technologies․ This structure ensures efficient navigation and quick access to essential details․

3․2 Visual Aids and Diagrams

The 2017 Ford F-150 Owners Manual incorporates detailed diagrams and illustrations to help owners understand complex features and procedures․ These visual aids cover topics like engine components, safety systems, and maintenance tasks․ Clear diagrams guide users through processes such as tire changes and fluid checks, while illustrations of controls and instruments help drivers familiarize themselves with the vehicle’s operation․ This enhances clarity and simplifies troubleshooting․

3․3 Important Symbols and Warnings

The 2017 Ford F-150 Owners Manual highlights essential symbols and warnings to ensure safe and proper vehicle operation․ These symbols alert drivers to critical systems, such as airbag status, seatbelt reminders, and engine issues․ Warnings are provided for safety precautions, maintenance requirements, and potential hazards․ Ignoring these symbols can lead to vehicle damage or safety risks, emphasizing the importance of understanding and heeding them․

Safety Features and Guidelines

The 2017 Ford F-150 Owners Manual provides detailed information on safety features, including airbag systems, seatbelt usage, and child seat installation․ It emphasizes safe driving practices and adherence to vehicle maintenance guidelines to ensure optimal safety and performance․

4․1 Airbag System and Safety Belts

The 2017 Ford F-150 Owners Manual explains the advanced airbag system, including dual-stage front airbags and side airbags, designed to provide enhanced protection in collisions․ Proper use of safety belts is emphasized, as they work in conjunction with airbags to minimize injury risk․ The manual also highlights the importance of ensuring all passengers, including children, are correctly secured at all times to avoid potential harm or legal violations․

4․2 Child Safety and Seat Installation

The 2017 Ford F-150 Owners Manual provides detailed guidelines for child safety, emphasizing proper installation of child seats using the LATCH system․ It recommends rear-facing seats for infants and forward-facing seats for toddlers, with clear weight and height limits․ The manual also highlights the importance of securing child seats with the vehicle’s seat belts and avoiding frontal airbag deployment zones for enhanced safety․

4․3 Driving Safety Tips and Precautions

The 2017 Ford F-150 Owners Manual emphasizes safe driving practices, such as adhering to speed limits, avoiding distractions, and ensuring proper load management․ It highlights the importance of adjusting driving habits for weather conditions and cargo weight․ The manual also encourages the use of safety features like seat belts and electronic stability control to minimize risks on the road․

Maintenance and Servicing Schedule

The 2017 Ford F-150 Owners Manual outlines recommended maintenance intervals, fluid checks, and tire pressure guidelines to ensure optimal vehicle performance and longevity․

5․1 Recommended Maintenance Intervals

The 2017 Ford F-150 Owners Manual provides detailed maintenance intervals to ensure optimal vehicle performance․ Regular oil changes are recommended every 5,000 to 7,500 miles, while tire rotations should occur every 6,000 miles․ Brake inspections and fluid checks are advised at 12,000-mile intervals․ Spark plug replacements are recommended every 100,000 miles, and the timing belt should be inspected every 50,000 miles․ Adhering to these schedules helps maintain your truck’s efficiency and prevents potential mechanical issues, ensuring a smooth and prolonged lifespan․

5․2 Fluid Checks and Replacements

The 2017 Ford F-150 Owners Manual emphasizes regular fluid checks to ensure proper vehicle function; Engine oil should be checked during every service visit, with replacements every 5,000 to 7,500 miles․ Coolant, transmission, and brake fluids should be inspected every 12,000 miles, while power steering fluid levels should be monitored at each oil change․ Always use Ford-approved products to maintain performance and prevent damage․ The manual provides a detailed schedule for all fluid-related maintenance․

5․3 Tire Pressure and Rotation Guidelines

The 2017 Ford F-150 Owners Manual recommends checking tire pressure monthly and before long trips, using the specified levels found on the tire information label․ Tires should be rotated every 5,000 to 8,000 miles to ensure even tread wear and longevity․ Proper inflation improves safety, fuel efficiency, and handling․ Always refer to Ford’s guidelines for accurate pressure levels and rotation patterns to maintain optimal performance and warranty compliance․

Customization and Upgrading Your F-150

6․1 Authorized Modifications and Accessories

Use Ford-approved accessories and modifications to ensure compatibility and maintain performance․ Only authorized upgrades comply with factory specifications, preserving your F-150’s warranty and safety standards․

Using Ford-approved accessories ensures compatibility, optimal performance, and safety for your 2017 F-150․ These modifications are designed to meet factory specifications, preserving your vehicle’s warranty and reliability․ Unauthorized upgrades may void your warranty or compromise safety․ Always consult Ford’s guidelines or a certified dealership for advice on legitimate aftermarket parts and installations․

6․2 Installing Aftermarket Parts Safely

Installing aftermarket parts requires careful consideration to ensure compatibility and safety․ Always use Ford-approved accessories or parts that meet factory specifications․ Follow the manufacturer’s installation instructions and consult a certified technician if unsure․ Improper installations can lead to system malfunctions or safety risks․ Verify compatibility with your F-150’s trim and configuration before proceeding․ Never compromise safety for aesthetics or performance․

6․3 Maintaining Warranty During Modifications

Maintaining your warranty while modifying your F-150 requires careful adherence to Ford’s guidelines․ Use only Ford-approved accessories or parts that meet factory specifications․ Keep records of all modifications, including installation receipts and part numbers․ Avoid alterations that compromise emissions or safety systems․ Consult a Ford dealer or certified technician to ensure modifications comply with warranty terms and conditions․

Troubleshooting Common Issues

The manual provides diagnostic guidance for common issues, such as error codes and system malfunctions․ Refer to the troubleshooting section for step-by-step solutions and recommendations․

7․1 Diagnostic Lights and Error Codes

The 2017 Ford F-150 Owners Manual details how to interpret dashboard warning lights and error codes․ These indicators help identify issues like engine problems or system malfunctions․ The manual provides a list of common codes, their meanings, and steps to address them․ Referencing these codes ensures accurate diagnostics and timely repairs, preventing further damage to the vehicle․

7․2 Common Problems and Solutions

The 2017 Ford F-150 Owners Manual addresses common issues like error codes, transmission glitches, and sensor malfunctions․ It provides step-by-step solutions, such as resetting systems, updating software, or consulting a technician․ The manual also offers troubleshooting tips for recurring problems, ensuring drivers can resolve issues efficiently and maintain their vehicle’s performance and reliability․

7․3 Resetting and Reinitializing Systems

The 2017 Ford F-150 Owners Manual provides detailed instructions for resetting and reinitializing various systems․ Procedures include resetting the infotainment system, oil change indicator, and safety features like lane-keeping assist․ Some systems require a technician, while others can be reset using the steering wheel controls or instrument cluster․ Always follow the manual’s guidelines to ensure proper system function and avoid potential issues․

Warranty and Customer Support

The 2017 Ford F-150 Owners Manual outlines warranty details, customer service contacts, and service appointment scheduling․ It provides guidance on understanding your vehicle’s warranty and accessing support resources․

8․1 Understanding Your Vehicle Warranty

The 2017 Ford F-150 Owners Manual details the vehicle warranty, including coverage periods, terms, and conditions․ It specifies what is covered under the warranty and for how long, ensuring owners understand their entitlements․ The manual also provides document numbers like HL3J19A321AB, outlining Ford’s commitment to quality and customer satisfaction, with provisions for potential updates or changes to warranty terms․

8․2 Contacting Ford Customer Service

For U․S․ customers, Ford Customer Service can be reached at 1-800-392-3673, with options available to address specific inquiries․ Additionally, owners can visit owner․ford․com for online support, resources, and detailed information․ The manual also provides guidance on contacting local dealerships or support centers for further assistance, ensuring comprehensive support for F-150 owners․

8․3 Scheduling Service Appointments

To schedule service appointments for your 2017 Ford F-150, visit owner․ford․com or contact your local Ford dealership directly․ The manual recommends scheduling regular maintenance to ensure optimal performance and warranty compliance․ Appointments can also be made by calling Ford Customer Service at 1-800-392-3673, ensuring convenient and timely service for your vehicle․

Additional Resources for F-150 Owners

Explore online forums, Ford’s official website, and mobile apps for additional support․ Visit owner․ford․com or contact local dealerships for personalized assistance and genuine parts;

9․1 Online Communities and Forums

Join online communities and forums dedicated to Ford F-150 owners for shared knowledge, troubleshooting tips, and real-world experiences․ Websites like owner․ford․com and enthusiast forums offer valuable resources, discussions, and advice from experienced owners․ These platforms provide insights into modifications, maintenance, and resolving common issues, helping you maximize your vehicle’s potential and stay informed about the latest updates and accessories․

9․2 Ford F-150 Mobile Apps

Ford offers mobile apps designed to enhance your F-150 ownership experience․ These apps provide access to maintenance schedules, troubleshooting guides, and diagnostic tools․ They also offer real-time vehicle monitoring, service appointment scheduling, and personalized tips for optimizing performance․ Download the official Ford apps to stay connected and informed about your truck’s condition, ensuring a seamless and efficient ownership journey․

9․3 Local Dealerships and Support Centers

Local Ford dealerships and support centers are essential resources for F-150 owners․ They offer scheduled maintenance, repairs, and genuine parts․ Trained technicians provide expert service, ensuring your truck operates at peak performance․ Visit your nearest dealership for personalized assistance, or use Ford’s official website to locate a center near you․ These facilities are equipped to address specific needs and ensure compliance with warranty requirements for your 2017 F-150․

manual transmission mazda

Mazda’s manual transmissions are renowned for their smooth shifting and driver engagement. Designed to enhance the driving experience‚ these transmissions offer precise control and fuel efficiency. They are a testament to Mazda’s commitment to performance and innovation.

Overview of Mazda’s Manual Transmission Models

Mazda offers a range of manual transmission models designed to deliver a engaging driving experience. The Mazda3‚ for instance‚ features a 6-speed manual gearbox that provides smooth shifts and responsive acceleration. Similarly‚ the Mazda MX-5 Miata is equipped with a 6-speed manual transmission‚ optimized for its lightweight and sporty nature‚ ensuring precise control and exhilarating performance.

In addition to these‚ the Mazda CX-30 crossover also offers a manual transmission option‚ blending practicality with driving enjoyment. Mazda’s manual transmissions are known for their short throw and crisp engagement‚ making them a favorite among driving enthusiasts. The brand continues to refine its manual offerings‚ integrating advanced technologies to enhance both performance and fuel efficiency without compromising the connection between driver and vehicle.

Each model’s manual transmission is tailored to its specific characteristics‚ whether it’s the sporty Mazda3‚ the iconic MX-5 Miata‚ or the versatile CX-30. This approach ensures that every Mazda with a manual transmission delivers a unique and satisfying driving experience‚ appealing to a wide range of drivers who appreciate the art of manual shifting.

History and Evolution of Manual Transmissions in Mazda Vehicles

Mazda’s manual transmissions have a rich history that dates back to the early days of the company; The first manual transmissions were introduced in the 1960s‚ with the iconic Mazda Carol and Mazda R360 Kei cars. These early units were simple‚ lightweight‚ and designed for fuel efficiency‚ reflecting Mazda’s focus on practicality and performance.

Throughout the 1980s and 1990s‚ Mazda refined its manual transmission technology‚ introducing the 5-speed and later 6-speed gearboxes. The Mazda MX-5 Miata‚ launched in 1989‚ became a symbol of the brand’s commitment to driving enthusiasts‚ featuring a precise and engaging manual transmission that remains a hallmark of the model to this day.

In recent years‚ Mazda has continued to innovate‚ incorporating advanced materials and technologies to improve shift quality and efficiency. Modern Mazda manual transmissions‚ such as those in the Mazda3 and CX-30‚ are celebrated for their smooth operation and driver engagement‚ embodying the brand’s philosophy of “Jinba Ittai” (horse and rider as one).

From humble beginnings to cutting-edge designs‚ Mazda’s manual transmissions have evolved to deliver exceptional performance‚ reliability‚ and driving satisfaction‚ solidifying their reputation among car enthusiasts worldwide.

Pros and Cons of Mazda Manual Transmission

Mazda’s manual transmissions offer engaging driving experiences and fuel efficiency but require more driver effort in traffic. They balance performance and practicality‚ appealing to enthusiasts yet presenting challenges in urban commuting conditions for some users.

Advantages of Driving a Mazda with Manual Transmission

Driving a Mazda with a manual transmission offers several advantages‚ including improved fuel efficiency and lower costs compared to automatic models. Manuals typically require less maintenance and are more durable in the long run. They also provide better control over acceleration and deceleration‚ making them ideal for both city driving and spirited performance on winding roads. Enthusiasts appreciate the direct connection to the vehicle‚ enhancing the driving experience. Additionally‚ manual transmissions often come with lower purchase prices‚ making them a cost-effective choice. The absence of advanced automatic features like engine start/stop technology can also be a plus for those who prefer simplicity. Overall‚ Mazda’s manual transmissions strike a balance between practicality and performance‚ appealing to drivers who value both efficiency and driving engagement.

Disadvantages and Common Complaints About Mazda Manual Transmissions

While Mazda’s manual transmissions are praised for their performance‚ some owners have reported issues. One common complaint is the engine start/stop feature‚ which can cause abrupt restarts when paired with manual transmissions‚ leading to discomfort in stop-and-go traffic. Some drivers find the clutch engagement point too high‚ making it less smooth in city driving. Additionally‚ there have been reports of premature clutch wear in certain models‚ potentially leading to costly repairs. Another issue is the “notchy” feel of the gear shifts‚ which can be frustrating for inexperienced drivers. In colder climates‚ some users have noted difficulty shifting into first gear due to stiffer mechanics. Despite Mazda’s reputation for reliability‚ these manual transmissions can require more maintenance attention than expected. However‚ many of these issues can be mitigated with proper care and driving techniques‚ ensuring the longevity and performance of the transmission.

Maintenance and Troubleshooting

Regular maintenance is essential for Mazda manual transmissions. Check transmission fluid levels‚ replace filters‚ and inspect for leaks. Addressing issues like rough shifting or noises promptly prevents costly repairs. Synthetic fluid can enhance performance and longevity.

Common Issues with Mazda Manual Transmissions

Some Mazda manual transmissions may experience issues like rough shifting or hesitation between gears‚ particularly during acceleration. Others have reported occasional grinding when engaging reverse gear. These problems often stem from worn synchronizers or clutch components. Additionally‚ improper clutch pedal adjustment can lead to difficulty in shifting gears smoothly. Over time‚ the transmission fluid may degrade‚ causing slipping or delayed engagement of gears. Addressing these issues early is crucial to prevent further damage. Regular fluid changes and inspections can help maintain optimal performance. If problems persist‚ consulting a professional mechanic is recommended to diagnose and repair any underlying faults.

How to Maintain and Prolong the Life of a Mazda Manual Transmission

Regular maintenance is key to extending the life of a Mazda manual transmission. Ensure the transmission fluid is changed every 30‚000 to 60‚000 miles‚ as specified in the owner’s manual‚ to prevent wear and tear. Flushing old fluid and replacing it with the recommended synthetic fluid can improve gear engagement and reduce friction. Inspect the clutch pedal for proper adjustment and function‚ as misalignment can lead to uneven wear on the clutch disc. Avoid riding the clutch‚ as this can overheat and prematurely wear the clutch and pressure plate. Additionally‚ shifting smoothly and avoiding abrupt gear changes can reduce stress on the transmission components. Monitoring for any unusual noises or vibrations and addressing them promptly can prevent minor issues from becoming major repairs. By following these steps‚ drivers can enjoy a smoother and more durable manual transmission performance.

Troubleshooting Tips for Mazda Manual Transmission Problems

Troubleshooting Mazda manual transmission issues involves identifying symptoms and addressing them promptly. Common problems include difficulty shifting gears‚ which may indicate low transmission fluid levels or worn synchronizers. Check the fluid level and top it off if necessary‚ ensuring the correct type is used. If gears grind or hesitate‚ inspect for worn clutch components or misaligned gear teeth. A dragging clutch might signal a faulty release bearing or cylinder.Listen for unusual noises‚ such as whining or clunking‚ which could point to bearing failure or loose mounts. If the car won’t move in gear‚ check for a slipping clutch or broken gear teeth. For persistent issues‚ use a scan tool to retrieve error codes from the transmission control module. Consulting a repair manual or a certified technician is advisable for complex diagnostics. Regular inspections and timely repairs can prevent minor issues from escalating into costly overhauls. By systematically addressing each symptom‚ drivers can effectively troubleshoot and maintain their Mazda manual transmission.

heat and glo remote control manual

Welcome to the Heat & Glo Remote Control Manual․ This guide provides essential information for operating and maintaining your remote control, ensuring a seamless fireplace experience with ease and convenience․

1․1 Overview of Heat & Glo Remote Control Features

The Heat & Glo remote control offers a variety of intuitive features designed to enhance your fireplace experience․ It includes a user-friendly interface with buttons for power, temperature adjustment, and mode selection․ The remote also features a timer, scheduling options, and smart mode for advanced control․ Additionally, it includes an LCD display for clear operation feedback and indicator lights for status updates․ These features ensure seamless control over your fireplace, providing comfort and convenience with every use․

1․2 Importance of the Remote Control for Fireplace Operation

The Heat & Glo remote control is essential for modern fireplace operation, offering unparalleled convenience and safety․ It eliminates the need for manual adjustments, reducing the risk of accidents and ensuring precise control․ With features like temperature regulation and timers, the remote enhances efficiency and comfort․ It also provides real-time feedback through its LCD display, making it easier to monitor and adjust settings․ This seamless control ensures a safer, more enjoyable fireplace experience, tailored to your preferences and needs․

Understanding the Remote Control Components

The Heat & Glo remote control features intuitive buttons, an LCD display, and indicator lights․ These components work together to provide precise control and real-time feedback for seamless operation․

2․1 Buttons and Their Functions

The remote control features a variety of buttons designed for specific functions․ The power button turns the fireplace on and off, while the mode button cycles through different operating settings․ The up and down arrows adjust flame height and heat output, ensuring a personalized experience․ Additional buttons may include timers, smart mode activation, and lighting controls․ Each button is clearly labeled, making it easy to navigate and customize your fireplace settings efficiently․

2․2 LCD Display and Indicator Lights

The remote control features an LCD display that provides real-time updates on temperature, mode, and timer settings․ Indicator lights signal the system’s status, such as power on/off, pairing confirmation, or error notifications․ These visual cues ensure intuitive operation, allowing users to monitor and adjust their fireplace settings effortlessly․ The display and lights work in tandem to offer a user-friendly experience, keeping you informed and in control of your fireplace’s performance at all times․

Installation and Pairing

Installation involves inserting batteries and syncing the remote with your fireplace․ Pairing ensures seamless communication between the remote and fireplace, enabling smooth operation․

3․1 Step-by-Step Pairing Process

  1. Insert the batteries into the remote control, ensuring they are correctly oriented․
  2. Locate the pairing button on the remote and press it until the LED light blinks․
  3. Find the pairing button on your fireplace control panel and press it simultaneously․
  4. Release both buttons when the LED light stops blinking, indicating successful pairing․
  5. Test the remote by adjusting settings to ensure proper connectivity․

This process ensures your remote is synchronized with the fireplace for smooth operation․

3․2 Troubleshooting Pairing Issues

If pairing fails, ensure the remote batteries are fresh and properly installed․ Check for interference from nearby devices․ Verify the fireplace is in pairing mode and the LED indicator is visible․ If issues persist, test the remote buttons for functionality․ Reset the system by turning the fireplace off and on again․ If pairing still fails, consult the manual or contact Heat & Glo support for assistance․ These steps will help resolve common pairing difficulties and restore remote functionality․

Operating Modes

Heat & Glo fireplaces offer Manual Mode for direct control and Smart Mode for advanced features like scheduling and temperature adjustments, enhancing your fireplace experience with flexibility․

4․1 Manual Mode

Manual Mode allows direct control over your fireplace, enabling immediate adjustments to flame height, heat output, and lighting․ This mode is ideal for quick, hands-on operation, providing real-time responses to button inputs․ Using the remote, you can effortlessly toggle between settings, ensuring a personalized experience․ The simplicity of Manual Mode makes it perfect for users who prefer straightforward, instantaneous control without relying on advanced features or scheduling․ It ensures your fireplace operates precisely as you desire, moment to moment․

4․2 Smart Mode

Smart Mode offers advanced control by automating fireplace operations based on your preferences․ This mode allows scheduling, timers, and adaptive learning to remember your habits․ It integrates seamlessly with smart home systems, enabling voice commands or app control․ Smart Mode optimizes energy use by adjusting settings automatically, ensuring efficiency and comfort․ With features like temperature control and flame customization, Smart Mode enhances convenience while maintaining a cozy ambiance, making it ideal for modern, tech-savvy users seeking a hands-free experience․

Advanced Features

Discover advanced features like timer scheduling, temperature control, and smart home integration․ These innovations enhance convenience, allowing precise control over your fireplace experience with ease and efficiency․

5․1 Timer and Scheduling

The timer and scheduling feature allows you to pre-set your fireplace operation, ensuring it turns on and off automatically․ This feature is perfect for maintaining a consistent room temperature and enhancing energy efficiency․ Using the remote, you can schedule operations in advance, whether it’s for a cozy evening or a warm welcome home․ The intuitive interface makes it easy to program, while the LCD display provides clear feedback on your settings․ This functionality combines convenience with smart energy management, optimizing your fireplace experience․

5․2 Temperature Control

The Heat & Glo remote control provides precise temperature control, allowing you to adjust the heat to your desired comfort level․ Using the remote, you can easily increase or decrease the temperature, and the LCD display will show the current setting․ This feature ensures consistent warmth and energy efficiency․ Whether you prefer a cozy ambiance or a specific temperature, the remote’s intuitive design makes it simple to customize your experience․ Additionally, it maintains the set temperature, optimizing comfort and energy use effectively․

Maintenance and Care

Regular maintenance ensures optimal performance of your Heat & Glo remote control․ Clean the remote gently with a soft cloth and avoid exposure to moisture or extreme temperatures․

6․1 Cleaning the Remote Control

Cleaning your Heat & Glo remote control is essential for maintaining its functionality and appearance․ Use a soft, dry cloth to gently wipe away dirt or fingerprints․ Avoid using harsh chemicals, abrasive cleaners, or excessive moisture, as they may damage the buttons or LCD screen․ For stubborn stains, lightly dampen the cloth with water, but ensure it is not soaking wet․ Regular cleaning prevents dust buildup and ensures smooth operation of all buttons and features․ Store the remote in a dry place to prolong its lifespan․

6․2 Battery Replacement

To ensure your Heat & Glo remote control functions properly, replace the batteries when they are low․ Use only the recommended battery type to avoid damage․ Open the battery compartment on the back of the remote, carefully removing the old batteries․ Insert the new ones, ensuring the polarity matches the diagram․ Close the compartment securely․ Test the remote to confirm it works․ Always use genuine Heat & Glo parts for reliability․ Dispose of old batteries properly and store spares in a dry place to maintain performance and longevity․

Safety Precautions

Always keep the remote away from moisture and extreme temperatures․ Avoid exposing it to direct sunlight or water․ Store out of children’s reach and ensure the remote is undamaged before use․

7․1 Usage Guidelines

Always operate your Heat & Glo remote control in a safe and controlled environment․ Keep it away from water and extreme temperatures to prevent damage․ Ensure the remote is out of reach of children and pets to avoid accidental activation․ Regularly inspect the remote for any signs of wear or damage, such as cracked buttons or a faulty LCD display․ Replace batteries only with the recommended type to maintain optimal performance and safety․ Avoid exposing the remote to direct sunlight or moisture, as this can interfere with its electronic components․ By following these guidelines, you can ensure reliable and secure operation of your Heat & Glo fireplace remote control․

7․2 Emergency Shutdown

In case of an emergency, ensure your safety by following proper shutdown procedures․ Press and hold the power button on the remote for 3-5 seconds to immediately turn off your Heat & Glo fireplace․ If the remote is unresponsive, use the manual shutdown valve located near the fireplace․ Always ensure the fireplace is completely cool before servicing․ Regularly check the remote’s batteries and functionality to prevent unexpected issues․ Follow the manufacturer’s guidelines for safe operation and emergency protocols to maintain a secure environment while using your Heat & Glo fireplace system․

home health care agency policy and procedure manual

This manual provides a comprehensive guide for home health care agencies‚ detailing essential policies‚ procedures‚ and compliance standards to ensure high-quality patient care and operational efficiency․

Overview of the Manual’s Purpose and Scope

This manual serves as a foundational resource for home health care agencies‚ outlining essential policies‚ procedures‚ and operational guidelines․ It ensures compliance with regulatory standards‚ promotes consistency in care delivery‚ and provides a framework for agency operations․ The scope includes admission processes‚ patient rights‚ staff training‚ financial management‚ and emergency preparedness‚ offering a customizable template to meet specific agency needs and enhance overall service quality․

Importance of Having a Comprehensive Policy and Procedure Manual

A comprehensive policy and procedure manual is essential for eliminating guesswork and ensuring all staff understand expectations․ It ensures compliance with federal and state regulations‚ promoting consistency in patient care․ Clear guidelines enhance operational efficiency‚ reduce liability risks‚ and support professional development․ This foundational document safeguards patient rights‚ maintains quality standards‚ and ensures accountability across all agency operations․

Regulatory Compliance and Accreditation Standards

Adhering to federal and state regulations‚ such as HIPAA and CMS guidelines‚ ensures legal compliance and maintains patient trust․ Accreditation standards from recognized bodies verify quality care delivery․

Federal and State Regulations Governing Home Health Care Agencies

Home health care agencies must comply with federal regulations‚ including CMS guidelines and HIPAA‚ ensuring patient privacy and care standards․ State-specific laws also apply‚ varying by jurisdiction․ These regulations outline requirements for licensure‚ patient rights‚ and operational standards․ Non-compliance can result in penalties or loss of accreditation‚ emphasizing the need for strict adherence to maintain trust and legal standing in healthcare delivery․

Accreditation Requirements and Standards for Home Health Care

Accreditation ensures home health care agencies meet rigorous industry standards‚ enhancing quality and safety․ Organizations like The Joint Commission and CHAP set criteria for care delivery‚ patient rights‚ and operational efficiency․ Agencies must undergo audits and evaluations to achieve accreditation‚ demonstrating compliance with best practices․ Accreditation boosts credibility and patient trust‚ often required for certification and reimbursement‚ ensuring agencies deliver exceptional care aligned with regulatory expectations and patient needs․

Patient Care Policies and Procedures

This section outlines essential policies and procedures for delivering high-quality patient care‚ ensuring safety‚ and meeting regulatory requirements․ It covers patient assessments‚ care planning‚ and monitoring to maintain consistent‚ effective care․

Admission and Assessment Processes for Patients

This section details the step-by-step process for patient admission‚ including initial assessments‚ eligibility criteria‚ and the development of personalized care plans․ It ensures a thorough evaluation of patient needs‚ accurate documentation‚ and compliance with regulatory standards․ The process emphasizes patient-centered care‚ fostering trust and transparency from the start of services․ Proper documentation and communication are highlighted to ensure smooth transitions and effective care delivery․

Delivery of Care‚ Including Patient Rights and Informed Consent

This section outlines the standards for delivering high-quality‚ patient-centered care‚ ensuring adherence to patient rights and informed consent․ It details the process for obtaining consent‚ explaining treatment plans‚ risks‚ and benefits․ The manual emphasizes respecting patient autonomy‚ dignity‚ and preferences while ensuring transparency in care delivery․ It also addresses the importance of involving patients in decision-making to align care with their goals and values․

Staffing and Training Requirements

This section establishes guidelines for recruiting‚ hiring‚ and training staff to ensure qualified personnel deliver high-quality care․ It emphasizes ongoing professional development and compliance with regulatory standards․

Recruitment‚ Hiring‚ and Credentialing of Staff Members

This section outlines the process for recruiting and hiring qualified staff‚ including background checks‚ credential verification‚ and compliance with state and federal regulations․ It ensures that all employees meet necessary qualifications and certifications to deliver safe and effective care․ The manual also details orientation procedures and ongoing training to maintain competency and adherence to agency standards․

Ongoing Training and Professional Development for Employees

This section details the requirements for continuous staff education‚ ensuring employees stay updated on industry standards‚ patient care best practices‚ and regulatory compliance․ It outlines training programs‚ including annual competency assessments‚ workshops‚ and online courses․ The manual emphasizes the importance of professional growth to enhance service quality and maintain licensure․ Employees are encouraged to pursue advanced certifications‚ with the agency supporting career development through structured programs and resources․

Privacy and Confidentiality Practices

  • Ensures patient data protection through secure systems and encryption․
  • Staff undergo training on handling sensitive information and confidentiality agreements․
  • Breaches of privacy result in disciplinary actions and legal consequences․
  • Compliance with HIPAA and state privacy laws is mandatory․
  • Patient consent is required for sharing medical records․

Compliance with HIPAA and Patient Data Protection

HIPAA mandates strict guidelines for safeguarding patient health information․ Agencies must implement encryption‚ secure storage‚ and access controls․ Staff receive regular training on HIPAA compliance to prevent data breaches․ Patient records are only shared with authorized individuals‚ ensuring confidentiality․ Regular audits are conducted to monitor adherence to regulations․ Breaches result in legal penalties and mandatory patient notifications‚ emphasizing the importance of rigorous data protection measures to maintain patient trust and privacy․

Confidentiality Agreements and Procedures for Handling Patient Information

All staff and contractors must sign confidentiality agreements to protect patient information․ Access to records is restricted to authorized personnel only․ Agencies implement secure storage and transmission protocols for patient data․ Breaches of confidentiality result in disciplinary action and legal consequences․ Training programs emphasize the importance of maintaining patient privacy and adhering to confidentiality protocols․ Regular audits ensure compliance with policies and procedures to safeguard sensitive information․

Financial Management and Billing Practices

This section outlines budgeting‚ financial planning‚ and billing processes to ensure secure and transparent transactions‚ maintaining compliance with regulations and promoting fiscal accountability in home health care operations․

Budgeting and Financial Planning for Home Health Care Agencies

Effective budgeting ensures fiscal stability and sustainable growth․ Agencies allocate resources for staff‚ patient care‚ and operations‚ while financial planning addresses revenue projections‚ cost management‚ and contingency strategies to maintain quality services․

Billing Processes‚ Insurance Reimbursement‚ and Payment Policies

Clear guidelines for billing processes ensure accurate and timely submissions․ Insurance reimbursement protocols are tailored to comply with payer requirements‚ while payment policies outline client responsibilities and acceptable methods․ Agencies must maintain detailed records and ensure transparency in financial transactions to avoid disputes․ Regular audits and follow-ups are essential to optimize reimbursement rates and maintain financial stability while adhering to regulatory standards and patient privacy laws․

Emergency Preparedness and Response

An effective emergency preparedness and response plan ensures patient safety and operational continuity during crises․ Agencies must develop strategies for medical and non-medical emergencies‚ ensuring staff readiness;

Developing an Emergency Preparedness Plan

Creating a robust emergency preparedness plan involves assessing risks‚ defining protocols‚ and ensuring staff readiness․ The plan should include communication strategies‚ patient evacuation procedures‚ and staff roles during crises․ Regular training and drills are essential to ensure effectiveness․ Agencies must also maintain updated emergency contact lists and resource inventories․ The plan should be tailored to address both medical and non-medical emergencies‚ ensuring continuous patient care and operational stability during critical events․

Protocols for Responding to Medical and Non-Medical Emergencies

Agencies must establish clear protocols for responding to emergencies‚ including rapid assessment‚ first aid‚ and escalation procedures․ For medical emergencies‚ staff should prioritize patient stabilization and timely referral to healthcare facilities․ Non-medical emergencies‚ such as natural disasters or power outages‚ require evacuation plans or shelter-in-place protocols․ Communication with emergency services and documentation of actions are critical․ Regular drills ensure staff preparedness and adherence to these protocols․

Quality Improvement and Monitoring

This section outlines strategies for continuously monitoring and improving care services‚ ensuring high standards of patient outcomes‚ and maintaining compliance with regulatory requirements through data-driven evaluations and adjustments․

Implementing Quality Assurance Programs

Quality assurance programs are essential for ensuring consistent‚ high-quality care․ They involve regular audits‚ performance reviews‚ and staff training to meet regulatory standards and improve patient outcomes․ These programs help identify gaps in service delivery‚ allowing agencies to make necessary adjustments․ By implementing robust QA measures‚ home health care agencies can enhance patient satisfaction‚ maintain compliance‚ and uphold their reputation for excellence in care provision․

Monitoring and Evaluating the Effectiveness of Care Services

Monitoring and evaluation are critical for assessing the effectiveness of care services․ This involves tracking patient outcomes‚ conducting regular reviews of care plans‚ and gathering feedback from patients and families․ Data collected is analyzed to identify trends‚ strengths‚ and areas for improvement․ Continuous monitoring ensures that care services remain aligned with patient needs and agency goals‚ fostering a culture of accountability and continuous improvement in home health care delivery․

Resources for Developing a Policy and Procedure Manual

Access customizable templates‚ tools‚ and guides to create a tailored manual․ Utilize industry-specific software and consult professional resources to ensure compliance and operational excellence in home health care․

Templates and Tools for Creating a Customized Manual

Customizable templates and tools are available to streamline the creation of a policy and procedure manual․ These resources include editable forms‚ budget templates‚ and compliance guidelines tailored to home health care agencies․ Digital files such as PDFs and other formats provide flexibility‚ allowing agencies to self-edit and adapt templates to meet specific needs․ Utilize these tools to ensure your manual is comprehensive and compliant with industry standards․

Where to Find Additional Information and Support

Additional resources and support for developing a home health care agency policy and procedure manual can be found through official websites‚ professional associations‚ and regulatory bodies․ Utilize templates and tools from reputable sources like the Centers for Medicare & Medicaid Services (CMS) and the National Association for Home Care & Hospice (NAHC)․ These organizations provide guidance‚ updated standards‚ and practical examples to ensure compliance and best practices in home health care operations․

conditions of a guide chgapter 19

Chapter 19 introduces core concepts essential for understanding safety protocols, effective educational strategies, and legal considerations, providing a foundation for implementing comprehensive guidance.

1.1. Overview of the Chapter’s Objectives

This chapter aims to provide a clear understanding of safety protocols, effective educational strategies, and legal considerations. It outlines the importance of identifying unsafe conditions, implementing measures, and preparing learners for real-world challenges. The objectives include addressing communication delays, navigating decision-making, and ensuring compliance with regulatory standards, all while maintaining confidentiality and privacy in diverse scenarios.

1.2. Key Themes and Their Significance

Key themes include safety protocols, effective educational strategies, and legal considerations. These themes are significant as they provide a framework for identifying unsafe conditions, implementing measures, and ensuring compliance with regulations; They also emphasize preparing learners for real-world challenges and maintaining confidentiality, which are crucial for ethical and efficient guidance in various scenarios.

Safety Protocols and Hazard Identification

Safety protocols are crucial for minimizing risks and ensuring compliance. They involve identifying hazards and implementing measures to prevent incidents. Regular assessments and adherence to guidelines are essential.

2.1. Identifying Potentially Unsafe Conditions

Identifying unsafe conditions involves assessing environments for risks such as equipment malfunctions or improper use. Regular inspections and employee feedback help pinpoint hazards. Understanding machine design and usage patterns is key. Proactive approaches ensure early detection, preventing accidents. Safety checklists and audits are tools used to systematically evaluate conditions. Addressing these issues promptly maintains a safe and efficient workplace environment.

2.2. Implementing Safety Measures

Effective safety measures involve developing clear procedures, training staff, and using tools like checklists. Regular training ensures understanding of protocols, while audits verify compliance. Establishing emergency response plans and encouraging employee participation fosters a safety-first culture. Proper documentation and continuous improvement are essential for sustained safety. These steps collectively minimize risks and enhance overall workplace safety standards.

Best Practices for Effective Guidance

Best practices involve research-based approaches, fostering engagement, and preparing learners for real-world applications, ensuring they develop practical skills and a deep understanding of core concepts effectively.

3.1. Research-Based Educational Approaches

Research-based educational approaches emphasize evidence-driven methods to enhance learning outcomes. These strategies, supported by studies, focus on engaging learners through interactive and immersive techniques. By integrating real-world applications, they foster critical thinking and practical skills. Such approaches ensure that learners gain a deep understanding of concepts, preparing them for diverse challenges. This section explores how these methods can be effectively implemented in various educational settings to maximize learner engagement and achievement.

3.2. Preparing Learners for Real-World Applications

Preparing learners for real-world applications involves bridging the gap between theoretical knowledge and practical skills. Educational strategies focus on fostering problem-solving, adaptability, and critical thinking. By incorporating case studies, simulations, and hands-on activities, learners gain experience in addressing real-world challenges. This approach ensures they are well-equipped to apply their skills in diverse, dynamic environments, making them adaptable and confident in overcoming obstacles. Real-world preparation enhances their readiness for future endeavors.

Common Challenges and Solutions

Addressing phonological delays and complex decision-making scenarios requires tailored strategies. Effective solutions involve research-based approaches, adaptive tools, and continuous learner support to ensure successful outcomes.

4.1. Addressing Phonological Delays in Communication

Phonological delays require targeted interventions, such as the Multiple Oppositions approach, to improve speech clarity. These methods help children differentiate sounds and develop accurate articulation. Early identification and tailored strategies are crucial for effective communication skill development, ensuring learners overcome challenges and achieve linguistic milestones. Consistent practice and supportive environments further enhance progress, making communication more accessible and meaningful for individuals with delays.

4.2. Navigating Complex Decision-Making Scenarios

Complex decision-making scenarios require a systematic approach to identify risks, evaluate options, and implement solutions. Tools like checklists and templates can enhance consistency and efficiency. Critical thinking and ethical considerations are essential to ensure decisions align with legal and moral standards. Effective communication and collaboration further support navigating intricate situations, ultimately leading to informed and impactful outcomes in real-world applications.

Legal and Ethical Considerations

Adhering to legal standards and ethical practices ensures compliance with regulations, maintains confidentiality, and upholds professional integrity, fostering trust and accountability in all guidance and decision-making processes.

5.1. Compliance with Regulatory Standards

Compliance with regulatory standards ensures adherence to established laws and guidelines, maintaining safety and ethical practices. It involves regular audits, proper documentation, and training to meet legal requirements, fostering accountability and trust.

5.2. Maintaining Confidentiality and Privacy

Maintaining confidentiality and privacy is crucial for building trust and ensuring ethical practices. This involves securely storing sensitive information, limiting access to authorized personnel, and adhering to legal and ethical standards. Proper protocols prevent unauthorized disclosure, safeguarding personal and organizational data while promoting accountability and transparency in all operations.

Tools and Resources for Implementation

Essential tools include checklists and templates that enhance consistency and efficiency, ensuring adherence to guidelines and streamlining processes for effective implementation and outcomes.

6.1. Utilizing Checklists for Consistency

Checklists are vital for maintaining consistency in implementing guidelines. They ensure all critical steps are followed, reducing errors and enhancing reliability. By breaking down complex processes into manageable tasks, checklists streamline workflows and improve adherence to safety protocols. Regular use of checklists fosters accountability and ensures that no essential steps are overlooked, leading to more efficient and effective outcomes across various applications;

6.2. Leveraging Templates for Efficiency

Templates are invaluable for streamlining processes and enhancing productivity. They provide a structured framework, ensuring consistency and reducing the time spent on repetitive tasks. By offering pre-designed formats, templates minimize errors and allow for easy customization to meet specific needs. Their use promotes standardization, making it easier to replicate successful strategies across different scenarios. This approach not only saves time but also ensures that key elements are consistently addressed, improving overall efficiency and effectiveness.

Case Studies and Real-World Applications

Real-world examples provide practical insights, showcasing how core concepts are applied in diverse scenarios, from education to safety, offering valuable lessons for implementation and problem-solving.

7.1. Analyzing Successful Implementations

Successful implementations highlight effective strategies, such as utilizing checklists for consistency and leveraging research-based approaches. These cases demonstrate improved safety, communication, and decision-making. By examining real-world examples, learners can identify best practices, understand the role of preparation, and adapt solutions to their contexts. These insights provide practical lessons, enabling individuals to apply core concepts effectively and prepare for future challenges in diverse scenarios.

7.2. Learning from Common Mistakes

Common mistakes often stem from overlooked safety protocols or inadequate preparation. Analyzing these errors reveals the importance of thorough hazard identification and consistent implementation of guidelines. For instance, failing to address phonological delays or neglecting legal standards can lead to significant challenges. By documenting and reflecting on these oversights, individuals can refine their strategies, enhancing safety, communication, and decision-making. These lessons underscore the value of careful planning and adherence to established frameworks.

Preparing for the Guide’s Requirements

Preparing involves gathering necessary materials, developing a strategic plan, and ensuring compliance with legal standards to meet the guide’s expectations effectively and efficiently.

8.1. Gathering Necessary Materials

Gathering materials involves identifying essential tools, checklists, and templates to ensure preparedness. Utilize resources like inspection guides and educational frameworks to meet the guide’s requirements efficiently. Ensure all documents align with legal standards and best practices, facilitating a smooth implementation process. Organize materials strategically to avoid delays and ensure accessibility when needed. This step is crucial for compliance and effective execution of the guide’s objectives.

8.2. Developing a Strategic Plan

Developing a strategic plan involves outlining clear objectives, prioritizing tasks, and establishing timelines. Align the plan with the guide’s requirements, ensuring resource allocation and accountability. Regularly review and adapt the plan to address challenges and maintain progress. A well-structured plan ensures efficient execution, fostering preparedness and compliance with the guide’s standards. This step is critical for achieving long-term success and meeting the chapter’s core objectives effectively.

This chapter concludes with a summary of key concepts and explores future opportunities for growth and development in guide implementation.

9.1. Summarizing Key Takeaways

Chapter 19 emphasizes the importance of safety protocols, effective educational strategies, and legal compliance. It highlights the use of tools like checklists for consistency and practical applications for real-world scenarios, ensuring a well-rounded approach to guide implementation and future development.

9.2. Exploring Opportunities for Further Development

Future developments may include integrating advanced technologies, expanding research collaborations, and creating adaptive resources to address evolving challenges. Enhancing tools for real-world applications and fostering innovation in educational approaches will be crucial; Continuous improvement in safety protocols and legal compliance will ensure the guide remains relevant and effective in meeting future demands and expectations.

Page 1 of 4

Powered by WordPress & Theme by Anders Norén