Choosing the Right Drill Bits for the Job
Selecting the correct drill bits is crucial for efficient drilling․ Bits vary by material type, such as metal, wood, or plastic, and geometry affects performance․ Twist bits are versatile, while spade bits are ideal for large holes․ Forstner bits ensure clean, precise cuts․ Always match the bit material to the workpiece to avoid damage and ensure optimal results․
1․1 Types of Drill Bits for Different Materials
Drill bits are designed for specific materials to ensure efficiency and prevent damage․ Twist bits are ideal for metal and general-purpose drilling․ Spade bits are best for large holes in wood․ Forstner bits create precise, clean holes in wood․ Hole saws are perfect for cutting large diameter holes in various materials․ Glass and tile bits are designed for smooth drilling in ceramics․ Masonry bits handle tough materials like concrete․ Using the right bit for the material ensures accuracy and longevity of the tool․
1․2 Importance of Drill Bit Material and Geometry
Drill bit material and geometry significantly impact drilling performance․ High-speed steel (HSS) bits are durable for general use, while cobalt or carbide bits excel in hard materials․ Geometry features like point angle and flute design enhance cutting efficiency․ A sharper point angle improves accuracy, while flute geometry affects chip removal․ Proper material and design ensure precise holes, reduce wear, and prevent overheating․ Investing in quality bits minimizes errors and extends tool life, making them essential for professional and DIY projects alike․
Preparing the Workpiece
Ensure the workpiece is stable and secure to prevent movement during drilling․ Mark the hole location accurately using a scribe or punch․ Clean the surface and remove debris for precise drilling․ For large holes, create a pilot hole to guide the drill bit and maintain accuracy․ Proper preparation ensures safety and achieves professional results․
2․1 Marking the Hole Location Accurately
Accurate marking is essential for precise drilling․ Use a scribe, rule, and square to locate the hole’s center․ For metal, a dot punch creates a guide for the drill bit․ Ensure marks are visible and aligned correctly․ Double-check measurements to avoid errors․ Proper alignment prevents misdrilled holes and enhances project quality․ Always verify the layout before drilling to ensure accuracy and save time․ This step is critical for achieving professional results in any drilling task․
2․2 Creating Pilot Holes for Larger Holes
Creating pilot holes is an essential step for drilling larger holes accurately․ Start with a small drill bit to guide the larger tool․ This prevents the bit from wandering and ensures a straight path․ Pilot holes also reduce the risk of material damage or splitting, especially in thin or delicate surfaces․ For metals, use a twist bit or spade bit to create the pilot hole․ Clean the area first for better accuracy and maintain steady pressure to avoid misalignment․
Safety Tips for Drilling Holes
Wear safety glasses and gloves to protect against debris․ Maintain firm control of the drill and avoid loose clothing․ Keep the work area clean and stable for optimal safety․
3․1 Essential Personal Protective Equipment
Always wear safety glasses or goggles to protect your eyes from flying debris․ Use gloves to maintain a firm grip and prevent hand injuries․ Ensure loose clothing or long hair is tied back to avoid accidents․ Steel-toe footwear is recommended in workshops․ Hearing protection may be necessary with loud drills․ Proper PPE ensures safety and focus while drilling, preventing potential hazards like eye damage or cuts from sharp edges․ Prioritize protection to maintain control and accuracy during the drilling process․
3․2 Maintaining Control of the Drill
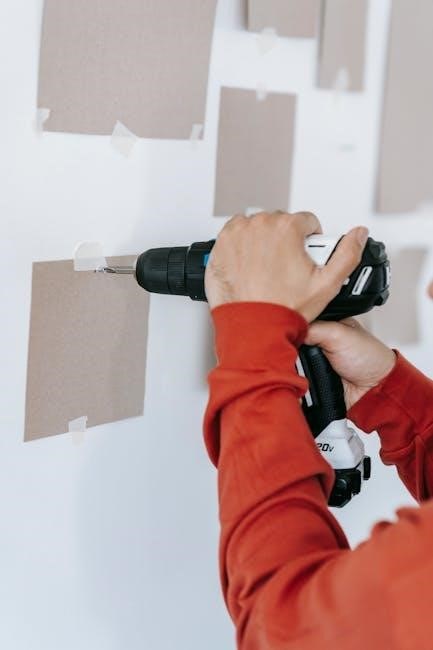
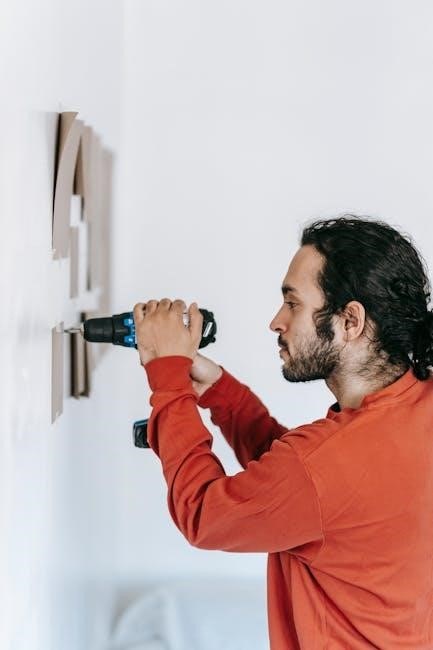
Maintaining control of the drill is crucial for precise and safe drilling․ Always grip the drill firmly with both hands, ensuring stability․ Apply steady, consistent pressure without forcing the bit, as excessive force can lead to loss of control or damage․ Keep the drill bit aligned with the pilot hole or marked location to prevent slipping․ Use appropriate drilling speeds—lower speeds often provide better control, especially with larger bits․ Secure the workpiece on a stable surface or use clamps to minimize movement․ Avoid over-reliance on the drill’s power; let the tool work at its own pace for accurate results․ Proper control ensures safety, precision, and prevents potential accidents during the drilling process․

Drilling Techniques
Drilling effectively requires sharp bits and proper speed․ Start with small pilot holes, enlarge gradually with steady pressure, and apply cutting oil to prevent overheating․
4․1 Maintaining Drill Bit Sharpness
Maintaining sharp drill bits is essential for clean cuts and efficiency․ Dull bits increase friction, overheat, and cause poor finishes․ Regularly inspect and sharpen drill bits using a grinder or sharpening stone․ Always follow the manufacturer’s instructions for sharpening angles to preserve the bit’s geometry․ Proper sharpening reduces wear, extends bit life, and ensures precise drilling․ Sharp bits also reduce the risk of material damage, making the drilling process safer and more accurate․
4․2 Using the Right Drilling Speed
Drilling speed significantly impacts hole quality and tool longevity․ Excessive speed can overheat bits, damaging both the tool and workpiece․ Too slow a speed reduces efficiency and may lead to incomplete cuts․ Adjust the drill’s RPM based on material type and bit size․ For metals, lower speeds are recommended to prevent overheating, while higher speeds are suitable for softer materials like wood․ Maintaining the optimal speed ensures clean, precise holes and extends the life of your drill bits․
Avoiding Common Mistakes
Prevent misaligned holes by using guides or jigs․ Avoid excessive speed, which can cause overheating or material damage․ Ensure proper pilot holes to minimize tear-out on thin materials․
5․1 Preventing Misaligned Holes
Misaligned holes can ruin a project, so precision is key․ Use a drill guide or jig to ensure accuracy; Mark the center clearly with a punch or marker․ Start with a small pilot hole to guide larger bits․ Maintain steady drill control, avoiding excessive pressure that could cause slipping․ For curved or uneven surfaces, consider clamping a straightedge as a guide․ Proper alignment prevents costly mistakes and ensures professional-looking results․
5․2 Minimizing Tear Out on Thin Materials
When drilling through thin or delicate materials, tear out can be a common issue․ To minimize this, apply masking tape or a backing material like plywood to the underside․ Use a sharp, high-quality drill bit, such as a twist or Forstner bit, designed for clean cuts․ Start with a small pilot hole and gradually increase the size․ Maintain steady, consistent drilling speed to avoid applying too much pressure, which can cause the material to split or tear․ This method ensures smooth, professional-looking holes with minimal damage․
Finishing the Hole
After drilling, deburr the edges using a small file or sandpaper to smooth rough surfaces․ Clean the hole thoroughly with compressed air or a damp cloth to remove debris․
6․1 Deburring the Edges
Deburring is essential for removing sharp edges and burrs after drilling․ Use a deburring tool, file, or sandpaper to smooth the hole edges․ This prevents injuries and ensures smooth surfaces; For precise results, apply light pressure and work in one direction․ Deburring also improves the fit of fasteners and reduces friction․ Regularly inspect and maintain tools to keep edges sharp and effective; Proper deburring enhances safety and product quality, making it a critical final step in the drilling process․
6․2 Cleaning the Hole
Cleaning the hole post-drilling is vital for removing debris and shavings․ Use compressed air or a brush to eliminate particles․ For precise results, apply a mild solvent to remove contaminants․ This ensures a clean surface for further processing, such as tapping or fastening․ Regular cleaning prevents re-cutting of material and extends tool life․ Properly cleaned holes enhance accuracy and reduce the risk of damage․ Always inspect the hole after cleaning to ensure it’s free from obstructions and ready for the next step․

Using a Drill Guide or Jig
A drill guide or jig ensures precise hole alignment and consistent results․ It helps maintain accuracy, especially for multiple holes, and minimizes errors․ Perfect for both professionals and DIYers․
7․1 Benefits of a Homemade Drill Guide
A homemade drill guide offers precision and convenience․ It can be crafted from scraps, ensuring alignment for pilot holes or screws․ This DIY solution is cost-effective and customizable, saving time and improving accuracy․ It also reduces errors, making it ideal for consistent results in various projects․ With minimal effort, a homemade guide enhances drilling efficiency, proving invaluable for both small and large-scale tasks․
7․2 Ensuring Precision with a Drill Jig
A drill jig is a must-have tool for achieving precise and consistent results․ It ensures accurate alignment and prevents deviations, making it ideal for repeatable hole placement․ By holding the drill bit steady, a jig minimizes errors and delivers clean, professional finishes․ This tool is especially useful for beginners, as it simplifies the drilling process․ Whether for DIY projects or professional tasks, a drill jig guarantees precision, making it an essential accessory for any drilling workflow․
Leave a Reply
You must be logged in to post a comment.