
Kodiak Cakes are a beloved breakfast option, known for their delicious, convenient, and wholesome recipes. Made with whole grains, they offer a homemade taste in minutes. Proper mixing ensures the perfect fluffy texture, making them a family favorite for a quick yet satisfying meal.
1.1 Overview of Kodiak Cakes and Their Popularity
Kodiak Cakes have become a household name, celebrated for their wholesome, hearty recipes and ease of preparation. Their popularity stems from offering a convenient yet nutritious breakfast option, appealing to both families and health-conscious individuals. With a variety of flavors and mix-ins, Kodiak Cakes provide endless customization, making them a versatile choice for any meal. Their commitment to quality and taste has solidified their place as a favorite in many kitchens.
1.2 Importance of Proper Mixing Instructions
Proper mixing is crucial for achieving the ideal texture and flavor in Kodiak Cakes. Overmixing can lead to dense, tough cakes, while undermixing may result in a lumpy batter. Following the instructions ensures a smooth, even consistency, which is essential for fluffy and tender pancakes. Taking the time to mix correctly enhances the overall quality, making it a key step in preparing a delicious and satisfying breakfast.
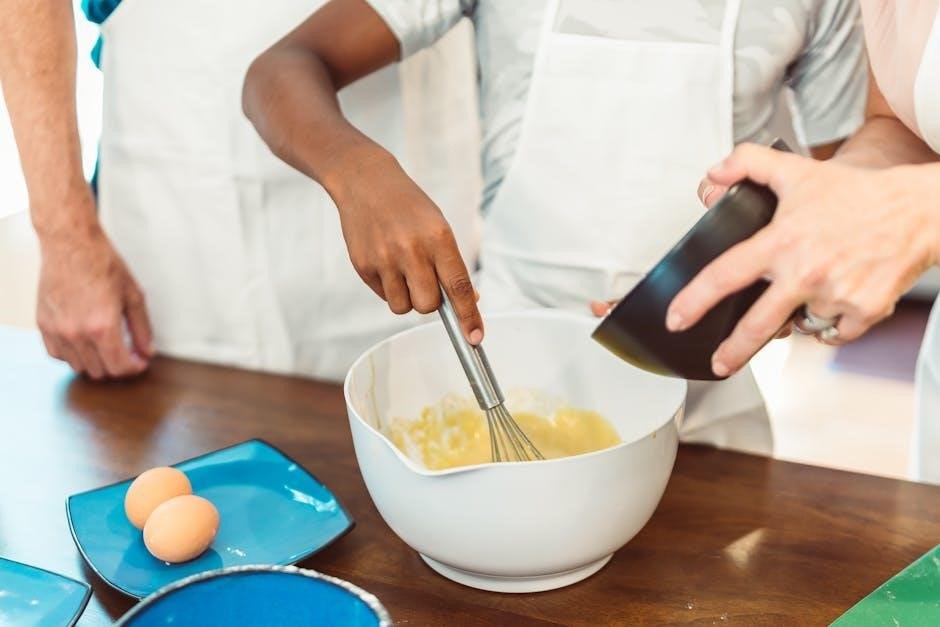
Gather Ingredients and Tools
Gathering all necessary ingredients and tools beforehand ensures a smooth mixing process. Measure cups, bowls, and utensils are essential for accurate preparation and efficient mixing of Kodiak Cakes.
2.1 Ingredients Required for Kodiak Cakes
- 1 cup Kodiak Cakes Pancake Mix
- 1 cup water (adjustable for consistency)
- 1 tablespoon sugar or sweetener (optional)
- 1 egg (optional for extra fluffiness)
- 1/4 cup buttermilk or milk (optional for tangy flavor)
- Butter or oil for greasing the pan
These ingredients ensure a classic, delicious batch of Kodiak Cakes, with optional additions for customization.
2.2 Essential Tools for Mixing Kodiak Cakes
- A large mixing bowl for combining ingredients
- A whisk or spoon for stirring the batter
- A measuring cup for accurate ingredient proportions
- A skillet or griddle for cooking
- Cooking spray or oil for preventing sticking
- A spatula for flipping the cakes
These tools ensure a smooth mixing and cooking process, helping you achieve perfectly cooked Kodiak Cakes every time;
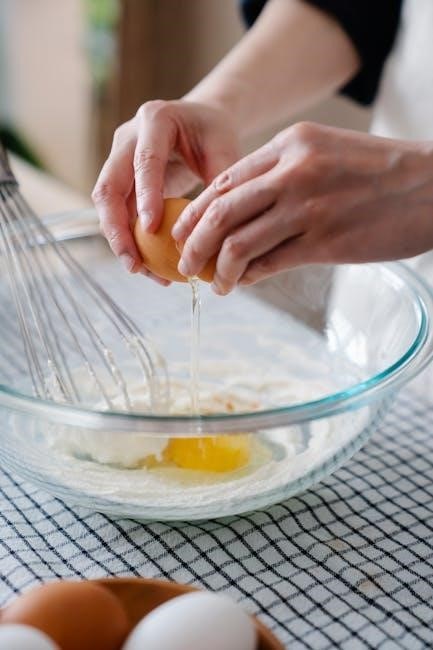
Understanding the Mixing Process
Mixing Kodiak Cakes requires gentle folding to avoid overmixing, ensuring a light and fluffy texture. Allow the batter to rest briefly for optimal results.
3.1 Step-by-Step Mixing Instructions
Start by combining Kodiak Cakes mix with water in a bowl. Add any optional ingredients like eggs or melted butter, then mix until just combined. Avoid overmixing to prevent a dense texture. Let the batter rest for a few minutes to allow the flour to absorb moisture evenly. Heat a skillet or griddle over medium heat and lightly grease it. Pour batter to desired size and cook until bubbles form on the surface. Flip and cook the other side until golden brown. Serve immediately for the best flavor and texture.
3.2 Tips for Achieving the Right Batter Consistency
Achieving the perfect batter consistency is key for fluffy Kodiak Cakes. Start by adding water gradually, mixing until just combined. Overmixing leads to a dense texture. For thicker cakes, use less water; for thinner, add a little more. Letting the batter rest for 2-3 minutes allows flour to absorb moisture evenly. For extra fluff, substitute water with buttermilk or add a tablespoon of vinegar. Adjust as needed to ensure a smooth, even pour.
Common Mistakes to Avoid
Avoid overmixing, which creates dense cakes. Use accurate measurements to ensure balance. Don’t skip letting the batter rest for proper hydration and aeration. Avoid excessive water.
4.1 Overmixing the Batter
Overmixing is a common mistake that leads to dense, tough cakes. It develops excess gluten, stripping the batter of its fluffiness. Stop mixing once ingredients are just combined. Avoid vigorous stirring or over-blending, as this destroys the delicate balance needed for a light texture. Instead, gently fold wet and dry ingredients until no visible lumps remain. This ensures Kodiak Cakes retain their signature airy, tender quality. Proper mixing technique is key to achieving the best results.
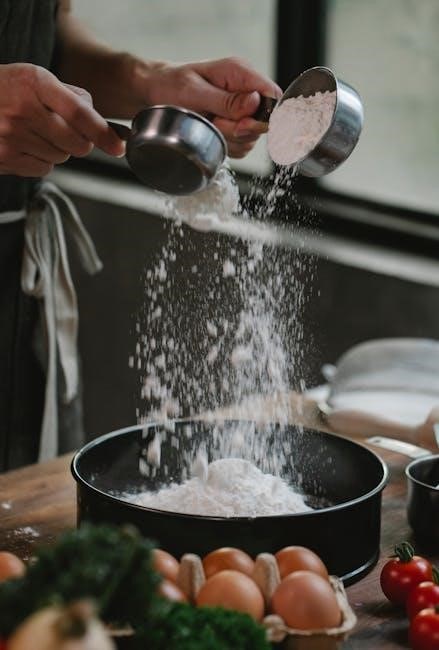
4.2 Incorrect Measurement of Ingredients
Incorrectly measuring ingredients can significantly affect the final texture of Kodiak Cakes. Using too much or too little flour, water, or mix can result in batter that’s either too thick or too runny. Always use a digital scale for precise measurements, especially for flour, as volume measurements can vary. For liquids, ensure the measuring cup is level to avoid over- or under-pouring. Accurate measurements are critical for achieving the right consistency and ensuring the cakes are light and fluffy, not dense or dry.
4.3 Not Allowing the Batter to Rest
Not allowing the batter to rest is a common mistake that can lead to dense, tough cakes. Resting enables the flour to absorb liquids fully and leavening agents to activate, ensuring a fluffy texture. Skipping this step disrupts gluten development and air incorporation, resulting in poor rise and an unpleasant mouthfeel. For optimal results, let the batter sit 3-5 minutes before cooking to enhance tenderness and structure, guaranteeing light, airy Kodiak Cakes every time.
Cooking Instructions
Cook Kodiak Cakes on a preheated griddle or skillet at medium heat. Pour batter, cook until bubbles form, then flip. Adjust heat to prevent burning for golden, fluffy results.
5.1 Cooking Temperatures and Timing
For optimal results, preheat your griddle or skillet to 375°F (190°C). Pour 1/4 cup of batter for each pancake. Cook for 2-3 minutes until bubbles form on the surface. Flip gently and cook for an additional 1-2 minutes until golden brown. Adjust heat as needed to prevent burning. Proper timing ensures a fluffy interior and a crispy exterior. Always use a thermometer to maintain consistent temperature for even cooking.
5.2 Tips for Flipping and Serving
Flip Kodiak Cakes when bubbles appear on the surface and edges look dry. Use a spatula to gently lift and turn for an even golden brown. Serve immediately with butter, syrup, fresh fruit, or whipped cream. For extra crispiness, cook until edges are slightly golden before flipping. Experiment with toppings like chocolate chips, nuts, or honey for added flavor. Proper flipping ensures a fluffy interior and a delicious presentation every time.
Customization Ideas
Customize Kodiak Cakes with fresh fruits, nuts, or spices for added flavor. Try blueberries, chocolate chips, or cinnamon for a personal touch. Adjust recipes to suit dietary needs, ensuring delicious and varied breakfast options.
6.1 Adding Flavorings and Mix-Ins
Kodiak Cakes can be enhanced with various flavorings and mix-ins for added taste and texture. Common additions include fresh or dried fruits, nuts, spices, or even cocoa powder. For example, blueberries or chocolate chips create a sweet twist, while cinnamon or nutmeg add warmth. Nuts like walnuts or pecans provide a satisfying crunch. Seeds, such as chia or flax, offer nutritional benefits. These mix-ins can be folded into the batter before cooking, allowing for endless customization to suit any preference or dietary need.
6.2 Adjusting for Dietary Preferences
Kodiak Cakes can be tailored to suit various dietary needs. For gluten-free options, substitute the mix with a gluten-free alternative or add gluten-free flours like almond or coconut flour. Vegans can replace eggs with flaxseed or mashed banana and use plant-based milk. Low-carb diets can incorporate protein powder or almond flour. Dairy-free versions benefit from non-dairy milk and vegan butter. These adjustments ensure everyone can enjoy Kodiak Cakes while adhering to their dietary preferences or restrictions.
Storing and Reheating
Proper storage and reheating techniques maintain the freshness and texture of Kodiak Cakes. Store batter in an airtight container in the fridge for up to 3 days. Cooked cakes can be refrigerated for 5 days or frozen for 2 months. For reheating, use a skillet over medium heat, a toaster, or microwave for a quick warm-up. Ensure cakes are thoroughly heated for the best taste and texture.
7.1 Proper Storage of Batter and Cooked Cakes
Kodiak Cakes batter should be stored in an airtight container in the refrigerator for up to 3 days. For cooked cakes, cool them completely before storing in an airtight container in the fridge for up to 5 days or freeze for up to 2 months. Label containers with dates to ensure freshness. When freezing, place cakes in a single layer or separate with parchment paper to prevent sticking. This ensures optimal texture and flavor when reheated.
7.2 Best Practices for Reheating
For reheating Kodiak Cakes, use a toaster or toaster oven at 350°F for 2-3 minutes. Alternatively, microwave for 20-30 seconds, covering with a damp cloth to retain moisture. For a crispy texture, reheat in a skillet over medium heat with a small amount of butter or oil. Reheating frozen cakes may require an extra 1-2 minutes. Avoid overcrowding the pan or microwave to ensure even heating. Refrigerated cakes can be reheated directly, while frozen ones should thaw slightly first for best results.

Troubleshooting Common Issues
Common issues like dense or tough cakes often result from overmixing or incorrect measurements. Adjusting batter consistency and cooking time can resolve most problems effectively.
8.1 Dealing with Dense or Tough Cakes
Dense or tough cakes often occur due to overmixing the batter, which develops too much gluten. To fix this, mix wet and dry ingredients separately and gently fold them together until just combined. Avoid over-stirring, as this leads to a dense texture. Also, ensure not to overcook the cakes, as this can make them tough. Adjusting the ratio of liquid to dry ingredients can also help achieve a lighter consistency.
8.2 Solutions for Sticking Cakes
Sticking cakes can be prevented by ensuring the pan or griddle is properly heated and greased. Use a small amount of butter or oil to coat the surface evenly. Avoid overcrowding the pan, as this can lower the temperature and cause sticking. Non-stick pans or griddles are ideal for cooking Kodiak Cakes. If cakes do stick, gently loosen them with a spatula before flipping. Proper preheating and lubrication are key to achieving a smooth, even release.
Safety Tips
Always handle hot skillets or griddles with oven mitts to prevent burns. Ensure the cooking area is clear of children and flammable materials for a safe experience.
9.1 Handling Hot Skillets or Griddles
When working with hot skillets or griddles, always use oven mitts or tongs to prevent burns. Never leave cooking unattended, especially with children nearby. Ensure the cooking surface is stable and far from flammable materials. Allow the skillet to cool before cleaning to avoid accidental contact with hot surfaces. Proper handling ensures a safe and enjoyable cooking experience for everyone involved in preparing Kodiak Cakes.
9.2 Allergen Considerations
Kodiak Cakes contain wheat, milk, and eggs, which are common allergens. Always check the ingredient list for potential allergens and ensure all utensils and surfaces are cleaned thoroughly to prevent cross-contamination. For those with dietary restrictions, consider using gluten-free or dairy-free mixes. Inform anyone with severe allergies about the ingredients used. Proper handling and communication are key to ensuring a safe and inclusive cooking environment for everyone enjoying Kodiak Cakes.
Mastering Kodiak Cakes requires attention to mixing, cooking, and safety. Follow instructions carefully, avoid overmixing, and cook at the right temperature for fluffy, delicious results every time. Practice makes perfect!
10.1 Recap of Key Mixing Instructions
To achieve the perfect Kodiak Cakes, follow these essential steps: Start by combining dry ingredients in a bowl. Gradually add wet ingredients, mixing until just combined. Avoid overmixing to prevent dense cakes. Let the batter rest for a few minutes to allow the flour to absorb moisture evenly. Heat your skillet or griddle over medium heat, ensuring it’s evenly coated with oil or butter. Pour batter in appropriate amounts, cook until bubbles form, then flip and cook the other side until golden brown. Adjust heat as needed to prevent burning. Always preheat properly and keep the griddle clean for consistent results. Proper mixing and cooking techniques ensure fluffy, delicious pancakes every time. Keep all ingredients at room temperature for optimal consistency and texture. Remember, the key is to mix wet and dry ingredients separately and fold them gently to maintain airiness. This method ensures tender and flavorful cakes that your family will love. Don’t forget to let the batter rest—it makes a big difference in texture. Finally, experiment with add-ins like fruit or nuts to create unique flavor combinations. Happy cooking!
10.2 Final Tips for Perfect Kodiak Cakes
For the best results, always use room-temperature ingredients and avoid overmixing the batter. Let it rest briefly to ensure fluffiness. Preheat your griddle thoroughly and grease it lightly to prevent sticking. Cook on medium heat for even browning. Don’t overcrowd the griddle—cook in batches if necessary. Experiment with add-ins like fresh fruit or nuts for extra flavor. Store leftovers in an airtight container and reheat gently. These tips will help you achieve perfectly cooked, delicious Kodiak Cakes every time!
Leave a Reply
You must be logged in to post a comment.