Category: Instructions Page 1 of 3

viking oven cleaning instructions

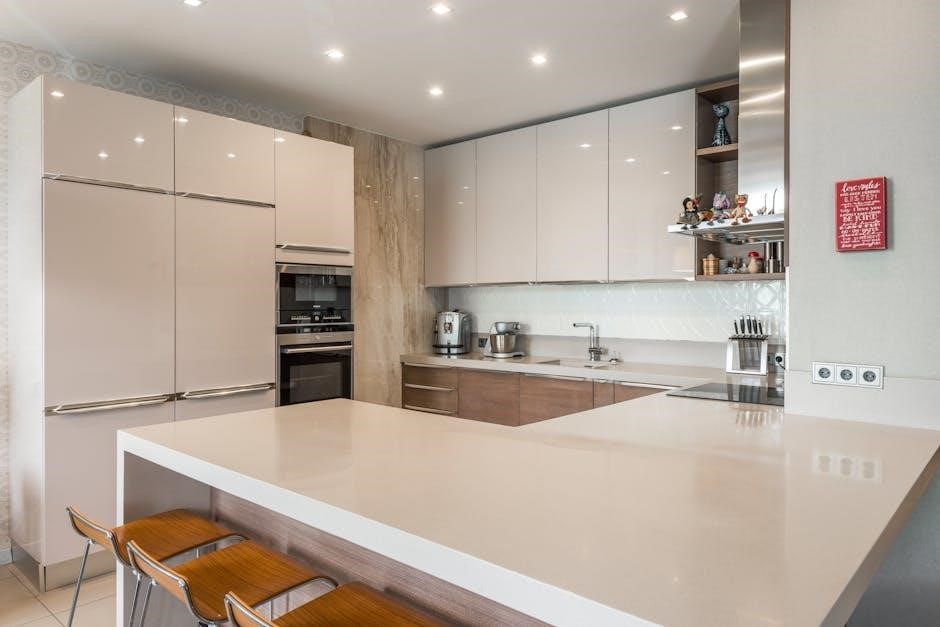
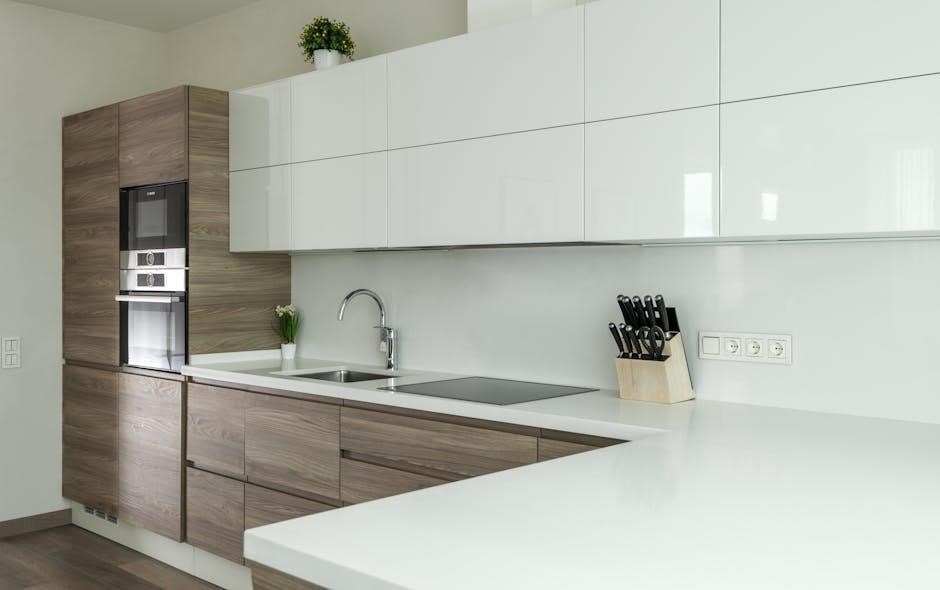
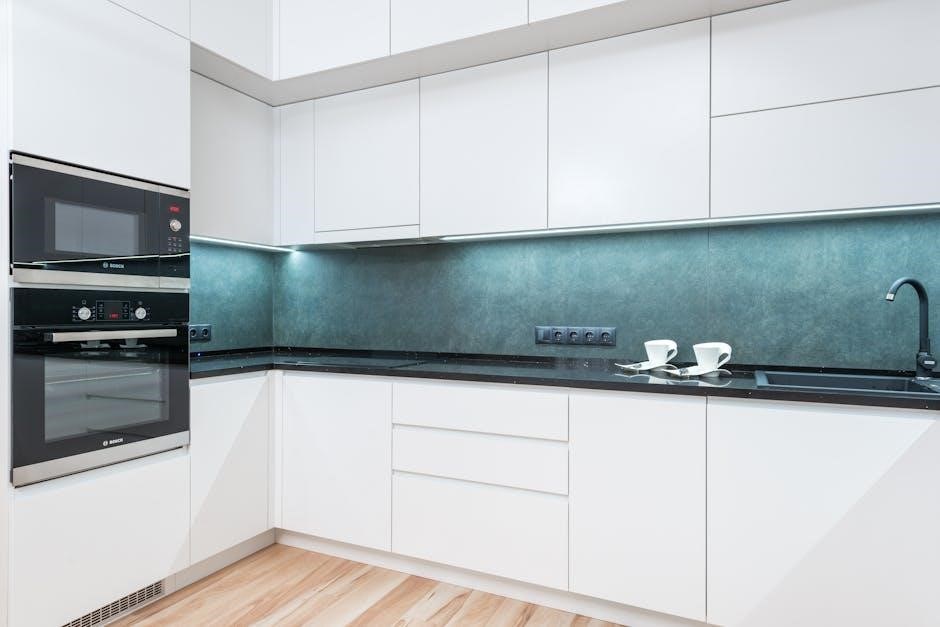
Regular cleaning is essential to maintain your Viking oven’s performance and appearance. This guide provides safe and effective cleaning tips to keep your oven in top condition.

Essential Tips Before You Start

Always ensure the oven is cool, wear gloves, and avoid abrasive cleaners. Refer to your manual, remove racks, and prepare a gentle cleaning solution or damp cloth.

2.1 Safety Precautions

Before cleaning your Viking oven, allow it to cool completely to avoid burns. Wear protective gloves and goggles to shield yourself from harsh cleaners or debris. Never use abrasive cleaners, bleach, or steel wool, as they can damage the finish. Ensure the area is well-ventilated when using strong cleaning products. If using the self-cleaning feature, follow the manufacturer’s instructions precisely and keep children away during the process. Always refer to your Viking oven’s manual for model-specific safety guidelines to ensure a safe and effective cleaning experience.

2.2 Recommended Cleaning Products

For effective Viking oven cleaning, use gentle yet powerful products. Easy-Off Fume Free Max Oven Cleaner is highly recommended for the interior, as it tackles tough grease without harsh fumes. For exterior surfaces, especially stainless steel, use a mild dish soap or a specialized stainless steel cleaner to maintain the finish. Avoid abrasive cleaners like bleach or steel wool, as they can damage the surfaces. For a DIY approach, a mixture of baking soda and vinegar can be used to create a natural, non-toxic cleaning solution. Always follow product instructions to ensure safety and effectiveness.

Manual Cleaning Process

Start by removing racks and accessories for soaking. Apply recommended cleaners like Easy-Off to the interior and let it sit. Scrub gently and rinse thoroughly for a sparkling finish.

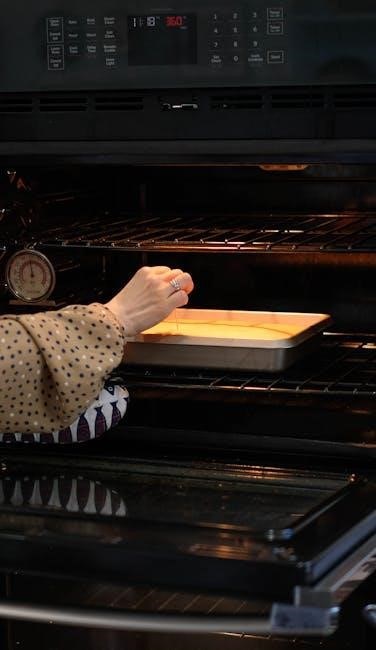
3.1 Cleaning the Oven Interior

Begin by removing racks and accessories for soaking. Apply Easy-Off Fume Free Max cleaner to the interior surfaces, avoiding heating elements. Let it sit as per instructions.

Use a damp sponge or soft brush to wipe down surfaces, focusing on stubborn stains. Avoid abrasive tools to prevent damage. Rinse thoroughly with clean water.

For tougher grease, mix baking soda and water to form a paste. Apply overnight and wipe clean in the morning. Ensure the oven is cool before starting.

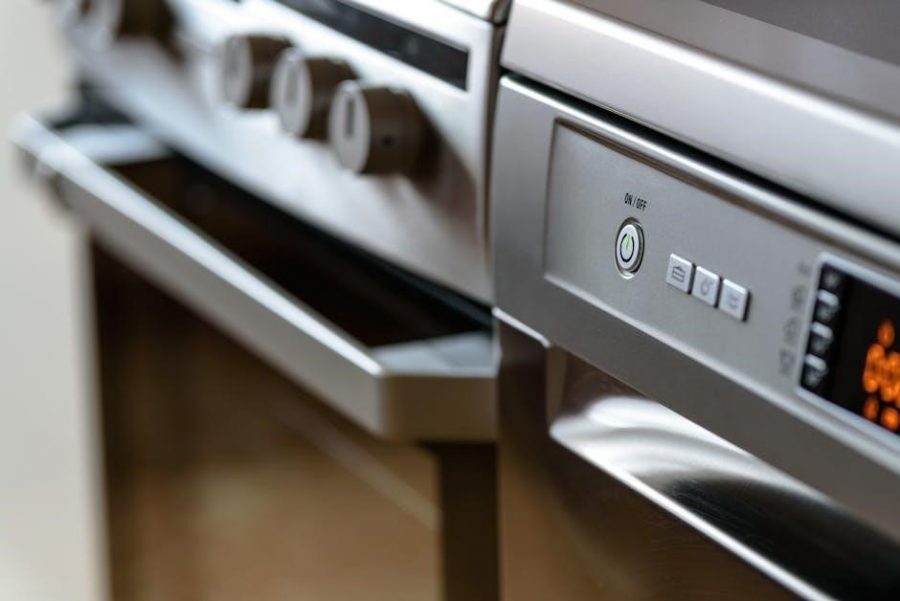
3.2 Cleaning the Exterior

Use warm soapy water and a soft cloth to wipe down the exterior, focusing on areas around knobs and handles. For stainless steel surfaces, apply a specialized cleaner to remove fingerprints and smudges.

  • Dry with a microfiber cloth to prevent watermarks.
  • Avoid harsh chemicals or abrasive tools to protect the finish.
  • Regular cleaning maintains the oven’s polished appearance and durability.

3;3 Cleaning Oven Racks and Accessories

Soak racks and accessories in hot, soapy water for 1-2 hours. For tough stains, add vinegar to the water. Scrub gently with a soft sponge or brush, then rinse thoroughly and dry.

  • Regular soaking helps loosen grease and food residue.
  • Avoid abrasive cleaners to prevent scratching.
  • Thorough drying prevents rust and maintains hygiene.

Using the Self-Cleaning Function

Activate the self-cleaning cycle by following your oven’s manual instructions. Remove racks and accessories, lock the door, and let the oven handle tough grime and food residue.

4.1 Steps to Activate and Use the Self-Cleaning Cycle

Ensure the oven is cool and remove racks, accessories, and food debris.

Refer to your Viking oven’s manual for specific activation steps.

Set the self-cleaning cycle, typically involving a temperature knob or digital control.

Lock the oven door and let the cycle run (usually 2-4 hours).

After completion, allow the oven to cool before wiping down the interior with a damp cloth.

Ventilate the area to avoid fumes and ensure safety.

This process simplifies deep cleaning, leaving your Viking oven spotless and maintained.

Avoiding Common Mistakes

Avoid using abrasive cleaners, harsh chemicals, or aluminum foil, as they can damage surfaces. Never neglect the control panel and avoid using excessive water to prevent damage and ensure longevity.

5.1 Don’ts of Viking Oven Cleaning

When cleaning your Viking oven, there are several things to avoid to prevent damage. Never use abrasive cleaners, steel wool, or harsh scrubbing pads, as they can scratch surfaces. Avoid using aluminum foil inside the oven cavity, as it can melt and stick permanently. Do not use harsh chemicals or strong commercial cleaners, as they can damage finishes and leave harmful residues. Additionally, never neglect the control panel—clean it gently with a damp cloth to avoid damage. Lastly, avoid using excessive water, as it can seep into electrical components. By following these guidelines, you can ensure your Viking oven remains in excellent condition and functions properly for years to come.

Maintenance and Cleaning Schedule

Regular maintenance is key to keeping your Viking oven in prime condition. Clean up spills immediately after use to prevent tough stains. Wipe the interior with a damp cloth weekly and deep clean every 1-2 months, depending on usage. For heavy users, consider cleaning after every 20-30 hours of use. Schedule annual professional maintenance to ensure optimal performance. By following this routine, you’ll maintain your oven’s efficiency, appearance, and longevity, ensuring it remains a reliable cooking companion for years.

DIY Natural Cleaning Solutions

Use a mixture of baking soda, vinegar, and water for an eco-friendly clean. Apply the paste overnight, then wipe away grime effortlessly, leaving your oven fresh and chemical-free.

7.1 Using Baking Soda and Vinegar

Mix 1 cup of baking soda with 1 cup of water to form a paste. Apply it to the oven interior, avoiding heating elements. Let it sit overnight. The next day, dampen a sponge with white vinegar and wipe away the grime effortlessly. This natural solution is chemical-free and eco-friendly, leaving your oven clean and fresh without harsh fumes. For tougher stains, repeat the process or add vinegar directly to the baking soda paste for extra cleaning power. This method is gentle yet effective for maintaining your Viking oven’s condition.

Cleaning Specific Parts

Cleaning specific parts of your Viking oven ensures optimal performance and longevity. Focus on areas like racks, burners, and glass, using appropriate techniques and products for each section.

8.1 Burner Caps and Grates

Cleaning burner caps and grates is crucial for maintaining your Viking oven’s efficiency. Remove them and soak in hot, soapy water for 15-20 minutes. For tougher stains, add a cup of sudsy ammonia. Use a soft scrub brush or non-abrasive pad to gently scrub away grease and food residue. Rinse thoroughly and dry to prevent rust. Regular cleaning ensures proper gas flow and prevents grease buildup, which can lead to fires. Always refer to your Viking manual for specific care instructions.

8.2 Cleaning the Glass

Cleaning the glass on your Viking oven is essential for maintaining visibility and hygiene. For normal soil, apply a few drops of glass ceramic cleaning cream to the cool surface using a damp paper towel. Wipe gently until all residue is removed. For heavier stains, use a specialized glass or stainless steel cleaner, following the product instructions. Avoid abrasive materials that could scratch the surface. Regular cleaning prevents grime buildup and ensures a clear view during cooking. Dry the glass with a microfiber cloth to prevent streaks and maintain a polished appearance.

Troubleshooting Common Cleaning Issues

Common cleaning issues with Viking ovens include stubborn residue and damage from harsh cleaners. For tough stains, avoid abrasive scrubbers and instead use gentle products like baking soda and vinegar or specialized cleaners. If the self-cleaning feature malfunctions, ensure the door latch is functioning and consult the manual. Never use aluminum foil inside the oven, as it can melt and cause damage. For glass surfaces, avoid scratching by using soft cloths and gentle glass cleaners. Regular maintenance and adhering to manufacturer guidelines can prevent most cleaning-related problems and ensure optimal performance.

intext:chase wire instructions filetype:pdf

Chase wire transfers provide a secure and efficient way to send funds both domestically and internationally. They require accurate recipient details to ensure timely processing.

Overview of Wire Transfers

A wire transfer is an electronic method of transferring funds directly from one bank account to another. It is a fast and reliable way to move money, often used for large or time-sensitive transactions. Wire transfers can be completed domestically or internationally, depending on the recipient’s location.

They are typically processed through secure banking networks, ensuring quick delivery of funds. Wire transfers are popular for their speed and security, making them a preferred choice for both personal and business transactions. Chase offers clear instructions to facilitate smooth transfers, ensuring accuracy and efficiency.

Importance of Using Official Chase Instructions

Using official Chase wire transfer instructions is crucial for ensuring accuracy and avoiding delays. Incorrect details, such as routing numbers or SWIFT codes, can lead to failed transactions or funds being sent to the wrong account. Official instructions provide clear guidelines, reducing the risk of errors. They also help protect against fraud by verifying the authenticity of the transfer details. Following Chase’s specific steps ensures compliance with banking regulations and maintains the security of your transactions. Always refer to Chase’s official documentation for reliable guidance;

Key Information for Chase Wire Transfers

Key details for Chase wire transfers include the routing number, SWIFT code, and bank address. Verify these details for accuracy to avoid delays and ensure correct processing of funds.

Routing Number (ABA)

The routing number, also known as the ABA number, is essential for Chase wire transfers. It identifies the bank and location. For Chase, the routing number is 021000021. This number must be included accurately to ensure the transfer reaches the correct account. It is crucial to verify the routing number with the recipient’s bank to prevent any delays or errors in processing the wire transfer. Always double-check this information before initiating the transaction.

SWIFT Code

The SWIFT code is a unique identifier used for international wire transfers. For Chase, the SWIFT code is CHASUS33. This code ensures the transfer is routed correctly to the recipient’s bank. It is essential to include the SWIFT code when sending funds internationally to avoid processing delays or errors. Always confirm the SWIFT code with the recipient or their bank before initiating the transfer to ensure accuracy and smooth transaction processing.

Bank Address

The bank address for Chase wire transfers is typically 270 Park Avenue, New York, NY 10017. This address is crucial for routing international and domestic wire transfers. Providing the correct bank address ensures funds are sent to the right destination. For international transfers, the address may vary slightly, so always verify with the recipient or Chase’s official instructions. Accurate bank address details help prevent delays and ensure smooth processing of wire transfers. Always cross-check the address before initiating a transfer to avoid errors.

Recipient Information Requirements

Chase wire transfers require the recipient’s full name, bank routing number (ABA), SWIFT code, account number, and address to ensure accurate and successful transactions.

Beneficiary Details

Chase wire transfers require precise beneficiary details, including the recipient’s full legal name, address, and account number. For international transfers, the SWIFT code and intermediary bank information are essential. Ensure all data matches the recipient’s bank records to avoid delays or rejections. Incorrect information can lead to processing issues and additional fees. Always verify details with the recipient before initiating the transfer. This ensures funds reach the intended account efficiently and securely.

Account Number

The beneficiary’s account number is essential for accurate fund routing. Ensure the number is correctly formatted and matches the recipient’s bank records. For international transfers, an IBAN may be required. Always verify the account number with the recipient to prevent errors. Incorrect or incomplete numbers can delay processing or result in funds being returned. Use the exact account details provided by the beneficiary to ensure seamless transfers. Double-checking this information is crucial for successful wire transfers.

Steps to Initiate a Wire Transfer

Enroll in Chase’s wire transfer service, add recipient details, and verify instructions to ensure smooth processing of your transaction;

Enrolling in Chase Wire Transfer Service

To initiate wire transfers, enrollment in Chase’s wire transfer service is necessary. This process typically involves verifying account ownership and setting up security measures. Users must provide required personal and banking information to complete registration. Once enrolled, recipients can be added, and transfers can be processed securely online or through a Chase representative. Ensure all details are accurate to avoid delays or issues.

Adding Recipient Information

Accurate recipient details are essential for successful wire transfers. Include the beneficiary’s full name, bank account number, and routing number (ABA) for domestic transfers. For international transfers, provide the SWIFT code and bank address. Verify all information to prevent delays or rejected transfers. Ensure the recipient’s bank accepts incoming wires and that all data aligns with Chase’s requirements. Double-checking details before submission is crucial for smooth processing.

Understanding Transfer Types

Chase offers domestic and international wire transfers. Domestic transfers occur within the U.S., while international transfers involve cross-border transactions, requiring additional details like SWIFT codes for processing.

Domestic Wire Transfers

Domestic wire transfers within the U.S. are processed quickly, typically on the same business day. They require the recipient’s bank routing number (ABA) and account number. Accurate details ensure timely delivery. Processing involves sending funds directly to the recipient’s bank, with transactions completed within 24 hours. This method is ideal for urgent payments. Ensure all information is correct to avoid delays or reversals.

International Wire Transfers

International wire transfers through Chase require the recipient’s SWIFT code and bank address. The SWIFT code for Chase is CHASUS33, and the routing number is 021000021. Processing typically takes 2-5 business days, depending on the destination. Recipients must provide their bank’s SWIFT code and address for accurate processing. Currency conversion may apply, affecting the final amount received. Ensure all details are correct to avoid delays or additional fees. This method is ideal for global transactions, offering a reliable way to send funds internationally.

Additional Considerations

Additional considerations for Chase wire transfers include understanding potential fees, exchange rates, and ensuring compliance with bank policies and service agreements.

Fees and Charges

  • Domestic wire transfers typically incur a fixed fee, while international wire transfers may include additional charges for currency conversion and intermediary banks.
  • Exchange rate fees apply to international transfers, and rates may fluctuate, affecting the final amount received by the beneficiary.
  • Fees vary based on the destination country and the type of transfer, with charges ranging from $15 to $50 or more for international transactions.
  • It’s essential to review and confirm all applicable fees with Chase before initiating a wire transfer to avoid unexpected charges.

Processing Time

Chase wire transfers typically process within 1-2 business days for domestic transactions, while international transfers may take 2-5 business days. Funds are usually received within 24 hours for domestic wires if initiated before the cutoff time. International transfers may be delayed due to intermediary banks or time zones. Processing times exclude weekends and holidays, and delays can occur if additional verification is required. It’s important to confirm the expected processing time with Chase for specific transactions to ensure timely delivery of funds.

Security and Verification

Chase wire transfers use advanced encryption and two-factor authentication to secure transactions. Recipient details are verified to prevent unauthorized access and ensure funds reach the correct account.

Verifying Instructions

Verifying wire transfer instructions is essential to ensure accuracy and prevent errors. Review the routing number, SWIFT code, and beneficiary details thoroughly. Chase provides detailed guides and online tools to confirm recipient information; Double-checking instructions helps avoid delays or misdirection of funds; Use official Chase resources or contact customer support for clarification. Accurate verification ensures smooth and secure transactions, protecting both sender and recipient from potential issues. Always cross-reference details with official Chase documentation before initiating a transfer.

Protecting Against Fraud

Protecting against fraud is crucial when initiating wire transfers. Always verify recipient details and ensure instructions come from trusted sources. Be cautious of unsolicited requests or suspicious emails. Monitor your accounts regularly for unauthorized activity. Use official Chase platforms and two-factor authentication for added security. Educate yourself on common fraud schemes, such as phishing or fake wire instructions. Report any discrepancies immediately to Chase customer support. Vigilance helps safeguard your funds and prevent fraudulent transactions.

Common Mistakes to Avoid

Common mistakes include using incorrect routing numbers, incomplete recipient details, and not verifying instructions. Always double-check information to avoid delays or misdirected funds.

Incorrect Routing or SWIFT Codes

Using incorrect routing or SWIFT codes can lead to delayed or misrouted transfers. Double-check these codes with the recipient and ensure they match the destination bank. For domestic transfers, the ABA routing number must be accurate. International transfers require the correct SWIFT code to avoid processing issues. Always verify details with Chase’s official instructions to prevent errors and ensure funds reach the intended beneficiary efficiently.

Incomplete Recipient Information

Incomplete recipient details can cause delays or failed transfers. Ensure the beneficiary’s full name, account number, and address are accurately provided. For international transfers, include the SWIFT code and bank address. Missing or incorrect information requires manual corrections, extending processing time. Always verify recipient data with the beneficiary and refer to Chase’s official wire transfer instructions to avoid such issues and ensure smooth transactions. Double-checking details is crucial for timely and accurate fund delivery.

Troubleshooting and Support

Chase offers dedicated customer support to resolve wire transfer issues. Contact their service team for assistance with delayed or incorrect transfers, ensuring prompt resolution and guidance.

Contacting Chase Customer Service

For assistance with wire transfers, contact Chase customer service via phone, online chat, or visit a local branch. Their support team is available to address issues, clarify instructions, and resolve transfer-related problems promptly. Representatives can guide you through troubleshooting steps, ensuring your wire transfer is processed correctly and efficiently. Chase also offers 24/7 support for urgent inquiries, making it easy to get help whenever you need it.

Resolving Transfer Issues

If a wire transfer encounters issues, contact Chase immediately to investigate delays or errors. Provide detailed transaction information for quick resolution. Common problems include incorrect routing numbers or incomplete recipient details. Chase customer service can assist in correcting mistakes and reinitiating transfers. Regularly verify transfer instructions to prevent future issues. Timely resolution ensures funds reach the beneficiary without unnecessary delays, maintaining the efficiency and reliability of Chase wire transfers.

pyne pod boost instructions

Discover the Pyne Pod Boost, a cutting-edge disposable vape designed for versatility and ease of use. Perfect for both newcomers and experienced vapers, it offers exceptional performance.

With its innovative Boost Mode and long-lasting battery life, the Pyne Pod Boost delivers enhanced flavor and vapor production, making it a standout choice in the market.

Overview of the Pyne Pod Boost

The Pyne Pod Boost is a sleek, portable disposable vape designed for convenience and performance. It offers an impressive puff count of up to 8500, making it a long-lasting option for vapers. Equipped with a powerful 550mAh rechargeable battery, it ensures extended use and reliable performance. The device features a unique dual-mode functionality, allowing users to switch between standard vaping and Boost Mode for enhanced flavor and vapor production. Its compact design and lightweight construction make it easy to carry on the go. With a variety of tantalizing flavor options, the Pyne Pod Boost caters to diverse preferences, offering a satisfying vaping experience for both beginners and seasoned users.

Key Features of the Pyne Pod Boost

The Pyne Pod Boost stands out with its advanced features, including a high-capacity 550mAh rechargeable battery for extended use. It boasts a dual-mode functionality, allowing users to switch between standard and Boost Mode for tailored vaping experiences. The device features a Type-C port for convenient charging, ensuring quick power-ups. With its dual mesh coil technology, the Pyne Pod Boost delivers dense vapor and rich flavors, enhancing overall satisfaction. The vapor gauge and battery life indicator provide users with real-time monitoring, preventing unexpected shutdowns. Its sleek, lightweight design makes it portable, while the variety of flavors caters to diverse preferences, ensuring a personalized vaping experience.

Unboxing and Initial Setup

Unbox your Pyne Pod Boost to find the device, a rechargeable battery, and a Type-C charging cable. Follow the quick start guide for easy setup.

What’s Included in the Package

Your Pyne Pod Boost package contains a sleek, pre-charged disposable vape device, a rechargeable 550mAh battery, and a Type-C charging cable for convenient power-ups.

Preparing the Device for Use

Before using your Pyne Pod Boost, ensure the 550mAh battery is fully charged using the provided Type-C cable. Look for indicator lights to check the battery level. Once charged, remove any protective covers from the mouthpiece and other parts. The device is draw-activated, so take a few short puffs to prime it and ensure smooth vapor flow. Familiarize yourself with the Boost Mode, which enhances flavor and vapor production. Check the pre-filled e-liquid’s flavor and nicotine level to confirm it matches your preferences. If issues arise, consult the troubleshooting guide for solutions like recharging or clearing blockages. Proper preparation ensures an optimal vaping experience with your Pyne Pod Boost.

Operating the Pyne Pod Boost

Activate the device by taking a draw, as it’s draw-activated. Use the Boost Mode for enhanced vapor and flavor by following the device’s simple operation guidelines.

Activating the Device

The Pyne Pod Boost is draw-activated, meaning it turns on automatically when you inhale through the mouthpiece. No buttons or complicated settings are required.

A blue light on the device will illuminate during use, confirming activation. For Boost Mode, follow the device’s specific instructions to enhance vapor production and flavor.

Ensure the pod is properly connected and charged before first use. If the device doesn’t activate, check for obstructions in the mouthpiece or connectors. A fully charged battery ensures optimal performance and consistent activation.

Using the Boost Mode

The Pyne Pod Boost features an innovative Boost Mode designed to elevate your vaping experience. This mode enhances flavor intensity and vapor production, providing a more satisfying draw.

To activate Boost Mode, press and hold the button (if applicable) or follow the device-specific instructions. Some models may require a quick tap sequence to toggle between standard and Boost Mode.

When in Boost Mode, you’ll notice denser vapor and richer flavors. Use this mode sparingly to conserve battery life and ensure optimal performance. Adjust according to your preference for a personalized vaping experience.

Charging the Pyne Pod Boost

The Pyne Pod Boost features a 550mAh rechargeable battery with a Type-C port for convenient charging. Use the included cable to charge via a USB port.

Charging Methods and Accessories

The Pyne Pod Boost is equipped with a Type-C charging port, ensuring fast and efficient charging. The package includes a compatible USB-C cable, allowing you to charge the device via any standard USB port or wall adapter. For optimal performance, use a high-quality charger and avoid overcharging to prolong battery life. The battery gauge feature helps monitor charging progress, ensuring you never run out of power unexpectedly. Always store the cable in a safe place to prevent damage and maintain the device’s charging capabilities.

Best Practices for Battery Life

To maximize the battery life of your Pyne Pod Boost, avoid extreme temperatures and ensure the device is stored properly when not in use. Keep the battery away from direct sunlight and moisture to prevent degradation. Always use the provided USB-C cable and a compatible charger to maintain charging efficiency. Avoid overcharging, as this can reduce battery longevity. If you plan to store the device for an extended period, charge it to about 50% to preserve battery health. Regularly cleaning the charging port can also prevent connectivity issues and ensure optimal performance over time.

Maintenance and Troubleshooting

Regularly clean the Pyne Pod Boost with a soft cloth to remove residue. For troubleshooting, check the charging port for blockages and ensure proper connectivity. Store the device in a cool, dry place to maintain performance and longevity.

Cleaning and Caring for the Device

Regular maintenance ensures the Pyne Pod Boost performs optimally. Gently wipe the exterior with a soft cloth to remove dirt or residue. Avoid using harsh chemicals or liquids, as they may damage the device. For the mouthpiece, use a cotton swab lightly dampened with water to clean away any buildup. Ensure the device is stored in a cool, dry place to prevent overheating. Check the charging port periodically for debris, as blockages can affect charging efficiency. Proper care extends the lifespan and maintains the flavor quality of your Pyne Pod Boost, ensuring a consistent vaping experience.

Resolving Common Issues

If the Pyne Pod Boost isn’t activating, ensure the mouthpiece is clean and free of debris. Check for blockages in the airflow sensor or charging port. If the blue light blinks repeatedly, it may indicate a low battery—recharge the device immediately. For a burnt taste, clean the mouthpiece with a cotton swab and ensure the pod is stored upright to prevent leakage. If the device overheats, allow it to cool down before use. Regularly cleaning and maintaining the device can prevent most issues, ensuring a smooth and enjoyable vaping experience. Always refer to the user manual for detailed troubleshooting guidance.

The Pyne Pod Boost offers a user-friendly, high-performance vaping experience with its Boost Mode and long-lasting battery life, making it a reliable choice for everyday use.

Final Tips for Optimal Use

To maximize your experience with the Pyne Pod Boost, keep these tips in mind:

  • Use Boost Mode sparingly to preserve battery life and avoid overheating the coil.
  • Prime the device by taking a few short puffs before using Boost Mode for better flavor and vapor production.
  • Avoid exposing the device to extreme temperatures to maintain optimal performance.
  • Regularly clean the charging port to ensure proper connectivity and prevent damage.
  • Store the device upright when not in use to prevent e-liquid leakage.
  • Experiment with different flavors to find your preference and enhance your vaping experience.

By following these guidelines, you can enjoy a seamless and satisfying vaping experience with your Pyne Pod Boost.

Where to Find More Information

For additional details about the Pyne Pod Boost, visit the official Pyne website or authorized retailers for product manuals and guides. Online review platforms, forums, and social media groups also offer user experiences and troubleshooting tips. YouTube and vape-focused blogs often feature in-depth reviews and tutorials. Ensure to verify information from reputable sources to avoid misinformation. Always refer to trusted outlets for updates on new features or accessories. This will help you make the most of your Pyne Pod Boost experience and stay informed about the latest advancements in vaping technology.

torque wrench instruction manual

A torque wrench is a precision instrument used to apply a specific torque to screws, bolts, and nuts, ensuring safety and preventing damage. Essential in mechanical tasks, it helps achieve accurate tightening, avoiding over or under-tightening. Available in digital or adjustable models, it’s a vital tool for precise control in various industries.

1.1 Purpose and Importance of Torque Wrenches

A torque wrench is designed to apply a precise amount of torque to screws, bolts, and nuts, ensuring proper tightening without over-tightening. Its purpose is to achieve accurate torque values, critical for safety, durability, and performance in mechanical systems. Proper torque application prevents damage to materials, ensures structural integrity, and meets industry specifications. It is essential in automotive, aerospace, and industrial applications, where precise control is vital to avoid component failure and maintain operational reliability.

1.2 Key Features of a Torque Wrench

A torque wrench typically features an adjustable mechanism to set precise torque values, ensuring accurate tightening. It includes a digital or analog display for clear torque readings and may have a built-in indicator to signal when the desired torque is reached. Many models offer dual-scale measurements (e.g., Nm and ft-lb) and are designed with ergonomic handles for comfort. Some wrenches also include ratchet heads for easier socket changes. These features ensure precision, versatility, and ease of use across various applications.

Safety Guidelines

Always follow safety guidelines when using torque wrenches to prevent accidents and ensure proper results. Proper handling, securing sockets, and avoiding over-tightening are crucial for safe operation and tool longevity.

2.1 Proper Handling and Usage

Proper handling and usage of a torque wrench are essential for safety and accuracy. Always grasp the wrench firmly, ensuring a secure grip on the handle. Attach sockets securely to the square drive to prevent tilting, which can lead to inaccurate torque application. Apply force slowly and evenly, avoiding sudden movements. Never use the wrench as a nut breaker, pry bar, or hammer. Keep the tool well-maintained and store it correctly when not in use to ensure optimal performance and longevity.

2.2 Avoiding Common Mistakes (e.g., Over-Tightening, Incorrect Grip)

Avoid common mistakes when using a torque wrench to ensure safety and accuracy. Over-tightening can damage threads or components, while an incorrect grip may lead to loss of control. Never use the wrench as a nut breaker or pry bar. Apply force in the tightening direction only and avoid sudden movements. Always approach the desired torque setting gradually, starting from a lower value. Keep the wrench on its lowest setting when not in use to prevent accidental over-tightening.

Calibration and Accuracy

Torque wrenches are factory-calibrated to meet precision standards like ASME. Regular calibration ensures accuracy, using a torque transducer. Always store the wrench at its lowest setting to maintain reliability.

3.1 Factory Calibration and Certification

Torque wrenches are pre-calibrated at the factory to ensure accuracy and reliability. They meet international standards like ASME and DIN ISO 6789. Each wrench is tested and certified before delivery, guaranteeing precise torque application. Calibration ensures the wrench delivers consistent results, crucial for safety and proper fastening. Always use the wrench within its specified range and store it at the lowest setting to maintain calibration accuracy. Proper factory certification ensures the tool is ready for precise torque control right out of the box.

3.2 Adjusting Torque Settings

Adjusting torque settings on a wrench involves turning the adjustment key or grip to reach the desired torque. Always approach the target from a lower setting to avoid overshooting. For reduced torque, rotate the key anti-clockwise past the setting, then increase. Ensure the wrench is set correctly before use to prevent fastener damage. Proper adjustment ensures accurate torque application, maintaining safety and efficiency in mechanical tasks. Regular checks are essential to maintain precision and reliability over time.

3.4 Calibration Frequency and Maintenance

Calibration ensures torque wrench accuracy and reliability. Factory-calibrated wrenches should be checked periodically, especially after heavy use or drops. Calibration frequency depends on usage, typically every 6-12 months or as specified. Store the wrench at its lowest torque setting when not in use to maintain accuracy. Regular maintenance, including cleaning and storage, prevents mechanical issues. Always refer to the manufacturer’s guidelines for specific calibration procedures to ensure optimal performance and extend the tool’s lifespan.

Operating Instructions

Attach the socket securely to the torque wrench’s square drive, ensuring proper positioning to avoid tilting. Grasp the handle firmly and apply force gradually, monitoring the torque reading as it increases with applied pressure. This ensures precise control and accurate torque application during tightening tasks.

4.1 Attaching Sockets and Positioning

Attach the socket securely to the torque wrench’s square drive, ensuring it is properly seated and aligned. Position the socket on the fastener so that tilting or misalignment is avoided; A firm grip on the handle is essential to maintain control during operation. Proper alignment ensures accurate torque application and prevents damage to the wrench or fastener. Always verify socket placement before applying force to guarantee precise and safe operation.

4.2 Applying Torque Slowly and Correctly

Apply torque gradually and steadily to avoid sudden jerks or overshooting the target. Hold the wrench by the center of the handle and exert force smoothly. Avoid applying pressure to the head or extension bars, as this can cause inaccurate readings. Use a consistent, controlled motion until the wrench reaches the desired torque setting. If equipped, wait for the clicking sound or visual indicator to confirm the torque has been achieved. This ensures precise and safe application of force.

4.3 Reading Torque Values

Reading torque values accurately ensures proper tightening. For digital wrenches, the LCD screen displays the torque applied. Analog models require aligning the marker with the desired torque line on the scale. Dual-scale wrenches show measurements in both Nm and ft-lb. Always verify the unit of measurement matches your application. Ensure the wrench is set to the correct scale range for precise readings. Digital models may beep or flash when the target torque is reached, providing clear confirmation.

Adjusting Torque Settings

Adjusting torque settings involves setting the desired value and fine-tuning. Always approach from a lower setting, then increase as needed. Use adjustment keys or nuts for precise control.

5.1 Setting the Desired Torque

Setting the desired torque involves selecting the specific value required for your task. Use the adjustment mechanism, such as a key or nut, to align the wrench with the needed torque. Always approach the target from a lower setting, then fine-tune upward. Ensure accuracy by referring to the tool’s scale or digital display. Avoid over-tightening by stopping once the preset torque is reached. This step ensures precision and prevents damage to components.

5.2 Fine-Tuning the Adjustment

Fine-tuning the adjustment ensures precise torque settings. After setting the desired torque, make small incremental adjustments using the wrench’s mechanism. Rotate the key or nut clockwise or counterclockwise as needed. Check the scale or digital display to confirm accuracy; Avoid over-adjustment, as it may lead to wear or inaccuracy. Once the correct torque is reached, ensure the adjustment is secure to maintain consistency during use. This step ensures reliability and prevents potential errors in tightening operations.

Usage Tips

Always use the correct socket size and maintain a firm grip. Apply force slowly and evenly to avoid overshooting the target torque. Regularly inspect for wear.

6.1 Using Adjustable Torque Wrenches

Adjustable torque wrenches allow precise control by setting the desired torque using an adjustable ring or knob. Always attach the socket securely to the square drive and position it correctly on the fastener to prevent tilting. Apply force slowly and evenly to avoid overshooting the target torque. Regularly refer to the manual for specific instructions, as settings may vary by model. Avoid using the wrench as a nut breaker or pry bar, and ensure it is calibrated properly before use.

6.2 Tightening Screws, Bolts, and Nuts

Tightening screws, bolts, and nuts with a torque wrench requires precision. Attach the socket securely to the wrench’s square drive, ensuring proper alignment to avoid tilting. Apply force slowly and steadily to the handle, maintaining control throughout the process. Avoid using excessive force, which could damage the fastener or surrounding material. Always refer to the manufacturer’s specifications for the correct torque value. Ensure the wrench is calibrated and set to the desired torque before tightening to achieve accurate results.

Maintenance and Storage

Regularly clean the wrench with a soft cloth and mild solvent; Store it in a dry place, set to the lowest torque setting to prevent internal stress.

7;1 Cleaning and Care

Regular cleaning is essential to maintain your torque wrench’s accuracy. Use a soft, dry cloth to wipe away dirt and grease. For stubborn grime, dampen the cloth with mild solvent, but avoid harsh chemicals. Never submerge the wrench in water or expose it to excessive moisture. After cleaning, store the wrench in a dry, cool place, ensuring it is set to the lowest torque setting. This prevents internal stress and ensures longevity. Proper care extends the tool’s lifespan and maintains its precision.

7.2 Storing the Torque Wrench

Store the torque wrench in a clean, dry environment to prevent rust or damage. Always set the wrench to its lowest torque setting before storage to reduce internal stress; Use a protective case or pouch to shield it from dust and physical impact. Avoid extreme temperatures or humidity, as this can affect accuracy. Regularly inspect the wrench for wear or corrosion before and after storage. Proper storage ensures the tool remains reliable and precise for future use.

Troubleshooting Common Issues

Identify common problems like calibration errors or mechanical malfunctions. Check for loose parts, worn components, or incorrect settings. Refer to the manual for solutions or professional assistance.

8.1 Resolving Calibration Errors

Calibration errors can occur due to improper adjustments or wear. To resolve, compare the wrench’s readings with a torque checker. If deviations are found, recalibrate by adjusting the torque nut according to the manufacturer’s instructions; Ensure the wrench is set to the lowest torque setting when not in use. Regular calibration checks are essential to maintain accuracy. If issues persist, seek professional calibration or consult the user manual for detailed adjustment procedures.

8.2 Addressing Mechanical Malfunctions

If a torque wrench malfunctions, inspect for damage or wear. Check the wrench’s internal mechanism and ensure all parts are securely tightened. If the wrench slips or fails to hold torque, clean and lubricate moving parts. For stuck or jammed components, gently apply penetrating oil and manipulate the parts. Avoid forcing adjustments, as this can cause further damage. If issues persist, refer to the manual or contact a professional for repair. Proper storage and regular maintenance can prevent mechanical failures.

prodigy p2 brake controller instruction manual

The Prodigy P2 Brake Controller is a trusted, user-friendly device designed for safe and efficient trailer braking․ It offers advanced features like proportional braking and easy setup for optimal towing performance․

1․1 Overview of the Prodigy P2 Brake Controller

The Prodigy P2 Brake Controller is a highly regarded electronic brake control system designed for trailers with 2, 4, 6, or 8 brakes․ Known for its proportional braking technology, it ensures smooth and balanced stopping power, enhancing safety while towing․ The device is compact, user-friendly, and compatible with a wide range of vehicles, making it a popular choice among tow enthusiasts․ Its advanced features, such as automatic leveling and boost functionality, simplify the towing experience․ The P2 is also recognized for its durability and reliability, making it a trusted solution for both novice and experienced tower operators․

1․2 Importance of Proper Installation and Setup

Proper installation and setup of the Prodigy P2 Brake Controller are crucial for safe and effective towing․ Incorrect installation can lead to unsafe braking performance, potentially causing accidents or damage to your vehicle and trailer․ Ensuring all connections are secure and settings are configured correctly guarantees optimal braking efficiency․ Misconfigured settings may result in inadequate or excessive brake force, which can compromise control while towing; Following the manufacturer’s guidelines and performing a thorough setup ensures reliability and longevity of the system․ Improper installation can also void the warranty or lead to electrical issues, emphasizing the need for careful attention to detail during the process․

Installation Guide for the Prodigy P2 Brake Controller

A comprehensive guide detailing the step-by-step process for installing the Prodigy P2 Brake Controller, including mounting, wiring, and testing procedures to ensure proper function and safety․

2․1 Step-by-Step Installation Instructions

Mount the Prodigy P2 Brake Controller in an accessible location, ensuring proper visibility․ Connect the power wire to the vehicle’s battery and the ground wire to a metal surface․ Attach the brake switch wire to the vehicle’s brake pedal switch․ Install the trailer connector and plug in the trailer wiring harness․ Set the controller to the correct trailer type using the manual knob․ Test the brakes without a trailer by activating the manual knob to ensure functionality․ Finally, tow a trailer to fine-tune the brake settings for optimal performance․ Refer to the wiring diagram for precise connections and follow safety guidelines․

2․2 Hard-Wiring Diagram and Connections

The Prodigy P2 Brake Controller requires precise hard-wiring connections to ensure proper functionality․ Connect the power wire directly to the vehicle’s battery, and the ground wire to a clean metal surface․ The brake switch wire links to the vehicle’s brake pedal switch, activating the trailer brakes when the vehicle brakes․ The trailer connector plugs into the trailer wiring harness․ Refer to the provided wiring diagram for correct terminal connections․ Ensure all wires are securely attached to avoid interference or damage․ Proper connections are critical for safe and reliable braking performance․ Always consult the manual or a professional if unsure․

Components of the Prodigy P2 Brake Controller

Key components include the Power Knob for adjusting power levels, the Boost Button for enhancing braking intensity, and the Manual Knob for manual activation․ LED indicators monitor system status․

3․1 Power Knob Functionality

The Power Knob on the Prodigy P2 Brake Controller allows users to adjust the power level sent to the trailer brakes․ Turning the knob increases or decreases the power output, ensuring smooth and controlled braking․ The power level is displayed via LED indicators, which change color to reflect the selected setting․ Proper adjustment of the power knob is crucial for safe towing, as it ensures the trailer brakes engage proportionally with the vehicle’s brakes․ This feature is particularly useful for fine-tuning brake performance based on the trailer’s weight and load conditions, enhancing overall towing stability and safety on the road․

3․2 Boost Button Features

The Boost Button on the Prodigy P2 Brake Controller provides additional braking power when needed․ Pressing the button applies a predetermined boost level to the trailer brakes, enhancing control during downhill towing or sudden stops․ This feature helps maintain trailer stability and prevents swaying, ensuring safer towing experiences․ The boost function can be manually activated to apply consistent brake pressure, offering an extra layer of safety and control․ This is especially useful for drivers towing heavy loads or navigating challenging terrain, making the Prodigy P2 a reliable choice for secure and efficient braking․

3․3 Manual Knob Operation

The Manual Knob on the Prodigy P2 Brake Controller allows for manual activation of the trailer brakes, providing additional control when needed․ Turning the knob applies brake pressure to the trailer, which is useful for testing or applying extra braking force without relying on the vehicle’s brakes․ The manual knob operates independently of the vehicle’s brake pedal, giving the driver more flexibility․ It can also be used to apply brakes when no trailer is connected, ensuring the system functions correctly․ This feature is particularly handy for adjusting brake settings or testing the system before towing․ Proper use ensures safe and precise control․

Operating the Prodigy P2 Brake Controller

Operating the Prodigy P2 involves adjusting settings for safe towing․ It uses proportional braking for smooth stops and includes manual activation for added control when needed․

4․1 Power Requirements and Activation

The Prodigy P2 Brake Controller requires a 12V DC power supply for operation․ Activation occurs automatically when the vehicle’s brakes are applied, ensuring proportional braking․ With a trailer connected, the controller activates seamlessly, while without a trailer, manual activation via the knob is possible․ Proper power setup ensures smooth and safe towing experiences․

4․2 Manual Knob Activation Without a Trailer

The Prodigy P2 Brake Controller allows manual activation of the trailer brakes using the manual knob, even without a trailer connected․ This feature is useful for testing the system or applying brakes in specific situations․ To activate, simply turn the manual knob clockwise, which sends a signal to the brake magnets․ The controller provides a smooth, gradual braking response․ Ensure the vehicle is stationary when testing to avoid unintended movement․ This function is a safety feature designed to give users full control over the braking system, ensuring reliability and peace of mind during towing operations․

Adjusting the Prodigy P2 Brake Controller

Adjusting the Prodigy P2 involves fine-tuning settings for optimal braking performance․ Calibration, sensitivity, and output levels can be modified to suit specific towing needs and vehicle-trailer configurations․

5․1 Fine-Tuning Brake Settings for Optimal Performance

Fine-tuning the Prodigy P2 Brake Controller ensures precise control over trailer braking․ Adjust the sensitivity and output levels to match the weight and type of your trailer․ Use the manual knob to set the initial brake power, then test the setup under real towing conditions․ If braking feels too aggressive or weak, tweak the settings accordingly․ The boost button can also be adjusted to enhance braking performance for heavier loads․ Regularly check and modify settings to adapt to changing trailer configurations or driving conditions for consistent and reliable braking performance․ Proper calibration ensures smooth, safe towing experiences every time․

Maintenance and Troubleshooting

Regularly inspect wiring connections and clean the controller to ensure proper function․ Address issues promptly, such as faulty connections or software updates, for reliable performance․

6․1 Regular Maintenance Tips

Regular maintenance ensures the Prodigy P2 Brake Controller functions optimally․ Check wiring connections for cleanliness and tightness to prevent signal loss․ Clean the control unit periodically to avoid dust buildup․ Inspect the manual knob and boost button for smooth operation․ Update firmware if available to enhance performance․ Test the brake system regularly to ensure proper activation․ Store the controller in a dry, cool place when not in use to prevent damage․ Refer to the manual for specific maintenance schedules and guidelines to keep your brake controller reliable and efficient for safe towing experiences․

6․2 Common Issues and Solutions

Common issues with the Prodigy P2 Brake Controller often relate to wiring or connectivity․ If the controller fails to power on, check the vehicle’s battery connection and ensure the unit is properly grounded․ For inconsistent braking, inspect the trailer wiring for damage or corrosion․ If the manual knob doesn’t activate brakes, verify the trailer is correctly connected․ Resetting the controller by disconnecting and reconnecting the power supply can resolve minor glitches․ Always refer to the manual for troubleshooting steps․ Regular maintenance and proper installation can prevent most issues, ensuring safe and reliable braking performance while towing;

The Prodigy P2 Brake Controller ensures safe and efficient towing․ Proper installation, setup, and maintenance are crucial for optimal performance․ Always follow the manual for best results․

7․1 Final Tips for Safe and Effective Use

For safe and effective use of the Prodigy P2 Brake Controller, always follow the manual instructions․ Regularly inspect wiring and connections to ensure proper functionality․ Adjust settings according to trailer weight and braking needs․ Use the boost feature for heavier loads and manual override for emergencies․ Keep the device clean and dry to prevent malfunctions․ Test the brakes periodically to ensure consistent performance․ Never tow without proper setup, as this can compromise safety․ By adhering to these guidelines, you can enjoy a secure and hassle-free towing experience with the Prodigy P2 Brake Controller․

targeted english language development instruction

Importance of Targeted English Language Development Instruction

Targeted ELD instruction is essential for English learners’ academic success. It bridges language gaps‚ ensuring students grasp both the form and function of English‚ while scaffolding their cultural and cognitive growth.

1.1 Focus on Form and Function of the English Language

Targeted ELD instruction emphasizes understanding both the structure (form) and usage (function) of English. This dual focus helps learners master grammatical rules‚ vocabulary‚ and pronunciation while grasping how language is used in real-life contexts. By integrating form and function‚ students develop the ability to communicate effectively and apply language skills across academic and social settings.

1.2 Personalized Learning Opportunities

Personalized learning is a cornerstone of targeted ELD instruction. By tailoring instruction to individual needs‚ teachers ensure each student receives focused support. This approach addresses diverse proficiency levels‚ learning styles‚ and cultural backgrounds‚ fostering a more inclusive and effective learning environment. Personalization helps learners progress at their own pace‚ building confidence and fluency in English.

Key Components of Targeted ELD Instruction

Targeted ELD instruction integrates structured immersion methods and explicit language structure instruction. These components ensure learners develop proficiency systematically‚ with clear focus and measurable progress in English acquisition.

2.1 Structured English Immersion Methods

Structured English immersion methods provide systematic exposure to the language. These approaches involve sheltered instruction‚ where content is taught using simplified language and visual aids. This creates an environment where learners are immersed in English while receiving scaffolded support‚ ensuring comprehension and active participation. Such methods are particularly effective for developing both conversational and academic language skills simultaneously.

2.2 Explicit Instruction on Language Structure

Explicit instruction on language structure is crucial for ELD. It involves direct teaching of grammar‚ vocabulary‚ and sentence patterns‚ ensuring learners understand and apply language rules. This method breaks down complex elements into manageable parts‚ providing clear examples and guided practice. Explicit instruction aligns with structured immersion‚ reinforcing learning through intentional‚ focused lessons that build foundational language skills progressively.

Inquiry-Based Learning in ELD

Inquiry-Based Learning in ELD fosters critical thinking and collaboration. By engaging students in exploratory‚ student-centered activities‚ it promotes deeper language understanding and cultural awareness‚ enhancing overall academic engagement.

3.1 Enhancing Critical Thinking Skills

Inquiry-Based Learning in ELD enhances critical thinking by engaging students in exploratory activities. Learners analyze information‚ evaluate evidence‚ and solve problems collaboratively. This approach fosters curiosity‚ encouraging questions and discussions. By articulating thoughts and supporting ideas with evidence‚ students develop clarity and precision in communication. Such practices not only improve critical thinking but also deepen language proficiency‚ making learning meaningful and effective for English learners.

3.2 Promoting Collaborative Learning Environments

Collaborative learning environments in ELD foster meaningful interaction and language practice. Group activities and peer discussions encourage students to communicate ideas‚ clarify doubts‚ and build confidence. Educators facilitate inclusive spaces where diverse perspectives are valued‚ promoting mutual respect and teamwork. This approach not only enhances language acquisition but also strengthens social skills‚ preparing learners for real-world communication and fostering a sense of community in the classroom.

Role of Language Objectives in ELD

Language objectives guide ELD instruction‚ ensuring learners develop specific skills tied to content goals. They align language acquisition with academic tasks‚ providing clear targets for teachers and students.

4.1 Aligning Language Objectives with Content Instruction

Aligning language objectives with content instruction ensures that English learners can access academic material effectively. By integrating both‚ teachers address specific language needs while teaching subject matter‚ promoting deeper understanding. This approach fosters proficiency and supports learners in meeting both linguistic and academic goals simultaneously‚ making instruction more cohesive and impactful.

4.2 Examples of Language Objectives Across Grade Levels

Language objectives vary by grade‚ ensuring learner-specific support. For elementary‚ objectives might focus on identifying vocabulary and forming basic sentences. Middle school could involve summarizing texts or comparing ideas. High school objectives might include analyzing arguments or using evidence to support claims. These examples demonstrate how objectives align with learners’ developmental stages and content demands.

Addressing a Wide Range of Skills and Abilities

ELD instruction must cater to diverse learner needs‚ ensuring scaffolding and Universal Design for Learning principles are applied to support varying proficiency levels and learning styles effectively.

5.1 Tailoring Instruction to Diverse Learner Needs

Tailoring instruction to diverse learner needs ensures that English language development meets individual student requirements. Teachers use differentiated strategies‚ including varied scaffolding techniques and learning resources‚ to support students with differing proficiency levels and learning styles. This personalized approach fosters an inclusive environment‚ promoting equitable access to content and language acquisition opportunities for all learners‚ regardless of their background or ability.

5.2 Universal Design for Learning (UDL) in ELD

Universal Design for Learning (UDL) in ELD ensures that instruction is accessible to all learners by providing multiple means of engagement‚ representation‚ and action & expression. This approach allows educators to address diverse learning needs proactively‚ fostering inclusivity and maximizing language development opportunities for English learners. UDL supports flexible learning environments that cater to varied preferences and abilities‚ enhancing overall academic outcomes.

The Importance of First Language in Second Language Learning

The first language serves as a cornerstone for second language acquisition‚ fostering cognitive and linguistic connections. Bilingualism enhances metalinguistic awareness‚ aiding learners in understanding English structures and cultural contexts effectively.

6.1 Dispelling the Myth of “English Only” Instruction

The “English Only” approach is outdated‚ as research shows bilingualism enhances learning. Allowing students to use their first language as a resource fosters understanding and bridges gaps in second language acquisition. This strategy promotes cultural identity and accelerates academic growth‚ benefiting learners in diverse educational settings and aligning with modern language development theories.

6.2 Strategies for Supporting Bilingual Learners

Supporting bilingual learners involves integrating their first language as a resource. Techniques include scaffolded instruction‚ group activities promoting peer-to-peer support‚ and incorporating multicultural resources. Encouraging code-switching and providing translation tools also aids comprehension. Additionally‚ involving parents through bilingual workshops or materials fosters a collaborative learning environment‚ honoring students’ linguistic and cultural backgrounds while enhancing their English proficiency.

Research-Backed Instructional Techniques

Research-backed techniques are proven to enhance language acquisition. Strategies like explicit instruction and scaffolded learning are supported by empirical evidence‚ ensuring measurable progress in language development.

7.1 Top 10 Evidence-Based Strategies for Language Learning

Research highlights effective strategies for language learning‚ including explicit instruction‚ task-based learning‚ and scaffolding. Techniques like form-focused instruction and differentiated teaching also enhance outcomes. Incorporating technology‚ spaced repetition‚ and visual aids supports retention. Formative assessments and culturally responsive practices further tailor instruction. These methods‚ backed by studies‚ ensure learners acquire language skills efficiently and effectively.

7.2 Accelerating Language Acquisition Through Effective Practices

Accelerating language acquisition involves integrating proven teaching methods that enhance understanding and retention. Strategies such as structured immersion‚ explicit instruction‚ and personalized learning opportunities ensure learners progress steadily. Additionally‚ incorporating formative assessments and scaffolding techniques helps tailor instruction to individual needs‚ fostering a supportive and inclusive learning environment that promotes rapid language development and academic success.

Integrating Cultural Awareness into ELD Instruction

Cultural awareness enriches ELD instruction by creating an inclusive environment. It fosters respect for diverse backgrounds‚ enhancing students’ sense of belonging and connection to their learning experiences.

8.1 The Role of Cultural Competence in Language Development

Cultural competence bridges language and cultural understanding‚ enhancing ELD instruction. It validates students’ identities‚ fostering an inclusive classroom environment. By incorporating diverse texts and discussions‚ educators tailor strategies to meet learners’ unique backgrounds‚ enriching their language acquisition journey and promoting cross-cultural connections. This approach ensures that students feel valued‚ leading to more effective and meaningful language development.

8.2 Incorporating Multicultural Resources in the Classroom

Multicultural resources enrich ELD instruction by reflecting diverse student experiences. They provide authentic contexts for language learning‚ making lessons relatable and engaging. By using literature‚ media‚ and materials from various cultures‚ educators create inclusive environments that celebrate students’ backgrounds. This approach not only enhances language acquisition but also fosters empathy and global understanding‚ benefiting all learners in the classroom.

Scaffolding Instruction for English Learners

Scaffolding instruction supports English learners by breaking tasks into manageable parts. It provides temporary support and guidance‚ enabling learners to build language skills progressively and confidently.

9.1 Gradual Release of Responsibility in Language Learning

The gradual release of responsibility is a powerful strategy in ELD instruction‚ where teachers initially model language tasks‚ then guide learners through practice‚ and finally allow independent application. This approach ensures learners build confidence and competence progressively‚ with scaffolding adjusted to meet individual needs. It promotes autonomy and reinforces language development across reading‚ writing‚ and speaking tasks‚ making complex skills achievable.

9;2 Using Visual and Graphic Organizers to Support Learning

Visual and graphic organizers are effective tools in ELD instruction‚ helping learners visualize language structures and concepts. These tools‚ such as charts‚ maps‚ and diagrams‚ scaffold learning by breaking down complex ideas into manageable parts. They support vocabulary development‚ sentence structure‚ and comprehension‚ enabling learners to organize ideas and connect new information with prior knowledge‚ fostering clearer expression and deeper understanding of content.

Assessing and Monitoring Progress in ELD

Regular formative assessments and progress monitoring ensure English learners’ growth is tracked effectively‚ guiding tailored instruction and fostering continuous improvement in language proficiency.

10.1 Formative Assessment Strategies for Language Development

Formative assessments are crucial for monitoring English learners’ progress. Strategies include exit tickets‚ verbal checks‚ and digital tools to gather real-time data on language proficiency. These methods allow teachers to identify strengths‚ areas for improvement‚ and adjust instruction accordingly; Regular feedback helps learners stay motivated and focused on their language goals‚ ensuring continuous growth and mastery of English skills.

10.2 Using Data to Inform Instructional Decisions

Data-driven instruction is vital for tailored English language development. By analyzing formative assessment results‚ teachers identify learning trends and gaps‚ enabling targeted interventions. This approach ensures personalized learning‚ aligns instruction with student needs‚ and maximizes progress. Data also helps track growth over time‚ informing adjustments to lessons and strategies‚ ultimately fostering more effective language acquisition and academic success for English learners.

presto poplite instructions

Welcome to the Presto PopLite instructions guide! This manual will help you master the art of making delicious popcorn with ease using the Presto PopLite hot air popper, ensuring quick and healthy results every time. Perfect for movie nights or snacks, this guide covers everything from setup to troubleshooting. Let’s get started!

1.1 Overview of the Presto PopLite Popper

The Presto PopLite is a hot air popcorn popper designed for quick and healthy popping. It features a built-in butter melter and a transparent cover for monitoring. Compact and efficient, it pops up to 18 cups in less than 2.5 minutes. Perfect for home use, it ensures evenly popped kernels without oil, making it a great choice for movie nights or snacks. Its simplicity and speed make it a popular option for popcorn lovers.

1.2 Importance of Following Instructions

Following the Presto PopLite instructions is crucial for safe and efficient operation. Proper use ensures optimal popping results, prevents damage to the appliance, and avoids potential hazards. Adhering to the guidelines helps maintain the popper’s longevity and performance. By following the steps, you can achieve perfectly popped popcorn every time while ensuring a smooth and enjoyable user experience. This makes the Presto PopLite a reliable choice for homemade popcorn lovers.

Key Features of the Presto PopLite

The Presto PopLite features hot air popping technology, a built-in butter melter, and a transparent cover for monitoring. It pops up to 18 cups quickly and evenly, making it an efficient and healthy choice for homemade popcorn enthusiasts. Its compact design and easy operation ensure a hassle-free snacking experience.

2.1 Hot Air Popping Technology

The Presto PopLite utilizes hot air popping technology to cook kernels without oil, offering a healthier alternative. This method ensures even popping, minimal unpopped kernels, and a quick process, delivering up to 18 cups of popcorn in under 2.5 minutes. The hot air circulation guarantees consistent results, making it faster and more efficient than traditional methods like microwaving. This technology is a key feature that sets the Presto PopLite apart, providing a convenient and healthy snacking experience.

2.2 Built-in Butter Melter

The Presto PopLite features a built-in butter melter that evenly distributes melted butter over the popcorn as it pops. This ensures every piece is coated without the need for oil, enhancing flavor naturally. The melter also doubles as a convenient measuring cup, making it easy to portion out the perfect amount of butter for your snack. This feature adds convenience and tastiness to your popcorn experience.

2.3 Transparent Cover for Monitoring

The Presto PopLite includes a transparent cover, allowing you to monitor the popping process without lifting it. This feature ensures you can watch as each kernel pops to perfection, preventing burning. The clear design provides real-time feedback, helping you achieve perfectly popped popcorn every time. This visibility makes the process both efficient and enjoyable, ensuring optimal results with minimal effort.

Setting Up Your Presto PopLite

Setting up your Presto PopLite is straightforward. Begin by unpacking and preparing the unit, ensuring all parts are included and undamaged. Place it on a heat-resistant surface for safe operation.

3.1 Unpacking and Initial Preparation

Start by carefully unpacking your Presto PopLite from the box. Ensure all components, including the popping chamber, transparent cover, and butter melter, are included and free from damage. Before first use, wash the removable parts with warm, soapy water and rinse thoroughly. Dry all components to prevent any moisture buildup. This initial preparation ensures your popper is clean and ready for safe operation.

3.2 Placing the Popper on a Heat-Resistant Surface

Position the Presto PopLite on a flat, heat-resistant surface, such as a countertop or table. Avoid placing it near water or moisture to prevent electrical hazards. Ensure the surface is stable and away from children or pets to maintain safety. This setup ensures proper ventilation and prevents overheating during operation. Always follow safety guidelines to enjoy hassle-free popcorn making.

Step-by-Step Usage Instructions

Follow these easy steps to enjoy perfect popcorn. Add kernels, operate the popper, and use the built-in butter melter for delicious results every time.

4.1 Measuring and Adding Popcorn Kernels

Measure 1/2 cup of popcorn kernels for optimal popping. Pour the kernels into the popping chamber, ensuring they are evenly spread. Avoid overfilling to allow proper popping.

4.2 Operating the Popper and Popping Process

Plug in the Presto PopLite and turn it on; The hot air will circulate, popping the kernels. Monitor the process through the transparent cover. Once popping slows, turn off the popper and unplug it. Let it cool slightly before serving. This method ensures evenly popped, healthy popcorn in under 2.5 minutes.

4.3 Using the Built-in Butter Melter

Pour melted butter into the built-in butter melter before or during popping. The melter evenly distributes butter over the popcorn as it pops, ensuring flavorful results. For easy cleaning, the butter melter is dishwasher-safe. This feature enhances the taste of your popcorn without extra effort, making it a convenient addition to the Presto PopLite’s design. Regular cleaning ensures optimal performance and prevents residue buildup.

Tips for Optimal Popping Results

For perfect popcorn, use fresh kernels, monitor popping, and adjust butter as needed. Experiment with flavors and seasonings for a customized taste experience every time.

5.1 Choosing the Right Popcorn Kernels

Selecting high-quality popcorn kernels is crucial for optimal results. Opt for fresh, dry kernels with a moisture level between 13.5% and 14%. Avoid stale kernels, as they yield fewer pops. For the best flavor, choose 100% whole-grain kernels. Mushroom kernels produce larger, fluffier pieces, while yellow kernels offer a buttery taste. Store kernels in a cool, dry place to maintain freshness. Experiment with different types to find your favorite for the Presto PopLite.

5.2 Adjusting Butter and Seasoning

For perfect flavor, use the Presto PopLite’s built-in butter melter to evenly distribute butter over your popcorn. Start with a small amount and adjust to your taste. Experiment with seasonings like salt, cheese powder, or herbs for unique flavors. Avoid over-saturating the popcorn with butter to prevent sogginess. Try mixing in melted butter gradually while the popcorn pops for optimal coverage. This ensures a delicious, customized snack every time!

Cleaning and Maintenance

Regular cleaning ensures your Presto PopLite lasts longer. Unplug the device, then wipe the popping chamber and cover with a damp cloth. Avoid abrasive cleaners to prevent scratches. Dry thoroughly before reuse to maintain longevity.

6.1 Cleaning the Popping Chamber

After each use, unplug the Presto PopLite and let it cool. Wipe the popping chamber with a soft, damp cloth to remove any leftover kernels or residue. Avoid using abrasive cleaners or scrubbers, as they may damage the surface. For tougher stains, mix a small amount of mild dish soap with warm water and gently scrub. Rinse thoroughly and dry with a clean cloth to prevent water spots.

6.2 Maintaining the Popper for Longevity

Regularly clean the Presto PopLite to prevent residue buildup. Store it in a dry place to avoid moisture damage. Avoid submerging the popper in water or exposing it to excessive humidity. Check for worn parts and ensure the unit cools down completely before handling. Use a soft cloth for wiping and avoid harsh chemicals. Proper maintenance ensures optimal performance and extends the lifespan of your Presto PopLite.

Safety Precautions

Always handle the Presto PopLite with care, as it may get hot during operation. Avoid touching hot surfaces and ensure children stay away from the device. Keep it away from water to prevent electrical hazards. Regularly inspect the cord for damage and unplug it when not in use. Follow all safety guidelines to ensure safe and enjoyable popcorn making.

7.1 Avoiding Burns and Electrical Hazards

Avoid burns by never touching the Presto PopLite’s hot surfaces during or after operation. Always unplug the device before cleaning or storing it. Keep the popper away from water to prevent electrical shocks. Ensure the power cord is undamaged and avoid overloading outlets. Never leave the device unattended while in use. Allow it to cool down completely before handling. Proper care ensures safe and enjoyable popcorn making.

7.2 Proper Storage and Handling

Always store the Presto PopLite in a cool, dry place to maintain its functionality. After use, allow the popper to cool completely before storing to prevent moisture buildup. Handle the power cord with care, avoiding twists or kinks that could damage it. Regularly clean the device to remove residual oil or debris. Store the PopLite upright to ensure stability and prevent accidental tipping. Proper storage extends the lifespan of your popper and ensures safe handling.

Comparing Presto PopLite to Other Poppers

The Presto PopLite excels in speed, popping up to 18 cups in under 2.5 minutes, making it faster than other hot air poppers. Its efficiency and health benefits make it a top choice for homemade popcorn lovers seeking quick, natural snacks.

8.1 Speed and Efficiency

The Presto PopLite is renowned for its exceptional speed, popping up to 18 cups of popcorn in less than 2.5 minutes. Its hot air popping technology ensures rapid, oil-free cooking, making it faster and more efficient than traditional methods. This makes it ideal for quick snacks, movie nights, or large gatherings, delivering fresh, healthy popcorn effortlessly and conveniently every time. Its efficiency surpasses many other poppers on the market.

8.2 Health Benefits of Hot Air Popping

Hot air popping with the Presto PopLite offers significant health benefits. It uses no oil, resulting in lower calorie and fat content compared to traditional frying methods. The popcorn is 100% whole grain, rich in natural fiber, and free from saturated fats. This method also avoids added preservatives and artificial ingredients, making it a healthier, guilt-free snack option for families and health-conscious individuals alike.

Troubleshooting Common Issues

Troubleshooting common issues with your Presto PopLite ensures optimal performance. Identify power issues, kernel quality, or blockages. Regular cleaning and proper setup often resolve problems quickly.

9.1 Low Popping Efficiency

Experiencing low popping efficiency? Check kernel freshness and quantity. Old or damp kernels may not pop well. Ensure the popping chamber is clean and free of blockages. Verify the power supply and proper assembly. Using the correct measuring cup helps maintain efficiency. Avoid overloading, as this can reduce airflow. Regular maintenance ensures consistent results. Refer to the user manual for specific troubleshooting steps.

9.2 Power and Performance Problems

If the Presto PopLite isn’t turning on or underperforming, check the power cord and electrical connections. Ensure the outlet is working and the cord is undamaged. If the popper overheats, allow it to cool down before restarting. Clean the vents and popping chamber to ensure proper airflow. Verify that the unit is placed on a heat-resistant surface. For persistent issues, consult the user manual or contact customer support.

With the Presto PopLite, you can effortlessly create delicious, healthy popcorn at home. Its efficient hot air technology and built-in butter melter make it a versatile and convenient kitchen appliance. By following these instructions, you’ll ensure optimal performance, safety, and longevity; Enjoy your homemade popcorn while benefiting from a quick, easy, and nutritious snacking experience. Happy popping!

miele induction stove top instructions

Miele induction stove tops offer advanced cooking solutions with efficient heat control and safety features․ These instructions guide users on proper installation, operation, and maintenance to ensure optimal performance and longevity of the appliance․

Key Features of Miele Induction Stove Tops

Miele induction stove tops are renowned for their innovative design and advanced functionality․ They feature four high-performance induction cooking zones, offering precise heat control and rapid heating․ The SmartSelect sensor panel provides intuitive operation, while the PowerFlex zones allow for flexible cooking by combining two zones into one larger cooking area․ Automatic boil detection ensures efficient cooking by adjusting heat levels once water reaches a boil․ Additionally, these stove tops are equipped with touch controls for easy navigation and WiFi connectivity for smart home integration․ Safety features include automatic shut-off, residual heat indicators, and child safety locks to prevent accidents․ The sleek, frameless design integrates seamlessly into modern kitchens, while the durable glass surface ensures long-lasting performance․ These features collectively enhance cooking efficiency, safety, and adaptability, making Miele induction stove tops a premium choice for home cooks and professional chefs alike․

Safety Precautions for Miele Induction Stove Tops

Always turn cooking zones off after use to prevent accidents․ Use heat-resistant utensils and avoid covering burners with cloth or foil․ Follow installation and operating instructions to ensure safety and prevent damage․

General Safety Guidelines

Always follow Miele’s safety guidelines to ensure safe operation of your induction stove top․ Read the manual thoroughly before installation and use․ Ensure the cooktop is installed by an authorized technician to prevent damage and hazards․ Keep children away from the appliance, as they may accidentally activate the cooking zones․ Avoid placing flammable materials near the cooktop․ Never use abrasive cleaners or sharp objects, as they can damage the surface․ Ensure all pots and pans are induction-compatible to prevent malfunction․ Regularly inspect the cooktop for damage and address any issues promptly․ Always turn off the cooking zones when not in use to avoid accidental activation; Follow the manufacturer’s instructions for maintenance and repairs to ensure optimal performance and safety․ By adhering to these guidelines, you can enjoy a safe and efficient cooking experience with your Miele induction stove top․

Handling Hot Surfaces Safely

Handling hot surfaces on your Miele induction stove top requires careful attention to prevent burns and ensure safe cooking․ Always turn off the cooking zones immediately after use to avoid accidental contact with hot areas․ Use heat-resistant pot holders or gloves when handling cookware, as the cooktop and pans can remain extremely hot even after the heat is turned off․ Never leave the cooktop unattended while it is in operation, especially if children are present․ Keep a safe distance from the cooking zones to prevent accidental burns․ Additionally, avoid placing any objects on the cooktop that could melt or catch fire due to residual heat․ Regularly clean spills to prevent them from hardening, which can make them difficult to remove and potentially require more heat․ Always allow the cooktop to cool down completely before cleaning to ensure your safety․ By following these guidelines, you can safely manage hot surfaces and enjoy a secure cooking experience with your Miele induction stove top․

Protective Gear and Apparel

Using appropriate protective gear and apparel is crucial when operating a Miele induction stove top to ensure safety and prevent accidents․ Always wear heat-resistant oven mitts or gloves when handling hot cookware to avoid burns․ Long sleeves and closed clothing can protect your skin from splatters․ An apron made of durable, heat-resistant material is also recommended to shield your clothes from spills and splashes․ Additionally, consider wearing protective eyewear to safeguard against potential grease or food particles flying during cooking․ Miele strongly advises using high-quality, heat-resistant utensils and cookware to maintain safety and performance․ Avoid wearing loose jewelry or clothing that could dangle near the cooktop, as it may catch fire or get damaged․ Proper protective gear ensures a safe and enjoyable cooking experience while using your Miele induction stove top․

Operating the Miele Induction Stove Top

Operating the Miele induction stove top involves turning cooking zones on/off, adjusting heat settings, and using induction-compatible cookware․ Ensure the cookware is properly placed and compatible for optimal performance and safety․

Understanding the Control Panel

The Miele induction stove top control panel is designed for intuitive operation, featuring touch-sensitive controls and clear LED displays․ The panel includes buttons for selecting cooking zones, adjusting power levels, and accessing special functions like timer settings․ Some models offer a SmartSelect interface, simplifying zone selection and heat control․ The display provides real-time feedback on active zones and current settings, ensuring precise cooking management․ Indicator lights signal when zones are active or if a pan is detected․ The control panel also includes safety features, such as child safety locks and automatic shut-off, which can be easily managed through the interface․ Understanding the control panel is essential for maximizing the stove’s efficiency and safety․ Regular updates or specific model variations may introduce new features, so consulting the manual is recommended for detailed functionality․ Proper use of the control panel ensures seamless cooking experiences and maintains the appliance’s longevity․ Always refer to the user manual for model-specific guidance and updates․

Turning Cooking Zones On and Off

To operate the Miele induction stove top, ensure the appliance is properly installed and connected to a power source․ Begin by cleaning and drying the cooktop to prevent any obstructions․ Place an induction-compatible pan on the desired cooking zone, as the stove automatically detects magnetic-based cookware․ Use the control panel to activate the zone by selecting the corresponding button or touchscreen area․ The stove will emit a confirmation tone, and the zone will begin heating․ Adjust the power level using the plus or minus buttons, or slide your finger on touch models for precise control․ When cooking is complete, turn the zone off using the control panel or let it automatically deactivate after removing the pan․ Always ensure the zone is turned off to avoid residual heat and energy waste․ Regularly check for software updates to maintain optimal functionality and safety features․ Proper operation ensures efficient and safe cooking experiences with your Miele induction stove top․

Adjusting Heat Settings

Adjusting heat settings on a Miele induction stove top is intuitive and precise․ Use the control panel to select the desired cooking zone and choose from various power levels․ The stove features a touch-sensitive interface, allowing users to increase or decrease heat by sliding their finger or pressing the plus or minus buttons․ The power levels are typically indicated by LED displays, showing the current setting from 1 to 9․ For delicate dishes, lower settings are ideal, while higher settings are suitable for rapid boiling or searing․ Some models offer a booster function, temporarily increasing power for tasks like quick heating․ The stove automatically adjusts to the size and type of cookware, optimizing energy use․ Always monitor the heat to prevent overheating, especially when using sensitive cookware․ Miele’s advanced sensors ensure responsive control, making it easy to achieve perfect cooking results․ Proper heat adjustment enhances cooking efficiency and helps maintain the longevity of both the stove and cookware․

Using Induction-Compatible Cookware

For optimal performance with your Miele induction stove top, it’s crucial to use induction-compatible cookware․ This ensures efficient heat transfer and energy efficiency․ Induction cookware typically features a ferromagnetic base, such as stainless steel or cast iron, which is essential for the magnetic field to activate the heating process․ Non-magnetic materials like aluminum or copper won’t work unless they have a ferromagnetic layer․ Always check for the induction compatibility symbol on your cookware, usually a coil icon․

  • Choose cookware with a flat, even base for consistent heat distribution․ Warped pans can lead to uneven cooking and reduced efficiency․
  • Avoid using glass or ceramic cookware unless specifically designed for induction cooking, as they may not heat properly or could damage the stove surface․

Test compatibility by placing a magnet on the cookware’s base; if it sticks firmly, it’s likely induction-compatible․ Proper cookware selection enhances cooking performance and ensures safety while using your Miele induction stove top․

Maintenance and Cleaning of Miele Induction Stove Tops

Regular cleaning and proper maintenance are essential for prolonging the life of your Miele induction stove top․ Use gentle, non-abrasive cleaners and avoid harsh chemicals to prevent damage to the glass surface․

Daily Cleaning and Upkeep

For daily cleaning, gently wipe the Miele induction stove top with a soft, damp cloth after each use to remove spills and splatters․ Avoid using abrasive materials or harsh chemicals, as they can scratch the surface․ Instead, use a cleaner specifically designed for glass or ceramic surfaces․ For tougher stains, apply a small amount of vinegar or a gentle cleaning solution and let it sit for a few minutes before wiping clean․ Regularly cleaning the stove top prevents grime buildup and maintains its polished appearance․ Always ensure the surface is cool before cleaning to prevent burns or damage․ Additionally, dry the stove top thoroughly after cleaning to avoid water spots․ Consistent daily upkeep ensures optimal performance and longevity of your Miele induction stove top․

Deep Cleaning and Sanitizing

Deep cleaning and sanitizing your Miele induction stove top are essential for maintaining hygiene and performance․ Start by allowing the surface to cool completely․ Mix a solution of equal parts water and white vinegar in a spray bottle․ Apply the solution to the stove top, ensuring full coverage․ Let it sit for 10-15 minutes to help break down stubborn stains and grime․ Use a soft, non-abrasive sponge or cloth to gently scrub the surface, working in a circular motion․ For particularly tough spots, apply a small amount of baking soda paste and let it sit for an additional 5 minutes before scrubbing․ Rinse thoroughly with a clean, damp cloth to remove any residue․ To sanitize, use a mixture of water and a few drops of dish soap, then wipe down the stove top and dry it with a clean towel․ Regular deep cleaning ensures your Miele induction stove top remains clean, sanitized, and in excellent condition․

Professional Servicing and Repairs

Professional servicing and repairs for your Miele induction stove top are crucial for maintaining its performance and safety․ Miele strongly recommends that all installation, maintenance, and repairs be carried out by authorized technicians․ This ensures compliance with safety standards and prevents potential damage to the appliance․ Attempting repairs yourself or using unauthorized personnel can void the warranty and pose serious safety risks․ If you notice any issues, such as malfunctioning cooking zones or damaged surfaces, contact a Miele-approved service provider immediately․ Regular professional servicing can also help prevent issues before they arise, ensuring your stove top operates efficiently and safely․ Always refer to the user manual for specific guidance on when and how to seek professional assistance․ Remember, proper servicing is essential for extending the lifespan of your Miele induction stove top and ensuring optimal cooking results․

dream on me synergy 5 in 1 convertible crib instructions

The Dream On Me Synergy 5-in-1 Convertible Crib is a top choice for parents seeking durability and style․ Its versatile 5-in-1 design transforms from crib to toddler bed‚ daybed‚ and more‚ ensuring safety and comfort as your child grows․

1․1 Overview of the Crib’s Features and Benefits

The Dream On Me Synergy 5-in-1 Convertible Crib offers a versatile design‚ adapting to your child’s growth from infancy to youth․ It features a sturdy frame‚ easy conversions‚ and adjustable mattress height․ The crib includes wheels for mobility and a sleek‚ modern style․ Its safety-focused construction meets rigorous standards‚ ensuring durability and reliability․ With included tools and hardware‚ assembly is streamlined‚ while its compact design fits seamlessly into any nursery decor‚ providing comfort and practicality for years․

1․2 Importance of Following the Assembly Instructions

Following the assembly instructions is crucial for ensuring the crib’s stability and safety․ Proper assembly prevents structural issues and potential hazards․ Adhering to guidelines ensures all parts are securely fastened‚ meeting safety standards․ Incorrect assembly can lead to a wobbly or unstable crib‚ risking your child’s safety․ Always use the provided hardware and tools to avoid damage or malfunction․ Your child’s security depends on precise assembly․

Safety Precautions and Warnings

Always follow safety guidelines to ensure your child’s well-being․ Use only approved hardware‚ avoid modifications‚ and keep the crib away from hazards like curtains or blinds․

2․1 General Safety Guidelines for Crib Assembly

Always ensure a flat‚ stable surface for assembly․ Use only the provided hardware and tools to avoid damage․ Follow the instructions carefully to prevent errors․ Tighten all bolts and screws securely to ensure stability․ Avoid using worn or damaged parts‚ as this could compromise safety․ Double-check all connections before placing the mattress inside․ Keep the area clean and free from distractions while assembling the crib․

2․2 Warning Labels and Hazard Identification

Warning labels on the crib highlight critical safety precautions to prevent accidents․ They emphasize avoiding loose bedding‚ ensuring proper mattress fit‚ and never leaving toys or objects that could pose choking or entrapment hazards․ Additionally‚ labels warn against exceeding weight limits and stress the importance of regular inspections for wear and tear․ Always check for sharp edges or gaps that could harm your child․

Identifying potential hazards‚ such as unstable structures or missing hardware‚ is essential before use․ Ensure all bolts and screws are securely tightened‚ and verify that the crib meets current safety standards․ Never modify the crib or use unauthorized parts‚ as this could compromise its integrity and safety features․

Tools and Parts Required for Assembly

The Dream On Me Synergy crib comes with essential hardware like screws‚ bolts‚ and wheels․ Additional tools such as an Allen wrench and screwdriver may be needed for assembly․

3․1 List of Included Hardware and Tools

The Dream On Me Synergy 5-in-1 Convertible Crib comes with essential hardware‚ including bolts‚ screws‚ and an Allen wrench for assembly․ Additionally‚ the package includes wheels with brakes for easy mobility and stability․ All necessary tools are provided to ensure a smooth assembly process․ Organize the parts carefully before starting‚ and refer to the instruction manual for a detailed list and usage guide․

3․2 Additional Tools You May Need

Beyond the included hardware‚ you may need a screwdriver‚ Allen wrench‚ or socket wrench for tighter fastening․ A rubber mallet can help tap parts into place without damaging the finish․ Optional tools like clamps or a power drill may speed up assembly․ Ensure all tools are within reach to streamline the process․ Having a tape measure handy can also help verify accurate alignment during assembly․

Step-by-Step Assembly Instructions

Begin by unpacking and organizing all components․ Attach the crib sides to the frame using the provided hardware‚ ensuring all bolts are securely tightened․ Proceed to assemble the mattress support and wheels‚ following the sequence outlined in the manual for stability and safety․

4․1 Unpacking and Organizing the Components

Begin by carefully unpacking all items from the box․ Inspect for damage and ensure all parts are included․ Separate the crib frame‚ sides‚ mattress support‚ wheels‚ and hardware․ Organize screws‚ bolts‚ and Allen wrenches in a designated area for easy access․ Refer to the included manual for a detailed list of components․ Double-check for any missing or damaged pieces before starting assembly to avoid delays․

4․2 Assembling the Crib Frame and Sides

Begin by unpacking and organizing all frame components․ Attach the side rails to the crib frame using the provided bolts and Allen wrench․ Ensure all connections are secure and tighten firmly․ Align the mattress support brackets with the frame and screw them into place․ Double-check that all bolts are tightened properly for stability․ Refer to the manual for specific hardware locations and torque specifications․

This step ensures a sturdy foundation for the crib‚ guaranteeing safety and durability for your child․

4․3 Attaching the Mattress Support and Wheels

Attach the mattress support by aligning its brackets with the crib frame․ Secure it using the provided screws‚ ensuring they are tightly fastened; Next‚ install the wheels by screwing them into the pre-drilled holes on the crib’s legs․ Tighten all bolts firmly to prevent movement․ Double-check that the mattress support is level and the wheels are securely attached for stability and safety․

Converting the Crib to Different Configurations

The Dream On Me Synergy crib converts to a toddler bed‚ daybed‚ or twin bed using included conversion kits․ Follow instructions for safe transitions․

5․1 Converting to a Toddler Bed

Converting the crib to a toddler bed involves removing the front rail and adjusting the mattress height for easier access․ Ensure the conversion kit is used correctly‚ and all bolts are secured tightly․ This step ensures a smooth transition for your child‚ maintaining safety and comfort during their growth․ Always follow the manufacturer’s instructions to avoid any assembly errors․

5․2 Converting to a Daybed

To convert the crib to a daybed‚ remove the Toddler Rail and attach the Daybed Rail using the provided hardware; Ensure all bolts are securely tightened․ Lower the mattress height to the middle or lowest setting for safety․ Double-check that the mattress fits snugly within the frame․ This configuration provides a comfortable sleeping or resting area for older children‚ maintaining the crib’s stability and style․ Always follow safety guidelines during conversion․

5․3 Converting to a Twin Bed (if applicable)

To convert the crib to a twin bed‚ attach the provided twin bed frame and ensure all bolts are securely tightened․ Place the twin-sized mattress inside‚ ensuring it fits snugly without gaps․ Double-check the stability of the bed and verify that all safety standards are met․ This step completes the transition to a twin bed configuration‚ providing a comfortable and safe sleeping solution for older children․

Adjusting the Mattress Height

Adjusting the mattress height ensures your child’s safety and comfort as they grow․ The crib features an easy-to-use mechanism to lower the mattress for toddler stages․

6․1 How to Lower the Mattress for Toddler Safety

To ensure toddler safety‚ lower the mattress as your child grows․ Locate the adjustment mechanism‚ typically found at the crib’s base․ Use the included Allen wrench to loosen the bolts; Carefully lower the mattress support to the desired height and tighten the bolts securely․ Always refer to the manual for specific instructions and ensure the mattress is snugly fitted to prevent gaps․ Safety and stability are paramount․

6․2 Securing the Mattress Support in Place

To ensure the mattress support is stable‚ tighten all screws and bolts firmly using the provided Allen wrench․ Double-check that all connections are secure and even․ If the support feels loose‚ adjust the screws until it is snug․ Regularly inspect and tighten any hardware to maintain stability and safety for your child․

Maintenance and Cleaning Tips

Regular maintenance ensures the crib remains safe and clean․ Clean surfaces with a mild detergent and soft cloth․ Avoid harsh chemicals or abrasive cleaners that may damage finishes․

  • Tighten all hardware and bolts periodically to maintain stability․
  • Inspect for wear and tear‚ addressing any issues promptly;
  • Wipe down mattress support and wheels for smooth operation․

7․1 Cleaning the Crib Surfaces Safely

To clean the crib surfaces safely‚ use a mild detergent diluted in warm water․ Dampen a soft cloth and gently wipe down all areas‚ avoiding harsh chemicals or abrasive cleaners․ For stubborn stains‚ lightly scrub with a non-toxic solution․ Rinse thoroughly with a clean‚ damp cloth and allow the crib to air dry․ Regular cleaning helps maintain hygiene and ensure your baby’s safety․ Avoid using bleach or strong acids‚ as they may damage the finish or harm your child․

7․2 Tightening Loose Parts and Hardware

Regularly inspect and tighten any loose bolts‚ screws‚ or hardware to ensure the crib’s stability․ Use an Allen wrench for most adjustments․ Avoid over-tightening‚ as this could damage the crib․ Check all joints and connections‚ especially after moving the crib․ Tightening should be done gently but firmly to maintain structural integrity․ This step is crucial for long-term durability and safety‚ ensuring the crib remains sturdy for years to come․

Troubleshooting Common Issues

Address common issues like wobbly frames or stuck parts by tightening hardware and ensuring proper alignment․ Lubricate moving parts if necessary․ Always consult the manual for solutions․

8․1 Fixing a Wobbly or Unstable Crib

To fix a wobbly crib‚ start by checking all bolts and screws‚ ensuring they are tightly secured․ Verify that all legs are evenly placed on a level surface․ If instability persists‚ inspect the frame for any loose joints or misaligned parts․ Tighten any hardware and ensure all safety locks are engaged․ If the issue remains‚ consult the manufacturer’s support for potential adjustments or replacements to restore stability and safety․

8․2 Resolving Stuck or Difficult-to-Move Parts

If parts feel stuck or difficult to move‚ inspect for obstructions or misalignment․ Gently wiggle components back and forth while applying minimal force․ Avoid using excessive strength‚ as this could damage the crib․ Ensure all hardware is properly secured and aligned․ If issues persist‚ refer to the assembly manual or contact customer support for assistance․ Patience and careful handling are key to resolving such problems effectively․

Additional Accessories and Upgrades

Enhance functionality with compatible mattresses‚ bedding sets‚ and storage drawers․ Optional conversion kits and decorative trim add style and extend usability for growing needs․

9․1 Recommended Mattresses for the Crib

For the Dream On Me Synergy 5-in-1 Convertible Crib‚ choose a mattress that fits snugly‚ with dimensions of 52․375″ x 27․625″․ Opt for a breathable‚ firm mattress to ensure proper support and safety․ Look for certifications like Greenguard Gold or CertiPUR-US for assurance of quality and safety․ Always check the manufacturer’s guidelines to confirm compatibility with the crib’s design and features․

9․2 Optional Add-Ons for Enhanced Functionality

Enhance your crib’s functionality with optional add-ons like under-crib storage drawers‚ keeping essentials within easy reach․ A changing table attachment adds convenience‚ while bedding sets ensure style and comfort․ Canopies or mobiles can create a soothing environment‚ and themed decals personalize the crib․ These accessories improve usability‚ aesthetics‚ and safety‚ offering a complete nursery solution․

Final Inspection and Safety Check

After assembly‚ inspect all bolts‚ screws‚ and connections for tightness․ Ensure the mattress fits snugly and verify crib stability․ Check for compliance with safety standards․

10․1 Ensuring All Bolts and Screws Are Secure

After assembling the crib‚ double-check all bolts and screws to ensure they are tightly secured․ Use a screwdriver to verify each connection‚ especially around the mattress support and frame․ Properly tightened hardware prevents wobbling and ensures stability․ Refer to the manual for specific torque recommendations․ Loose parts can pose safety risks‚ so address them immediately to guarantee a secure and safe environment for your child․

10․2 Verifying Compliance with Safety Standards

Verifying compliance with safety standards ensures the crib meets all necessary regulations for your child’s safety․ Check that the mattress support is correctly positioned‚ and all rails are at the recommended height․ Ensure all hardware is securely tightened and no sharp edges or loose parts exist; Refer to the instruction manual for specific guidelines and test the crib’s stability by gently rocking it․ This step guarantees a safe environment for your child‚ adhering to ASTM and JPMA standards․

With these instructions‚ you’ve successfully assembled and configured the Dream On Me Synergy 5-in-1 Convertible Crib․ Always follow safety guidelines to ensure your child’s well-being and comfort․

11․1 Summary of Key Assembly Steps

Begin by unpacking and organizing all components‚ ensuring no parts are missing․ Assemble the crib frame and sides securely‚ following the provided instructions․ Attach the mattress support and wheels‚ tightening all hardware firmly․ Convert the crib to desired configurations by adjusting side rails and mattress height․ Double-check all bolts and screws for stability․ Ensure the crib meets safety standards and perform a final inspection before use․

11․2 Final Tips for Enjoying Your Convertible Crib

Regularly inspect and tighten all hardware to ensure stability․ Keep the crib clean using gentle‚ non-toxic cleaners to maintain a safe environment․ Store the instruction manual for future reference and adjustments․ Consider adding a breathable mattress protector for hygiene․ Always ensure the mattress fits snugly to prevent gaps․ By following these tips‚ you can enjoy your convertible crib for years‚ providing a safe and comfortable space for your child to grow․

oster toaster oven instruction manual

Welcome to the Oster Toaster Oven Instruction Manual! This guide provides essential information to help you use your appliance safely and effectively. Read carefully to understand its features, operation, and maintenance for optimal performance.

Overview of the Manual

This manual serves as a comprehensive guide for your Oster Toaster Oven, detailing essential information for safe and effective use. It covers product features, safety precautions, operating instructions, and maintenance tips. Additionally, troubleshooting advice and warranty details are included to ensure optimal performance. The manual is designed to help you understand your appliance thoroughly, enabling you to make the most of its capabilities while adhering to important safety guidelines. Reading this manual carefully will ensure a safe and enjoyable cooking experience with your Oster Toaster Oven.

Importance of Reading the Manual

Reading this manual is crucial for safe and efficient use of your Oster Toaster Oven. It provides essential safety precautions, detailed operating instructions, and troubleshooting tips. Understanding the features and guidelines ensures optimal performance and longevity of the appliance. By following the manual, you can avoid potential hazards and make the most of your cooking experience. It also helps you identify common issues and solutions, ensuring you get the best results from your Oster Toaster Oven while maintaining safety and satisfaction in your kitchen.

Safety Precautions and Guidelines

Cleaning and Maintenance

Regular cleaning ensures optimal performance. Unplug the oven, let it cool, and wipe with a damp cloth. Avoid immersion in water to prevent damage and ensure longevity.

General Safety Tips

Always unplug your Oster Toaster Oven before cleaning or maintenance. Avoid touching hot surfaces; use oven mitts or tongs. Keep children away while in operation. Ensure the oven is placed on a stable, heat-resistant surface. Never immerse electrical parts in water. Follow recommended cooking times and temperatures to prevent overheating. Regularly inspect the power cord for damage. Do not operate the oven if it malfunctions. Store food and utensils safely to avoid accidents. Adhere to these guidelines to ensure safe and efficient use of your appliance.

Electrical Safety Instructions

Always unplug the Oster Toaster Oven before cleaning or performing maintenance to avoid electrical hazards. Never submerge the appliance or its electrical components in water. Use the oven on a stable, heat-resistant surface away from water sources. Ensure the power cord is kept away from hot surfaces and avoid overloading circuits. Do not modify the plug or attempt repairs yourself. If issues arise, contact Oster Customer Service at 1-800-334-0759. Follow these guidelines to ensure safe electrical operation and prevent potential risks.

Product Features and Components

The Oster Toaster Oven features a digital control panel, convection baking, and a large capacity for versatile cooking. Its components include a baking pan, rack, and crumb tray for easy food preparation and cleanup.

Key Features of the Oster Toaster Oven

The Oster Toaster Oven offers a range of impressive features, including digital controls, convection baking, and an extra-large capacity for cooking multiple dishes. It also includes preset settings for various cooking modes, such as toasting, baking, and broiling. The oven’s intuitive interface allows for easy temperature and timer adjustments. Additional features like a stainless steel exterior and interior lighting enhance user experience. These features make the Oster Toaster Oven a versatile and convenient addition to any kitchen, perfect for both casual and advanced cooking tasks.

Understanding the Control Panel

The Oster Toaster Oven’s control panel is designed for intuitive operation. It features a digital display for clear visibility of settings and a user-friendly interface. The panel includes buttons for selecting cooking modes, adjusting temperature, and setting timers. A dial or touch controls allow precise adjustments. Indicators light up to show the active functions. Familiarize yourself with each button’s purpose, such as the start/stop button, to ensure smooth operation. Refer to the manual for detailed explanations of specific controls and their functions to maximize your cooking experience.

Operating the Oster Toaster Oven

Plug in the oven, preheat if needed, and select your desired cooking mode. Use the control panel to set temperature, timer, and functions. Monitor cooking progress for perfect results.

Basic Controls and Functions

The Oster Toaster Oven features a user-friendly control panel with intuitive buttons and dials. The power button turns the oven on/off, while the function buttons select modes like bake, toast, and convection. Use the temperature dial to adjust heat settings, and the timer buttons to set cooking duration. The LCD display shows current settings for easy monitoring. Press Start to begin cooking and Cancel to stop. These controls ensure precise adjustments for consistent results, making it easy to achieve your desired cooking outcomes safely and efficiently.

Cooking Modes and Settings

The Oster Toaster Oven offers versatile cooking modes, including Bake, Toast, Convection, Broil, Roast, and Reheat. Each mode is designed for specific tasks, such as even baking, crispy toasting, or faster cooking with convection; Adjust settings like temperature (150°F–450°F) and timer (up to 90 minutes) to tailor cooking to your recipe. Use the preset buttons for quick access to common settings, ensuring perfectly cooked dishes every time. These modes and settings provide flexibility and precision for a variety of culinary needs, making the oven adaptable to your cooking style.

Temperature and Timer Instructions

Set the temperature between 150°F and 450°F using the digital controls for precise cooking. The timer can be adjusted up to 90 minutes, with an automatic shut-off feature for safety. Always preheat the oven for 5-10 minutes before cooking for even heat distribution. Use the + and ― buttons to adjust settings, and press Start to begin. Ensure the timer is set correctly to avoid overcooking. Regularly check the display to monitor progress and adjust as needed for optimal results.

Always unplug the oven and let it cool before cleaning. Wipe interior and exterior with a damp cloth; avoid immersion in water. Clean after each use to prevent food buildup. Regular maintenance ensures longevity and optimal performance. Follow these steps to keep your Oster Toaster Oven in excellent condition for years of reliable service.

Step-by-Step Cleaning Instructions

To clean your Oster Toaster Oven, start by unplugging it and allowing it to cool completely. Remove the racks and trays and wash them with warm soapy water. For the interior, wipe down surfaces with a damp cloth, avoiding harsh chemicals. Use a soft brush to scrub away food residue. For tougher stains, mix baking soda and water to create a paste, apply it, and let it sit before wiping clean. Clean the exterior with a damp cloth to maintain its appearance. Regular cleaning prevents food buildup and ensures optimal performance.

Regular Maintenance Tips

Regular maintenance ensures your Oster Toaster Oven performs optimally. After each use, clean the interior and exterior to prevent food residue buildup. Check and replace worn-out parts like racks or trays. Descale the oven periodically if you live in areas with hard water. Ensure proper ventilation by keeping the oven at least 4 inches away from walls. Store it in a cool, dry place when not in use. By following these tips, you extend the lifespan of your appliance and maintain its efficiency for years to come.

Troubleshooting Common Issues

If your Oster Toaster Oven isn’t functioning properly, check for common issues like uneven heating or malfunctioning timers. Ensure proper power supply and clean the oven regularly for smooth operation.

Identifying Common Problems

Common issues with your Oster Toaster Oven may include uneven heating, malfunctioning timers, or power supply problems. Check for faulty electrical connections or damaged heating elements. Ensure the oven is clean, as food residue can affect performance. Verify that the timer and temperature controls are set correctly. If the oven does not turn on, confirm it is properly plugged in and the outlet is functioning. Consult the manual for troubleshooting steps before contacting customer support for assistance.

Solutions for Frequently Encountered Issues

If your Oster Toaster Oven experiences uneven heating, ensure proper air circulation and clean food residue. For timer malfunctions, reset the device and check power connections. If the oven does not turn on, verify the outlet is working and the oven is properly plugged in. For faulty heating elements, contact customer support. Regular cleaning prevents performance issues. Always unplug the oven before troubleshooting to ensure safety. Refer to the manual for detailed solutions or reach out to Oster’s customer service for professional assistance.

Warranty and Customer Support

Your Oster Toaster Oven is backed by a one-year limited warranty covering manufacturing defects. For inquiries or service, visit www.oster.com or call 1.800.334.0759 for assistance.

Understanding the Warranty Coverage

Your Oster Toaster Oven is covered by a one-year limited warranty, protecting against manufacturing defects in materials and workmanship. This warranty ensures repairs or replacements for faulty parts during the specified period. Coverage begins from the purchase date and applies to the original owner only. Misuse or unauthorized modifications may void the warranty. For detailed terms and conditions, refer to the warranty section in your manual. Contact customer service at 1.800.334.0759 or visit www.oster.com for assistance with warranty claims or inquiries.

Contacting Oster Customer Service

For assistance with your Oster Toaster Oven, contact customer service at 1.800.334.0759 or visit www.oster.com. Representatives are available to address questions, warranty claims, and repair inquiries. Online support includes downloadable manuals, troubleshooting guides, and product registration. Ensure to have your model number and purchase date ready for efficient service. Oster’s dedicated team is committed to resolving issues promptly and ensuring your satisfaction with their appliances.

By following this manual, you’ll master your Oster Toaster Oven’s features, ensuring safe and efficient cooking. Happy cooking and enjoy exploring its versatile capabilities!

Final Tips for Optimal Use

For optimal performance, always preheat your Oster Toaster Oven before cooking. Use the correct baking pans and avoid overcrowding the oven. Regularly clean the interior to maintain hygiene and efficiency. Experiment with different cooking modes to achieve desired results. Refer to the manual for specific temperature and timer settings. Ensure the oven cools down completely before cleaning. By following these tips, you’ll extend the lifespan of your appliance and enjoy consistent cooking results.

Encouragement to Explore More Features

Take full advantage of your Oster Toaster Oven by exploring its versatile features. Experiment with convection baking, toasting, and broiling to elevate your cooking. Refer to the manual for guidance on using advanced settings like precise temperature control and timer functions. Don’t hesitate to try new recipes and techniques to maximize your oven’s potential. By familiarizing yourself with all features, you’ll unlock endless culinary possibilities and enjoy a superior cooking experience with your Oster Toaster Oven.

Page 1 of 3

Powered by WordPress & Theme by Anders Norén