Category: Manuals Page 3 of 11

ariens service manual pdf

Importance of Safety Precautions

Safety precautions are critical when working with Ariens equipment. Always read the manual thoroughly, understand controls, and follow guidelines to prevent accidents. Be aware of carbon monoxide risks and ensure proper ventilation. If you feel unwell, stop the engine immediately and seek fresh air. Regular maintenance and proper handling can prevent malfunctions and ensure safe operation.

1.1 General Safety Guidelines

Adhering to safety guidelines is essential when working with Ariens equipment. Always read the manual thoroughly and familiarize yourself with all controls. Know how to stop the engine quickly in emergencies. If you feel sick, dizzy, or weak while operating, shut off the engine immediately and seek fresh air. Carbon monoxide risks are serious, so ensure proper ventilation. Regular maintenance and proper handling can prevent malfunctions and ensure safe operation. Follow all instructions carefully to avoid accidents and protect yourself.

1.2 Specific Warnings from the Ariens Service Manual

The Ariens Service Manual highlights critical safety warnings to prevent hazards. It emphasizes the risks of carbon monoxide poisoning, advising operators to shut off the engine immediately if they feel unwell and seek fresh air. Proper ventilation is essential to avoid such risks. The manual also warns against improper maintenance practices and recommends using a voltmeter to check battery voltage, ensuring safe troubleshooting and maintenance procedures are followed. These warnings are crucial for safe and effective equipment operation.

Overview of the Ariens Service Manual PDF

The Ariens Service Manual PDF is a comprehensive guide for maintaining and repairing Ariens equipment. It includes detailed instructions, diagrams, and troubleshooting tips for optimal performance.

2.1 What is the Ariens Service Manual?

The Ariens Service Manual is an essential resource for owners and technicians, providing detailed instructions for maintenance, repair, and troubleshooting of Ariens equipment. It covers various models, ensuring users can diagnose and fix issues efficiently. The manual includes safety guidelines, parts lists, and step-by-step procedures, making it indispensable for anyone looking to service or repair their Ariens machinery effectively. Regularly updated, it remains a vital tool for maintaining equipment performance and longevity.

2.2 How to Navigate the Manual Effectively

To navigate the Ariens Service Manual efficiently, start by reviewing the table of contents to locate specific sections quickly. Use the search function to find keywords or part numbers, saving time when looking for detailed procedures. Pay attention to diagrams and illustrations, as they often accompany complex instructions. Familiarize yourself with the index for easy access to parts lists and troubleshooting guides. Organize your workflow by bookmarking frequently used pages or sections, ensuring a smooth experience while servicing your equipment.

Maintenance Schedule and Procedures

Regular maintenance is essential for optimal performance and longevity of your Ariens equipment. Adhere to the schedule outlined in the manual for routine checks and servicing. Proper maintenance helps prevent unexpected issues and ensures reliability. Always refer to the manual for specific intervals and procedures tailored to your model. Neglecting maintenance can lead to premature wear and potential safety hazards.

3.1 Routine Maintenance Tasks

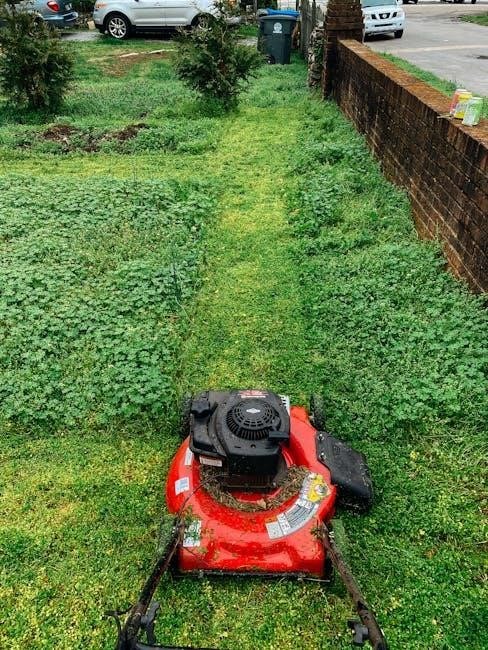
Routine maintenance tasks for Ariens equipment are designed to ensure optimal performance and longevity. Regular oil changes are crucial, using the specified type and viscosity as outlined in the manual. Check and clean or replace the air filter to maintain proper engine airflow. Inspect and sharpen the mower blades periodically to ensure clean cuts and prevent damage. Additionally, monitor and maintain the tire pressure and lubricate moving parts as recommended. Always follow the schedule provided in the manual for these tasks. Neglecting routine maintenance can lead to reduced efficiency and potential breakdowns.

3.2 Detailed Maintenance Procedures

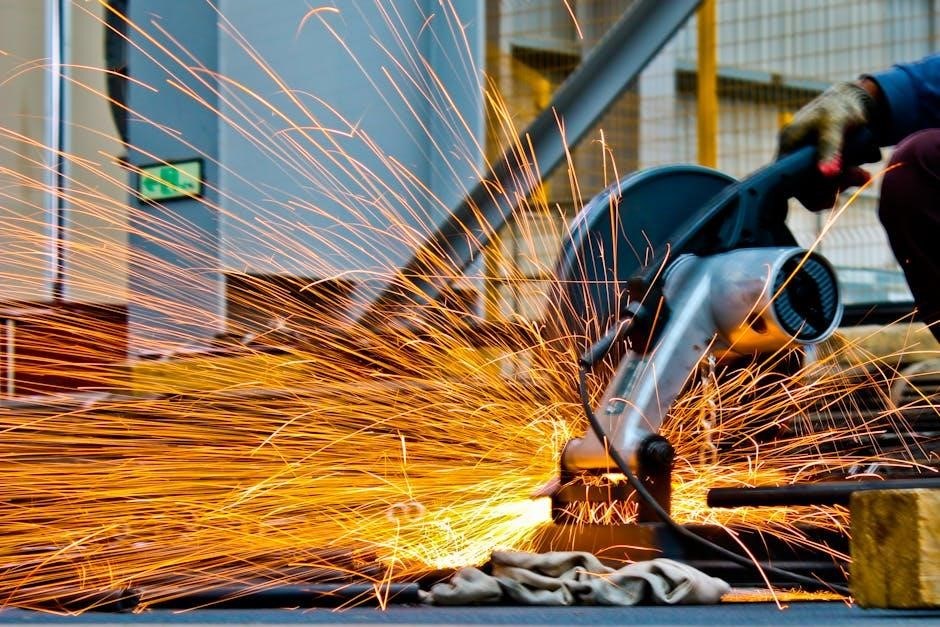
Detailed maintenance procedures ensure your Ariens equipment operates efficiently and safely. Spark plug replacement involves removing the plug, checking the gap, and reinstalling it securely. Inspect and replace belts if cracks or wear are evident. For hydraulic systems, check fluid levels and look for leaks. Always refer to the manual for torque specifications when tightening bolts or nuts. Properly clean or replace filters to maintain performance. These steps help prevent major repairs and extend the lifespan of your equipment. Regularly inspecting these components ensures reliability and optimal function.

3.3 Troubleshooting Common Maintenance Issues

Common maintenance issues with Ariens equipment often involve engine surging or difficulty starting. If the engine surges, check the governor adjustment as outlined in the manual. For starting issues, ensure the air filter is clean and the fuel system is free of blockages. If the blade stops suddenly, inspect for debris or wear. Always refer to the manual for specific troubleshooting steps and adjustments to resolve these issues effectively and safely. Regular checks can prevent these problems from arising.

Repair and Replacement Guidance

For repairs, consult the manual for step-by-step instructions and specific tools needed. Always identify parts using the provided diagrams and order genuine replacements for reliability.

4.1 Identifying and Ordering Replacement Parts

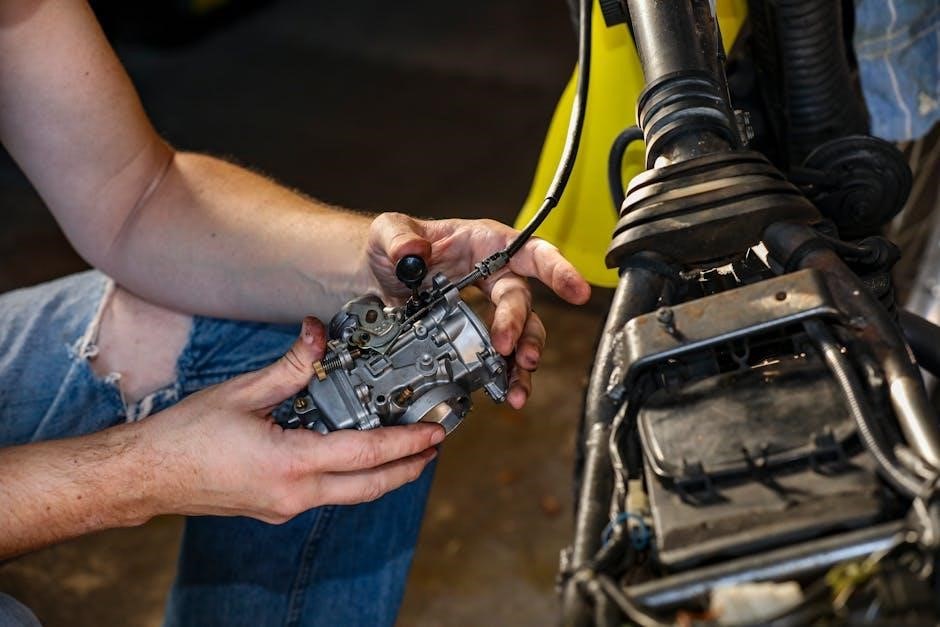
To identify replacement parts, refer to the parts diagram in the Ariens service manual. Locate the specific part number and description for accurate ordering. Use the manufacturer’s official website or authorized dealers to ensure genuine parts. Cross-reference the part number with the manual to avoid errors. Ordering genuine parts ensures compatibility, safety, and optimal performance. Always verify the part number before purchasing to avoid delays or incorrect shipments. This step is crucial for maintaining equipment reliability and longevity.

4.2 Step-by-Step Repair Instructions

The Ariens service manual provides detailed, step-by-step repair instructions for various components. Before starting, gather tools and ensure safety by disconnecting the battery. Follow the manual’s guidance for disassembling and reassembling parts. Pay attention to torque specifications and lubrication requirements. After completing repairs, test the equipment to ensure proper function. If unsure about any step, consult the parts list or contact Ariens support for clarification. Properly documented repairs ensure longevity and reliability of your equipment. Always refer to the manual for accurate procedures.

Diagnostic Techniques

The Ariens manual outlines diagnostic methods to identify issues. Use tools like voltmeters to check electrical systems and follow symptom-based troubleshooting guides for accurate repairs.

5.1 Common Diagnostic Methods

The Ariens service manual recommends starting with visual inspections to identify worn or damaged parts. Use a voltmeter to check electrical circuits and ensure proper voltage. Symptom-based troubleshooting guides help pinpoint issues, such as engine surging or poor performance. Refer to Figure 4 for locating components during maintenance. Always follow the manual’s step-by-step diagnostic procedures to ensure accurate repairs and avoid further damage. Regular checks can prevent major breakdowns and keep your equipment running smoothly.

5.2 Advanced Troubleshooting Tips

For complex issues, governor adjustments and compression checks are essential. Use a compression tester to identify internal engine problems. Advanced users can employ multimeters to trace electrical faults. Always refer to the manual for specific diagnostic procedures. When addressing engine surging, check for worn throttle cables or faulty carburetors. For persistent issues, consult supplementary guides or contact Ariens support for specialized assistance. Thorough inspections and systematic troubleshooting ensure effective repairs.

Engine-Specific Information

Engine-specific details in the Ariens manual ensure proper maintenance and repair. Briggs & Stratton and Honda engines require unique care. Regular oil changes and governor adjustments prevent surging. Always follow manufacturer guidelines for optimal performance.

6.1 Engine Maintenance and Repair

Regular engine maintenance is essential for optimal performance. Oil changes, air filter cleaning, and spark plug replacements are crucial. Address issues like engine surging by adjusting the governor. For Briggs & Stratton engines, inspect the piston for marks, as this can cause compression loss. Honda engines may require specific adjustments to avoid sudden shutdowns. Always use genuine parts and follow the manual’s torque specifications. Proper repair techniques prevent further damage and ensure longevity. Refer to the manual for detailed procedures and guidelines.

6.2 Addressing Engine Surging Issues

Engine surging can be resolved by checking the air filter and fuel system. Ensure the governor is properly adjusted, as outlined in the manual. Clean or replace the carburetor if dirty. Verify fuel line connections are secure and free from blockages. If surging persists, consult the troubleshooting section of the manual; For persistent issues, contact Ariens support for further assistance to prevent engine damage and maintain optimal performance. Always follow safety guidelines when servicing the engine.

Downloading and Accessing the Manual

Access the Ariens Service Manual PDF through the official website or authorized portals. Download and save it for easy reference to ensure proper equipment maintenance and safe operation.

7.1 Where to Find the Ariens Service Manual PDF

The Ariens Service Manual PDF can be easily found on the official Ariens website. Visit www.ariens.com and navigate to the “Support” section. From there, select “Manuals” and enter your model number to locate the specific document. Additionally, authorized dealers and online forums often provide direct links to the manual. Ensure you download from reputable sources to avoid unauthorized modifications or outdated versions. Always verify the PDF’s authenticity to guarantee accurate and safe guidance for your equipment.

7.2 How to Download and Save the Manual

To download the Ariens Service Manual PDF, visit the official Ariens website and navigate to the “Support” section. Select “Manuals,” enter your equipment’s model number, and search for the specific document. Once found, click the “Download PDF” option to save it to your device. Ensure you have a compatible PDF reader installed. For convenience, organize the manual in a designated folder or upload it to cloud storage. Periodically check for updates to ensure you have the latest version.

Additional Resources

For further assistance, visit the Ariens official website or contact their support team via phone or email. Supplementary guides and troubleshooting tips are also available online.

8.1 Supplementary Guides and Documentation

In addition to the Ariens service manual, supplementary guides provide detailed diagrams, troubleshooting tips, and part-specific instructions. These resources help users understand complex procedures and resolve issues efficiently. The official Ariens website offers downloadable PDFs and interactive tools for enhanced learning. Technical support documents, such as engine-specific maintenance guides, are also available. For visual learners, video tutorials and repair manuals with illustrations can be found online. These materials ensure comprehensive understanding and effective problem-solving for Ariens equipment owners.

8.2 Contacting Ariens Support for Further Assistance

For additional help, users can contact Ariens support through their official website or customer service hotline. The support team provides expert guidance, answers technical questions, and assists with troubleshooting. Visit the Ariens website for contact details and online resources. Reaching out ensures accurate solutions tailored to specific issues, enhancing maintenance and repair efficiency. This direct support complements the service manual, offering comprehensive assistance for optimal equipment performance and longevity.

The Ariens Service Manual PDF is an essential resource for maintaining and repairing equipment. It provides detailed guidance on safety, maintenance, repairs, and troubleshooting. By following the manual, users can ensure optimal performance and extend the lifespan of their machinery. Additionally, accessing supplementary materials and contacting Ariens support enhances the overall experience. Regularly referring to the manual and staying informed about updates ensures safe and effective equipment operation. This comprehensive guide empowers users to handle various tasks confidently and efficiently.

kenwood walkie talkie user manual

Welcome to the Kenwood Walkie Talkie User Manual! This guide provides comprehensive instructions for setting up‚ operating‚ and troubleshooting your Kenwood two-way radio device effectively.

1.1 Overview of the Kenwood Walkie Talkie

The Kenwood Walkie Talkie is a reliable and feature-rich two-way radio designed for both personal and professional use. Known for its durability and clear communication‚ Kenwood radios are popular among outdoor enthusiasts‚ businesses‚ and emergency response teams. Models like the NEXEDGE and PMR446 series offer advanced features such as dual-channel displays‚ independent channel control‚ and memory storage for multiple frequencies. This manual provides a detailed guide to help users understand and utilize their Kenwood Walkie Talkie to its full potential‚ ensuring optimal performance in various environments.

1.2 Key Features and Benefits

Kenwood Walkie Talkies offer a range of key features‚ including crystal-clear voice transmission‚ long-lasting battery life‚ and robust construction for durability. Models like the NEXEDGE series support digital and analog modes‚ while PMR446 devices provide license-free operation. Additional benefits include programmable channels‚ emergency modes‚ and noise reduction settings for enhanced communication. These features make Kenwood radios ideal for various applications‚ ensuring reliable performance in challenging conditions. The intuitive design and user-friendly interface further enhance the overall experience‚ catering to both novice and advanced users effectively.

Preparation for Using the Walkie Talkie

Preparation involves unpacking and inventorying all accessories‚ reading the user manual for setup guidance‚ understanding safety precautions‚ and ensuring compliance with legal requirements.

2.1 Unpacking and Accessories

When unpacking your Kenwood Walkie Talkie‚ carefully inspect the contents to ensure all accessories are included. Typically‚ the package contains the radio unit‚ antenna‚ battery pack‚ charger‚ belt clip‚ and user manual. Check each item against the packing list to confirm completeness. Before first use‚ charge the battery fully and familiarize yourself with the device’s layout and controls. Ensure all accessories are compatible with your specific Kenwood model for optimal performance. Properly storing unused items in the original packaging can help maintain their condition.

2.2 Safety Precautions and Legal Information

Before using your Kenwood Walkie Talkie‚ read and follow all safety precautions to ensure safe and legal operation. Avoid making unauthorized modifications‚ as this may cause harmful interference or violate regulations. Use only Kenwood-approved accessories to maintain compliance and performance. Familiarize yourself with local laws regarding radio frequency usage‚ as unlicensed operation may be prohibited. Properly dispose of batteries and electronic components to minimize environmental impact. Always adhere to the guidelines outlined in this manual to ensure optimal functionality and compliance with legal standards.

Installation and Setup

This section guides you through the process of installing and setting up your Kenwood Walkie Talkie‚ including hardware assembly‚ software configuration‚ and channel programming.

3.1 Hardware Installation and Assembly

Unpack your Kenwood Walkie Talkie carefully‚ ensuring all accessories like antennas‚ batteries‚ and chargers are included. Refer to the user manual for specific assembly instructions. Attach the antenna securely to the designated port for optimal signal reception. Insert the battery according to the polarity markings and charge it fully before first use. For models requiring additional hardware‚ follow the step-by-step guide to assemble components correctly. Always handle the device with care to avoid damage. If unsure‚ consult an authorized Kenwood dealer or service center for assistance. Proper assembly ensures reliable performance and longevity of your walkie talkie.

3.2 Software and Firmware Setup

Begin by entering the Setting mode as outlined in your Kenwood Walkie Talkie manual. Use the menu buttons to navigate through options for software configuration. Ensure all settings align with your communication needs‚ such as squelch levels or channel groupings. Regularly update the firmware to access the latest features and improvements. Download updates from Kenwood’s official website or through authorized dealers. Always use Kenwood-approved software to avoid compatibility issues. After updating‚ restart the device to apply changes. For customized settings‚ consult your dealer to ensure optimal performance and compliance with local regulations.

3.3 Channel Programming and Configuration

Access the menu to program and configure channels on your Kenwood Walkie Talkie. Select the desired channel group and set the frequency‚ offset‚ and tone settings as needed; Use the scan mode to monitor multiple channels simultaneously. Organize channels into groups for easier access. Ensure all settings comply with local regulations and communication standards. Save your configurations to maintain consistent performance. For advanced customization‚ refer to the user manual or consult an authorized Kenwood dealer for professional assistance.

Operating the Walkie Talkie

Learn to operate your Kenwood Walkie Talkie with ease. Master basic functions like turning on/off‚ adjusting volume‚ and transmitting. Explore advanced features such as scanning and emergency modes for enhanced communication.

4.1 Basic Operations: Turn On/Off‚ Volume Control‚ and Transmission

Master the fundamental operations of your Kenwood Walkie Talkie. To turn it on‚ press and hold the power button until the display lights up. Adjust the volume using the dedicated control‚ ensuring optimal audio clarity. For transmission‚ press the Push-to-Talk (PTT) button to initiate communication. Ensure the device is set to the correct channel. Refer to the manual for detailed steps on these basic functions to ensure seamless operation. Proper use of these features will enhance your communication experience and overall device performance.

4.2 Advanced Features: Scanning‚ Memory Channels‚ and Emergency Modes

Explore advanced features to enhance your communication experience. Enable scanning to automatically search for active channels‚ ensuring you never miss important transmissions. Utilize memory channels to store frequently used frequencies for quick access. Activate emergency modes to send distress signals or prioritize critical messages; These features‚ detailed in the manual‚ allow for efficient and reliable communication‚ especially in high-stakes situations. Mastering these functions will optimize your device’s performance and ensure seamless connectivity in various environments and conditions.

Troubleshooting Common Issues

Identify and resolve common problems with practical solutions. Resetting the device‚ updating firmware‚ and addressing connectivity issues are covered to ensure optimal performance and reliability.

5;1 Common Problems and Solutions

Addressing common issues ensures uninterrupted communication. Low volume or static may require adjusting squelch settings or checking antenna alignment. Lost channels can be restored by reprogramming. Battery drain? Ensure proper charging and avoid overuse. If the device fails to power on‚ check battery connections and charge levels. For interference‚ switch to a quieter channel or use noise-reduction features. If issues persist‚ refer to the troubleshooting guide or contact Kenwood support for assistance. Regular maintenance and firmware updates help prevent recurring problems.

5.2 Resetting the Device and Updating Firmware

Resetting your Kenwood Walkie Talkie restores default settings‚ resolving software issues. To reset‚ enter the Settings mode‚ press and hold the Menu button‚ then select “Factory Reset.” For firmware updates‚ download the latest version from Kenwood’s official website. Connect the device to your computer using a USB cable‚ launch the Kenwood firmware update tool‚ and follow on-screen instructions. Ensure the battery is fully charged before updating. Regular firmware updates improve performance‚ add features‚ and fix bugs‚ ensuring optimal functionality and compatibility with new technologies. Always verify the update source to avoid unauthorized software.

Maintenance and Care

Regularly clean the device with a soft cloth and store it in a dry‚ cool place. Avoid exposure to extreme temperatures or moisture to ensure longevity. Battery care is essential; charge it fully before storage and replace it as recommended in the manual for optimal performance.

6.1 Cleaning and Storage Tips

Regular cleaning ensures optimal performance. Use a soft‚ dry cloth to wipe the exterior and avoid harsh chemicals. For stubborn dirt‚ lightly dampen the cloth with water. Store the walkie talkie in a cool‚ dry place away from direct sunlight and moisture. Avoid extreme temperatures and humidity. When not in use‚ remove the battery to prevent leakage. Clean the antenna and connectors regularly for better signal reception. Refer to the manual for Kenwood-recommended cleaning solutions. Proper storage and maintenance extend the device’s lifespan and ensure reliable communication.

6.2 Battery Care and Replacement

Proper battery care ensures longevity and reliable performance. Charge the battery using Kenwood-approved chargers to avoid damage. Avoid overcharging‚ as it can reduce battery life. Clean the terminals with a dry cloth to maintain good connectivity. Store batteries in a cool‚ dry place away from metal objects. Replace batteries when they no longer hold a charge. Use Kenwood-recommended replacements for compatibility. Dispose of old batteries responsibly‚ following local regulations. Refer to the manual for specific instructions on replacement and recycling guidelines to ensure environmental safety and optimal device functionality.

7.1 Final Tips for Optimal Performance

For the best experience with your Kenwood Walkie Talkie‚ ensure proper setup‚ regular cleaning‚ and battery maintenance. Keep firmware updated and adjust volume according to surroundings. Always use recommended accessories and follow legal guidelines for operation. Store the device in a dry‚ cool place and avoid extreme temperatures. Regularly check antennas for damage and replace if necessary. By adhering to these tips‚ you’ll maximize the device’s performance‚ reliability‚ and lifespan. Happy communicating with your Kenwood Walkie Talkie!

ailinke humidifier manual

Welcome to the Ailinke Humidifier Manual, your comprehensive guide to understanding and optimizing your device. This manual covers setup, maintenance, troubleshooting, and safety tips to ensure optimal performance and longevity of your humidifier. By following the instructions, you’ll enjoy improved indoor air quality, enhanced comfort, and hassle-free operation year-round.

1.1 Overview of the Ailinke Humidifier

The Ailinke humidifier is designed for efficient mist distribution, improving indoor air quality and comfort. Featuring adjustable humidity control, a low water indicator, and remote operation, it ensures convenient use. Its sleek design and advanced functions, including aroma diffuser capability, make it a versatile solution for maintaining optimal humidity levels in various spaces.

1.2 Importance of Reading the Manual

Reading the Ailinke humidifier manual is crucial for safe and effective operation. It provides essential guidance on setup, maintenance, and troubleshooting, ensuring optimal performance and longevity. Understanding the manual helps prevent issues, ensures proper usage, and enhances your overall experience with the device while maintaining indoor air quality and comfort year-round.

Key Features and Benefits of the Ailinke Humidifier

The Ailinke Humidifier offers advanced features like adjustable humidity control, low water indicator, remote control, auto shut off, and an aroma diffuser, ensuring efficient and convenient operation while enhancing indoor air quality and comfort.

2.1 Adjustable Humidity Control

The Ailinke Humidifier features an adjustable humidity control, allowing you to set your desired moisture levels. This function ensures optimal indoor air quality, prevents over-humidification, and maintains a comfortable environment. The intuitive control panel or remote lets you customize settings effortlessly, while the built-in sensor monitors and adjusts humidity automatically for consistent performance.

2.2 Low Water Indicator

The Ailinke humidifier includes a low water indicator that alerts you when the water level is low. This feature ensures the device operates efficiently and prevents damage from running dry. The indicator lights up or signals when it’s time to refill, making maintenance straightforward and keeping your humidifier in optimal working condition.

2.3 Remote Control and Auto Shut Off

The Ailinke humidifier features a convenient remote control, allowing you to adjust settings from across the room. Additionally, the auto shut-off function turns the device off when the water level is low or the tank is removed, ensuring safe and efficient operation. These features enhance user convenience and provide peace of mind.

2.4 Aroma Diffuser Functionality

The Ailinke humidifier includes an aroma diffuser, enhancing your humidification experience with a refreshing scent. Simply add essential oils to the fragrance box, and the humidifier will diffuse a pleasant aroma alongside mist. This feature promotes relaxation, improves mood, and creates a cozy ambiance in your space, making it a versatile addition to your home comfort system.

Unboxing and Initial Setup

Welcome to the unboxing and initial setup section. Carefully unpack all components, ensure they are undamaged, and place the humidifier on a flat, stable surface before first use.

3.1 What’s Included in the Box

Your Ailinke humidifier box includes the main unit, power adapter, user manual, remote control, water tank, aroma diffuser, and air filter. Ensure all items are undamaged and accounted for before setup. The comprehensive manual provides detailed instructions, while the remote offers convenient control. The water tank and filter are essential for operation and maintaining air quality.

3.2 Step-by-Step Installation Guide

Place the humidifier on a flat, stable surface. Attach the water tank securely and install the air filter as per instructions. Plug in the device and turn it on. Use the remote control to set your preferred humidity level. Refer to the manual for detailed setup and operation instructions to ensure proper functionality.

Operating the Ailinke Humidifier

Turn on the humidifier, select your desired mode, and adjust settings as needed. Use the remote control to customize humidity levels, mist output, and timer. Monitor the humidity level to ensure optimal comfort and air quality in your space.

4.1 Daily Usage Instructions

Fill the water tank, replace it securely, and plug in the humidifier. Turn it on, select your desired mode, and adjust humidity levels using the control panel or remote. Monitor the humidity level to ensure it stays within the recommended range. For optimal performance, clean the device regularly and replace the filter as needed to maintain efficiency and hygiene. Always follow the manufacturer’s guidelines for daily operation to ensure safety and effectiveness.

4.2 Adjusting Humidity Levels

To adjust humidity levels, turn on the humidifier and use the control panel or remote to select your desired mode. For precise control, use the plus or minus buttons to set your preferred humidity level, typically between 30%-50%. Engage auto mode for automatic adjustments based on the current room humidity. Monitor levels regularly to maintain comfort and prevent moisture buildup, ensuring optimal indoor air quality and device efficiency.

4.3 Understanding the Control Panel

The control panel on your Ailinke humidifier features intuitive buttons for adjusting settings. Use the plus and minus buttons to increase or decrease humidity levels, typically between 30% to 50%. Press the mode button to cycle through manual or automatic operation. The automatic mode adjusts based on the room’s current humidity. Utilize the timer function to set operating duration, enhancing convenience and preventing overuse. Enable auto shut-off for energy efficiency and safety.

Maintenance and Cleaning

Regular maintenance ensures your Ailinke humidifier operates efficiently and effectively. Clean the tank and misting chamber weekly, and replace the filter as recommended. Always use distilled water to minimize mineral buildup. Dry the humidifier thoroughly after cleaning to prevent mold growth and ensure optimal performance.

5.1 Cleaning the Humidifier

Clean your Ailinke humidifier weekly to prevent mineral buildup and mold growth. Use a soft cloth and mild soap to wipe the tank and misting chamber. For tougher buildup, mix water and white vinegar, soak for 30 minutes, then rinse thoroughly. Dry all parts completely after cleaning to maintain hygiene and efficiency.

5.2 Replacing the Filter

To replace the filter in your Ailinke humidifier, start by turning off and unplugging the device. Empty the water tank to prevent spills. Locate the filter, usually held by clips or screws. Remove the old filter gently, taking care not to spill any moisture. Dispose of it properly. Insert the new filter, ensuring it’s the correct type for your model. Align it correctly for a snug fit. Reassemble everything, refill the tank, and test the humidifier to ensure it’s working smoothly. Replace the filter every 1-2 months based on usage. Keep track of replacements to maintain efficiency and hygiene.

5.3 Regular Maintenance Tips

  • Clean the humidifier tank and parts regularly to prevent mold and bacteria growth.
  • Replace the filter every 1-2 months, depending on usage and water quality.
  • Check for mineral buildup and descale if necessary using vinegar or a descaling solution.
  • Empty the water tank daily and dry it thoroughly to avoid standing water;
  • Regularly inspect and clean the mist outlet for optimal performance.

Troubleshooting Common Issues

This section helps you diagnose and resolve common issues like the humidifier not turning on, low mist output, or water leakage. Follow these steps to address problems effectively.

6.1 Humidifier Not Turning On

If your Ailinke humidifier won’t turn on, check the power source and ensure it’s properly plugged in. Verify the outlet is working and the power button is functioning. Make sure the water tank is filled and correctly placed. If issues persist, consult the manual or contact customer support for further assistance.

6.2 Low Mist Output

If your Ailinke humidifier has low mist output, check the water level in the tank and ensure it’s not empty. Clean or replace the filter if it’s dirty or clogged. Verify that the humidifier is set to the correct mode and that the mist nozzle is not blocked; Regularly cleaning the device and ensuring proper water flow can resolve the issue.

6.3 Water Leakage Issues

If water leakage occurs, immediately turn off the humidifier and unplug it. Check all connections for tightness and ensure the water tank is properly aligned. Empty the tank and inspect for cracks or damage. Wipe up any spills and restart the device after ensuring all parts are secure. Consult the manual for further guidance if the issue persists.

Safety Precautions

Always turn off the humidifier when not in use and avoid water spills. Keep it out of children’s and pets’ reach to prevent accidents. Ensure proper placement on a stable surface and follow the manual’s guidelines for safe operation.

7.1 General Safety Tips

Always adhere to safety guidelines when using your Ailinke humidifier. Unplug it when not in use, avoid water spills, and keep it out of children’s and pets’ reach. Place the humidifier on a stable, flat surface to prevent tipping. Regularly clean and maintain the device to ensure safe and efficient operation. Follow the manual for proper usage and maintenance to avoid potential hazards.

7.2 Precautions for Children and Pets

Keep the humidifier out of children’s reach to avoid accidental burns or water spills. Ensure pets do not drink from the water tank or interfere with the device. Supervise children and pets when the humidifier is in use. Place it on a stable surface to prevent tipping and ensure safe operation.

Warranty and Customer Support

This section details the warranty coverage for your Ailinke humidifier and provides information on how to contact customer support for assistance with any issues. Refer to the official website for more details on warranty terms and support options.

8.1 Warranty Coverage

The Ailinke humidifier is backed by a limited warranty covering manufacturing defects for a specified period. Visit the official Ailinke website for detailed warranty terms, including duration and covered components. Proper registration and adherence to maintenance guidelines are required to ensure warranty validity. For warranty claims, contact customer support with proof of purchase and product details.

8.2 Contacting Customer Service

To contact Ailinke customer service, visit their official website for support options. Use the provided contact form, phone number, or email address for inquiries. Ensure you have your product details and proof of purchase ready for efficient assistance. Representatives are available to address concerns, provide troubleshooting guidance, and assist with warranty or repair requests. Live chat may also be available for immediate support.

Advanced Features and Customization

Explore advanced features like remote control, timer settings, and aroma diffuser functionality. Customize your experience with adjustable humidity levels and smart app integration for enhanced comfort and convenience.

9.1 Using the Fragrance Box

To enhance your aromatherapy experience, follow these steps: Detach the fragrance box from the humidifier base. Add a few drops of your preferred essential oil to the diffuser. Reattach the box and enjoy your customized scent. This feature allows you to create a relaxing atmosphere while maintaining optimal humidity levels in your space.

9.2 Setting Up the Timer

Using the timer on your Ailinke humidifier adds convenience. Press the timer button on the control panel to select a duration from 1 to 12 hours. Use the touch-sensitive controls to adjust the timer. The humidifier will automatically shut off once the timer expires or when the desired humidity level is reached, ensuring efficient operation.

Comparison with Other Models

The Ailinke humidifier stands out for its advanced features like adjustable humidity and timer functionality, offering better efficiency and customization compared to Philips and Essick Air models.

10.1 Ailinke vs. Philips Humidifier

The Ailinke humidifier offers a larger 8L capacity, remote control, and aroma diffuser, while Philips focuses on advanced NanoCloud technology for mist-free humidification. Both ensure improved air quality, but Ailinke’s customizable settings and additional features appeal to users seeking versatility, whereas Philips is praised for its reliable filtration and quiet operation.

10.2 Ailinke vs. Essick Air Humidifier

Ailinke humidifiers feature ultrasonic technology, an 8L capacity, and advanced options like remote control and aroma diffusion. Essick Air humidifiers use evaporative systems, emphasizing quiet operation and whole-house coverage. Ailinke suits modern, tech-savvy users, while Essick Air is ideal for those prioritizing simplicity and reliable performance in larger spaces.

Environmental Benefits

By maintaining optimal humidity levels, the Ailinke humidifier helps reduce energy consumption and preserves indoor air quality, contributing to a healthier and more sustainable living environment.

11.1 Improving Indoor Air Quality

The Ailinke humidifier enhances indoor air quality by maintaining balanced humidity levels, preventing dryness and excess moisture. This reduces respiratory issues, static electricity, and damage to wooden furniture, creating a healthier and more comfortable living space while efficiently managing air quality for your home.

11.2 Health Benefits of Using a Humidifier

Using the Ailinke humidifier promotes respiratory health by adding beneficial HO molecules to the air, relieving dryness and congestion. It prevents dry skin, soothes allergies, and reduces airborne germs, creating a healthier environment. Regular use helps maintain sinus balance and overall well-being, ensuring a comfortable and germ-free space for you and your family.

Frequently Asked Questions

  • What water type is best for the Ailinke humidifier?
  • Can I use essential oils in the Ailinke humidifier?
  • How often should the filter be replaced?

12.1 What Type of Water is Best to Use?

For optimal performance, use distilled or demineralized water in your Ailinke humidifier. Tap water may contain minerals that lead to buildup and bacterial growth. Always avoid using hard water, as it can reduce the device’s efficiency and longevity. This ensures clean mist output and maintains your humidifier’s effectiveness over time.

12.2 Can I Use Essential Oils in the Ailinke Humidifier?

The Ailinke humidifier features an aroma diffuser, allowing you to add essential oils for a refreshing scent. However, always use the designated fragrance box and avoid adding oils directly to the water tank to prevent damage. This feature enhances your experience while maintaining the humidifier’s performance and longevity.

12.3 How Often Should I Replace the Filter?

Replace the Ailinke humidifier filter every 2-3 months or as indicated in the manual. Usage patterns, water hardness, and humidity levels may require more frequent changes. Regular filter replacement ensures optimal performance, prevents bacteria growth, and maintains clean mist output for better indoor air quality and health benefits.

samsung rf28hdedbsr user manual

Welcome to the Samsung RF28HDEDBSR user manual! This guide introduces the 27.8 cu. ft. French Door Refrigerator, featuring the Food Showcase design and Twin Cooling Plus technology. Designed to enhance your kitchen experience, this manual provides essential information for optimal performance, safety, and maintenance. Explore its innovative features and learn how to use your appliance effectively.

1.1 Overview of the Refrigerator Model

The Samsung RF28HDEDBSR is a 27.8 cu. ft. French Door Refrigerator with advanced features like the Food Showcase design, Twin Cooling Plus technology, and an Ice Master ice maker. Designed for modern kitchens, it offers a spacious interior, flexible storage solutions, and energy-efficient performance. This model combines sleek aesthetics with innovative cooling systems to keep your food fresh and organized.

1.2 Importance of Reading the User Manual

Reading the Samsung RF28HDEDBSR user manual is essential for understanding safety guidelines, warranty details, and optimal appliance operation. It provides critical information on features like the Twin Cooling Plus system and Ice Master ice maker. The manual also offers troubleshooting tips, energy-saving advice, and maintenance schedules to ensure longevity and performance. By following the guide, users can maximize efficiency and enjoy a seamless cooking experience.

Safety Precautions and Warranty Information

This section outlines essential safety guidelines and warranty details for the Samsung RF28HDEDBSR. It ensures safe installation, usage, and highlights terms for repair and replacement coverage.

2.1 Key Safety Guidelines for Installation and Use

Ensure proper electrical connections and avoid overloading circuits. Keep the refrigerator away from direct sunlight and heat sources. Follow leveling instructions to maintain stability. Never plug the appliance into a damaged outlet. Avoid placing flammable materials near the fridge. Ensure children do not play with doors or controls. Regularly inspect power cords for damage. Always unplug during cleaning or maintenance. Adhere to Samsung’s safety recommendations for optimal performance and user safety.

2;2 Warranty Details and Terms

The Samsung RF28HDEDBSR is backed by a 1-year limited warranty for parts and labor. Extended warranties may apply to specific components like the compressor. Coverage includes repairs and replacements due to manufacturing defects. Proper installation and registration are required. Misuse, damage from power surges, or unauthorized repairs may void the warranty. Refer to the manual for full terms and conditions.

Product Features and Specifications

The Samsung RF28HDEDBSR features a 27.8 cu. ft. capacity, Food Showcase French Door Design, Twin Cooling Plus System, Ice Master Ice Maker, and CoolSelect Pantry, ensuring optimal storage and energy efficiency.

3.1 Food Showcase French Door Design

The Samsung RF28HDEDBSR boasts an innovative Food Showcase French Door Design. This feature provides easy access to frequently used items through an exterior showcase, while the InnerCase stores larger items. The sleek, modern doors are designed for style and functionality, with spillproof glass shelves and humidity-controlled crisper drawers. The design ensures fresh food organization and maintains optimal temperature zones for long-lasting freshness and convenience.

3.2 Twin Cooling Plus System

The Twin Cooling Plus System ensures precise temperature control and humidity levels in both the refrigerator and freezer compartments. This advanced system prevents air from mixing between the compartments, maintaining optimal freshness and reducing odor transfer. It also helps preserve food quality by maintaining consistent temperatures, making it ideal for storing perishables and extending shelf life effectively. This feature enhances overall cooling efficiency and performance.

3.3 Ice Master Ice Maker and CoolSelect Pantry

The Ice Master Ice Maker produces up to 10 lbs of ice daily, ensuring a steady supply for entertaining. The CoolSelect Pantry offers precise temperature control, ideal for storing meats, cheeses, and snacks. This combination enhances convenience and freshness, allowing you to customize storage conditions effortlessly while maintaining optimal humidity and temperature levels for various food types. These features cater to diverse household needs efficiently.

Installation and Setup

Proper installation ensures optimal performance. Ensure the refrigerator is placed on a level surface, with adequate clearance for ventilation. Follow the manual’s electrical and plumbing guidelines carefully to avoid damage and ensure safety. Complete the setup by programming initial settings and testing all features to confirm they function correctly before regular use begins. This ensures reliability and longevity of your appliance.

4.1 Pre-Installation Requirements

Before installing your Samsung RF28HDEDBSR refrigerator, ensure the model number matches your appliance. Verify the installation location is level, measuring the space to fit the refrigerator’s dimensions. Check electrical connections for compatibility with the unit’s power requirements. Gather necessary tools and materials, such as a water supply line for the ice maker. Prepare the area by clearing any obstructions and ensuring proper ventilation for optimal performance. Follow all safety guidelines to avoid damage or injury during the setup process.

4.2 Step-by-Step Installation Guide

Position the refrigerator in its designated space, ensuring it is level and plumb. Connect the water supply line to the ice maker inlet valve, tightening securely to prevent leaks; Align and attach the doors to the frame, adjusting hinges as needed. Plug in the appliance and test all functions, including the ice maker and water dispenser. Finally, arrange shelves and drawers to suit your storage needs, ensuring proper alignment and functionality.

Operating the Refrigerator

Master your Samsung RF28HDEDBSR with ease! Use the control panel to adjust settings, monitor temperature, and access features like Ice Master and Twin Cooling Plus for optimal performance.

5.1 Control Panel Functions and Settings

The control panel on your Samsung RF28HDEDBSR offers intuitive controls for temperature, ice maker, and door lock functions. Use the buttons to adjust fridge and freezer settings, monitor cooling modes, and enable features like Eco-Mode. The digital display provides real-time feedback, ensuring precise adjustments. Regularly check and customize settings to maintain optimal conditions for your stored food and beverages. Proper use enhances performance and efficiency.

5.2 Adjusting Temperature and Humidity Settings

Adjust the temperature and humidity settings on your Samsung RF28HDEDBSR using the control panel. The refrigerator typically operates between 37°F and 40°F, while the freezer should be set to 0°F. Use the CoolSelect Pantry to adjust humidity levels for optimal food storage. Regularly monitor and adjust settings based on storage needs and external conditions to maintain freshness and prevent spoilage. Proper calibration ensures efficient performance and food quality.

Maintenance and Cleaning Tips

Regularly clean the exterior with stainless steel cleaner and wipe interior shelves. Check door seals and drain for blockages. Maintain proper ventilation for optimal performance.

6.1 Regular Maintenance Recommendations

Regularly inspect and clean the condenser coils to ensure efficient cooling. Replace the water filter every 6 months to maintain water quality. Check door seals for tightness and clean the drain regularly. Schedule annual professional maintenance for optimal performance and longevity of your Samsung RF28HDEDBSR refrigerator.

6.2 Cleaning the Interior and Exterior

Clean the interior with a mild soap solution, avoiding harsh chemicals. Wipe shelves and drawers with a soft cloth, and dry thoroughly. For the exterior, use a microfiber cloth and stainless steel cleaner to maintain the finish. Regularly clean the door seals and handles to prevent dust buildup. Always unplug the refrigerator before cleaning to ensure safety.

Troubleshooting Common Issues

Identify and resolve common issues like error codes or cooling problems; Refer to the manual for specific solutions, reset instructions, and maintenance tips to ensure optimal performance.

7.1 Identifying and Resolving Error Codes

Identify error codes like SE, 41, or 42, which indicate specific issues. Press and hold the Freezer and Fridge keys for 3 seconds to reset. Refer to the manual for detailed solutions, such as checking sensors or power supply. Regular maintenance can prevent errors. If issues persist, contact Samsung support for professional assistance.

7.2 Solutions for Ice Maker and Cooling Problems

Ensure the water supply line is connected and ice maker is turned on. Check freezer temperature (0-5°F). If issues persist, reset the ice maker or perform manual defrost by pressing and holding the Freezer and Fridge keys. For cooling problems, verify door seals and ensure proper ventilation. Contact Samsung support if issues remain unresolved for professional assistance.

Energy Efficiency and Eco-Friendly Features

The Samsung RF28HDEDBSR is ENERGY STAR certified, ensuring energy efficiency. Eco-Mode optimizes performance while reducing energy consumption, helping you save on utility bills and support eco-friendly living.

8.1 Energy Star Compliance

The Samsung RF28HDEDBSR is ENERGY STAR certified, meeting strict energy efficiency standards set by the U.S. Environmental Protection Agency. This certification ensures the refrigerator consumes less energy, reducing utility bills and environmental impact. By adhering to ENERGY STAR guidelines, it contributes to eco-friendly living while maintaining high performance and reliability.

8.2 Eco-Mode and Energy-Saving Tips

Enable Eco-Mode to optimize energy consumption by adjusting settings for efficient operation. Regularly defrosting, proper door sealing, and maintaining optimal temperatures also conserve energy. Utilizing the CoolSelect Pantry and Twin Cooling Plus system ensures efficient humidity and temperature control. Follow these tips to maximize energy savings while maintaining freshness and performance.

Customer Support and Additional Resources

Access the Samsung RF28HDEDBSR user manual online for detailed instructions. Contact Samsung customer support for assistance, and explore additional resources like service manuals and troubleshooting guides.

9.1 Contacting Samsung Customer Service

To contact Samsung customer service, visit their official website or call the support hotline for assistance with your RF28HDEDBSR refrigerator. Representatives are available to address inquiries, troubleshooting, and repair requests. Additionally, the website offers access to user manuals, service manuals, and other resources to help you maintain and repair your appliance effectively.

9.2 Accessing Online Manuals and Guides

Access the Samsung RF28HDEDBSR user manual and service manual online through Samsung’s official website or platforms like ManualsLib. These resources provide detailed instructions for installation, operation, and troubleshooting. Download free PDF versions for easy reference, ensuring you have comprehensive guidance for maintaining and repairing your refrigerator. Online guides also offer tips for optimal performance and troubleshooting common issues.

The Samsung RF28HDEDBSR user manual provides comprehensive guidance for optimal performance, safety, and maintenance. By following the tips and instructions, you can maximize the benefits of your refrigerator.

10.1 Summary of Key Features and Benefits

The Samsung RF28HDEDBSR offers a spacious 27.8 cu. ft. capacity with Food Showcase doors for easy access. Twin Cooling Plus ensures optimal humidity and temperature control, preserving freshness. The Ice Master and CoolSelect Pantry enhance convenience. ENERGY STAR certification and eco-friendly features promote energy efficiency. This refrigerator combines style, functionality, and advanced technology for a superior kitchen experience.

10.2 Final Tips for Optimal Performance

Regularly clean the condenser and check door seals for optimal cooling. Store food properly, avoiding overloading shelves; Use energy-saving settings and maintain recommended temperatures. Run the ice maker occasionally to prevent issues. Refer to the manual for specific care instructions and troubleshooting. By following these tips, you’ll ensure your Samsung RF28HDEDBSR refrigerator performs efficiently and maintains its longevity.

huskee lt4200 parts manual

The Huskee LT4200 parts manual provides essential information for maintaining and repairing your lawn tractor‚ covering models like 13W2775S031 (2012)‚ 13W277SS031 (2015)‚ and 13WN77SS031 (2017). This guide helps identify genuine parts‚ ensuring optimal performance and safety. Use it to locate detailed diagrams and instructions for efficient servicing.

1.1 Overview of the Huskee LT4200 Lawn Tractor

The Huskee LT4200 is a versatile and powerful lawn tractor designed for efficient mowing and yard maintenance. Available in various models such as 13W2775S031 (2012)‚ 13W277SS031 (2015)‚ and 13WN77SS031 (2017)‚ it features a robust hydrostatic transmission and a 42-inch cutting deck. Equipped with a reliable engine‚ this tractor offers a smooth operational experience. Its compact design and user-friendly controls make it ideal for homeowners seeking to manage medium-sized lawns. The LT4200 is built to deliver durability and performance‚ ensuring years of reliable service. This overview highlights its key features‚ making it easier to understand its capabilities and maintenance needs.

1.2 Importance of Using Genuine Parts

Using genuine Huskee parts ensures optimal performance‚ safety‚ and longevity for your LT4200 lawn tractor. Genuine parts are designed to meet exact specifications‚ guaranteeing compatibility and reliability. They are rigorously tested to maintain quality and durability‚ unlike aftermarket alternatives‚ which may compromise performance. Safety is a top priority‚ as genuine parts adhere to strict safety standards‚ reducing the risk of malfunctions. Additionally‚ using genuine parts preserves your tractor’s warranty‚ ensuring continued protection and support. Investing in authentic components prevents potential damage from ill-fitting or substandard replacements‚ safeguarding your investment and ensuring years of trouble-free operation.

Parts Diagrams for Huskee LT4200

The Huskee LT4200 parts diagrams provide detailed visual guides for models like 13W2775S031 (2012)‚ 13W277SS031 (2015)‚ and 13WN77SS031 (2017). These diagrams cover key components such as engines‚ transmissions‚ and mowing decks‚ helping users identify and replace parts accurately for efficient repairs and maintenance.

2.1 Detailed Parts Diagram for Model 13W2775S031 (2012)

The detailed parts diagram for the Huskee LT4200 model 13W2775S031 (2012) provides a comprehensive visual breakdown of all components. It includes sections like the 4P90JUB engine‚ attachments‚ engine accessories‚ frame‚ PTO‚ and lift mechanisms. The diagram also covers front-end steering‚ hood‚ and label maps‚ ensuring precise identification of parts. Users can reference this diagram to locate components such as the battery‚ controls‚ and deck lift. This tool is essential for repairs and maintenance‚ allowing owners to accurately identify and order genuine Huskee parts. By following the diagram‚ users can ensure proper fitment and functionality‚ maintaining their tractor’s performance and longevity.

2.2 Parts Diagram for Model 13W277SS031 (2015)

The parts diagram for the Huskee LT4200 model 13W277SS031 (2015) offers a detailed layout of all tractor components‚ including the Manual PTO system. It categorizes parts into sections such as battery‚ controls‚ dash (lower and upper)‚ deck‚ deck lift‚ and discharge chute. This diagram is crucial for identifying specific parts like the engine‚ frame‚ and steering mechanisms. It serves as a visual guide for repairs and replacements‚ ensuring accurate identification and ordering of genuine Huskee parts. By referencing this diagram‚ users can efficiently troubleshoot issues and maintain their tractor’s optimal performance. It’s a valuable resource for DIY maintenance and professional servicing alike‚ promoting longevity and reliability.

2.3 Parts Diagram for Model 13WN77SS031 (2017)

The parts diagram for the Huskee LT4200 model 13WN77SS031 (2017) provides a comprehensive visual breakdown of all components‚ including the 42-inch deck‚ controls‚ and PTO system. It categorizes parts into sections like Battery‚ Controls‚ Dash-Lower‚ Dash-Upper‚ Deck‚ Deck Lift‚ and Discharge Chute. This detailed layout aids in identifying and replacing parts accurately. The diagram also highlights key components such as the engine‚ frame‚ and steering mechanisms. It serves as an essential tool for troubleshooting and maintaining the tractor. By referencing this diagram‚ users can ensure they order the correct genuine OEM parts‚ promoting safety and optimal performance. It’s a vital resource for both DIY enthusiasts and professional technicians‚ ensuring efficient and reliable servicing.

Operator’s Manual Highlights

This section highlights essential safety precautions‚ operating instructions‚ and maintenance tips for the Huskee LT4200. It ensures safe and efficient operation‚ optimizing performance and longevity.

3.1 Safety Information and Precautions

The Huskee LT4200 operator’s manual emphasizes critical safety measures to ensure safe operation. Always wear protective gear‚ including gloves and eyewear‚ and ensure the area is clear of obstacles. Keep children and pets away while operating the tractor. Never dismount without engaging the parking brake and shutting off the engine. Be cautious on slopes‚ operating at a safe angle to prevent tipping. Avoid sudden turns and maintain a firm grip on the steering wheel. Regularly inspect the tractor for worn or damaged parts‚ addressing issues promptly to prevent accidents. These precautions are essential to protect both the operator and bystanders‚ ensuring a safe and efficient mowing experience.

3.2 Setting Up and Operating the Tractor

Setting up and operating the Huskee LT4200 requires careful attention to detail. Before use‚ ensure all components are properly assembled and adjusted‚ such as the steering‚ seat‚ and mower deck; Check fluid levels‚ tire pressure‚ and blade sharpness for optimal performance. Familiarize yourself with the controls‚ including the hydrostatic transmission‚ PTO engagement‚ and deck lift system. Start the engine slowly‚ allowing it to warm up before use. For models like 13W2775S031 (2012)‚ 13W277SS031 (2015)‚ and 13WN77SS031 (2017)‚ refer to the manual for specific startup procedures. Always operate the tractor in an open area‚ avoiding steep slopes and obstacles. Adjust mowing height according to grass conditions and maintain a steady pace for even cutting. Proper setup and operation ensure efficient mowing and extend the tractor’s lifespan.

3.3 Maintenance and Troubleshooting Tips

Regular maintenance is crucial for the longevity of your Huskee LT4200. Start by checking the oil level and replacing it as recommended in the manual. Inspect the air filter and clean or replace it if dirty. Keep the mower deck clear of debris to ensure even cutting. Sharpen or replace blades annually to maintain performance. If issues arise‚ such as uneven cutting or poor engine performance‚ consult the troubleshooting guide. For models like 13W2775S031 (2012)‚ check the PTO engagement and belt tension. Refer to the parts diagrams for specific components‚ like the 4P90JUB engine or deck lift system‚ to identify and replace worn parts. Always use genuine Huskee parts for repairs to ensure safety and reliability;

Repair and Service Manuals

Access detailed repair and service manuals for Huskee LT4200 models‚ including 13W2775S031 (2014) and 13W277SS031 (2016). These manuals provide step-by-step repair procedures and parts diagrams.

4.1 Repair Manual for Model 13W2775S031 (2014)

The repair manual for the Huskee LT4200 model 13W2775S031 (2014) provides comprehensive instructions for servicing and repairing your lawn tractor. It includes detailed diagrams and step-by-step guides for components like the 4P90JUB engine‚ attachments‚ and frame. The manual covers essential systems such as the PTO‚ lift‚ and steering‚ ensuring you can address issues effectively. Safety precautions and troubleshooting tips are also highlighted to help you maintain your tractor’s performance. Use this resource to identify genuine parts and follow proper repair procedures. By adhering to the manual’s guidelines‚ you can ensure your Huskee LT4200 operates safely and efficiently for years to come.

  • Includes diagrams for engine‚ PTO‚ and steering systems.
  • Provides detailed repair procedures for model-specific components.
  • Emphasizes safety and proper maintenance practices.

4.2 Service Manual for Model 13W277SS031 (2016)

The service manual for the Huskee LT4200 model 13W277SS031 (2016) offers detailed guidance for maintaining and servicing your lawn tractor. It includes parts diagrams and instructions for components like the battery‚ controls‚ deck‚ and discharge chute. The manual provides maintenance schedules‚ troubleshooting tips‚ and safety precautions to ensure proper care of your equipment. Use this resource to identify and replace parts efficiently‚ with clear instructions for repairs and upgrades. By following the manual’s recommendations‚ you can extend the lifespan of your tractor and keep it running at peak performance. This manual is essential for anyone looking to service their Huskee LT4200 effectively.

  • Covers maintenance schedules and troubleshooting.
  • Includes detailed parts diagrams for accurate repairs.
  • Focuses on safety and optimal performance.

OEM Parts Lookup and Diagrams

Use model-specific diagrams to identify genuine Huskee LT4200 parts‚ ensuring compatibility and performance. Find detailed diagrams for models like 13W277SS031 (2016) and 13WN77SS031 (2017) online.

  • Model diagrams help locate exact parts needed.
  • Genuine parts ensure optimal performance and safety.

5.1 How to Use Model Diagrams for Parts Identification

Model diagrams are essential tools for identifying parts for your Huskee LT4200. Start by locating your tractor’s model number (e.g.‚ 13W2775S031 or 13WN77SS031) to access the correct diagram. Navigate through the detailed illustrations‚ which categorize parts by system (e.g.‚ engine‚ deck‚ or steering). Each component is labeled with a reference number‚ making it easy to search and verify compatibility. Use the parts list alongside the diagram to match numbers with descriptions. This method ensures accuracy when ordering genuine Huskee parts. Always cross-reference your findings with the official parts manual to avoid errors. This systematic approach saves time and guarantees the correct fit for your tractor’s specific year and model.

5.2 OEM Parts for Model 13WN77SS031 (2017)

The 2017 Huskee LT4200 model 13WN77SS031 requires genuine OEM parts for optimal performance and longevity. These parts are specifically designed for this model‚ ensuring precise fitment and reliability. Key components include the 4P90JUB engine‚ deck lift assemblies‚ and steering systems. Always refer to the official parts diagram for accurate identification. Genuine parts are available through authorized dealers or online retailers‚ such as MTD Parts Lookup. Using OEM parts guarantees compliance with safety standards and maintains your tractor’s warranty. Avoid aftermarket alternatives‚ as they may compromise performance and safety. Consult the parts manual or contact customer support for assistance in locating the correct components for your 2017 Huskee LT4200.

The Huskee LT4200 parts manual guides maintenance and repair for models like 13WN77SS031 (2017). Use genuine parts and diagrams for optimal performance and longevity.

6.1 Final Tips for Maintaining Your Huskee LT4200

Regularly inspect and maintain your Huskee LT4200 to ensure optimal performance. Refer to the operator’s manual for guidance on inspections and repairs. Always use genuine parts to maintain safety and functionality. Check the battery‚ controls‚ and deck lift system seasonally. Lubricate moving parts and sharpen blades for efficient cutting. Store the tractor in a dry‚ protected area during off-seasons. Follow safety precautions when operating or servicing the tractor. Keep the mower deck clean and properly adjusted. Refer to model-specific diagrams for parts identification and replacement. By following these tips‚ you can extend the life of your Huskee LT4200 and ensure reliable operation for years to come.

owner’s manual husqvarna riding mower

Welcome to the Husqvarna riding mower owner’s manual. This guide provides essential information for safe operation, maintenance, and troubleshooting your mower, ensuring optimal performance and longevity.

1.1 Importance of Reading the Manual

Reading the Husqvarna riding mower owner’s manual is crucial for safe and effective operation. It provides detailed safety guidelines, maintenance recommendations, and troubleshooting tips. Understanding the manual ensures you grasp the mower’s features, proper usage, and essential care routines. This helps prevent accidents, extends the mower’s lifespan, and optimizes performance. Take time to review the manual thoroughly before operating your Husqvarna riding mower.

1.2 Key Features and Benefits of Husqvarna Riding Mowers

Husqvarna riding mowers are designed for superior efficiency and comfort. They feature hydrostatic transmissions, adjustable mower decks, and ergonomic controls. These mowers excel at cutting large areas quickly and evenly. The durable construction ensures long-lasting performance, while user-friendly designs make operation straightforward. With models tailored to various needs, Husqvarna mowers offer reliability and versatility for maintaining your lawn effortlessly.

Safety Precautions and Rules

Always follow safety guidelines, wear protective gear, and ensure the area is clear of obstacles. Operate responsibly to ensure safe and effective mowing experiences.

2.1 General Safety Guidelines

Safety is crucial when operating a Husqvarna riding mower. Always wear protective gear, including gloves, safety glasses, and sturdy footwear. Ensure the mowing area is clear of obstacles, children, and pets. Read and follow all safety rules in this manual to minimize risks. Never operate the mower under the influence of alcohol or drugs. Familiarize yourself with controls before starting. Keep bystanders at a safe distance while mowing.

2.2 Safety Rules for Operating the Mower

Always wear protective gear, including gloves, safety glasses, and sturdy footwear. Keep loose clothing tied back and avoid jewelry. Never operate the mower while under the influence of alcohol or drugs. Ensure the mowing area is clear of obstacles, children, and pets. Start the mower on a level surface and use caution on slopes. Never leave the mower unattended while it’s running. Keep children away from the mowing area and ensure the mower deck is properly secured before use.

Understanding Your Husqvarna Riding Mower

Familiarize yourself with your Husqvarna riding mower’s controls, transmission, and mower deck. Understanding these key components ensures ease of operation and optimal mowing performance. This manual provides detailed guidance to help you get the most from your mower.

3.1 Familiarizing Yourself with the Controls

Take time to identify and understand the key components of your Husqvarna riding mower. Locate the control panel, steering controls, and hydrostatic transmission. Compare the illustrations in this manual with your tractor to ensure familiarity with control placements and functions. Check the parts boxes (A, B, C) listed in the manual to confirm all components are included. This step is crucial for safe and effective operation.

3.2 Adjusting the Mower Deck for Optimal Performance

To achieve optimal performance, adjust the mower deck according to the manual’s guidelines. When the mower is in its highest position, ensure the front edge is 1/8 to 1/2 inch lower than the rear. Locate the height adjustment handles on either side of the deck and use a wrench or socket to make precise adjustments. After adjusting, test the mower on a small area to check for even cutting. Regularly clean the deck to prevent grass buildup and sharpen blades for a clean cut. For uneven terrain, adjust the deck to stay level relative to the ground to avoid scalping the lawn. Check belt tension as per manual specifications for smooth operation. Always follow safety precautions, such as turning off the engine and engaging the brake, before making any adjustments. Proper adjustment ensures effective cutting and extends the life of your mower.

Starting and Stopping the Mower

Ensure the parking brake is engaged and the mower is on a level surface. Follow pre-start checks, then turn the key and press the ignition button. To stop, disengage the blades, reduce speed, and turn off the engine. Always refer to the manual for specific starting and stopping procedures.

4.1 Pre-Start Checks

Before starting the mower, ensure the parking brake is engaged and the mower is on a level surface. Check the oil level, fuel level, and ensure the mower deck is clear of debris; Verify that all safety features are functioning properly and that loose clothing or jewelry is secured. Inspect the blades for damage and ensure the cutting deck height is adjusted correctly. Always refer to the manual for detailed pre-start procedures to ensure safe and efficient operation.

4.2 Starting and Stopping Procedures

To start the mower, sit comfortably, ensure the parking brake is engaged, and move the throttle to the start position. Turn the ignition key to the “start” position and release it once the engine begins to run. For stopping, bring the mower to a complete stop, move the throttle to the “stop” position, engage the parking brake, and turn off the ignition. Always allow the engine to cool before leaving the mower unattended.

Maintenance and Servicing

Regular maintenance is crucial for optimal performance. Check oil levels, filters, and blades frequently. Lubricate moving parts and clean the mower deck after use. Schedule servicing every 50 hours for best results. Refer to the manual for detailed procedures and visit authorized Husqvarna service centers for genuine parts and expert assistance.

5.1 Regular Maintenance Tasks

Regular maintenance ensures your Husqvarna riding mower runs efficiently. Check oil levels, air filters, and blade sharpness frequently. Clean the mower deck after use to prevent debris buildup. Lubricate moving parts and inspect belts for wear. Replace filters and sharpen blades every 25 hours. Change oil and gas filters every 50 hours to maintain engine health. Refer to your manual for specific schedules and procedures.

5.2 Oil and Filter Change Procedures

Regular oil and filter changes are crucial for maintaining your Husqvarna riding mower’s engine health. Warm the engine slightly, then drain the oil into a pan. Replace the oil filter with a genuine Husqvarna filter. Refill the engine with the recommended oil type. Check for leaks and dispose of used oil responsibly. Replace the gas filter every 50 hours to ensure proper fuel flow and engine performance.

Troubleshooting Common Issues

Addressing common problems like blade engagement failures and starting difficulties can be resolved by following diagnostic steps outlined in this section for optimal mower functionality.

6.1 Why the Blades May Not Engage

The blades may fail to engage due to a broken or loose drive belt, faulty pulleys, or issues with the PTO (Power Take-Off) switch. Check for worn or damaged belts and ensure all connections are secure. Verify the PTO switch is functioning correctly and consult the manual for belt replacement procedures if necessary. Addressing these common issues promptly ensures proper mowing performance.

6.2 Solving Starting Problems

Starting issues with your Husqvarna riding mower can often be resolved by checking the basics. First, ensure the fuel tank is not empty and that the fuel is fresh. Old or contaminated fuel can prevent the engine from starting. Next, inspect the spark plug for cleanliness and wear. A dirty or worn-out spark plug should be cleaned or replaced. Also, check the air filter for dirt or debris and clean or replace it as needed. If these steps don’t resolve the issue, consider examining the carburetor for potential clogs, which may require cleaning. Additionally, verify the condition of the ignition coil, as a faulty coil can prevent proper spark generation. If the battery is dead, try jumping it or replacing it if necessary. Finally, inspect the fuel line for kinks or blockages that might restrict fuel flow. If none of these solutions work, it may be advisable to consult a professional for further diagnosis and repair.

Husqvarna Customer Support and Resources

Husqvarna offers comprehensive customer support through online resources, including manuals, FAQs, and a dealer locator. Visit their website or contact customer service for assistance with your riding mower.

7.1 Where to Find Manuals and Guides

Husqvarna provides easy access to manuals and guides on their official website. Visit the support section, enter your product model, and download the PDF manual for free. Additionally, use the dealer locator tool to find local service centers for personalized assistance. Digital copies ensure you always have the information needed to maintain and troubleshoot your riding mower effectively.

7.2 Contacting Husqvarna Service Centers

For assistance, visit Husqvarna’s official website and use the dealer locator tool to find your nearest service center. Contact their customer support team directly for troubleshooting, maintenance, or repair inquiries. Local service centers offer personalized help, ensuring your riding mower operates at its best. Reach out for expert advice and reliable service to maintain your equipment’s performance and longevity.

Accessories and Replacement Parts

Explore the range of genuine accessories and replacement parts designed for your Husqvarna riding mower. This section guides you on identifying and ordering the correct components efficiently.

8.1 Identifying Genuine Husqvarna Parts

Identifying genuine Husqvarna parts ensures compatibility and quality. Look for the Husqvarna logo, part numbers, and packaging. Verify the serial number in the manual. Purchase from authorized dealers to avoid counterfeit products. Cross-reference part numbers online or in the manual for accuracy. Genuine parts are designed to maintain performance and safety, ensuring your mower operates as intended. Always double-check before ordering to guarantee authenticity and warranty coverage.

8.2 Ordering Parts Online

To order genuine Husqvarna parts online, visit the official Husqvarna website or authorized dealer portals. Use your mower’s model or part number for accurate searches. Select the desired part, review the description, and proceed to checkout. Ensure the seller is verified to avoid counterfeit items. Track your order and confirm delivery details. Genuine parts ensure warranty coverage and optimal performance, maintaining your mower’s quality and reliability over time.

Tips for Optimal Mowing Performance

Maintain the mower deck at the recommended height and ensure blades are sharp for even cutting. Regularly check and lubricate moving parts to enhance efficiency and prolong lifespan.

9.1 Adjusting the Mower for Different Terrain

Adjust your Husqvarna riding mower to suit various terrains for optimal performance. For hills, ensure the mower deck is level to prevent scalping. On flat ground, raise the deck slightly for even cutting. For uneven terrain, lower the deck cautiously to maintain stability. Always check tire pressure and blade angle before mowing. Consult your manual for specific height recommendations based on grass type and terrain conditions.

9.2 Sharpening and Replacing Blades

Sharpen mower blades every 25 hours of use for optimal cutting performance. Dull blades tear grass, leaving it vulnerable to disease. Use a grinder or file to maintain the original blade angle. Replace blades if they are worn, bent, or damaged. Always install genuine Husqvarna parts for compatibility and safety. Refer to your manual for specific blade sharpening and replacement instructions tailored to your model.

Warranty and Service Information

Understand your warranty coverage for repairs and replacements. Schedule routine service with authorized Husqvarna dealers to maintain warranty validity. Use genuine parts for compliance and optimal performance.

10.1 Understanding Your Warranty Coverage

Your Husqvarna riding mower is backed by a comprehensive warranty program. Coverage varies by model and typically includes repairs or replacements for defective parts during the warranty period. Proper maintenance and use of genuine Husqvarna parts are essential to maintain warranty validity. Review your manual or contact Husqvarna support for detailed terms and conditions. Always ensure service is performed by authorized dealers to uphold coverage.

10.2 Scheduling Routine Service

Regular servicing is crucial for maintaining your Husqvarna riding mower’s performance and longevity. Refer to your owner’s manual for recommended service intervals, typically every 50 hours, including oil changes, filter replacements, and deck cleaning. Use genuine Husqvarna parts and authorized dealers to ensure warranty validity. Proper maintenance ensures optimal mower function and prevents potential issues. Schedule service promptly to keep your mower running efficiently throughout the season.

charge code manual

The Charge Code Manual is a standardized guide published by the Missouri State Highway Patrol, providing a structured system for tracking criminal offenses. It ensures uniformity in reporting and categorizing crimes across law enforcement agencies. The manual includes detailed charge codes, modifiers, and instructions for accurate data entry, facilitating efficient criminal justice operations.

1.1 Definition and Purpose

The Charge Code Manual is a standardized guide assigning unique codes to criminal offenses, enabling consistent reporting and classification. Its purpose is to provide a uniform system for law enforcement and criminal justice agencies to track and categorize crimes accurately. Published by the Missouri State Highway Patrol, it ensures clarity and precision in legal procedures and data management, aligning with legal changes and updates.

1.2 Importance in Criminal Justice Systems

The Charge Code Manual is essential for maintaining consistency in criminal justice systems, enabling accurate tracking and reporting of offenses. It standardizes how crimes are classified, ensuring uniformity across law enforcement agencies. This system facilitates efficient data collection, statistical analysis, and legal compliance, while also aiding in the proper administration of justice and public safety efforts.

History and Development of the Charge Code Manual

The Charge Code Manual originated to standardize criminal offense tracking. Published by the Missouri State Highway Patrol, it has evolved over time with periodic updates and expansions.

2.1 Origins and Evolution

The Charge Code Manual was first introduced to create a uniform system for criminal offense classification. It began as a basic catalog of crimes and has since expanded to include detailed modifiers and instructions. Updates are coordinated by the Missouri State Highway Patrol, ensuring the manual remains relevant and accurate for law enforcement and criminal justice agencies.

2.2 Key Milestones in Its Development

The Charge Code Manual has undergone significant updates to enhance accuracy and usability. Key milestones include the 2001 expansion to include NCIC modifiers, the 2015 addition of ordinance comparisons, and the 2024 integration of new codes for emerging crimes like cyber offenses. These updates ensure the manual remains a vital tool for law enforcement and criminal justice agencies.

Structure and Organization of the Charge Code Manual

The Charge Code Manual is organized into sections with charge codes, modifiers, and instructions for accurate reporting. It provides a structured format for law enforcement agencies to classify offenses uniformly.

3.1 Format and Layout

The Charge Code Manual is designed with a clear and consistent format, featuring tables, codes, and detailed descriptions. Each section is organized logically, with headings and subheadings for easy navigation. The layout includes numerical indexing, charge code listings, and instructional notes, ensuring users can quickly locate specific information. The manual’s structured format enhances usability for law enforcement and criminal justice professionals.

3.2 Coding System and Nomenclature

The Charge Code Manual employs a standardized coding system, utilizing a 5-digit code for each offense, followed by a 2-digit NCIC modifier. This nomenclature ensures uniformity in tracking and reporting crimes. Codes are structured to categorize offenses precisely, aiding law enforcement and criminal justice officials in maintaining consistent records. The system’s clarity enhances data management and legal compliance across jurisdictions.

The Charge Code Committee

The Charge Code Committee oversees the development and maintenance of the manual, ensuring codes align with state laws and criminal justice needs. It collaborates with law enforcement and legal experts to update and refine the system, guaranteeing accuracy and relevance in tracking offenses.

4.1 Role and Responsibilities

The Charge Code Committee is responsible for reviewing and approving new codes, ensuring they align with current laws and criminal justice requirements; The committee collaborates with law enforcement agencies and legal experts to maintain the manual’s accuracy and relevance. They also address updates, resolve coding conflicts, and ensure the system remains efficient for tracking and reporting criminal offenses statewide.

4.2 Process for Reviewing and Approving New Codes

New charge codes undergo a rigorous review process to ensure accuracy and relevance. Submissions are evaluated for clarity, consistency, and alignment with existing laws. The committee consults with legal experts and law enforcement agencies before approval. Updates are documented and published quarterly, with annual comprehensive revisions to reflect legislative changes and system improvements, ensuring the manual remains current and effective.

Current Charge Code Manual

The current Charge Code Manual covers August 28, 2024, to August 27, 2025, providing updated codes for criminal offenses. It is published by the Missouri State Highway Patrol and the Office of State Courts Administrator, ensuring accurate tracking and reporting of crimes for law enforcement and criminal justice agencies.

5.1 Publication Details and Coverage Period

The Charge Code Manual is published annually by the Missouri State Highway Patrol and the Office of State Courts Administrator. The current edition covers the period from August 28, 2024, to August 27, 2025. It is available in print and digital formats, with updates reflecting changes in statutes and criminal justice reporting requirements. The manual is accessible on the Missouri State Highway Patrol’s official website.

5;2 Content and Features

The Charge Code Manual contains a comprehensive list of 5-digit charge codes, each corresponding to specific criminal offenses. It includes NCIC modifiers, statutory references, and offense classifications. The manual also features instructions for code usage, updates on new or revised codes, and cross-references for related offenses. Additional resources include ordinance comparisons and a criminal offense pamphlet, ensuring accurate reporting and compliance with legal standards.

5.3 Accessing the Manual

The Missouri Charge Code Manual is published by the Missouri State Highway Patrol and is available on their official website. The manual covers specific periods, such as August 28, 2024, to August 27, 2025. It includes current charge codes, historical editions, and quarterly updates. Users can access PDF versions, retired codes, and related resources, ensuring easy reference for law enforcement and criminal justice officials.

Historical Charge Code Manuals

Archived editions of the Missouri Charge Code Manual are accessible online, covering past years like 2001, 2015-2016, and 2020-2021. These historical manuals provide valuable insights into retired charge codes, updates, and previous reporting structures, aiding research and reference for criminal justice agencies and legal professionals.

6.1 Archives and Past Editions

The Missouri State Highway Patrol maintains an extensive archive of past Charge Code Manual editions, including 2001, 2015-2016, and 2020-2021 versions. These archives are accessible online, offering historical charge codes, updates, and retired codes. They provide valuable insights into the evolution of criminal offense tracking and support legal research and reference needs for criminal justice professionals and researchers.

6.2 Retired Charge Codes

Retired charge codes are archived and accessible through the Missouri State Highway Patrol’s website. These codes, though inactive, remain available for reference and legal purposes. They document historical offenses and updates, ensuring continuity in tracking criminal justice data. Retired codes are essential for understanding changes in criminal statutes and maintaining accurate records for law enforcement and judicial processes.

Charge Code Applications

The Charge Code Manual is primarily used by law enforcement agencies and criminal justice officials for reporting and tracking criminal offenses, ensuring accurate data collection and legal compliance.

7.1 Law Enforcement Agencies

Law enforcement agencies utilize the Charge Code Manual to assign specific codes to criminal offenses, ensuring uniform reporting. This standardized system facilitates accurate crime statistics and legal compliance. The codes enable efficient data sharing with state and federal authorities, aiding in statewide crime analysis and resource allocation. Regular updates ensure agencies have current information.

7.2 Criminal Justice Officials

Criminal justice officials rely on the Charge Code Manual to classify offenses accurately. It ensures legal compliance and uniform data reporting. By using standardized codes, officials maintain consistency in tracking and analyzing crimes. This supports efficient case management and informed decision-making within the criminal justice system.

Charge Code Updates and Revisions

The Charge Code Manual is updated quarterly to reflect legal changes, ensuring accuracy and compliance. Revisions include new codes and removal of repealed laws, maintaining relevance.

8.1 Frequency and Process

The Missouri Charge Code Manual is updated quarterly, aligning with legislative changes and law enforcement needs. The process involves the Charge Code Committee reviewing submissions, ensuring compliance with state laws, and approving new codes. Updates are published on the Missouri State Highway Patrol’s website, providing accessible and timely revisions for criminal justice agencies.

8.2 Recent Changes and Additions

The Missouri Charge Code Manual has recently introduced new codes for emerging offenses, modified existing codes for clarity, and aligned with updated state laws. The latest edition includes additional features for improved data tracking and reporting. Retired codes are now listed for historical reference, ensuring comprehensive documentation and seamless transitions for criminal justice agencies.

Charge Code Manual Training

Training materials, including manuals and guides, are available to ensure accurate and compliant use of the Charge Code Manual. These resources are designed for law enforcement and criminal justice officials, covering updates and alignment with current laws and reporting standards.

9.1 Available Training Materials

The Missouri State Highway Patrol offers comprehensive training materials, including guides, webinars, and interactive tools, to educate users on the Charge Code Manual. These resources are designed to help law enforcement and criminal justice officials understand the coding system, updates, and legal compliance. Materials are accessible online, ensuring easy access for continuous professional development and accurate implementation of charge codes.

9.2 Importance of Training

Training on the Charge Code Manual is essential for ensuring accurate and consistent data reporting. It equips law enforcement and criminal justice officials with the knowledge to apply codes correctly, understand updates, and maintain legal compliance. Proper training enhances data integrity, supports efficient crime tracking, and ensures the fair application of justice across all jurisdictions, making it a critical component of criminal justice operations.

Charge Code Manual and Legal Compliance

The manual ensures alignment with state laws, excluding repealed laws to maintain legal accuracy. Regular updates reflect legislative changes, ensuring compliance and accurate crime reporting across jurisdictions.

10.1 Alignment with State Laws

The Charge Code Manual is carefully aligned with state laws, ensuring that all codes reflect current legislation. Regular updates incorporate new laws and remove repealed ones, maintaining legal accuracy. This alignment ensures that criminal justice agencies can accurately classify offenses, promoting consistency and compliance in crime reporting and legal proceedings across Missouri.

10.2 Handling of Repealed Laws

The Charge Code Manual systematically removes codes for repealed laws, ensuring only active legislation is referenced. This process maintains accuracy in crime reporting and legal compliance. Retired codes are archived to preserve historical data while preventing their misuse in current criminal justice operations.

Accessing Charge Code Information

The Charge Code Manual is accessible online through official websites, offering PDF and Excel formats. Users can search by law descriptions or titles for specific codes.

11.1 Online Resources

The Missouri State Highway Patrol’s website offers the Charge Code Manual in PDF and Excel formats. Users can access current and historical charge codes, search by law descriptions, and view non-fingerprintable and repealed laws. The online resource provides efficient tools for law enforcement and criminal justice officials to track and report offenses accurately. Visit their website for detailed information and support.

11.2 Search and Reporting Features

The Charge Code Manual offers advanced search and reporting tools. Users can search by law description, title, or specific codes to find relevant information quickly. Reports can be generated in PDF or Excel formats, allowing for easy data analysis. Features include filtering options, detailed law descriptions, and access to repealed laws, enhancing efficiency for criminal justice professionals and law enforcement agencies.

The Future of the Charge Code Manual

The Charge Code Manual will evolve with technological advancements, enhancing its digital accessibility and integration with criminal justice systems. Its expanded use beyond law enforcement is anticipated.

12.1 Technological Advancements

The Charge Code Manual is expected to transition into digital platforms, enhancing accessibility and usability. Future updates may include advanced search features, real-time data updates, and integration with law enforcement databases. Mobile accessibility and AI-driven code suggestions could streamline operations, ensuring efficiency and accuracy in criminal justice reporting and tracking systems.

12.2 Expanding Uses Beyond Law Enforcement

Beyond law enforcement, the Charge Code Manual is increasingly used in background checks, regulatory compliance, and data analysis. Its standardized codes aid employers in screening processes and researchers in studying crime trends. This expansion highlights the manual’s versatility and its growing role in supporting decisions across various sectors, enhancing its utility beyond its original purpose.

sanus bmf320 manual

Welcome to the Sanus BMF320 manual guide! This comprehensive 36-page document provides detailed instructions for installing, configuring, and maintaining your BMF320 TV mount. It includes technical specifications, troubleshooting tips, and maintenance advice to ensure optimal performance. Available as a downloadable PDF, this manual is your go-to resource for seamless installation and long-term use. Visit the official Sanus website or trusted sources to access the guide and additional resources.

Overview of the Sanus BMF320

The Sanus BMF320 is a premium flat-panel wall mount designed for TVs, offering a robust and versatile solution for home entertainment systems. It is compatible with a wide range of TV sizes and VESA patterns, ensuring flexibility for various screen configurations. The mount features advanced full-motion capability, allowing for smooth tilt, swivel, and pivot adjustments to achieve the perfect viewing angle. Constructed with high-quality materials, the BMF320 is built to last, with a focus on durability and stability. Its sleek design complements modern interiors while providing reliable support for your TV. The product includes essential hardware and a wall plate template for ease of installation. Additionally, the BMF320 manual offers detailed instructions to guide users through the setup process. With its user-friendly design and comprehensive support resources, the Sanus BMF320 is an excellent choice for enhancing your viewing experience. Its compatibility and adjustability make it a popular option among consumers seeking a reliable wall mount solution.

Key Features and Benefits

The Sanus BMF320 boasts an array of impressive features designed to enhance your viewing experience. Its full-motion capability allows for seamless tilt, swivel, and pivot adjustments, ensuring optimal screen positioning from any angle. The mount is built with high-grade materials, offering a sturdy and durable solution for your TV. With a weight capacity of up to 130 lbs, it securely supports a wide range of flat-panel displays. The BMF320 is VESA-compatible, making it versatile for various TV sizes and models. Its sleek, low-profile design ensures minimal visibility, blending seamlessly with modern interiors. Additionally, the mount comes with a wall plate template for precise installation and includes all necessary hardware. The comprehensive manual provides clear, step-by-step instructions, while the product’s adjustability ensures a perfect fit for your TV. These features make the BMF320 a reliable and user-friendly choice for mounting your television, offering both functionality and aesthetic appeal. Its durability and adjustability provide long-term satisfaction, ensuring your TV remains securely and attractively mounted for years to come.

Installation Process

The Sanus BMF320 installation process is streamlined with a detailed step-by-step guide. Use the included wall plate template for precise drilling. Follow the manual’s instructions carefully for a secure and level mount. FAQs are available for common queries.

Tools and Materials Needed

To successfully install the Sanus BMF320, gather the necessary tools and materials. A power drill with bits is essential for drilling into walls. Phillips and flathead screwdrivers are required for tightening screws. A stud finder helps locate wall studs for secure mounting. A level ensures proper alignment, and a pencil marks drilling locations. Additional tools like an Allen wrench may be needed for adjustments. Materials provided in the box include mounting hardware, such as bolts and lag screws, a wall plate, and spacers. The manual also includes a wall plate template for accurate drilling. Ensure you have all components before starting. If additional materials like wall anchors are needed, they can be purchased separately. Always follow the manual’s recommendations for tools and materials to guarantee a safe and proper installation. Double-check the list in the manual to avoid missing any items. Proper preparation ensures a smooth and efficient installation process.

Step-by-Step Installation Guide

Begin by preparing the wall. Locate wall studs using a stud finder and mark the mounting location. Attach the wall plate to the wall using lag screws, ensuring it is level. Next, secure the TV bracket to the back of your television using the provided screws. Mount the TV onto the wall plate by aligning the bracket with the wall plate and clicking it into place. Adjust the TV to your desired position, ensuring it is level. Tighten all screws firmly to secure the installation. Use the wall plate template provided in the manual for accurate drilling. Follow the manual’s instructions for tilt, swivel, or full-motion adjustments. Double-check all connections and test the mount by gently pulling on the TV to ensure stability. Refer to the manual for specific instructions tailored to your TV size and type. Proper installation ensures safety and optimal performance. Always follow the step-by-step guide in the manual for a secure setup.

Common Installation Mistakes to Avoid

When installing the Sanus BMF320, avoid common mistakes to ensure a safe and proper setup. First, do not skip locating wall studs, as failing to secure the mount to studs can lead to instability or damage. Incorrectly drilling into the wall or misaligning the wall plate can result in uneven mounting. Over-tightening screws may damage the TV or mount, so tighten them firmly but avoid excessive force. Ensure the TV bracket is properly attached to the television before hanging it on the wall plate. Misaligned brackets can cause the TV to sit unevenly or fall. Additionally, not verifying the weight and size compatibility of your TV with the mount can lead to safety hazards. Always double-check the manual’s specifications to confirm compatibility. Finally, avoid rushing through the process; take your time to follow each step carefully to ensure a secure and stable installation.

Technical Specifications

The Sanus BMF320 is designed for compatibility with various TV sizes and weights, supporting up to 130 lbs. It features a full-motion design with tilt, swivel, and pivot functions for optimal viewing angles. The mount includes VESA pattern compatibility and is constructed with durable materials for long-lasting performance.

  • Weight capacity: Up to 130 lbs.
  • Compatible TV sizes: Varies based on VESA patterns.
  • Mount type: Full-motion wall mount.
  • Adjustability: Tilt, swivel, and pivot functions.
  • Included hardware: Wall plate, mounting brackets, and installation template.

Weight Capacity and Compatibility

The Sanus BMF320 is engineered to support a maximum weight capacity of 130 lbs, ensuring stability for a wide range of TV sizes. It is compatible with flat-panel TVs ranging from 32 to 90 inches, offering versatility for different screen sizes. The mount is designed to accommodate various VESA patterns, making it suitable for most modern televisions. Constructed with high-quality materials, it provides durability and reliability. For optimal performance, ensure your TV’s weight and dimensions align with the specified limits. Always refer to your TV’s manual to confirm compatibility before installation. Proper alignment with VESA standards ensures a secure and balanced mount. This feature-rich design makes the BMF320 a reliable choice for homeowners seeking a sturdy and adaptable mounting solution. Adhering to these specifications guarantees safety and optimal performance for your TV setup.

  • Maximum weight capacity: 130 lbs.
  • Compatible TV sizes: 32″ to 90″.
  • VESA pattern compatibility: Ensures proper fit for most TVs.
  • Durable construction: Built to last with high-quality materials.

Mounting Types and Adjustability

The Sanus BMF320 offers versatile mounting options to suit various installation needs. It supports both wall stud and wood stud installations, ensuring a secure fit in different wall types. The mount is highly adjustable, featuring tilt, swivel, and rotation functionalities. This allows for precise positioning to achieve the optimal viewing angle. With a smooth tilt mechanism, you can adjust the TV’s angle from -10° to +10°, reducing glare and enhancing visibility. The swivel feature enables the TV to turn up to 90°, making it ideal for corner placements or multi-room viewing. Additionally, the mount allows for 360° rotation, ensuring compatibility with both landscape and portrait orientations. These adjustability options provide flexibility to customize your TV setup according to your preferences. Furthermore, the BMF320 includes a leveling adjustment to ensure the TV is perfectly aligned, even after installation. These features make the Sanus BMF320 a highly adaptable and user-friendly mounting solution for modern TVs.

  • Tilt range: -10° to +10°.
  • Swivel range: Up to 90°.
  • Rotation: 360° for landscape or portrait orientation.
  • Leveling adjustment for precise alignment.

Troubleshooting and Maintenance

Address common issues like uneven TV alignment or loose hardware by tightening bolts and checking wall studs. Regularly clean moving parts and lubricate hinges for smooth operation. Refer to the manual for detailed solutions.

Common Issues and Solutions

When using the Sanus BMF320, common issues may arise during or after installation. One frequent problem is uneven TV alignment, which can be resolved by ensuring the wall mount is properly leveled and securely fastened to wall studs. Another issue is loose hardware, which can be addressed by tightening all bolts and screws according to the torque specifications in the manual. If the mount does not fit your TV, verify that the VESA pattern matches and that the weight capacity is not exceeded. For sticking or difficult-to-move parts, apply a small amount of silicone-based lubricant to the hinges or joints. If the TV wobbles, check the wall plate installation and ensure it is flush against the wall. For any electrical issues, disconnect the mount from power and consult the troubleshooting section in the manual. Regular maintenance, such as cleaning dust from moving parts, can prevent many of these problems. Always refer to the official Sanus BMF320 manual for detailed solutions and safety precautions.

How to Update or Replace Parts

Updating or replacing parts on your Sanus BMF320 is straightforward when done correctly. First, consult the manual to identify the specific part number you need. Visit the official Sanus website or authorized retailers to purchase genuine replacement parts. Before starting, gather the necessary tools, such as Allen wrenches or screwdrivers, as specified in the manual. Disconnect the TV and any power sources for safety. For minor parts like screws or hinges, simply remove the old ones and install the new ones securely. For more complex components, like the wall plate or mounting arms, follow the step-by-step disassembly instructions in the manual. Ensure all bolts are tightened to the recommended torque to avoid instability. If unsure, consider consulting a professional. Regularly updating or replacing worn-out parts will ensure your mount remains stable and functional. Always refer to the official Sanus BMF320 manual for detailed guidance on part replacement and maintenance.

The Sanus BMF320 manual provides a comprehensive guide for installation, maintenance, and troubleshooting. Follow these steps to ensure a secure and durable setup. Refer to the manual for any further assistance.

Final Tips for Optimal Use

For the best experience with your Sanus BMF320, ensure regular maintenance and proper adjustments. Clean the mount periodically to avoid dust buildup. Always check the weight limit to prevent overloading. Tighten all bolts after installation and periodically to maintain stability. Use the wall template for accurate drilling. Adjust the mount to your desired viewing angle for optimal comfort. Refer to the manual for specific configurations. For dual installation, ensure both mounts are aligned properly. Test the mount’s sturdiness before placing your TV. Keep the manual handy for future reference. Finally, visit the Sanus website for additional resources or updates. By following these tips, you’ll enjoy a secure, durable, and flexible mounting solution for your TV.

Where to Find Additional Resources

For further assistance with your Sanus BMF320, visit the official Sanus website at https://www.sanus.com. Here, you can download the complete PDF manual and access detailed installation guides; The site also offers a dedicated support section with FAQs, troubleshooting tips, and technical specifications; Additionally, you can find instructional videos and user forums where experienced users share their insights. For direct assistance, contact Sanus Customer Support via email or phone. Ensure to refer to the official resources for the most accurate and up-to-date information. By utilizing these resources, you can maximize your understanding and enjoyment of the BMF320 mount.

splendide washer dryer combo manual

Welcome to the Splendide Washer Dryer Combo Manual, your comprehensive guide to understanding and operating the Splendide Washer Dryer Combo. This manual provides essential information to help you maximize efficiency, safety, and performance of your appliance. Designed for convenience, the Splendide Washer Dryer Combo combines washing and drying functions in one unit, perfect for space-saving solutions. Inside, you’ll find detailed instructions, troubleshooting tips, and maintenance advice to ensure optimal use of your washer-dryer. Reading this manual carefully will help you unlock all features and enjoy hassle-free laundry experiences.

1.1 Overview of the Splendide Washer Dryer Combo

The Splendide Washer Dryer Combo is a front-loading, space-saving appliance designed for home use. It combines a washer and dryer in one unit, offering convenience and efficiency. With an extra-large door opening, it provides easy access for loading and unloading laundry. The appliance features multiple wash cycles and drying options, catering to various fabric types. Its compact design makes it ideal for small spaces, such as apartments or RVs. The Splendide Washer Dryer Combo is engineered to deliver reliable performance while minimizing energy and water usage, making it a practical choice for modern households.

1.2 Importance of Reading the Manual

Reading the Splendide Washer Dryer Combo Manual is essential for optimal performance and safety. It provides detailed instructions on installation, operation, and maintenance, ensuring you understand all features and settings. The manual highlights safety precautions, energy efficiency tips, and troubleshooting solutions, helping you avoid common issues. By following the guidelines, you can extend the appliance’s lifespan and maintain warranty validity. Understanding the manual empowers you to use the washer-dryer effectively, ensuring efficient laundry cycles and minimizing potential risks. It’s a vital resource for maximizing your appliance’s capabilities and enjoying a seamless user experience.

Installation and Setup

Proper installation and setup ensure optimal performance and safety. Place the unit on a level surface, secure all connections, and follow manufacturer guidelines to avoid issues.

2.1 Pre-Installation Checks

Before installing your Splendide Washer Dryer Combo, ensure the location meets specific requirements. Verify that the power supply matches the unit’s electrical needs (120V for most models). Check that the floor is level, sturdy, and can support the appliance’s weight when fully loaded. Ensure proper ventilation for the dryer function to prevent moisture buildup. Inspect the drainage system to confirm it can handle wastewater. Review local codes and manufacturer instructions for compliance. If unsure, consult a qualified installer to avoid potential issues during operation.

2.2 Step-by-Step Installation Instructions

Begin by carefully unpacking and inspecting the unit for damage. Place the washer-dryer on a level, sturdy surface and secure it using the provided hardware to prevent movement. Connect the water supply lines to the unit, ensuring they are tightly secured to avoid leaks. Attach the drain hose to a standpipe or laundry tub, making sure it is properly fastened. Plug the unit into a grounded 120V electrical outlet. Once installed, run a test cycle to verify proper function and check for any leaks. Refer to the manual for specific model instructions and safety guidelines.

Operating the Appliance

Learn how to operate your Splendide Washer Dryer Combo efficiently. Understand the control panel, select appropriate wash and dry cycles, and utilize energy-saving settings for optimal performance.

3.1 Understanding the Control Panel

The control panel of your Splendide Washer Dryer Combo is designed for intuitive operation. It features a user-friendly interface with buttons for selecting wash and dry cycles, temperature settings, and additional options like delayed start. The panel includes an LED display showing cycle status and error codes. Familiarize yourself with each button’s function to customize your laundry process. Regularly check the display for updates and ensure all settings align with your load requirements. Proper use of the control panel ensures efficient and safe operation of the appliance.

3.2 Wash and Dry Cycles Explained

The Splendide Washer Dryer Combo offers multiple wash cycles, including Normal, Delicate, and Heavy Duty, tailored for different fabric types and soil levels. The dryer cycle includes options like Low, Medium, and High heat, as well as a No Heat setting for sensitive fabrics. The appliance also features an automatic Wash-to-Dry function, allowing seamless transition from washing to drying in the same drum. Note that the dryer capacity is slightly smaller than the washer, so you may need to remove excess clothes before drying. Always refer to the manual for specific cycle recommendations and adjustments.

3.3 Energy Efficiency and Settings

The Splendide Washer Dryer Combo is designed with energy efficiency in mind, offering eco-friendly settings to reduce water and energy consumption. The appliance features an Energy Star certification, ensuring it meets strict energy-saving standards. Users can customize settings like water temperature, spin speed, and drying time to optimize efficiency. The combo also includes an eco-mode for lighter loads, reducing energy use further. Additionally, smart sensors automatically adjust water levels and drying times based on load size, helping to conserve resources. These features make the Splendide Combo both environmentally friendly and cost-effective for everyday use.

Maintenance and Troubleshooting

Regular maintenance ensures optimal performance. Clean filters, check for blockages, and ensure proper ventilation. Refer to error codes for troubleshooting common issues like uneven drying or noise.

4.1 Regular Maintenance Tips

Regular maintenance is crucial to ensure your Splendide Washer Dryer Combo operates efficiently. Clean the lint filter after every use to prevent buildup and improve drying performance. Check and clear the drain pump filter regularly to avoid blockages. Ensure proper ventilation by maintaining a clean venting system, as clogged vents can reduce drying efficiency. Additionally, run a cleaning cycle every 1-2 months to remove detergent residue and debris. Always refer to the manual for specific maintenance instructions tailored to your model. Regular upkeep helps prevent issues, extends the appliance’s lifespan, and maintains optimal performance.

4.2 Common Issues and Solutions

Common issues with the Splendide Washer Dryer Combo include error codes, lint buildup, and slow drying. If you encounter an error code like E1 or E3, check the drain hose for blockages or kinks. For poor drying performance, ensure the lint filter and venting system are clean. If the appliance overheats, verify that the venting system is unobstructed. Regularly cleaning the filter and checking for blockages can prevent many issues. Always refer to the manual for specific solutions, as some errors may require professional assistance. Addressing these issues promptly ensures optimal performance and extends the appliance’s lifespan.

4.3 Error Codes and Their Meanings

Your Splendide Washer Dryer Combo may display error codes like E1, E2, or E3. E1 indicates a water supply issue, such as low pressure or a closed valve. E2 signals a drainage problem, like a clogged drain hose. E3 suggests overheating, often due to blocked vents or excessive lint buildup. To resolve these, check water connections, ensure proper drainage, and clean vents regularly. For persistent issues, consult the manual or contact customer support. Understanding these codes helps you quickly address and fix problems, ensuring smooth operation of your appliance.

Safety Guidelines

Always follow safety guidelines to ensure safe operation; Proper installation, adherence to electrical safety, and avoiding overloaded circuits are crucial. Never leave the appliance unattended during operation and keep children away from the washer-dryer combo. Regularly inspect power cords and avoid using damaged plugs or grounded adapters. Proper usage and maintenance prevent hazards, ensuring a safe laundry experience with your Splendide Washer Dryer Combo.

5.1 General Safety Precautions

Ensure the Splendide Washer Dryer Combo is installed by a qualified technician to meet safety standards. Properly ground the appliance to prevent electrical hazards. Keep the area around the unit clear of flammable materials and ensure good ventilation. Never overload the washer-dryer, as this can cause damage or pose a fire risk. Always read and follow the manual instructions carefully. Supervise children when the appliance is in use. Avoid bypassing safety features or using damaged power cords. Regularly maintain the appliance as outlined in the manual to ensure safe and efficient operation.

5.2 Electrical Safety Considerations

Always ensure the Splendide Washer Dryer Combo is installed by a qualified technician, adhering to local electrical codes and manufacturer instructions. Proper grounding is essential to prevent electrical hazards. Use the correct power supply voltage (120V) and avoid using damaged cords or extensions. Never modify the appliance’s electrical components, as this can lead to safety risks. Keep the area around the washer-dryer dry to prevent electrical accidents. Regularly inspect the power cord for damage and replace it if necessary. Follow all electrical safety guidelines outlined in the manual to ensure safe operation.

User Manual Contents

The Splendide Washer Dryer Combo Manual includes detailed installation guidelines, operating instructions, maintenance tips, and troubleshooting solutions. It also covers error codes, safety precautions, and warranty information, ensuring comprehensive guidance for optimal appliance performance and user safety.

6.1 What’s Included in the Manual

The Splendide Washer Dryer Combo Manual includes a wide range of essential information to help you understand and use your appliance effectively. It features detailed installation instructions, step-by-step operating guides, and maintenance tips to ensure optimal performance. Additionally, the manual provides troubleshooting solutions for common issues, explanations of error codes, and safety guidelines to prevent accidents. You’ll also find information on energy efficiency settings and advanced features like the automatic wash-to-dry function. The manual is designed to be user-friendly, offering clear diagrams and concise explanations to help you navigate every aspect of your washer-dryer combo.

6.2 How to Navigate the Manual

Navigating the Splendide Washer Dryer Combo Manual is straightforward, thanks to its organized structure. The manual is divided into clear sections, such as installation, operation, maintenance, and troubleshooting, making it easy to locate specific information. Each section includes detailed subsections with step-by-step instructions and visual guides. Use the table of contents to quickly find the topic you need, and refer to the index for specific terms or error codes. The manual also includes cross-references to help you move seamlessly between related topics, ensuring a smooth and efficient user experience.

Advanced Features

The Splendide Washer Dryer Combo boasts advanced features like the automatic wash-to-dry function and quiet operation, ensuring efficient and noise-reduced laundry processing. These innovations enhance user convenience and performance.

7.1 Automatic Wash-to-Dry Function

The Automatic Wash-to-Dry Function seamlessly integrates washing and drying cycles, eliminating the need to transfer clothes. This feature ensures continuous operation, saving time and effort. The same drum is used for both processes, optimizing space and energy. Sensors monitor moisture levels to adjust drying time, preventing overdrying. Ideal for full-time living, this function enhances convenience and efficiency, making laundry day simpler and quicker. It’s a key advantage of the Splendide Washer Dryer Combo, designed for modern, compact lifestyles.

7.2 Quiet Operation and Vibration Reduction

The Splendide Washer Dryer Combo features advanced engineering for quiet operation and vibration reduction, ensuring minimal noise during cycles. Designed with noise-dampening materials and balanced components, it operates smoothly, even at high speeds. This makes it ideal for use in living spaces, RVs, or small homes. The reduced vibration also prevents movement during operation, enhancing stability. These features contribute to a more comfortable and peaceful laundry experience, showcasing the appliance’s focus on user convenience and performance. The quiet design ensures it blends seamlessly into any environment, providing efficient functionality without disruption.

oster air fryer manual

Welcome to the Oster Air Fryer Manual, your comprehensive guide to unlocking the full potential of your air fryer. This manual ensures safe and effective use, providing detailed instructions for operation, maintenance, and troubleshooting. Discover how to achieve crispy, healthy meals effortlessly while adhering to essential safety guidelines and optimization tips for your cooking experience.

Overview of the Oster Air Fryer

The Oster Air Fryer is a versatile and innovative kitchen appliance designed to deliver crispy, flavorful meals with minimal oil. It uses advanced rapid air technology to circulate hot air evenly, ensuring perfectly cooked dishes every time. With its user-friendly interface and adjustable controls, the Oster Air Fryer allows for precise temperature and timer settings, making it ideal for frying, baking, grilling, and more. Its spacious capacity accommodates large portions, perfect for family meals or entertaining guests. The digital display and pre-set functions simplify cooking, while the dishwasher-safe parts make cleanup a breeze. This air fryer combines efficiency, convenience, and versatility, offering a healthier alternative to traditional frying methods.

Importance of Reading the Manual

Reading the Oster Air Fryer manual is essential for safe and effective use of your appliance. It provides critical safety precautions, such as proper handling and electrical guidelines, to prevent accidents and ensure longevity. The manual also offers detailed operating instructions, helping you understand how to use features like air frying, grilling, and baking. By following the guidelines, you can achieve optimal results and avoid common mistakes. Additionally, the manual includes troubleshooting tips to resolve technical issues and maintenance advice to keep your air fryer in top condition. Understanding the warranty information and compliance with regulations, such as FCC rules, is also crucial. Taking the time to read the manual ensures you make the most of your Oster Air Fryer while staying safe and informed.

Safety Precautions and Guidelines

Ensure the Oster Air Fryer is placed on a stable, heat-resistant surface. Keep children away, avoid overheating, and use only recommended accessories. Always follow cleaning guidelines and unplug after use.

General Safety Instructions

For safe operation, always place the Oster Air Fryer on a stable, heat-resistant surface, away from water and flammable materials. Ensure the appliance is out of children’s reach. Avoid overheating by not leaving it unattended. Do not immerse the unit or its parts in water. Use only recommended accessories to prevent damage. Before cleaning, unplug the air fryer and allow it to cool. Never use abrasive cleaners or metal scourers, as they may damage the surfaces. Regularly check for wear and tear on cords and parts. Follow these guidelines to ensure optimal performance and safety while using your Oster Air Fryer.

Warning Labels and Symbols

The Oster Air Fryer Manual includes important warning labels and symbols to ensure safe and proper use. These labels are designed to alert users to potential hazards and provide clear instructions to avoid accidents. Common symbols include the warning triangle, indicating critical safety information, and the electric symbol, highlighting electrical components. Additionally, the manual may feature a propane symbol for gas models, a high-temperature symbol, and a no-immersion symbol to prevent water exposure. Always read and adhere to these warnings to prevent injury or damage. Failure to follow these guidelines may result in serious consequences. Make sure to familiarize yourself with these labels before first use to ensure a safe and effective cooking experience with your Oster Air Fryer.

Operating Instructions

Plug in the Oster Air Fryer, press the power button to start. Load ingredients into the basket, set temperature and timer, and cook. Ensure proper ventilation during use.

Steps to Begin Air Frying

To start air frying, first ensure the Oster Air Fryer is properly plugged into a nearby electrical outlet. Press the power button to activate the device. Open the basket and carefully place your ingredients inside, ensuring not to overload it. Close the basket securely and use the control panel to set your desired temperature and cooking time. For optimal results, shake the basket halfway through the cooking process to promote even cooking. Once settings are confirmed, press the start button to begin. Always follow the recommended guidelines for specific foods and ensure proper ventilation in the kitchen during operation. This ensures a safe and delicious cooking experience.

Using the Grill Function

To use the grill function on your Oster Air Fryer, start by selecting the Grill mode using the control panel. Adjust the temperature and cooking time according to your recipe or the type of food you are preparing. Place the food on the grill rack, ensuring it is evenly spaced for consistent cooking. Preheating the grill for a few minutes can enhance results. Once everything is set, press the Start button to begin grilling. Monitor the cooking progress through the window, and flip the food if necessary for even browning. Always use oven mitts when handling hot racks or food. For specific guidelines, refer to the manual or recommended temperature charts for different foods.

Cleaning and Maintenance

Regular cleaning ensures optimal performance and longevity. Always unplug the air fryer before cleaning. Use a damp cloth for exterior and pan surfaces, avoiding abrasive cleaners. The basket and racks are dishwasher-safe for easy maintenance. For tough residue, soak parts in warm soapy water before scrubbing gently. Regular deep cleaning prevents grease buildup and ensures consistent cooking results. Follow manual guidelines for detailed care instructions to keep your Oster Air Fryer in prime condition.

Post-Use Cleaning Tips

Regular cleaning after each use is essential to maintain your Oster Air Fryer’s performance and hygiene. Always unplug the unit before cleaning to avoid accidents. Wipe the exterior with a damp cloth, ensuring no moisture enters the electrical components. For the basket and pan, wash them with warm soapy water or place them in the dishwasher for convenience. Food residue should be removed promptly to prevent hardening. For tougher stains, soak the parts in warm water before scrubbing; Avoid using abrasive cleaners or scouring pads, as they may damage the non-stick surfaces. Regular post-use cleaning helps prevent grease buildup and ensures your air fryer continues to function optimally for delicious meals.

Deep Cleaning the Air Fryer

Deep cleaning your Oster Air Fryer is crucial for maintaining its efficiency and longevity; Start by unplugging the unit and allowing it to cool completely. Remove all accessories and soak them in warm, soapy water for at least 30 minutes; For the main unit, mix equal parts water and white vinegar in the basket, then run the air fryer at 300°F (150°C) for 10-15 minutes to loosen grease. Use a soft-bristle brush to scrub away stubborn residue inside the unit. Rinse all parts thoroughly with clean water and dry them with a soft cloth. Regular deep cleaning prevents grease buildup and ensures optimal performance. This process should be done every 1-2 months for consistent results.

Troubleshooting Common Issues

Identify and resolve common issues like uneven cooking or malfunctioning buttons by checking power connections, ensuring proper basket placement, and cleaning debris. Refer to the manual for detailed solutions to restore optimal functionality and address specific error messages or operational problems effectively.

Resolving Technical Problems

Encountering issues with your Oster Air Fryer? Start by checking the power cord and ensuring it’s properly plugged in. If the display isn’t responding, try resetting the unit by unplugging it for 30 seconds. For uneven cooking, verify that the basket is evenly loaded and the air fryer is preheated. Clean the interior regularly to prevent debris buildup, which can affect performance. If error messages appear, consult the manual for specific troubleshooting steps. For persistent problems, contact Oster’s customer support or visit their official website for additional resources and repair options. Regular maintenance and proper usage can help minimize technical issues.

Accessories and Compatible Parts

Your Oster Air Fryer can be enhanced with a variety of accessories designed to optimize its performance and versatility. Essential items include air fryer baskets, grill pans, and non-stick trays, which are dishwasher-safe and durable. Additional accessories like baking sheets, skewers, and racks expand your cooking options. Ensure all parts are compatible with your specific model for proper fitment and safety. Visit Oster’s official website or authorized retailers to purchase genuine accessories, as using non-recommended parts may void your warranty or pose safety risks. Regularly check for updates or new compatible products to enhance your air frying experience. Always refer to the manual for compatibility guidelines before purchasing any accessories.

Where to Find Additional Resources

Visit the official Oster website at www.oster.com to download the PDF manual, access troubleshooting guides, and find additional resources for your air fryer’s optimal performance.

Downloading the PDF Manual

To access the Oster Air Fryer Manual, visit the official Oster website at www.oster.com. Here, you can download the full PDF version of the manual for your specific model, such as the TSSTTVDAF2 or CKSTAF7MCDDF_22SEPM2. The PDF manual includes detailed safety instructions, warranty information, and operating guidelines to ensure safe and effective use of your air fryer. It also covers troubleshooting tips and maintenance advice. For models like the CKSTAFOV3 Super Air Fryer Oven, the manual provides essential safety precautions to minimize injury risks. If you encounter issues opening the PDF, consider downloading a PDF viewer for better accessibility. This resource is crucial for maximizing your air fryer’s performance and longevity.

Page 3 of 11

Powered by WordPress & Theme by Anders Norén