Category: Manuals Page 4 of 11

accu chek guide me manual

Welcome to the Accu-Chek Guide Me Manual‚ your comprehensive guide to mastering the Accu-Chek Guide Me blood glucose monitoring system. Designed for both new and experienced users‚ this manual provides step-by-step instructions‚ tips‚ and troubleshooting advice to ensure accurate and efficient blood glucose testing. Whether you’re setting up the meter‚ performing tests‚ or integrating with apps‚ this resource will help you maximize the performance of your Accu-Chek Guide Me system for better diabetes management.

Purpose and Scope of the Manual

This manual is designed to provide a clear and comprehensive guide for setting up‚ using‚ and maintaining the Accu-Chek Guide Me blood glucose monitoring system. Its purpose is to ensure users understand how to operate the device accurately and safely. The scope includes step-by-step instructions for initial setup‚ performing blood glucose tests‚ interpreting results‚ and troubleshooting common issues. Additionally‚ it covers the proper use of accessories and integration with compatible apps. This manual is intended for both new and experienced users‚ aiming to enhance their understanding and confidence in managing blood glucose monitoring effectively.

Overview of the Accu-Chek Guide Me System

The Accu-Chek Guide Me System is designed for quick and accurate blood glucose monitoring. It includes a user-friendly meter‚ test strips‚ and a lancet for easy blood sampling. The system integrates seamlessly with the mySugr app via Bluetooth‚ allowing users to track and manage their blood glucose levels efficiently. Its sleek design and advanced features make it an ideal choice for effective diabetes management. The system ensures precise results‚ helping users make informed decisions about their health.

Setting Up the Accu-Chek Guide Me Meter

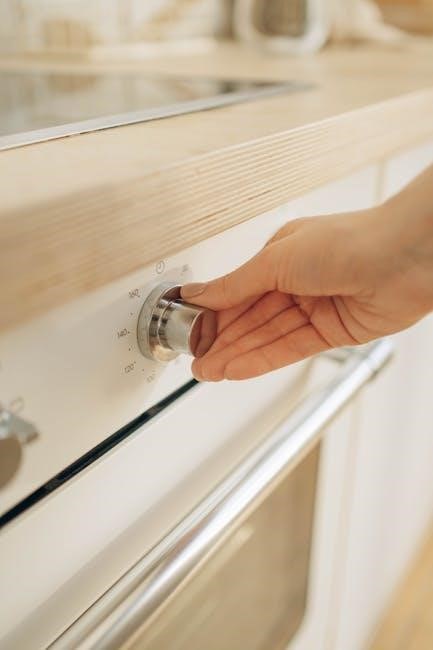
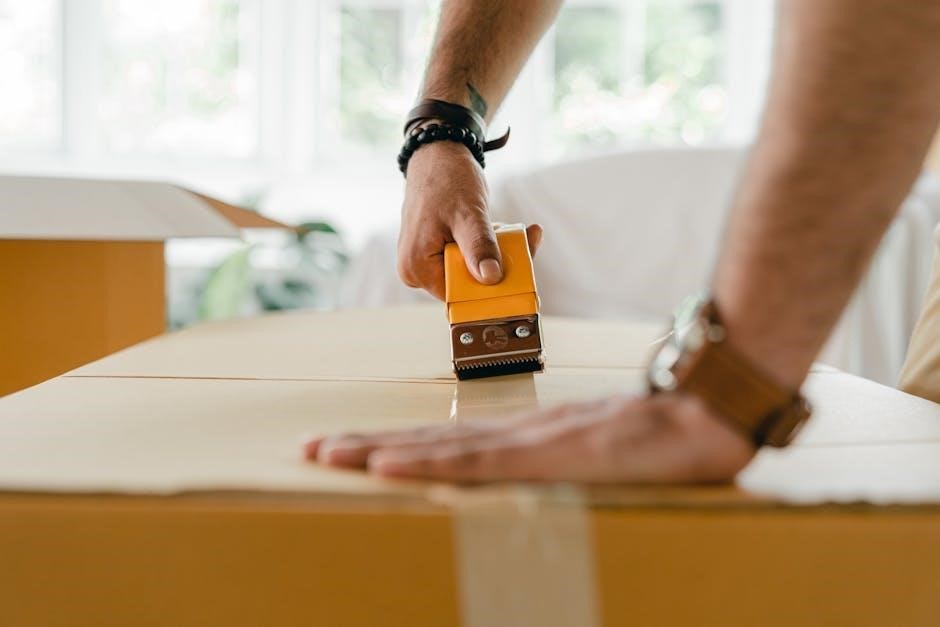
Begin by unpacking and preparing your Accu-Chek Guide Me Meter. Insert the test strip to activate the meter. Ensure all components are ready for use.

Initial Setup and Configuration

Start by unpacking your Accu-Chek Guide Me Meter and ensuring all components are included. Insert a test strip to activate the meter and follow the on-screen instructions. Set the time and date by navigating through the menu options. Familiarize yourself with the test strip port and lancet location. Ensure the meter is placed on a flat surface and handled with clean‚ dry hands. Refer to the manual for detailed steps to complete the initial setup and configuration process accurately.

Setting the Time and Date

To ensure accurate blood glucose tracking‚ set the time and date on your Accu-Chek Guide Me Meter. Access the menu by pressing the navigation buttons. Select the “Time and Date” option and adjust the values using the arrow keys. Confirm your settings to save them. Note that the meter uses a 12-hour format with AM/PM. Ensure the time and date are correct before performing your first test for precise recording of results. This step is crucial for maintaining accurate test logs and healthcare professional recommendations. Always verify the time zone if traveling across regions. Properly set time and date ensure your blood glucose readings are accurately recorded and aligned with your personal schedule‚ aiding in effective diabetes management and tracking of trends over time. This simple step prevents errors in data synchronization with apps or devices‚ ensuring seamless integration with platforms like the mySugr app for comprehensive health monitoring. Regularly check and update the time and date‚ especially after battery replacement or traveling‚ to maintain consistency in your records. Accurate timekeeping is essential for correlating blood glucose levels with meals‚ medications‚ and activities‚ providing a clear overview of your health status. By following these steps‚ you can ensure your Accu-Chek Guide Me Meter operates efficiently and provides reliable data for better diabetes care. Always refer to the manual for detailed instructions if you encounter any issues during the process. Proper time and date settings are the foundation of accurate blood glucose monitoring and personalized care plans. Adjusting these settings incorrectly can lead to misleading data‚ so double-check your entries before saving. Utilize the meter’s intuitive interface to navigate through the menu effortlessly. If you’re unsure about the correct time zone or format‚ consult the user manual or contact customer support for clarification. Maintain your meter’s settings regularly to uphold the integrity of your blood glucose records and ensure optimal performance of the Accu-Chek Guide Me system. This attention to detail supports your efforts in managing diabetes effectively and staying informed about your health. The time and date settings are essential for generating accurate reports and sharing data with healthcare providers‚ enabling them to make informed decisions about your care. Keep your meter updated to reflect any changes in your schedule or location‚ ensuring your blood glucose data remains precise and relevant. By prioritizing the accuracy of your meter’s time and date‚ you can rely on your Accu-Chek Guide Me system to provide trustworthy results‚ empowering you to take control of your diabetes management confidently. Always remember that accurate time and date settings are vital for the proper functioning of your blood glucose monitor and the effectiveness of your diabetes care plan. If you notice any discrepancies in your test results‚ verify the time and date settings as a first step in troubleshooting. Ensuring your meter is correctly set up helps you avoid unnecessary confusion and ensures that your blood glucose data is recorded accurately. This step is a simple yet critical part of using your Accu-Chek Guide Me Meter effectively. Take a moment to review and update the time and date whenever necessary to maintain the reliability of your blood glucose monitoring system; Properly set time and date settings are essential for the Accu-Chek Guide Me Meter to function correctly and provide accurate results‚ which are crucial for effective diabetes management. Always prioritize this step during the initial setup and after any battery replacement to ensure uninterrupted and accurate monitoring. By doing so‚ you can trust the data your meter provides‚ making informed decisions about your health and well-being. The time and date settings are a fundamental aspect of your meter’s operation‚ and their accuracy directly impacts the reliability of your blood glucose records. Dedicate a few moments to configure these settings correctly‚ and you’ll enjoy precise and trustworthy results from your Accu-Chek Guide Me system. This straightforward process is a key part of maximizing the performance and benefits of your blood glucose monitoring device. Accurate time and date settings ensure that your test results are properly timestamped‚ allowing you to track patterns and trends in your blood glucose levels over time. This information is invaluable for adjusting your diet‚ exercise‚ and medication regimens to achieve optimal glucose control. By maintaining correct time and date settings‚ you can ensure that your Accu-Chek Guide Me Meter remains a reliable and indispensable tool in your diabetes care routine. Always remember to update these settings as needed to continue enjoying accurate and meaningful blood glucose monitoring. The time and date settings are a small but important detail that contributes significantly to the overall functionality and effectiveness of your Accu-Chek Guide Me system. Take the time to set them correctly‚ and you’ll be able to focus on what really matters—managing your diabetes with confidence and precision. Properly configured time and date settings are the cornerstone of accurate blood glucose monitoring‚ enabling you to make informed decisions and maintain better control over your health. Ensure these settings are up to date and correct to get the most out of your Accu-Chek Guide Me Meter and achieve your diabetes management goals. The time and date settings are a critical part of your meter’s operation‚ and their accuracy ensures that your blood glucose data is reliable and actionable. By keeping these settings current and correct‚ you can trust the information your meter provides‚ helping you manage your diabetes more effectively. Always prioritize the accuracy of your meter’s time and date settings to maintain the integrity of your blood glucose records and support your overall health and well-being. The time and date settings on your Accu-Chek Guide Me Meter are essential for accurate blood glucose tracking‚ enabling you to monitor your levels over time and make informed decisions about your care. Ensure these settings are correctly configured to get the most out of your meter and maintain precise records of your health. By taking a few moments to set the time and date accurately‚ you can ensure that your Accu-Chek Guide Me system provides reliable and trustworthy results‚ empowering you to manage your diabetes effectively. Always double-check these settings after any changes or battery replacements to maintain the accuracy of your blood glucose data. Properly set time and date settings are vital for the optimal performance of your Accu-Chek Guide Me Meter‚ ensuring that your test results are accurately recorded and easily interpreted. Take the time to configure these settings correctly‚ and you’ll be able to rely on your meter for precise and meaningful blood glucose monitoring; The time and date settings are a fundamental aspect of your meter’s functionality‚ and their accuracy directly impacts the reliability of your test results. By keeping these settings up to date and correct‚ you can trust the data your meter provides‚ helping you manage your diabetes with confidence and precision. Always ensure that the time and date on your Accu-Chek Guide Me Meter are accurate to maintain the integrity of your blood glucose records and support your overall diabetes care plan. The time and date settings on your meter are crucial for generating accurate test results and maintaining reliable records of your blood glucose levels. Take a moment to set these settings correctly‚ and you’ll enjoy precise and actionable data from your Accu-Chek Guide Me system. Properly configured time and date settings are essential for the optimal performance of your meter‚ enabling you to track your glucose levels effectively and make informed decisions about your health. Always prioritize the accuracy of these settings to ensure that your blood glucose data is reliable and meaningful. The time and date settings are a small but important part of your Accu-Chek Guide Me Meter’s operation‚ and their accuracy ensures that your test results are properly recorded and easily interpreted. By configuring these settings correctly‚ you can trust the information your meter provides‚ helping you manage your diabetes more effectively. Always double-check the time and date settings after any changes or battery replacements to maintain the accuracy of your blood glucose data. Properly set time and date settings are vital for the reliable operation of your Accu-Chek Guide Me Meter‚ ensuring that your test results are accurately recorded and meaningful. Take the time to configure these settings correctly‚ and you’ll be able to rely on your meter for precise blood glucose monitoring. The time and date settings are essential for the proper functioning of your meter‚ and their accuracy directly impacts the reliability of your test results. By keeping these settings current and correct‚ you can trust the data your meter provides‚ helping you manage your diabetes with confidence. Always ensure that the time and date on your Accu-Chek Guide Me Meter are accurate to maintain the integrity of your blood glucose records and support your overall health and well-being. The time and date settings are a critical part of your meter’s operation‚ ensuring that your blood glucose data is recorded accurately and is easily interpreted. By configuring these settings correctly‚ you can rely on your Accu-Chek Guide Me system to provide precise and trustworthy results‚ empowering you to manage your diabetes effectively. Always double-check the time and date settings after any changes or battery replacements to ensure the accuracy of your test results. Properly set time and

Performing a Blood Glucose Test

Performing a blood glucose test: insert the test strip into the Accu-Chek Guide Me‚ obtain a blood sample with the lancet‚ apply it‚ and read result.

Inserting the Test Strip

To insert the test strip‚ align it with the guide on the meter and gently push until it clicks. Ensure the strip is properly seated and the arrows match the meter’s direction. Place the meter on a flat surface for stability. Handle the strip by the edges to avoid contamination. Once inserted‚ the meter will automatically prepare for the test. Proper insertion ensures accurate results and prevents errors during blood glucose testing.

Using the Lancet for Blood Sampling

To use the lancet‚ first‚ ensure it is properly loaded into the meter. Adjust the lancet depth by turning the cap until it stops‚ selecting a comfortable setting for your skin type. Gently press the lancet against your fingertip‚ ensuring the notch aligns with the device. Perform a quick‚ firm puncture to obtain a small blood sample. Use a new lancet for each test to maintain hygiene and avoid infection. Proper technique ensures a sufficient blood sample for accurate glucose readings.

Reading and Interpreting Results

The Accu-Chek Guide Me meter displays blood glucose results in seconds. After testing‚ the meter will show your glucose level on the screen. A checkmark indicates a successful test‚ while an “E” or number signals an error. Use the arrows to scroll through stored results. Interpret results based on your target range‚ set by your healthcare provider; High readings may require insulin or lifestyle adjustments‚ while lows may need immediate treatment. Regularly review stored data to track trends and manage your diabetes effectively.

Control Tests and Accuracy

Why Control Tests Are Important

Control tests are essential to ensure the accuracy and reliability of your Accu-Chek Guide Me meter. They verify that the meter and test strips are functioning correctly‚ providing confidence in your blood glucose readings. Regular control tests help detect any issues with the system‚ such as faulty test strips or meter errors‚ ensuring precise results. This is particularly important after opening a new batch of test strips‚ traveling‚ or exposing the meter to extreme temperatures. Accurate readings are crucial for effective diabetes management‚ making control tests a vital step in maintaining your health.

How to Perform a Control Test

To perform a control test‚ insert a control test strip into the meter and add a small drop of Accu-Chek Guide control solution. The meter will display a result‚ which should match the expected range printed on the control solution bottle. This ensures the meter and test strips are functioning correctly.

Regular control tests help verify system accuracy‚ especially after opening new test strips or exposing the meter to environmental changes. Always follow the manual’s guidelines for optimal results and reliable blood glucose monitoring.

Troubleshooting Common Issues

Welcome to the troubleshooting section of the Accu-Chek Guide Me Manual. This guide helps identify and resolve common issues‚ ensuring accurate blood glucose results and smooth device operation;

honeywell 9000 thermostat user manual

Welcome to the Honeywell 9000 Thermostat, a cutting-edge, Wi-Fi-enabled, color touchscreen device designed for smart home comfort and energy efficiency․ This guide helps you maximize its features․

1․1 Overview of the Honeywell 9000 Thermostat

The Honeywell 9000 Thermostat is a Wi-Fi-enabled, color touchscreen device offering advanced temperature control․ It allows remote monitoring and adjustment of your HVAC system via the internet․ Features include schedule setting, email alerts, and automatic software updates․ It also integrates with outdoor weather conditions for enhanced functionality․ Designed for energy efficiency and smart home integration, this thermostat provides a seamless and convenient user experience․

1․2 Key Features and Benefits

The Honeywell 9000 Thermostat boasts a color touchscreen interface, Wi-Fi connectivity, and remote access via the internet․ It offers customizable schedules, energy usage reports, and geofencing for location-based automation; Additionally, it provides humidity control, fan settings, and integration with outdoor weather data․ These features promote energy efficiency, convenience, and smart home compatibility, making it an ideal choice for modern households seeking advanced temperature management․

Installation and Setup

The Honeywell 9000 Thermostat installation is straightforward, requiring wiring setup and physical mounting․ Follow the manual for step-by-step guidance to ensure proper functionality and safe operation․

2․1 Physical Installation Steps

Begin by turning off the power to your HVAC system․ Remove the old thermostat and take note of the wiring connections․ Mount the new Honeywell 9000 Thermostat base plate, ensuring it is level․ Drill holes if necessary and secure with provided screws․ Attach the wires to the corresponding terminals, following the wiring guide․ Finally, snap the thermostat onto the base plate and restore power․ Always follow safety precautions during installation․

2․2 Wiring Instructions and Requirements

Ensure the HVAC system is powered off before wiring․ Match the wires to the correct terminals on the Honeywell 9000 Thermostat, referring to the wiring guide․ Use a screwdriver to secure the wires tightly; Verify compatibility with your HVAC system, typically requiring a 24V AC power supply․ If unsure, consult a professional․ Always follow safety guidelines to avoid electrical issues․ Proper wiring ensures optimal performance and functionality of the thermostat․

2․3 Initial Setup and Configuration

Power on the thermostat and follow the on-screen prompts․ Select your preferred language and system type․ Choose your HVAC configuration (e․g․, heat pump, gas furnace)․ Set your location and preferences for temperature units (Fahrenheit or Celsius)․ Connect to your Wi-Fi network for remote access․ Register your thermostat to enable advanced features․ Finally, set your initial temperature and schedule to start using the device effectively․

User Interface and Navigation

The Honeywell 9000 features a vibrant color touchscreen, offering an intuitive interface for easy navigation․ Adjust temperature, schedules, and settings with a few taps, enjoying a seamless experience․

3․1 Navigating the Color Touchscreen

The Honeywell 9000’s color touchscreen offers a user-friendly interface․ Slide between screens for quick access to temperature, schedules, and settings․ Tap menu icons to adjust comfort levels or view system status; The vibrant display provides clear visuals, while intuitive controls make navigation effortless․ Use the touchscreen to explore features like fan settings, energy reports, and smart home integrations, ensuring a seamless experience tailored to your needs․

3․2 Customizing the Home Screen

Personalize your Honeywell 9000’s home screen to suit your preferences․ Add shortcuts for frequently used settings like temperature adjustment or fan control․ Rearrange icons or hide unused options for a cleaner interface․ Choose from various themes or brightness levels to match your home decor․ Customization ensures quick access to essential features, enhancing your user experience and making thermostat operation more convenient and tailored to your lifestyle․

Smart Home Integration

The Honeywell 9000 Thermostat seamlessly integrates into smart home systems, enabling remote monitoring and control through internet connectivity․ This feature enhances energy efficiency and user convenience significantly․

4․1 Connecting to Wi-Fi

To connect your Honeywell 9000 Thermostat to Wi-Fi, navigate to the menu, select Wi-Fi setup, and choose your network․ Enter the password when prompted․ If the thermostat doesn’t prompt for Wi-Fi connection, manually access the Wi-Fi setup option․ Ensure your router is nearby for a stable connection․ Once connected, you can access remote features and receive updates․ Refer to the user manual for troubleshooting connectivity issues․

4․2 Remote Access and Control via Internet

With the Honeywell 9000 Thermostat, enjoy seamless remote access and control through the internet․ Using the Honeywell Home app, monitor and adjust temperature settings, schedules, and system modes from anywhere․ Receive email alerts for system changes or issues․ Ensure your thermostat is registered and connected to Wi-Fi for full remote functionality, allowing you to manage your home comfort and energy usage effortlessly, even when you’re not at home․

Scheduling and Automation

Set custom schedules for your preferred temperatures throughout the day․ Enable geofencing to automatically adjust settings based on your location, optimizing comfort and energy efficiency seamlessly․

5․1 Creating and Managing Schedules

Navigate to the schedule section on the touchscreen to create custom temperature settings for different times of the day․ Set up to six daily periods, adjusting the temperature, fan, and system mode․ Use the pre-set templates or customize your own for optimal comfort․ Easily edit or override schedules as needed, ensuring energy efficiency and personalized comfort․ Geofencing integration allows automatic adjustments based on your location, enhancing smart home automation․

5․2 Geofencing and Location-Based Automation

Enable geofencing to automatically adjust your thermostat based on your location․ Set a radius around your home, and the thermostat will switch to energy-saving mode when you leave and resume comfort settings as you return․ This feature integrates seamlessly with your smartphone’s location services, optimizing energy efficiency without manual adjustments․ Customize the radius and preferences in the app for a tailored experience․

Energy Efficiency and Savings

The Honeywell 9000 Thermostat offers advanced energy-saving modes and settings to reduce consumption․ Monitor energy usage reports to optimize efficiency and lower utility bills effectively․

6․1 Energy-Saving Modes and Settings

The Honeywell 9000 Thermostat features advanced energy-saving modes, including Smart Recovery and Eco Mode, designed to optimize heating and cooling usage․ These settings help reduce energy consumption by learning your schedule and preferences․ The thermostat also supports geofencing, adjusting temperatures based on your location․ Additionally, it offers customizable energy reports to track usage and identify savings opportunities, ensuring your system operates efficiently while maintaining comfort․

6․2 Monitoring Energy Usage and Reports

The Honeywell 9000 Thermostat provides detailed energy usage reports, accessible via the touchscreen or the Honeywell Home app․ These reports offer insights into your heating and cooling consumption, helping you identify trends and opportunities to save energy․ Customizable alerts notify you of unusual usage patterns, enabling proactive adjustments․ Historical data is stored for up to 12 months, allowing you to track your progress and refine your energy-saving strategies effectively․

Advanced Features

The Honeywell 9000 Thermostat offers advanced features like smart fan operation, humidity control, and geofencing, enhancing comfort and efficiency․ These features work seamlessly with smart home systems․

7․1 Fan Settings and Air Circulation

The Honeywell 9000 Thermostat features advanced fan settings for optimal air circulation․ Users can adjust fan speed manually or set automatic modes to improve indoor air quality and reduce energy use․ The thermostat also supports smart circulation, which runs the fan briefly to ensure even temperature distribution․ Additionally, the fan can be programmed to run continuously for enhanced comfort․ These settings are accessible via the touchscreen or remote internet control, making it easy to customize your home’s airflow․ The system integrates seamlessly with smart home devices for a unified experience․

7․2 Humidity Control and Outdoor Weather Integration

The Honeywell 9000 Thermostat offers advanced humidity control, ensuring balanced indoor air quality․ It integrates with outdoor weather data via Wi-Fi, allowing you to monitor temperature and humidity levels․ This feature enables smart adjustments to your heating and cooling system․ The thermostat can automatically optimize settings based on outdoor conditions, enhancing comfort and energy efficiency․ Customizable alerts for humidity levels are also available, providing greater control over your home environment․

Maintenance and Troubleshooting

Regular maintenance and troubleshooting ensure optimal performance of your Honeywell 9000 Thermostat․ This section provides solutions for common issues and tips to keep your system running smoothly․

8․1 Common Issues and Solutions

  • Connection Issues: Restart the thermostat and ensure stable Wi-Fi connectivity․
  • Display Malfunction: Power cycle the device or reset settings to factory defaults․
  • Temperature Inaccuracy: Recalibrate the thermostat for precise readings․
  • System Response Delay: Check wiring connections and update software if available․

8․2 Air Filter Maintenance and Alerts

The Honeywell 9000 Thermostat includes air filter maintenance alerts to ensure optimal performance․ Replace the air filter every 1-3 months or as indicated by the alert․ Clean filters improve airflow, reduce energy costs, and extend system lifespan․ Set reminders through the thermostat or app for timely replacements․ Neglecting filter maintenance may lead to poor system performance and increased energy consumption․

Registration and Updates

Register your Honeywell 9000 Thermostat to access online features and receive important software updates․ Visit Honeywell’s website or use the app to complete registration and enable remote control․

9․1 Registering Your Thermostat

Registering your Honeywell 9000 Thermostat is essential to unlock remote access and updates․ Visit Honeywell’s official website or use the Honeywell Home app to create an account․ Follow the on-screen instructions to link your thermostat to your account․ Ensure your thermostat is connected to Wi-Fi during registration․ Once registered, you can monitor and control your thermostat remotely, receive notifications, and access the latest software updates for optimal performance․

9․2 Receiving Software Updates

Your Honeywell 9000 Thermostat automatically checks for software updates when connected to Wi-Fi․ Updates are downloaded and installed in the background, enhancing features and performance․ Ensure your thermostat is registered and linked to your Honeywell Home account to receive notifications for updates․ A stable internet connection is required for seamless updates․ Regular updates ensure your thermostat stays optimized, secure, and equipped with the latest advancements in smart home technology․

Safety Precautions

Always follow safety guidelines when installing or using the Honeywell 9000 Thermostat․ Avoid electrical hazards, ensure proper wiring, and keep the device out of reach of children․ Follow the manufacturer’s instructions carefully to prevent damage or injury․

10․1 Safety Guidelines for Installation and Use

Always turn off power at the circuit breaker before installing the Honeywell 9000 Thermostat․ Avoid exposing the device to water or extreme temperatures․ Use proper wiring techniques to prevent electrical hazards․ Keep the thermostat out of reach of children․ Follow all safety instructions provided in the manual to ensure safe operation and avoid potential risks․ Regularly inspect the device for damage and address any issues promptly․

Technical Specifications

The Honeywell 9000 Thermostat features a color touchscreen, Wi-Fi connectivity, and compatibility with most HVAC systems․ It supports stages of heating and cooling for precise temperature control․

11․1 Compatibility and System Requirements

The Honeywell 9000 Thermostat is compatible with most HVAC systems, including gas, oil, electric, and heat pumps․ It supports up to 3 stages of heating and 2 stages of cooling․ Requires a 24V AC power supply and a common wire (C-wire) for Wi-Fi functionality․ Works with single or dual transformer systems and supports humidifiers, dehumidifiers, and ventilation systems․ Ensure compatibility with your specific HVAC setup before installation for optimal performance․

Warranty and Support

The Honeywell 9000 Thermostat comes with a limited warranty and offers extensive support options, including online resources and customer service for troubleshooting and repairs․

12․1 Warranty Information

The Honeywell 9000 Thermostat is backed by a limited warranty, typically covering parts and labor for a specified period․ Registration is required to validate the warranty․ The warranty period varies by region and product, ensuring protection against defects in materials and workmanship․ For detailed terms, refer to the official Honeywell website or contact customer support at Honeywell Home or call 1-800-645-7490․

12․2 Contacting Honeywell Support

For assistance with your Honeywell 9000 Thermostat, visit the official Honeywell Home website․ Contact support via phone at 1-800-645-7490 or email through their online portal․ Live chat is also available for quick inquiries․ For troubleshooting, refer to the user manual or explore the FAQs section․ Representatives are available 24/7 to address your concerns and provide solutions․

The Honeywell 9000 Thermostat offers a blend of smart features, energy efficiency, and user-friendly design, making it an excellent choice for modern homes․ With its color touchscreen, Wi-Fi connectivity, and advanced automation, it simplifies temperature control while saving energy․ By following this guide, you can fully utilize its capabilities, ensuring comfort and convenience․ For further assistance, Honeywell’s support resources are always available to help you get the most out of your thermostat․

safety 1st grand 2-in-1 booster car seat manual

Welcome to the Safety 1st Grand 2-in-1 Booster Car Seat manual‚ your essential guide for safe installation‚ usage‚ and maintenance of this versatile car seat.

Overview of the Manual and its Importance

This manual provides comprehensive guidance for the Safety 1st Grand 2-in-1 Booster Car Seat‚ ensuring proper installation‚ usage‚ and maintenance. It covers both forward-facing and booster modes‚ with detailed instructions for securing your child safely. The manual emphasizes adherence to safety standards‚ weight limits‚ and harness adjustments‚ crucial for optimal protection. By following the guidelines‚ parents can ensure compliance with federal regulations‚ prolong the seat’s lifespan‚ and maintain their child’s safety. Regular updates and clear instructions make this manual an indispensable resource for responsible car seat usage.

Key Features of the Safety 1st Grand 2-in-1 Booster Car Seat

The Safety 1st Grand 2-in-1 Booster Car Seat is designed for versatility and safety‚ accommodating children from 30-100 pounds. It features a 5-point harness for forward-facing use (30-65 lbs) and converts to a belt-positioning booster (40-100 lbs). The seat includes adjustable height settings‚ a removable and washable cover‚ and a built-in cup holder for convenience. Its lightweight design and easy-transition system make it a practical choice for growing children‚ ensuring comfort and protection across various stages of development.

Installation and Setup Guidelines

This section provides step-by-step instructions for securely installing the Safety 1st Grand 2-in-1 Booster Car Seat in both forward-facing and booster modes‚ ensuring proper fit and safety.

Forward-Facing Mode Installation Steps

For forward-facing mode‚ ensure your child weighs between 30-65 lbs (13.6-29 kg) and measures 32-49 inches (81.3-125 cm) tall. Place the seat in the vehicle’s rear or front seat‚ following the manual’s guidance for proper positioning. Secure the seat using the vehicle’s seat belt or LATCH system‚ tightening it firmly to eliminate any slack. Attach and tighten the tether to the vehicle’s anchor point for added stability. Always refer to the manual for specific installation steps and safety precautions to ensure a secure fit for your child.

Booster Mode Installation Instructions

For booster mode‚ ensure your child weighs between 40-120 lbs (18.1-54.4 kg) and measures 43-57 inches (109.2-144.8 cm) tall. Place the booster in the vehicle’s back seat‚ positioning it upright against the vehicle seat. Secure the booster using the vehicle’s seat belt‚ ensuring the lap belt is snug across the child’s hips and the shoulder belt rests comfortably across their chest. Always refer to the manual for specific booster mode instructions and ensure proper fit to maximize safety and compliance with regulations.

Transitioning Between Modes

Transitioning from high-back to belt-positioning booster is seamless‚ ensuring proper fit and safety for children as they grow. Always follow the manual’s conversion steps for a secure adjustment and optimal safety.

Converting from High Back to Belt-Positioning Booster

Converting the Safety 1st Grand 2-in-1 Booster Car Seat from high-back to belt-positioning booster mode is a straightforward process designed to accommodate growing children; Begin by removing the harness‚ then adjust the seat’s backrest and headrest to ensure proper fit. Ensure the vehicle’s seat belt correctly positions across the child’s shoulder and lap for optimal safety. Always refer to the manual for specific instructions to guarantee a secure and safe transition‚ ensuring your child’s protection as they outgrow the high-back mode.

Adjusting the Seat for Proper Fit

Adjusting the Safety 1st Grand 2-in-1 Booster Car Seat ensures a secure and comfortable fit for your child. Begin by positioning the headrest to align with your child’s shoulders‚ ensuring proper harness or seat belt placement. The backrest and seat depth can be adjusted to accommodate your child’s height and weight. Always check that the seat belt crosses the shoulder and lap correctly in booster mode. Regularly inspect and adjust the fit as your child grows to maintain optimal safety and comfort. Refer to the manual for detailed guidance on making these adjustments safely and effectively.

Safety Standards and Compliance

The Safety 1st Grand 2-in-1 Booster Car Seat meets rigorous federal and international safety standards‚ ensuring compliance with regulatory requirements for child passenger safety and protection.

Meeting Federal and International Safety Regulations

The Safety 1st Grand 2-in-1 Booster Car Seat adheres to strict federal and international safety standards‚ ensuring optimal protection for children. It meets or exceeds FMVSS 213 requirements and is certified for use in both forward-facing and booster modes. Rigorous testing includes crash simulations and material durability checks. The seat is designed to accommodate children from 30-65 lbs (13.6-29 kg) in forward-facing mode and 40-100 lbs (18.1-45.4 kg) in booster mode‚ aligning with global safety benchmarks. Compliance is verified through independent third-party testing for reliability and performance.

Weight and Height Limits for Safe Usage

The Safety 1st Grand 2-in-1 Booster Car Seat has specific weight and height limits to ensure safe usage. In forward-facing mode‚ it accommodates children weighing 30-65 lbs (13.6-29 kg) and measuring 32-49 inches (81.3-125 cm) tall. For booster mode‚ the weight range is 40-100 lbs (18.1-45.4 kg)‚ with a height of 43-57 inches (109.2-144.8 cm). Always refer to the manual to verify these limits and ensure proper fit for your child‚ as exceeding these could compromise safety and compliance with regulatory standards.

Maintenance and Cleaning

Regular inspection and cleaning are crucial for maintaining the Safety 1st Grand 2-in-1 Booster Car Seat’s condition. Use mild soap‚ avoid harsh chemicals‚ and follow the manual’s guidelines.

Regular Inspection and Care Tips

Regular inspection ensures the Safety 1st Grand 2-in-1 Booster Car Seat remains safe and functional. Check for wear‚ damage‚ or loose parts‚ and clean the seat with mild soap and water. Avoid harsh chemicals that may degrade materials. Store the seat in a dry‚ cool place when not in use. Inspect harness straps for fraying or tears and ensure buckles are secure. Refer to the manual for detailed cleaning instructions and maintenance schedules to prolong the seat’s lifespan and ensure optimal performance for your child’s safety.

Cleaning the Seat and Harness

Regular cleaning of the Safety 1st Grand 2-in-1 Booster Car Seat is essential for hygiene and durability. Use mild soap and warm water to wipe down the seat and harness. Avoid harsh chemicals‚ bleach‚ or abrasive cleaners‚ as they may damage the materials. For tough stains‚ gently scrub with a soft-bristle brush. Allow the seat to air-dry completely before reuse. Do not machine wash or dry any parts. Refer to the manual for detailed cleaning instructions to ensure the seat remains safe and functional for your child.

Troubleshooting Common Issues

Check harness tightness and positioning for proper fit. Ensure the seat belt is correctly routed and snug. Refer to the manual for solutions to common issues.

Resolving Harness Tightness and Positioning Problems

Ensure the harness is snug but not overly tight. Loosen the harness by pulling the adjustment strap‚ then reposition your child. Tighten the harness until snug‚ ensuring proper fit. The chest clip should be at armpit level. If straps are too tight‚ adjust the shoulder straps upward or loosen the harness. For booster mode‚ check the seat belt fits correctly across the shoulder and hips. Regularly inspect for proper alignment and fit to ensure safety and comfort for your child.

Addressing Belt-Positioning Booster Fit Concerns

Ensure proper fit by adjusting the booster’s height to align the seat belt correctly. The lap belt should lie snugly across the child’s thighs‚ and the shoulder belt should rest across the chest‚ away from the neck. If the belt positions incorrectly‚ check the booster’s guides and adjust as needed. Always refer to your vehicle’s manual for seat belt usage. Regularly inspect the booster’s fit to ensure optimal safety and comfort for your child during travel.

Comparison with Other Booster Car Seats

The Safety 1st Grand 2-in-1 Booster Car Seat stands out for its versatility‚ supporting both high-back and belt-positioning modes with an extensive weight range of 30-100 lbs.

Distinguishing Features and Benefits

The Safety 1st Grand 2-in-1 Booster Car Seat offers a unique 2-in-1 design‚ transitioning from a high-back booster to a belt-positioning booster. It supports children from 30-100 lbs and up to 57 inches tall‚ providing long-lasting use. The seat features a 5-point harness for younger children and adapts to belt-positioning for older kids. Its adjustable headrest and multiple recline positions ensure comfort and proper fit. The lightweight design and easy installation make it a practical choice for families. This versatility‚ combined with superior safety features‚ sets it apart from other booster car seats.

User Feedback and Recommendations

Parents praise the Safety 1st Grand 2-in-1 Booster Car Seat for its versatility and ease of use. Many highlight its ability to grow with their child‚ from forward-facing to booster mode. The adjustable features and comfortable design are frequently commended. Some users note that the manual could be clearer for first-time installers. Overall‚ it’s highly recommended for its safety‚ durability‚ and value‚ making it a top choice for families seeking a reliable car seat that adapts to their child’s needs over time.

Additional Resources and Support

Access the full manual online at safety1st.com or contact customer service for further assistance with installation‚ troubleshooting‚ or general inquiries about the car seat.

Accessing the Full Manual and Guides Online

The Safety 1st Grand 2-in-1 Booster Car Seat manual is available for free download on the official Safety 1st website. Visit safety1st.com‚ navigate to the support section‚ and search for the specific model. The manual is provided in PDF format‚ making it easy to access and print. It includes detailed installation instructions‚ safety guidelines‚ and troubleshooting tips. Ensure you download the correct version for your car seat model to get accurate information. This resource is essential for proper usage and maintenance of your booster car seat.

Contacting Customer Service for Assistance

For questions or concerns about the Safety 1st Grand 2-in-1 Booster Car Seat‚ contact customer service through the official Safety 1st website. Visit the “Support” section to find contact options‚ including email‚ phone‚ or live chat. Provide your product model number (e.g.‚ BC149) and a detailed description of your inquiry for prompt assistance. Representatives are available during business hours to address installation‚ maintenance‚ or warranty-related issues. Ensure to have your product details ready for efficient support. This service is available in multiple languages‚ including English‚ for your convenience.

bradford white defender water heater manual

Welcome to the Bradford White Defender Water Heater Manual, your comprehensive guide for installation, operation, troubleshooting, and maintenance. This manual ensures safe and efficient use of your water heater, highlighting key safety features like the Eco-Defender Safety System and Flammable Vapor Ignition Resistance. Designed for both professionals and DIY enthusiasts, it provides detailed instructions to optimize performance and longevity while ensuring compliance with industry standards. Use this resource to understand your water heater better and maintain it effectively for years of reliable service.

Overview of the Bradford White Defender Series

The Bradford White Defender Series includes high-efficiency water heaters like the RG150L, featuring advanced safety technologies such as the Eco-Defender Safety System. Designed to resist flammable vapor ignition, these models incorporate Ultra Low NOx emissions technology, aligning with environmental standards. The series offers a range of options, from energy-saving designs to high-capacity solutions, ensuring reliable performance for residential and commercial applications while maintaining safety and efficiency.

Importance of the Manual for Installation and Maintenance

The Bradford White Defender Water Heater Manual is essential for proper installation, troubleshooting, and maintenance. It provides detailed instructions for safe operation, ensuring compliance with industry standards. The manual includes step-by-step guides for diagnosing issues, resetting the safety system, and performing routine checks. By following the manual, users can optimize performance, prevent potential hazards, and extend the lifespan of their water heater. It is a crucial resource for both homeowners and service professionals.

Key Features of the Bradford White Defender Safety System

The Bradford White Defender Safety System offers advanced safety protocols, including flammable vapor ignition resistance and eco-friendly technologies, ensuring reliable and secure water heating solutions for homeowners.

Eco-Defender Safety System: Ultra Low NOx Technology

The Eco-Defender Safety System incorporates Ultra Low NOx Technology, significantly reducing nitrogen oxide emissions. This eco-friendly feature minimizes environmental impact while maintaining high efficiency. The system ensures compliance with strict emissions standards, making it a sustainable choice for homeowners. By integrating advanced combustion controls, it achieves lower emissions without compromising performance, thus promoting a greener and safer water heating solution.

Flammable Vapor Ignition Resistance

The Bradford White Defender Safety System includes Flammable Vapor Ignition Resistance, designed to prevent the ignition of flammable vapors outside the water heater. This advanced feature enhances safety by reducing the risk of accidental fires or explosions. By incorporating specialized sensors and controls, it ensures reliable operation in environments where flammable vapors may be present. This technology meets industry safety standards, providing peace of mind for homeowners and professionals alike.

Installation Instructions and Guidelines

Follow the Bradford White Defender Water Heater Manual for proper installation steps, ensuring compliance with local codes and safety protocols. Conduct pre-installation checks and verify all connections for venting, gas, and electrical systems to guarantee safe and efficient operation.

Pre-Installation Checks and Requirements

Before installing your Bradford White Defender Water Heater, conduct thorough pre-installation checks. Verify the model number and serial number match your manual. Ensure the location meets clearance requirements and is vented properly. Inspect gas lines for leaks, check electrical connections, and confirm water supply lines are correctly sized. Verify drain pan installation if applicable. Ensure compliance with local codes and manufacturer guidelines for safe installation. Refer to the manual for specific instructions tailored to your unit.

Step-by-Step Installation Process

Follow these steps to install your Bradford White Defender Water Heater:
Place the heater on a level surface, ensuring proper clearance and ventilation.
Connect gas lines securely, using a leak test kit to verify integrity.
Attach water supply lines, ensuring correct sizing and direction.
Install venting components according to local codes and manufacturer guidelines.
Connect electrical connections, referencing the wiring diagram in the manual.
Test the system for leaks and proper function before finalizing installation.
Complete all safety checks and ensure compliance with industry standards.

Troubleshooting Common Issues

Identify and resolve issues promptly using diagnostic tools and error codes. Check for ignition failures, sensor malfunctions, or gas leaks. Refer to the manual for detailed solutions and ensure safety protocols are followed during repairs.

Diagnosing Error Codes and Alarms

The Bradford White Defender Water Heater Manual provides detailed guidance for diagnosing error codes and alarms. Error codes indicate specific issues, such as ignition failures or sensor malfunctions. The Eco-Defender Safety System includes advanced diagnostics to help identify and resolve problems quickly. Refer to the troubleshooting section for step-by-step instructions and ensure all repairs are performed by qualified professionals to maintain safety and warranty compliance. Use the manual’s error code reference chart for accurate diagnoses.

Resetting the Defender Safety System

Resetting the Defender Safety System is a straightforward process outlined in the manual. If the system triggers an alarm, ensure all potential hazards are eliminated. Locate the reset button on the control panel, then press and hold it for 5-10 seconds. Release and wait for the system to restart. If issues persist, consult the troubleshooting section or contact a certified technician. Always follow the manual’s instructions to ensure safety and proper functionality.

Maintenance and Service Recommendations

Regular maintenance is crucial for optimal performance. Schedule annual servicing by a certified technician. Perform routine checks on temperature-pressure relief valves and anode rods to ensure longevity and safety.

Routine Checks for Optimal Performance

Perform routine checks to ensure your Bradford White Defender water heater operates efficiently. Check the temperature-pressure relief valve annually for proper function. Inspect the anode rod every 3-5 years for corrosion and replace if necessary. Ensure venting systems are clear and functioning correctly to maintain safe operation. Regularly monitor water temperature settings and adjust as needed. Refer to the manual for detailed guidance on these checks to prolong the lifespan of your water heater and prevent potential issues.

Replacing Parts and Accessories

When replacing parts or accessories for your Bradford White Defender water heater, always refer to the manual for specific instructions. Turn off power and gas supply before starting any replacement. Use genuine Bradford White parts to ensure compatibility and safety. Common replacements include the anode rod and temperature-pressure relief valve. Consult a qualified technician if unsure to avoid damage or safety hazards. Regular part replacements help maintain efficiency and prevent costly repairs.

Technical Specifications of Bradford White Defender

The Bradford White Defender series offers various fuel types, capacities, and energy efficiency ratings. It features advanced technologies and complies with industry emission standards.

Fuel Type and Capacity Options

The Bradford White Defender series offers flexibility with various fuel types, including natural gas and propane options, catering to different installation requirements. Capacities range from 30 to 100 gallons, ensuring a model suitable for every household size and hot water demand. These options provide reliable performance while maintaining energy efficiency, making them adaptable to various residential and light commercial applications.

Each model is designed to meet specific needs, whether for high-demand households or energy-conscious users, ensuring optimal performance and efficiency. The Defender series delivers consistent hot water supply with durable construction, making it a trusted choice for homeowners and professionals alike.

Energy Efficiency Ratings

The Bradford White Defender series excels in energy efficiency, featuring advanced technologies like Ultra Low NOx to minimize emissions. Models are designed with high-efficiency ratings, reducing energy consumption and lowering utility bills. Many units are ENERGY STAR® certified, ensuring they meet rigorous energy-saving standards. These water heaters combine eco-friendly performance with reliable operation, making them an excellent choice for environmentally conscious and cost-aware homeowners. Energy efficiency is a cornerstone of the Defender series design.

Accessing the Bradford White Defender Manual Online

Access the Bradford White Defender manual online through their official website. Search by model or serial number for easy retrieval of installation, operation, and troubleshooting guides.

Downloading the Manual from Official Sources

To download the Bradford White Defender manual, visit the official Bradford White website. Enter your water heater’s model or serial number in the provided search bar. For assistance in locating these numbers, refer to the guidance section on the webpage. Ensure you only download from authorized sources to avoid unauthorized modifications. This ensures you receive the correct, up-to-date manual tailored to your specific water heater model;

Guidance for Finding Model and Serial Numbers

To locate the model and serial numbers on your Bradford White Defender water heater, check the rating plate, usually found near the data plate or on the side of the unit. These numbers are essential for downloading the correct manual. For assistance, refer to the guidance section on the Bradford White website or consult the manual’s index. Ensure the numbers are clean and visible for accurate identification.

Bradford White Defender Safety System Benefits

The Bradford White Defender Safety System enhances safety and compliance, offering advanced protection against flammable vapors and reducing emissions with Ultra Low NOx technology.

Enhanced Safety Features

The Bradford White Defender Safety System includes advanced technologies like the Eco-Defender, which reduces emissions with Ultra Low NOx, and Flammable Vapor Ignition Resistance. These features ensure safer operation by preventing external vapors from igniting and minimizing environmental impact. The system is designed to protect users from potential hazards while maintaining high efficiency and performance. Such enhancements make the Defender Series a reliable choice for modern water heating needs, prioritizing both safety and sustainability.

Compliance with Industry Standards

The Bradford White Defender Safety System is designed to meet or exceed industry standards, ensuring reliability and safety. It adheres to ANSI standards for water heaters, guaranteeing compliance with regulatory requirements. The Eco-Defender Series also meets Ultra Low NOx emissions standards, reducing environmental impact. This compliance ensures that the Defender Series operates efficiently while maintaining safety and environmental responsibility, making it a trusted choice for homeowners and professionals alike.

Energy Efficiency and Cost Savings

The Bradford White Defender Series offers advanced energy-saving technologies, reducing energy consumption and lowering utility bills. Its Ultra Low NOx emissions contribute to environmental sustainability while maintaining efficiency.

Energy-Saving Technologies

The Bradford White Defender Series incorporates advanced energy-saving technologies, such as Ultra Low NOx emissions and high-efficiency combustion systems, to minimize energy consumption. These innovations ensure optimal performance while reducing utility costs and environmental impact. The Eco-Defender Safety System contributes to energy efficiency, making the Bradford White Defender a sustainable choice for homeowners seeking reliable and cost-effective water heating solutions.

Reducing Emissions

The Bradford White Defender Series features Ultra Low NOx technology, designed to minimize nitrogen oxide emissions, a key contributor to air pollution. This eco-friendly innovation ensures compliance with stringent environmental regulations while maintaining high efficiency. By reducing emissions, the Defender Series supports a greener future, aligning with modern environmental standards and promoting sustainable water heating solutions for homeowners and businesses alike.

Warranty and Support Information

Bradford White offers comprehensive warranty coverage for the Defender Series, ensuring protection against defects. Dedicated customer support and technical assistance are available for troubleshooting and repairs, providing peace of mind and reliable service.

Warranty Coverage

Bradford White Defender water heaters come with a comprehensive warranty program, ensuring protection against defects in materials and workmanship. The warranty typically covers parts and labor for a specified period, depending on the model and installation conditions. Proper registration and adherence to maintenance guidelines are required to maintain warranty validity. For detailed terms and conditions, refer to the official Bradford White website or contact their customer support team for personalized assistance.

Customer Service and Technical Support

Bradford White offers dedicated customer service and technical support to assist with queries, troubleshooting, and repair needs. Their team is available to provide guidance on installation, maintenance, and warranty claims. For additional help, resources such as user manuals, FAQs, and repair guides are accessible online. Visit their official website or contact their support hotline for prompt and reliable assistance tailored to your Bradford White Defender water heater needs.

The Bradford White Defender Water Heater Manual is an essential guide for optimal performance and safety. It provides comprehensive instructions, ensuring proper installation, maintenance, and troubleshooting for years of reliable service.

Final Thoughts on the Bradford White Defender Manual

The Bradford White Defender Manual is a vital resource for ensuring safe and efficient water heater operation. It provides detailed guidance on installation, troubleshooting, and maintenance, emphasizing safety features like the Eco-Defender system. Professionals and homeowners alike will benefit from its clear instructions and focus on optimal performance. By following this manual, users can extend the lifespan of their water heater and enjoy reliable service for years to come.

Encouragement for Proper Usage

Adhering to the Bradford White Defender Manual ensures optimal performance and safety. Regular maintenance and correct installation practices, as outlined, will extend the lifespan of your water heater. Always follow the guidelines to prevent potential hazards and enjoy efficient, reliable service. Proper usage not only safeguards your investment but also contributes to energy efficiency and environmental sustainability. Make it a priority to review and implement the manual’s recommendations for lasting benefits.

doorking 1812 manual

Welcome to the DoorKing 1812 manual‚ your guide to installing and operating the 1812 Telephone Intercom System․ This system offers advanced access control and communication features for residential use‚ enabling seamless interaction with visitors and secure entry management․ Designed for compatibility with various circuit boards‚ the 1812 model ensures reliability and flexibility‚ making it a robust solution for modern home security needs․

Overview of the DoorKing 1812 System

The DoorKing 1812 is a versatile telephone intercom and access control system designed for residential applications․ It allows homeowners to communicate with visitors and grant access remotely․ The system is compatible with various circuit boards‚ ensuring flexibility and adaptability․ With advanced communication features‚ it integrates seamlessly into modern home security setups‚ providing a reliable and user-friendly solution for managing entry points․ The 1812 model is renowned for its durability and ease of use‚ making it a popular choice for enhancing home security and convenience․

Key Features and Functionalities

The DoorKing 1812 system offers a robust telephone intercom and access control solution․ It supports two-way communication between residents and visitors‚ with the ability to grant or deny access remotely․ The system is compatible with secondary keypads and RFID integration‚ enhancing convenience and security․ It operates on a 24-volt transformer‚ ensuring reliable performance․ The 1812 model also features advanced programming options‚ allowing users to set entry codes and customize access settings․ Its compact design and user-friendly interface make it a practical choice for residential security needs‚ providing a seamless integration of communication and access control in one system․

System Requirements and Compatibility

The DoorKing 1812 system requires a 24-volt‚ 20 VA transformer and is compatible with circuit boards 1871-010 REV S or higher‚ ensuring optimal performance and safety․

Compatible Models and Circuit Boards

The DoorKing 1812 system is designed for use with specific models and circuit boards to ensure optimal functionality; It is compatible with all 1812 Telephone Intercom Systems that utilize circuit board 1871-010 REV S or higher․ Additionally‚ it supports optional accessories such as secondary keypads and wireless adapters‚ which must be paired with the main unit for proper operation․ The system requires a 24-volt‚ 20 VA transformer for power‚ ensuring reliable performance․ Compatibility with these components is essential for maintaining the system’s advanced features and security capabilities․ Always verify hardware compatibility before installation to avoid potential issues․

Transformer and Power Requirements

The DoorKing 1812 system requires a 24-volt‚ 20 VA transformer for proper operation․ This transformer is essential to power the unit and ensure all features function reliably․ The system is designed to meet UL 294 safety standards‚ guaranteeing safe and efficient performance․ It is crucial to use the specified transformer to avoid damage or malfunction․ The transformer’s compatibility with the 1812 model ensures optimal energy delivery‚ supporting advanced features like telephone intercom and access control․ Always refer to the manual for detailed installation instructions to maintain system integrity and performance․

Installation and Setup

Installation of the DoorKing 1812 involves setting up the hardware‚ wiring‚ and ensuring all connections are precise for proper functionality․ Follow the manual’s guidelines carefully․

Step-by-Step Installation Guide

Begin by unpacking and inventorying all components‚ ensuring compatibility with circuit board 1871-010 REV S or higher․ Mount the main unit securely on a flat surface near the gate or door․ Connect the wiring carefully‚ following the manual’s diagram to avoid errors․ Install the required 24-volt‚ 20 VA transformer‚ ensuring proper electrical connections․ Proceed to program the system‚ starting with entry codes and access settings․ Test all functionalities‚ including intercom and remote features‚ to confirm everything operates smoothly․ Refer to section 2․3 for detailed programming instructions and ensure all safety precautions are followed․

Wiring and Hardware Setup

Start by mounting the main unit and connecting the 24-volt‚ 20 VA transformer‚ ensuring a stable power supply․ Carefully wire the system‚ adhering to the provided diagrams to avoid short circuits․ Connect the keypad‚ intercom‚ and any optional accessories like RFID readers or secondary keypads․ Secure all connections tightly and double-check for proper polarity․ Use high-quality cables to minimize interference; Once wired‚ test each component to ensure functionality․ Refer to the manual for specific wiring instructions tailored to your model and circuit board version․ Follow safety guidelines to prevent electrical hazards during installation․

Programming and Configuration

Program entry codes and telephone settings using the keypad or optional secondary keypad․ Configure access control‚ intercom settings‚ and optional RFID integration for enhanced security and functionality․

Setting Up Entry Codes and Access Control

To set up entry codes and access control for the DoorKing 1812‚ start by programming the system using the keypad or optional secondary keypad․ Create unique entry codes for residents and visitors‚ ensuring secure access․ Configure access levels to restrict or grant entry based on user permissions․ Integrate RFID tags for enhanced convenience․ Use the DoorKing Manager software to program codes remotely and manage access schedules․ Ensure all settings are saved properly to maintain system functionality․ Regularly update codes to maintain security and convenience for users․ Follow the manual’s instructions for troubleshooting any issues during setup․

Configuring Telephone and Intercom Settings

The DoorKing 1812 system features a unique telephone communication system‚ allowing homeowners to use their existing telephone lines as an intercom․ To configure the telephone settings‚ connect the system to your home’s telephone lines and program the desired settings via the keypad or optional secondary keypad․ Ensure the system is set to recognize incoming calls and activate the intercom function․ For intercom settings‚ configure the speaker volume and response delays as needed․ Refer to the manual for specific programming codes and sequences․ This setup enables seamless communication with visitors and enhances your home’s security and convenience․

Advanced Features and Accessories

The DoorKing 1812 system supports advanced features like optional secondary keypads‚ RFID integration‚ and wireless adapters‚ enhancing functionality and convenience for secure access control and communication․

Optional Secondary Keypad and RFID Integration

The DoorKing 1812 system allows for enhanced functionality with an optional secondary keypad‚ enabling remote access code activation for doors or gates․ This feature is compatible with models equipped with circuit board 1871-010 Rev S or higher․ Additionally‚ RFID integration can be incorporated‚ providing users with convenient and secure access control․ The secondary keypad simplifies changing settings‚ such as analog telephone configurations or PIN codes‚ while RFID offers a hands-free entry solution․ These accessories streamline operations and improve overall system efficiency‚ making the 1812 system adaptable to various user needs and preferences․

Wireless Adapter and Remote Access Activation

The DoorKing 1812 system supports a wireless adapter for remote access‚ offering a plug-and-play solution that automatically connects to your home router․ This feature simplifies remote management of your entry system‚ allowing you to monitor and control access from a smartphone or other devices․ The wireless adapter is programmed through section 2․3 of the manual‚ ensuring seamless integration with the system․ This functionality enhances convenience and security‚ enabling users to grant access or communicate with visitors remotely․ The adapter is compatible with the DoorBird D1812 main unit‚ ensuring a reliable and modern access control experience․

Troubleshooting and Maintenance

The DoorKing 1812 system requires regular maintenance to ensure optimal performance․ Check power supply‚ connections‚ and wiring for issues․ Refer to the manual for troubleshooting common problems and maintenance tips to keep your system reliable and secure․

Common Issues and Solutions

Common issues with the DoorKing 1812 include power outages‚ wiring faults‚ and intercom connectivity problems․ If the system fails to power on‚ ensure the transformer is functioning and connections are secure․ For intercom issues‚ check the telephone settings and wiring․ If the keypad isn’t responding‚ verify the PIN codes and RFID configurations․ Regularly inspect the magnetic locks and armature surfaces for proper alignment and cleanliness․ Refer to the manual for detailed troubleshooting steps and solutions to resolve these issues efficiently and maintain system performance․

Regular Maintenance Tips

Regular maintenance ensures optimal performance of the DoorKing 1812 system․ Inspect wiring and connections periodically to prevent corrosion or damage․ Clean the magnetic locks and armature surfaces to maintain proper alignment and functionality․ Check the transformer for consistent power supply and replace it if necessary․ Update firmware and software to benefit from the latest features and security enhancements․ Lubricate moving parts of gates or doors to ensure smooth operation․ Schedule annual professional inspections to address hidden issues early․ These steps help extend the system’s lifespan and maintain reliable access control and communication․

The DoorKing 1812 manual provides comprehensive guidance for installation‚ configuration‚ and maintenance․ By following these instructions‚ users can master the system’s functionalities‚ ensuring optimal performance and security․ Always adhere to safety precautions and manufacturer recommendations for lasting reliability and efficiency․

Final Notes and Safety Precautions

Always follow safety guidelines when installing or servicing the DoorKing 1812 system․ Disconnect power before performing maintenance to avoid electrical hazards․ Use appropriate tools and ensure all connections are secure․ Keep the system out of reach of children and unauthorized individuals․ Regularly inspect wiring and components for damage or wear․ Refer to the manual for troubleshooting and maintenance tips to ensure optimal performance․ Compliance with U․L 294 safety standards guarantees reliability and security for your home or property․ Adhere to all manufacturer recommendations for a safe and efficient user experience․

graco tranzitions 3-in-1 manual

Welcome to the Graco Tranzitions 3-in-1 Manual‚ your guide to safely and effectively using this versatile car seat. Designed for children from toddler to youth‚ it offers three modes: forward-facing harness‚ highback booster‚ and backless booster. This manual provides detailed instructions for installation‚ usage‚ and maintenance‚ ensuring your child’s safety and comfort.

Overview of the Graco Tranzitions 3-in-1 Car Seat

The Graco Tranzitions 3-in-1 Car Seat is a versatile and adaptable child restraint designed to grow with your child. It transitions seamlessly through three modes: forward-facing harness‚ highback booster‚ and backless booster. Built for safety and comfort‚ it accommodates children from 22 to 100 pounds‚ ensuring proper support and protection. The seat features a sturdy design‚ easy-to-use harness‚ and adjustable headrest for a customizable fit. Its compatibility with both seatbelt and LATCH installation methods makes it a practical choice for various vehicles‚ offering peace of mind for parents seeking a reliable car seat solution.

Importance of Reading the Manual

Reading the Graco Tranzitions 3-in-1 Manual is essential for ensuring your child’s safety and proper use of the car seat. It provides critical information on weight and height limits‚ installation methods‚ and safety guidelines. Understanding the manual helps prevent misuse‚ such as improper harness adjustment or incorrect booster mode transitions. It also offers troubleshooting tips and maintenance advice to extend the seat’s longevity. By following the manual‚ you can ensure a secure and comfortable ride for your child at every stage of their growth. Proper adherence guarantees optimal protection and peace of mind for parents. Always refer to it before and during use to avoid potential risks and ensure compliance with safety standards.

Understanding the 3-in-1 Functionality

The Graco Tranzitions 3-in-1 car seat adapts to your child’s growth‚ offering three modes: forward-facing harness‚ highback booster‚ and backless booster. This versatility ensures long-lasting safety and comfort as your child grows.

Forward-Facing Harness Mode

The forward-facing harness mode is designed for children weighing between 22 and 65 pounds. This mode provides optimal protection with a 5-point harness‚ ensuring proper restraint and comfort. Proper installation is critical‚ requiring the seat to be securely fastened using either the vehicle seatbelt or LATCH system. Always ensure the harness straps are snug and correctly positioned‚ with the buckle at your child’s hip level. Refer to the manual for guidance on adjusting the harness and headrest as your child grows. Regular checks are essential to maintain safety and compliance with usage guidelines.

Highback Booster Mode

The highback booster mode is suitable for children weighing between 40 and 100 pounds. This mode transitions your child from the harness system to using the vehicle’s seat belt‚ providing enhanced support and comfort. The highback design offers side impact protection and proper belt positioning across the shoulder and lap. Ensure the vehicle seat belt is correctly routed through the designated guides and securely fastened. This mode is ideal for older children who no longer require a harness but still need booster support for proper seat belt fit and safety.

Backless Booster Mode

The backless booster mode is designed for children weighing between 40 and 100 pounds‚ providing a streamlined option for older kids. This mode removes the backrest‚ offering a more compact design while still ensuring proper seat belt positioning. The vehicle’s seat belt secures the child‚ with the booster seat elevating them to achieve the correct belt fit. Ideal for children who no longer need the highback support‚ this mode prioritizes safety and ease of use‚ making it a practical choice for growing children who still require booster assistance.

Installation Methods

The Graco Tranzitions 3-in-1 can be installed using a vehicle seatbelt or the LATCH system‚ ensuring a secure fit in various seating positions for optimal safety.

Seatbelt Installation

Seatbelt installation for the Graco Tranzitions 3-in-1 is a straightforward process. Use either a lap/shoulder seat belt or a lap-only seat belt‚ ensuring the belt is snug and properly positioned. Review section 3-C of this manual and your vehicle’s owner’s manual for compatibility. Tighten the seatbelt until the car seat is secure‚ and double-check the installation for any slack. Always follow the manufacturer’s guidelines to ensure a safe and proper fit for your child. Proper installation is critical for maximizing safety and protection.

LATCH System Installation

The LATCH (Lower Anchors and Tethers for Children) system provides a secure way to install the Graco Tranzitions 3-in-1 car seat. Locate your vehicle’s built-in lower anchors and attach the car seat’s LATCH connectors. Ensure the connectors are securely fastened and tighten the straps until the seat is firmly in place. Refer to your vehicle’s manual to confirm LATCH compatibility and anchor locations. Properly securing the seat using LATCH ensures a stable and safe installation‚ meeting safety standards for your child’s protection.

Choosing the Best Seating Location

When selecting the best seating location for the Graco Tranzitions 3-in-1 car seat‚ consider your vehicle’s manual recommendations. The back seat is generally the safest option‚ as it reduces the risk of injury from front airbags. If possible‚ place the seat in the middle of the rear bench to maximize distance from side impacts. Ensure the seat fits snugly and does not interfere with other passengers or objects. Proper placement ensures optimal safety and comfort for your child‚ aligning with the car seat’s design and functionality.

Safety Features and Guidelines

The Graco Tranzitions 3-in-1 car seat prioritizes your child’s safety with weight and height limits‚ proper harness and seatbelt guidance‚ and robust side impact protection features.

Weight and Height Limits

The Graco Tranzitions 3-in-1 car seat is designed for children within specific weight and height ranges. In forward-facing harness mode‚ it accommodates children from 22 to 65 pounds. The highback and backless booster modes are suitable for children weighing between 40 and 100 pounds. Height limits also apply‚ ensuring proper fit and safety. Always refer to the manual for exact measurements and guidelines to ensure your child’s safety and comfort across all modes. Adhering to these limits is crucial for optimal protection. Proper fit ensures effective safety features.

Proper Harness and Seatbelt Use

Proper use of the harness and seatbelt is essential for your child’s safety. Ensure the harness is snug‚ with shoulder straps at or below your child’s shoulders and the chest clip at armpit level. In booster modes‚ always use the vehicle’s lap/shoulder seatbelt‚ ensuring the shoulder belt crosses the chest and the lap belt fits low on the hips. Regularly check the fit of the harness and seatbelt to accommodate your child’s growth. Refer to the manual and your vehicle’s instructions for compatibility and correct usage. Proper fit ensures maximum protection. Always follow guidelines for secure and safe use.

Side Impact Protection

The Graco Tranzitions 3-in-1 is designed with side impact protection in mind‚ featuring energy-absorbing materials to shield your child from crash forces. The seat’s reinforced frame and padding work together to minimize injury risk. Proper installation and correct harness or seatbelt use are crucial for optimal protection. Always follow the manual’s guidelines to ensure the seat is securely positioned and adjusted for your child’s size. Regular checks ensure the seat remains effective in safeguarding your child during side collisions. Trust the Graco Tranzitions for reliable protection.

Maintenance and Cleaning

Regularly clean the Graco Tranzitions seat using mild soap and water. Avoid harsh chemicals that may damage materials. Inspect for wear and tear to ensure longevity.

Cleaning the Seat and Harness

To maintain the Graco Tranzitions 3-in-1 car seat‚ clean it regularly with mild soap and lukewarm water. Avoid harsh chemicals or abrasive cleaners‚ as they may damage the materials. For the harness‚ remove any debris gently and wash with a soft cloth. Allow all parts to air dry completely before reuse. Regular cleaning ensures longevity‚ safety‚ and comfort for your child. Always refer to the manual for specific instructions to avoid voiding the warranty.

Replacing Parts and Accessories

For the Graco Tranzitions 3-in-1‚ replace parts only with Graco-authorized accessories to ensure safety and warranty validity. Check the manual for specific instructions on replacing components like harness straps or booster cushions. Visit Graco’s official website or authorized retailers to purchase genuine parts. Before replacing‚ refer to Section 7 of the manual for guidance. If unsure‚ contact Graco customer support for assistance. Proper replacement ensures optimal performance and continued protection for your child. Always follow manufacturer guidelines to maintain safety standards.

Storage and Longevity Tips

To maintain the Graco Tranzitions 3-in-1 car seat’s longevity‚ store it in a dry‚ cool place away from direct sunlight. Avoid exposing it to extreme temperatures or moisture. Before storing‚ clean the seat thoroughly using mild soap and water‚ as outlined in the manual. Ensure all parts are dry to prevent mold or mildew. Use the original packaging if available for better protection. Regularly inspect the seat for wear and tear‚ and check expiration dates to ensure it remains safe for use. Proper storage extends the seat’s lifespan and ensures it remains ready for future use.

Troubleshooting Common Issues

Addressing common issues with the Graco Tranzitions 3-in-1‚ such as harsh harness adjustment‚ belt positioning‚ and installation difficulties‚ requires consulting the manual for specific solutions and guidance.

Harsh Harness Adjustment

Harsh harness adjustment can cause discomfort for your child. To resolve this‚ ensure the harness straps are snug but not overly tight. Check the weight limits (22-65 lb for forward-facing) and adjust the shoulder straps to fit your child’s height. Loosen the harness‚ reposition your child‚ then tighten evenly. If issues persist‚ consult the manual for guidance on proper adjustment techniques to ensure safety and comfort. Regularly checking the harness fit is essential for optimal protection and ease of use.

Belt Positioning Problems

Belt positioning issues can affect safety and comfort. Ensure the seat belt lies flat across your child’s shoulder and hips‚ avoiding any twisting. For proper positioning‚ refer to Section 3-C of the manual and your vehicle’s owner’s manual. Check that the belt is snug and not too loose or tight. Adjust the booster seat or reposition it if necessary to achieve the correct fit. Always verify that the belt rests correctly across your child’s body‚ as improper positioning can compromise safety. If problems persist‚ consult the troubleshooting section for further guidance.

Installation Difficulties

Installation challenges can arise‚ but solutions are straightforward. Ensure the car seat is placed on a firm‚ flat vehicle seat. Check for proper alignment of the LATCH connectors or seat belt. If using the LATCH system‚ verify that the lower anchors are securely attached. Tighten the seat belt or LATCH straps until the seat is firmly in place. Consult Section 3-C of the manual for detailed guidance. If issues persist‚ review your vehicle’s manual for compatibility and ensure no obstructions are present. Proper installation is crucial for safety‚ so double-check all connections before use.

The Graco Tranzitions 3-in-1 Manual provides comprehensive guidance for safe and effective use‚ ensuring your child’s comfort and protection from toddler to youth. Follow the manual’s instructions carefully to maximize safety and longevity of the seat.

Final Thoughts on the Graco Tranzitions 3-in-1 Manual

The Graco Tranzitions 3-in-1 Manual is a comprehensive guide that ensures safe and effective use of the car seat. It covers installation‚ maintenance‚ and troubleshooting‚ making it a valuable resource for parents. The manual’s clear instructions help users navigate the seat’s 3-in-1 functionality‚ from forward-facing harness to highback and backless booster modes. By adhering to the guidelines‚ parents can ensure their child’s safety and comfort. This manual is essential for maximizing the seat’s longevity and adapting it to your child’s growth.

dc41 dyson manual

Welcome to the official Dyson DC41 Manual. This comprehensive guide covers the Dyson DC41 Animal and other variants, providing detailed instructions for operation, maintenance, and troubleshooting. Ensure optimal performance and safety by following the outlined procedures. This manual is available for download in PDF format for easy access.

Overview of the Dyson DC41

The Dyson DC41 is a high-performance upright vacuum cleaner designed for household use. It features Dyson’s innovative cyclonic suction technology, capturing dust, dirt, and allergens effectively. This bagless vacuum is lightweight, easy to maneuver, and suitable for various floor types, including carpets, hardwood, and tiles. With its powerful motor and advanced design, the DC41 provides efficient cleaning while maintaining a compact and user-friendly structure. It is part of Dyson’s renowned lineup, known for reliability and superior cleaning results.

Key Features and Benefits

The Dyson DC41 boasts advanced cyclonic technology for superior suction power, capturing microscopic dust and allergens. Its lightweight design enhances maneuverability, making it ideal for cleaning various floor types. The bagless structure eliminates the need for replacement bags, while the washable filter reduces maintenance costs. Additional tools, such as the crevice tool and upholstery brush, provide versatility for detailed cleaning. The DC41 also features a hygienic bin emptying mechanism, ensuring a mess-free experience. Its ergonomic handle and balanced design offer comfort during extended use, making it a practical choice for efficient household cleaning.

Safety Precautions

Always unplug the Dyson DC41 before maintenance or attaching tools. Ensure the vacuum is used only for household cleaning and avoid vacuuming water or hot objects. Keep out of children’s reach and follow all instructions carefully to prevent accidents.

Important Safety Instructions

Before using the Dyson DC41, ensure you read and follow these safety guidelines. Always unplug the vacuum cleaner before performing any maintenance, such as cleaning the filter or checking the belt. Avoid vacuuming water or hot objects, as this may cause damage or electrical hazards. Never use the DC41 near open flames or sparks. Keep the appliance out of reach of children and pets to prevent accidental operation. Use only Dyson-approved accessories to maintain safety and performance. Regularly inspect the power cord and plug for damage, and avoid using the vacuum if any damage is found. Follow all instructions provided in the manual to ensure safe and effective operation. Remember, the Dyson DC41 is designed for household use only and should not be used in commercial settings. By adhering to these precautions, you can enjoy a safe and efficient cleaning experience with your Dyson DC41.

Precautions Before Use

Before first use, ensure the Dyson DC41 is unpacked and all parts are included. Inspect the vacuum cleaner for any visible damage. Read the entire manual thoroughly to understand its operation and safety features. Ensure the power cord and plug are undamaged. Always use Dyson-approved parts and accessories to maintain safety and performance. Familiarize yourself with the controls and components before operating the machine. Ensure the area to be cleaned is clear of obstacles or fragile items. By following these precautions, you can enjoy a safe and efficient cleaning experience with your Dyson DC41.

Assembly and Installation

Begin by carefully unpacking the Dyson DC41 and verifying all components are included. Follow the step-by-step guide to assemble the vacuum, ensuring all parts align properly. Securely attach the handle, wand, and cleaning head. Make sure all connections are tight and components are correctly fitted before first use. Proper assembly ensures optimal performance and longevity of your Dyson DC41.

Unpacking and Inventory of Parts

Begin by carefully unpacking your Dyson DC41 vacuum cleaner and laying out all components. Ensure you have the main unit, wand, motorized head, crevice tool, and other included accessories. Check for any damage or missing items. Refer to the provided inventory list in the manual to confirm all parts are present. This step ensures a smooth assembly process and prevents delays. If any components are missing, contact Dyson support immediately. Proper organization of parts is key to efficient setup.

The Dyson DC41 Animal and other variants may include additional attachments, such as the mini turbine tool or combination tool. Verify these are included in your package. Match each part with the diagram in the manual to familiarize yourself with their purpose. This step is crucial for understanding how each component contributes to the vacuum’s functionality. Once all parts are accounted for, proceed to the assembly phase with confidence. Dyson’s design ensures intuitive assembly, but preparation is essential for success.

Step-by-Step Assembly Guide

Begin by attaching the wand to the main unit, ensuring it clicks securely into place. Next, connect the motorized head to the wand by aligning the connectors and pressing firmly. For upright models, ensure the head is locked in the correct position. If your model includes a detachable handheld unit, attach it to the main body using the provided clips. Refer to the diagrams in the manual for clarity. Ensure all parts are tightly secured to avoid loose connections during use. This step-by-step process ensures your Dyson DC41 is assembled correctly and ready for operation.

Operating the Dyson DC41

Learn how to operate your Dyson DC41 effectively. This section covers power modes, movement tips, emptying the bin, and filter checks for optimal performance.

Understanding the Controls and Components

Familiarize yourself with the Dyson DC41 controls and components. The vacuum features an on/off button, variable suction control, and a detachable wand. Key components include the bin, filter, and brush bar. The wand enables above-floor cleaning, while the crevice tool and motorized brush add versatility. The bin is easy to empty, and the filter ensures efficient cleaning. Always refer to the manual for proper operation of each part to maintain performance and longevity of your Dyson DC41.

Basic Operating Instructions

Start by ensuring the Dyson DC41 is properly assembled. Plug in the vacuum and press the power button to turn it on. Use the variable suction control for different surfaces. For carpets, engage the brush bar; for hard floors, disable it. Empty the bin when it reaches the max line, and wash the filter regularly. Use the detachable wand for above-floor cleaning and attach tools like the crevice or motorized brush for specific tasks. Refer to the manual for detailed guidance on operation and maintenance.

Maintenance and Troubleshooting

Regularly clean the filter and check for blockages. Troubleshoot issues like reduced suction by inspecting the belt and hoses. Refer to the manual for detailed solutions and maintenance tips.

Regular Maintenance Tasks

Perform regular maintenance to ensure optimal performance. Clean the filter every month and check for blockages in the wand or hoses. Inspect and replace the belt every 12 months or if damaged. Empty the dustbin after each use and wipe it clean. Regularly check the brush bar for tangled hair or debris. Refer to the manual for detailed steps on these tasks to maintain your Dyson DC41’s efficiency and longevity. Always use Dyson-approved parts for replacements to ensure warranty validity and proper function.

Troubleshooting Common Issues

Address common issues to maintain performance. If the vacuum loses suction, check for blockages in the wand, hose, or filter. Clean or replace the filter as needed. For a non-spinning brush bar, remove tangled hair or debris. If the belt is damaged, replace it using Dyson-approved parts. If the machine overheats, allow it to cool before restarting. Refer to the manual for detailed troubleshooting steps. Contact Dyson support if issues persist for expert assistance and ensure your warranty remains valid.

Accessories and Attachments

The Dyson DC41 includes a range of attachments like the crevice tool, upholstery brush, and motorized brush for versatile cleaning. Use only Dyson-approved accessories for optimal performance and compatibility.

Using Dyson-Approved Accessories

For optimal performance, use only Dyson-approved accessories with your DC41. These include the crevice tool, upholstery brush, and motorized brush. Approved accessories ensure compatibility and maintain suction power. They are designed to fit securely, enhancing cleaning efficiency. Using non-approved accessories may compromise performance and void the warranty. Always attach tools correctly as per the manual. Regularly check for wear and tear on accessories and replace them when necessary to uphold your vacuum’s effectiveness. Dyson-approved parts guarantee quality and longevity for your DC41.

Filter and Belt Maintenance

Regular maintenance of the filter and belt is crucial for optimal performance. Clean or replace the filter as recommended to ensure strong suction. Inspect the belt for wear and replace it if damaged. Use only Dyson-approved parts to maintain warranty validity. Neglecting maintenance may reduce efficiency and damage the motor. Always refer to the manual for specific guidance on filter and belt maintenance procedures.

Cleaning and Replacing the Filter

To maintain your Dyson DC41’s performance, regular filter maintenance is essential. Start by turning off and unplugging the vacuum. Locate and remove the filter according to the manual’s instructions. Wash the filter with cold water without using any detergents. Allow it to air dry completely, which may take about 24 hours. Reinstall the filter once it’s dry. If the filter is damaged or shows signs of wear, replace it with a genuine Dyson part. Avoid using the vacuum without the filter or with a damaged one, as this can lead to reduced suction power and potential motor damage. Regular filter maintenance ensures optimal cleaning efficiency and prolongs the life of your Dyson DC41.

Inspecting and Replacing the Belt

Regularly inspect the belt for signs of wear, such as cracks or fraying. To replace it, turn off and unplug the vacuum for safety. Access the belt by removing any covering parts, usually held by screws or clips. Remove the old belt and install the new one, ensuring it’s properly aligned and seated. Use a genuine Dyson replacement belt for optimal performance. After installation, test the vacuum to ensure smooth operation. Proper belt maintenance prevents motor damage and maintains cleaning efficiency.

Warranty and Support

Your Dyson DC41 is covered by a comprehensive warranty. For inquiries or assistance, contact Dyson support via phone, email, or their official website. Refer to your manual for specific warranty terms and contact details.

Understanding Your Warranty

Your Dyson DC41 warranty provides coverage for parts and labor against manufacturing defects. The standard warranty period is typically five years, commencing from the date of purchase. Ensure to register your product on Dyson’s official website to activate warranty benefits. For detailed terms and conditions, refer to the warranty section in your Dyson DC41 manual. Keep your proof of purchase handy for any warranty claims. Contact Dyson support for assistance with warranty-related inquiries or repairs.

Contacting Dyson Support

For assistance with your Dyson DC41, visit Dyson’s official website to access support resources. You can contact Dyson support via phone, email, or live chat for inquiries about your product, troubleshooting, or warranty claims. Ensure to have your product details ready for efficient service. Dyson’s customer support team is available to help with questions regarding manuals, maintenance, or repairs. Visit their website for regional contact information and operating hours to get the help you need promptly.

The Dyson DC41 manual provides a comprehensive guide to maximizing the potential of your vacuum cleaner. By following the instructions and maintenance tips outlined, you can ensure optimal performance and longevity. Regular upkeep, proper usage, and troubleshooting common issues are essential for maintaining your device. For further assistance, refer to the detailed sections or contact Dyson support. This manual serves as a valuable resource for both new and experienced users, helping you achieve the best cleaning results with your Dyson DC41.

kenmore 80 series washer owners manual

The Kenmore 80 Series Washer is a reliable and efficient appliance designed for seamless laundry operations․ It features multiple wash cycles‚ durable construction‚ and user-friendly controls․ This guide provides essential information for optimal use and maintenance․

Safety Guidelines for Installation and Operation

Always follow safety guidelines to ensure safe installation and operation․ Read the manual carefully‚ avoid overloading‚ and ensure proper installation to prevent accidents and maintain efficiency․

2․1 Pre-Installation Safety Checks

Before installing your Kenmore 80 Series Washer‚ ensure the installation site meets all safety and compatibility requirements․ Verify the power supply matches the washer’s specifications and avoid overloaded circuits․ Check for proper ventilation to prevent moisture buildup․ Inspect the water supply lines for leaks or damage and ensure they are securely connected․ Ensure the drain system is compatible with the washer’s drain hose and can handle the water flow․ Clear the installation area of clutter and flammable materials․ Always turn off the water supply and power before starting the installation process to prevent accidents or damage․

2․2 General Safety Precautions

Always read and follow the safety instructions in the Kenmore 80 Series Washer manual․ Ensure the washer is installed on a level‚ stable surface to prevent tipping; Avoid overloading the washer‚ as this can cause imbalance and damage․ Keep children away from the washer during operation‚ as moving parts and hot surfaces can pose hazards․ Never lean or sit on the washer‚ and avoid touching hot surfaces during or after use․ Use only recommended detergent and fabric softeners to prevent damage or fires․ Ensure proper ventilation in the laundry area to avoid moisture buildup․ Regularly inspect and maintain the washer to ensure safe operation․

Installation Instructions

Ensure the Kenmore 80 Series Washer is installed on a level surface and properly connected to water‚ power‚ and drainage systems․ Follow the manual for detailed steps․

3․1 Installation Requirements

Ensure the Kenmore 80 Series Washer is installed on a level‚ stable surface to prevent vibration and imbalance․ Choose a location with adequate drainage options‚ such as a standpipe‚ laundry tub‚ or floor drain․ The washer must be connected to a 120V‚ 60Hz power supply and have access to hot and cold water lines․ Verify the inlet hoses are securely attached to prevent leaks․ Avoid installing near water heaters or in areas exposed to extreme temperatures․ Proper ventilation is essential to prevent moisture buildup․ Refer to the manual for specific clearance requirements and ensure all connections meet local plumbing codes for safe operation․

3․2 Step-by-Step Installation Guide

Unpack the washer and inspect for damage․ Ensure all parts‚ including hoses and drain components‚ are included․
Position the washer on a level‚ stable surface‚ ensuring proper drainage options are accessible․
Connect the hot and cold water inlet hoses to the respective ports on the washer and water supply lines․ Tighten securely to avoid leaks․

Attach the drain hose to the standpipe‚ laundry tub‚ or floor drain‚ using the provided clamp to secure it․
Plug the power cord into a nearby 120V outlet․
Level the washer using the adjustable legs to prevent vibration during operation․
Test the washer by running a short cycle to ensure all connections are leak-free and functioning correctly․

Operating Instructions

Choose the desired wash cycle‚ water temperature‚ and fabric setting according to load type․ Start the washer and monitor the cycle progress․ Always follow fabric care guidelines․
Ensure the lid is closed securely before starting․ For optimal performance‚ use recommended detergent amounts and avoid overloading the washer drum․

4․1 Understanding Wash Cycles

The Kenmore 80 Series Washer offers multiple wash cycles to cater to different fabric types and soil levels․ The Delicate cycle is ideal for sensitive fabrics‚ using gentle agitation and low spin speeds․ The Normal cycle handles everyday laundry with a balanced wash and rinse․ For heavily soiled items‚ the Heavy Duty cycle uses powerful agitation and hot water․ Additionally‚ a Quick Wash option is available for smaller loads that need cleaning in a hurry․ Each cycle is designed to optimize cleaning efficiency while protecting fabrics․

4․2 Fabric Care and Settings

The Kenmore 80 Series Washer offers fabric care settings to protect delicate items and ensure optimal cleaning․ Use the Delicate setting for sensitive fabrics like silk or wool‚ which uses gentle agitation․ For heavily soiled items‚ the Heavy Duty setting provides intense cleaning․ The washer also features temperature controls‚ allowing you to choose cold‚ warm‚ or hot water based on fabric type․ Always check care labels to select the right cycle and temperature․ This ensures fabrics are cleaned thoroughly without damage․ Proper settings help maintain fabric quality and extend the life of your garments․ Adjusting these settings according to load type ensures efficient and gentle cleaning․

Maintenance Tips

Regularly check and clean the washer’s drain pump filter to prevent clogs․ Inspect hoses for cracks and ensure they are tightly connected․ Leave the lid open after use to dry the interior and prevent mildew buildup․ Check and balance the washer periodically to maintain stability during operation․ Clean the gasket and seals to avoid mold and odors․ Refer to the manual for detailed maintenance schedules and guidelines to ensure optimal performance and longevity of your Kenmore 80 Series Washer․

5․1 Routine Maintenance Tasks

Regular maintenance is essential to ensure the optimal performance and longevity of your Kenmore 80 Series Washer․ Start by checking and cleaning the drain pump filter after each use to prevent clogs and debris buildup․ Inspect the inlet and outlet hoses for cracks or damage and replace them if necessary․ Leave the washer lid open after use to allow the interior to dry‚ reducing mold and mildew growth․ Balance the washer periodically to prevent vibration during operation․ Clean the gasket and seals regularly to remove residue and odors․ Refer to the manual for specific maintenance schedules and guidelines to keep your washer running efficiently․

5․2 Replacing Parts

Replacing parts on your Kenmore 80 Series Washer is straightforward when done correctly․ Start by identifying the specific part needing replacement‚ such as the drain pump filter‚ inlet hoses‚ or gasket․ Refer to the manual or Sears Parts Direct for genuine replacement parts․ Before beginning‚ disconnect the power and water supply to ensure safety․ Follow the step-by-step instructions provided in the manual for each part replacement․ For complex components‚ consider consulting a professional․ Regularly replacing worn-out parts ensures optimal performance and prevents further damage․ Always use Kenmore-approved parts to maintain warranty validity and appliance efficiency․

Troubleshooting Common Issues

The Kenmore 80 Series Washer may encounter issues like not starting‚ excessive noise‚ or poor drainage․ If the washer doesn’t start‚ check the power supply‚ ensure the lid is closed‚ and verify the outlet is functioning․ For noise‚ inspect for loose parts or imbalance․ Poor drainage may result from kinked hoses or a clogged drain pump․ Regularly clean the drain filter and check for blockages․ Refer to the manual for specific troubleshooting steps․ Addressing issues promptly prevents further damage and ensures optimal performance․ Always follow safety guidelines when troubleshooting to avoid accidents․

Repair and Service Resources

For repair and service needs‚ Kenmore provides comprehensive resources․ Download official manuals from Kenmore’s website or Sears Parts Direct for detailed instructions and part diagrams․ Contact Kenmore customer support at 1-800-488-1222 for professional assistance․ DIY enthusiasts can find repair guides and troubleshooting tips online․ Ensure to use genuine Kenmore parts for reliability․ Visit Sears Parts Direct for specific components and accessories․ Online forums and communities also offer valuable insights and solutions from experienced users․ Regular maintenance and timely repairs can extend the lifespan of your Kenmore 80 Series Washer and maintain its performance․

Product Features and Benefits

The Kenmore 80 Series Washer offers multiple wash cycles‚ durable construction‚ and user-friendly controls․ It features advanced fabric care settings and efficient water temperature management․ The washer is designed for reliability and long-term performance‚ ensuring optimal laundry results with minimal effort․ Its compact design suits various household spaces‚ while the robust build guarantees years of dependable service․ The washer’s energy efficiency and quiet operation enhance user convenience․ With its comprehensive feature set‚ the Kenmore 80 Series Washer is a practical choice for homeowners seeking a balance of functionality and durability․ It caters to different fabric types and washing needs‚ making it a versatile addition to any laundry room․

Warranty Information and Customer Support

The Kenmore 80 Series Washer is backed by a comprehensive warranty program‚ ensuring coverage for parts and labor under specified conditions․ Customers can access dedicated support through Sears Parts Direct for genuine replacement parts and expert assistance․ The warranty details and claim procedures are outlined in the owner’s manual․ For inquiries or troubleshooting‚ the customer support hotline (1-800-488-1222) provides prompt assistance․ Additionally‚ downloadable PDF manuals and repair guides are available online‚ offering convenient access to maintenance and troubleshooting information․ This robust support system ensures optimal performance and longevity of the appliance‚ giving users peace of mind and reliable service․

ge house alarm manual

Welcome to the GE House Alarm Manual, your comprehensive guide to understanding and operating the GE Security system. This manual provides essential instructions for installation, programming, and troubleshooting, ensuring your home remains safe and secure.

Overview of the GE House Alarm System

The GE House Alarm System is a comprehensive security solution designed to protect your home and family. It features advanced components like touchscreens, wireless sensors, and IP-based receivers for reliable monitoring. The system integrates seamlessly with other GE devices, offering real-time alerts and customizable settings. With options for smart home integration, it provides enhanced control and peace of mind. This system is built to adapt to your needs, ensuring maximum security and convenience.

Importance of the Manual for System Operation

This manual is essential for mastering the GE House Alarm System. It provides clear instructions for installation, programming, and daily operation, ensuring optimal performance. By following the guidelines, users can customize settings, understand error codes, and troubleshoot issues efficiently. The manual also highlights safety protocols and emergency procedures, making it a vital resource for maintaining security and peace of mind. Keep it accessible for quick reference to ensure your system operates effectively at all times.

System Components and Hardware

The GE House Alarm System consists of key components like sensors, control panels, and sirens. These elements work together to provide reliable security and real-time monitoring capabilities.

Key Hardware Components of the GE Alarm System

The GE Alarm System includes essential hardware components such as the control panel, sensors, sirens, and keypads. These elements ensure comprehensive security coverage for your home. Sensors detect intrusions or hazards, while sirens alert during alarms. The control panel acts as the system’s brain, managing all operations. Additional components like communication modules and power supplies ensure reliable performance. Each part is designed to integrate seamlessly, providing a robust security solution.

Compatibility with Other GE Security Devices

The GE Alarm System seamlessly integrates with a range of GE Security devices, enhancing your home’s protection. From wireless sensors to smart home systems, compatibility ensures a unified security network. Additional devices like smoke detectors and cameras can be easily connected, offering comprehensive coverage. This integration allows users to monitor and control all security elements from a single interface, optimizing safety and convenience for a connected home environment.

Installation Instructions

Welcome to the GE House Alarm Manual installation section. This guide provides step-by-step instructions for a successful setup, ensuring your system is installed correctly and efficiently.

Pre-Installation Checklist

Before installing your GE House Alarm System, ensure you have all necessary components, power sources, and tools. Verify network compatibility and sensor placements. Check for any existing wiring or security systems to integrate seamlessly. Ensure the system is compatible with your home’s infrastructure. Review local regulations and safety guidelines. Familiarize yourself with the manual and installation steps. Prepare a backup power source and test all devices post-installation. This checklist ensures a smooth and efficient setup process.

Step-by-Step Installation Guide

Begin by mounting the control panel in a central location. Ensure all sensors and wiring are within range. 2. Install door and window sensors, securing magnets for proper alignment. 3. Mount motion detectors in strategic areas, avoiding direct sunlight. 4. Connect all wiring to the control panel, following the diagram. 5. Power on the system and test each sensor to ensure functionality. 6. Program the system with your preferred codes and settings. 7. Test the alarm sirens and communication features. 8. Sync all devices to ensure seamless operation. Complete these steps carefully for reliable security coverage.

Connecting the System to a Network

To connect your GE House Alarm System to a network, start by linking the control panel to your router using an RJ31X jack. Ensure the jack is installed correctly and in series with other devices. Next, configure the network settings in the system menu, entering your Wi-Fi password or Ethernet details. Once connected, test remote monitoring features to confirm functionality. This setup enables real-time alerts and remote system control, enhancing your home security capabilities.

Programming the Alarm System

Programming your GE Alarm System allows you to customize settings, set codes, and configure advanced features for enhanced security. Follow the step-by-step guide for easy setup;

Basic Programming for Beginners

Start with the default master code 1234 to access basic settings. Learn to change codes, arm/disarm zones, and program sensors. Identify zones using the keypad and refer to the manual for troubleshooting common issues. Understand how to reset sensors and test the system. This section guides you through simple steps to configure your GE Alarm System for everyday use, ensuring security and ease of operation.

Advanced Programming Features

Explore advanced programming options to customize your GE Alarm System. Set custom user codes, program zones for specific responses, and integrate with smart home devices. Use multi-format compatibility to connect with various security software. Learn to manage remote outputs and create tailored scenarios for enhanced security. This section helps you unlock the full potential of your system, ensuring it meets your unique needs and preferences for a secure and automated home environment.

Arming and Disarming the System

Master the arming and disarming processes with ease. Use designated codes or key fobs to activate/deactivate the system. Utilize exit delays for smooth transitions and ensure all zones are clear before rearming.

How to Arm the System

To arm the system, enter your master code on the keypad and press “ARM.” Select “Stay” for home mode or “Away” for full protection. Ensure all zones are clear before arming. The system will confirm arming with a beep and status light. If a zone is faulted, address it before retrying. For quick arming, use a key fob or remote accessory. Always verify the arming status to ensure your home is secure.

How to Disarm the System

To disarm the system, enter your master code on the keypad; Press “DISARM” to deactivate all zones. If using a key fob, press and hold the disarm button until the system confirms. For remote disarming, use the GE Security app. If an accidental alarm occurs, disarm immediately to avoid false alerts. Ensure the system status light turns off and no alarms sound. Always verify disarm confirmation to maintain system readiness and prevent unintended triggers.

Monitoring and Responding to Alarms

Monitor real-time alerts via the GE Security app. Check system status and respond promptly to alarms. Use emergency protocols for verified threats and reset false alarms immediately.

Real-Time Monitoring Features

The GE House Alarm System offers advanced real-time monitoring features, enabling users to track system status, sensor activity, and zone alerts via the GE Security app. Receive instant notifications for security breaches, fire alarms, or motion detection. Customize alert settings to prioritize critical events and reduce false alarms. The system also provides detailed logs of past incidents, allowing for comprehensive review and analysis. Ensure continuous protection with 24/7 monitoring capabilities tailored to your home security needs.

Understanding Alarm Responses and Emergency Procedures

Understand how your GE House Alarm System responds to triggers and emergencies. The system alerts users through sirens and notifications when sensors detect breaches or hazards. In case of fire, smoke, or unauthorized entry, follow evacuation routes and contact emergency services immediately. Familiarize yourself with the panel’s indicators and error codes to address issues promptly. Ensure all household members know the emergency protocols to ensure safety and effective response during alarms.

Troubleshooting Common Issues

Identify and resolve system errors promptly using error codes and diagnostic tools. Check sensor connections, power issues, and software updates to ensure optimal system performance and reliability.

Identifying and Resolving Common System Errors

Common issues include sensor malfunctions, power outages, and communication errors. Use the system’s error codes to identify problems. Check sensor connections, ensure proper power supply, and verify network connectivity. Restart the system if necessary. For recurring issues, update software or consult the user manual. If unresolved, contact a certified technician to ensure system reliability and security. Regular maintenance and updates help prevent errors and maintain optimal performance. Always refer to the manual for specific troubleshooting steps.

Understanding Error Codes and Alarms

The GE House Alarm System displays error codes to indicate specific issues, such as sensor malfunctions or communication failures. Codes like “System Malfunction (Code 12)” or “Sensor Fault (Code 34)” help identify problems quickly. Refer to the user manual for a detailed list of codes and their meanings. Understanding these codes allows you to address issues promptly, ensuring your system operates effectively. If unsure, consult the manual or contact a certified technician for assistance. Regularly monitoring error codes helps maintain system reliability and security. Always keep the manual handy for quick reference.

Maintenance and Updates

Regularly check sensors, batteries, and wiring for optimal performance. Update system software to ensure compatibility and security. Always follow manufacturer guidelines for maintenance and updates.

Regular Maintenance Tips for Optimal Performance

Regularly inspect sensors, wires, and batteries to ensure proper function. Test alarm systems monthly and update software periodically. Clean sensors to avoid false alarms. Check for loose connections and replace worn-out parts. Refer to the manual for detailed maintenance schedules and procedures. Always follow manufacturer guidelines to maintain system efficiency and reliability. Consult a professional if issues persist beyond basic troubleshooting steps outlined in the manual.

Updating System Software and Firmware

Regular software and firmware updates are crucial for maintaining the performance and security of your GE Security system. Always check for updates via the system interface or manufacturer’s website. Download and install updates promptly to ensure you have the latest features and security patches. Restart the system after updates to apply changes. Follow the manual’s instructions for a smooth update process. Keep your system up-to-date to enhance functionality and protect against potential vulnerabilities.

Advanced Features and Customization

Explore advanced customization options to tailor your GE Security system to your specific needs. Integrate with smart home systems, program custom responses, and utilize remote management features for enhanced control and flexibility.

Customizing System Settings for Specific Needs

Customize your GE Security system to meet your unique security requirements. Program zones, set arming levels, and define response protocols. Utilize remote management features to adjust settings from your smartphone. The system allows integration with smart home devices, enabling seamless control. Advanced options include custom user codes and emergency response plans. Refer to the manual for step-by-step guidance on tailoring your system for maximum security and convenience.

Integrating with Smart Home Systems

The GE Security system seamlessly integrates with smart home devices, enhancing convenience and control. Compatible with Z-Wave and Wi-Fi technologies, it allows voice command operation through platforms like Amazon Alexa. Users can monitor and manage their security system via smartphone apps. Integration with smart door locks, lights, and thermostats ensures a unified home automation experience. Refer to the manual for detailed instructions on connecting your system to smart home networks for enhanced functionality and security.

This manual has guided you through the GE House Alarm System’s operation, ensuring your home’s safety. Proper installation, regular maintenance, and understanding emergency procedures are vital for optimal performance. Refer to this guide for troubleshooting and advanced customization options.

Final Tips for Effective System Usage

Regularly test sensors and ensure all components are functioning properly. Keep backup power sources charged and easily accessible. Familiarize all household members with arming, disarming, and emergency procedures. Periodically review and update alarm codes to maintain security. Always refer to this manual for troubleshooting common issues and optimizing system performance. By following these guidelines, you can ensure your GE House Alarm System operates effectively, providing reliable protection for your home and family;

Resources for Further Assistance

For additional support, visit the official GE Security website or contact their customer service. Refer to the GE Concord 4 User Guide or Simon XT User Manual for model-specific instructions. Local security dealers can also provide professional assistance. Ensure to keep this manual accessible for future reference. For troubleshooting, consult the GE Appliances owner manuals or reach out to certified installers; Utilize online forums and official resources to stay updated on system maintenance and advanced features.

msa altair 5x user manual

Welcome to the MSA Altair 5X User Manual, your comprehensive guide to understanding and operating the Altair 5X Multigas Detector. This manual provides essential information on device features, safety precautions, and proper usage to ensure safe and effective operation. Designed for trained personnel, it covers everything from initial setup to maintenance and troubleshooting, helping you maximize the device’s performance and reliability in hazardous environments.

1.1 Overview of the MSA Altair 5X Multigas Detector

The MSA Altair 5X Multigas Detector is a advanced portable device designed to detect multiple gases and vapors in hazardous environments. It features cutting-edge sensor technology, wireless connectivity, and real-time monitoring capabilities. The detector is built for durability and reliability, ensuring accurate readings in challenging conditions. With its intuitive interface and customizable settings, the Altair 5X is a vital tool for workplace safety, providing critical alerts and ensuring compliance with safety standards.

1.2 Importance of Reading the Manual

Reading the MSA Altair 5X User Manual is crucial for safe and effective use of the device. It provides detailed instructions on operation, maintenance, and troubleshooting, ensuring compliance with safety standards. Understanding the manual helps users interpret gas readings, respond to alarms, and perform calibration correctly. Proper usage, as outlined in the manual, is essential for reliable performance in hazardous environments and to protect both the user and others from potential risks.

Key Features and Benefits of the MSA Altair 5X

The MSA Altair 5X features advanced sensor technology, wireless connectivity, and long battery life, ensuring reliable gas detection and real-time data transmission in hazardous environments.

2.1 Advanced Sensor Technology

The MSA Altair 5X boasts cutting-edge sensor technology, enabling rapid and accurate detection of multiple gases. Its dual-tox sensor simultaneously monitors CO and H2S, while an optional infrared sensor detects CO2 or combustible gases. This advanced system ensures faster response times, enhancing worker safety in hazardous environments. The sensor technology is designed for reliability and durability, providing consistent performance across various conditions.

2.2 Wireless Connectivity and Data Transmission

The Altair 5X features wireless connectivity, enabling seamless data transmission to compatible devices. This capability allows real-time monitoring and remote data access, enhancing incident response and safety management. Using MSA Link software, users can easily transmit data from the detector, facilitating efficient record-keeping and compliance reporting. Wireless connectivity also supports firmware updates, ensuring the device stays current with the latest advancements in gas detection technology.

Safety Precautions and Warnings

Always read and follow the manual carefully. Use the device only as intended. Perform regular calibration and maintenance. Avoid high-temperature environments and ensure proper ventilation. Never ignore alarms or warnings, as this can lead to unsafe conditions; Adhere to all safety guidelines to ensure reliable operation and personal safety in hazardous environments.

3.1 General Safety Guidelines

Always read and follow the manual carefully. Ensure proper training before using the device. Use the detector only for its intended purpose. Perform regular maintenance and calibration. Avoid exposing the device to extreme temperatures or physical shock. Never ignore alarms or warnings. Ensure the device is properly configured for the specific gas hazards present. Follow all safety instructions to prevent accidents and ensure reliable performance in hazardous environments. Proper use enhances safety and effectiveness.

3.2 Hazardous Atmosphere Precautions

The MSA Altair 5X is designed for use in hazardous atmospheres but must be operated with caution. Always ensure the device is properly calibrated and configured for the specific gases present. Avoid entering areas with gas concentrations exceeding the detector’s limits. Never use the device in environments with high gas levels without proper protective equipment. If the detector alarms, evacuate the area immediately and follow safety protocols. Regular calibration is crucial after exposure to extreme conditions or physical shock.

Installation and Setup

Unpack and inventory all components carefully, ensuring no damage. Proceed with initial configuration, following the manual to set up sensors, wireless connectivity, and device settings properly.

4.1 Unpacking and Inventory

Begin by carefully unpacking the Altair 5X Multigas Detector and verifying all components against the provided inventory list. Ensure the device, sensors, batteries, and accessories are included and free from damage. This step is crucial to ensure proper functionality and compliance with safety standards. Handle the device with care to avoid damage, especially the sensors, which are sensitive to physical shock. Once unpacked, store unused items in a protective case to maintain their condition. Always refer to the manual for specific unpacking instructions to prevent any potential issues.

4.2 Initial Configuration and Settings

After unpacking, proceed to configure the Altair 5X according to your operational needs. Power on the device and navigate through the menu to set up gas types, alarm levels, and wireless communication options. Ensure all settings align with your workplace requirements and safety protocols. Proper configuration is critical for accurate gas detection and reliable performance. Refer to the manual for detailed instructions on customizing settings to meet specific monitoring demands. Always save configurations before exiting the setup menu to ensure they are retained for future use.

Calibration and Maintenance

Regular calibration and maintenance are essential for ensuring the accuracy and reliability of the Altair 5X. Follow the manual’s guidelines for sensor checks, gas calibration, and routine cleaning to maintain optimal performance and extend the device’s lifespan.

5.1 Calibration Procedures

Calibration is critical for ensuring the Altair 5X operates accurately. Use MSA-approved calibration gases and follow the manual’s step-by-step instructions. Perform single-point or multi-point calibration based on sensor types. Calibration should occur after sensor replacement, exposure to high contaminant levels, or physical shock. Regular checks ensure reliable gas detection and alarm functionality. Refer to the manual for detailed calibration methods and frequency recommendations to maintain device performance and safety standards.

5.2 Routine Maintenance Tips

Regular maintenance ensures optimal performance of the Altair 5X. Clean the exterior with a soft cloth and mild detergent, avoiding sensors and openings. Check sensors for damage or blockages and replace them as needed. Store the device in a dry, cool place when not in use. Perform functional tests periodically and update software via MSA Link. Follow the manual for detailed maintenance schedules and procedures to prolong device lifespan and reliability.

Understanding the Display and Alarms

The Altair 5X display provides real-time gas level readings, alarm status, and battery life. Audible and visual alarms alert users to hazardous conditions, ensuring prompt responses to safety threats.

6.1 Interpreting Gas Readings

The MSA Altair 5X display shows real-time gas concentrations for detected gases, including combustible gases, CO, H2S, and O2. Readings are updated continuously, ensuring accurate monitoring. The device provides numerical values and bar graphs for easy interpretation. For combustible gases, readings are displayed as a percentage of the lower explosive limit (LEL). For toxic gases like CO and H2S, readings are shown in ppm. Oxygen levels are displayed as a percentage of the atmosphere. Understanding these readings is critical for assessing safety and taking appropriate actions. Always refer to the manual for specific gas interpretation guidelines.

6.2 Alarm Conditions and Responses

The MSA Altair 5X triggers alarms for dangerous gas levels or low oxygen; Visual, audible, and vibrational alerts notify users of potential hazards. Alarms activate when gas concentrations exceed safe thresholds or oxygen levels drop below 19.5%. Users must immediately evacuate the area, wear breathing apparatus if required, and follow established safety protocols. Never ignore alarms; always investigate and resolve the hazard promptly. Refer to the manual for specific alarm response procedures.

Troubleshooting Common Issues

This section addresses common issues like sensor faults, connectivity problems, and error codes. It provides solutions such as calibration checks and diagnostic procedures for optimal device performance.

7.1 Diagnostic Modes and Error Codes

The MSA Altair 5X features advanced diagnostic modes to identify and address issues promptly. Error codes provide specific insights into device malfunctions, such as sensor failures or connectivity problems. By accessing diagnostic modes, users can perform self-tests and view detailed error logs. Refer to the manual for code interpretations and troubleshooting steps. Addressing these issues ensures optimal performance and reliability in hazardous environments. Always consult the manual or contact MSA support for assistance

7.2 Resolving Sensor Faults

Sensor faults on the MSA Altair 5X can often be resolved by checking connections, cleaning sensors, or recalibrating the device. If a sensor fails, ensure it is properly seated and free from contaminants. For persistent issues, refer to the manual for recalibration procedures or replace the sensor if damaged. Always use MSA-approved replacement parts. If problems remain, contact MSA support for further assistance. Regular maintenance ensures accurate gas detection and device reliability.

MSA Support and Resources

MSA offers comprehensive support, including online resources, manuals, and dedicated customer service. Visit the MSA website for troubleshooting guides, software updates, and contact information. For immediate assistance, call 1-800-MSA-2222 in North America or 1-724-776-8626 internationally. Additional documentation and training materials are available to ensure optimal use of your Altair 5X device.

8.1 Contacting MSA Customer Service

For assistance with the Altair 5X, contact MSA Customer Service at 1-800-MSA-2222 (North America) or 1-724-776-8626 (international). Visit the MSA website for additional resources, including manuals, troubleshooting guides, and software updates. MSA’s dedicated support team is available to address any questions or concerns, ensuring optimal performance and safety of your device in hazardous environments. Reach out for expert guidance on maintenance, repairs, or technical inquiries.

8.2 Accessing Additional Documentation

Additional documentation for the MSA Altair 5X is available on the MSA website. Visit MSA’s official site to access the full Instruction Manual: ALTAIR 5X Multigas Detector (EN) and Instruction Manual: ALTAIR 5X PID Multigas Detector (EN). These resources provide detailed operating instructions, troubleshooting guides, and technical specifications. Order No. 10102623/01 is also available for supplementary information. Refer to these documents for comprehensive support and maintenance guidance.

Compliance and Regulatory Information

The MSA Altair 5X complies with international safety standards and certifications. Devices for the Russian Federation, Kazakhstan, and Belarus include approval documents. Ensure compliance with regional regulations.

9.1 Certifications and Approvals

The MSA Altair 5X Multigas Detector holds various certifications, ensuring compliance with global safety standards. It is CSA-certified for use in hazardous environments. The device meets stringent regulations for gas detection, including those for combustible gases and oxygen levels. Specific models, like the Altair 5X IR, are designed with infrared sensors for precise CO2 detection. All units are rigorously tested to guarantee reliability and performance in diverse industrial settings.

9.2 Regional Compliance Requirements

The MSA Altair 5X Multigas Detector complies with regional safety regulations worldwide. In North America, it meets CSA standards for hazardous locations. For Europe, it adheres to ATEX directives for explosive atmospheres. Devices shipped to the Russian Federation, Kazakhstan, and Belarus include a passport with approved certification. The detector is configured to meet specific regional norms, ensuring compliance and safe operation across global markets and regulatory environments.

Page 4 of 11

Powered by WordPress & Theme by Anders Norén