
Welcome to the Daikin Mini Split Installation Manual, your comprehensive guide for installing, operating, and maintaining your mini split system. This manual provides detailed instructions to ensure safe and proper installation, covering essential steps, safety precautions, and troubleshooting tips. Follow the guidelines carefully to optimize performance and longevity of your unit.
Purpose and Scope of the Manual
This manual is designed to provide clear, step-by-step instructions for the proper installation of Daikin mini split systems. It ensures compliance with safety standards, optimal system performance, and adherence to local regulations. The scope includes guidelines for indoor and outdoor unit placement, refrigerant line connections, electrical wiring, and post-installation checks. Intended for licensed professionals, it covers essential tools, materials, and best practices to guarantee a successful setup. By following this manual, installers can avoid common issues and ensure the system operates efficiently, safely, and as intended. Proper adherence to the manual is crucial for maintaining warranty validity and system reliability.
Important Safety Precautions
Always follow safety guidelines to prevent accidents during installation. Ensure the power supply is turned off before starting work. Use proper tools and wear protective gear, including gloves and safety glasses. Keep the installation area clear of flammable materials. Avoid overloading circuits, and ensure all electrical connections comply with local codes. Never modify the system beyond manufacturer specifications. Refrigerant handling requires specialized training and equipment. Properly vent refrigerants to prevent environmental harm. Follow all warnings and cautions outlined in this manual. Failure to adhere to safety precautions may result in injury, system damage, or void the warranty. Ensure only licensed professionals perform critical tasks.

System Components and Tools Needed
The Daikin Mini Split system includes indoor and outdoor units, refrigerant lines, and drainage components. Required tools include drills, wrenches, and tubing cutters. Ensure all materials meet specifications for proper installation.
Indoor and Outdoor Unit Overview
The Daikin Mini Split system comprises two main units: the indoor unit, designed for installation inside your home, and the outdoor unit, placed outside. The indoor unit ensures efficient air distribution and quiet operation, while the outdoor unit houses the compressor and condenser. Both units are connected via refrigerant lines and electrical connections. Proper placement and alignment of these units are crucial for optimal performance. The indoor unit should be mounted securely on an interior wall, while the outdoor unit requires a stable base to ensure smooth operation and minimize noise. Both units must be installed according to the manufacturer’s specifications to ensure reliability and efficiency. Always refer to the installation manual for specific guidance on positioning and leveling. Additionally, ensure that all safety precautions are followed during installation to avoid potential hazards. By correctly installing both units, you can enjoy efficient heating and cooling throughout the year. Proper installation also helps in maintaining the unit’s longevity and performance, ensuring that your home remains comfortable in all seasons. Regular maintenance and inspections are recommended to keep the system running smoothly. Understanding the components and their functions is essential for troubleshooting and ensuring optimal operation. Always consult the manual for detailed instructions and guidelines specific to your Daikin Mini Split model. This will help you achieve the best results and ensure your system operates efficiently for years to come.
Required Tools and Materials
To successfully install your Daikin Mini Split system, gather the necessary tools and materials. Essential tools include a drill, screwdrivers, wrenches, and cable ties for securing wires. A vacuum pump is required for evacuating the refrigerant lines, while a manifold gauge ensures proper system pressure. Materials needed include insulated copper pipes, drainage hoses, and electrical cables. Additionally, obtain mounting brackets for both indoor and outdoor units, as well as sealants to prevent air leaks. Ensure all components are compatible with your specific Daikin model and meet local building codes. Refer to the manual for a detailed list of recommended tools and materials to avoid missing critical items. Proper preparation ensures a smooth installation process. Always verify that all materials meet safety and quality standards. Having everything ready beforehand saves time and reduces the risk of installation errors. Follow the manufacturer’s guidelines for optimal results and system performance. This comprehensive approach guarantees a professional-grade installation.
Pre-Installation Considerations
Before starting, ensure compatibility with local regulations and system requirements. Assess the site for power supply, space, and drainage. Plan the layout carefully to avoid installation issues and ensure optimal performance. Proper preparation is key to a successful and efficient installation process.
Site Preparation and Location Selection
Proper site preparation and location selection are crucial for a successful installation. Ensure the area is clear of obstacles and meets the space requirements for both indoor and outdoor units. The indoor unit should be installed in a well-ventilated area, away from direct sunlight and moisture. The outdoor unit must be placed on a firm, level surface, protected from extreme weather conditions, and have adequate airflow. Avoid installing near water sources or in laundry rooms to prevent water damage or electrical risks. Ensure compliance with local building codes and manufacturer guidelines for optimal performance and safety.
System Compatibility and Local Regulations
Ensure the Daikin mini split system is compatible with existing infrastructure, including electrical supply and building structure. Verify that the system meets local regulations, such as electrical codes, environmental standards, and zoning laws. Check compatibility of refrigerant type (e.g., R410A or R32) with local requirements to avoid non-compliance. Ensure the system’s power consumption aligns with the building’s electrical capacity. Compliance with safety and efficiency standards is mandatory to prevent installation issues and legal complications. Always consult local authorities and Daikin guidelines to confirm compatibility before proceeding with installation.

Installation Process
The installation process involves mounting the indoor unit, installing the outdoor unit, connecting refrigerant lines, and ensuring proper drainage. Follow all safety guidelines for a successful setup.
Mounting the Indoor Unit
Mounting the indoor unit requires careful planning to ensure proper installation; Choose a location with adequate clearance, away from direct sunlight and moisture. Use a level to ensure the unit is evenly positioned. Secure the unit to the wall using the provided brackets, ensuring stability to prevent vibration. Follow the manufacturer’s instructions for drilling holes and installing the mounting plate. Ensure all electrical and refrigerant connections are accessible. Tighten all screws firmly to prevent movement. Double-check the unit’s alignment and leveling before proceeding. Refer to the manual for specific torque specifications and safety guidelines to avoid damage or improper installation;
Installing the Outdoor Unit
Installing the outdoor unit is a critical step in the mini split system setup. Choose a well-ventilated, shaded location to maximize efficiency. Ensure the unit is placed on a level surface, using a concrete pad or rubber feet for stability. Secure the unit firmly to prevent vibration. Position it at least 3 feet away from obstacles to ensure proper airflow. Follow the manufacturer’s instructions for installing the mounting bracket and connecting the refrigerant lines. Ensure the unit is grounded to prevent electrical hazards. Avoid installing in areas exposed to direct sunlight or extreme weather conditions. Consult the manual for specific guidelines on elevation and drainage requirements for optimal performance and safety. Proper installation ensures reliable operation and extends the system’s lifespan.
Connecting Refrigerant Lines and Drainage
Connecting refrigerant lines and drainage is a critical step in the installation process. Ensure all connections are tight and free from leaks to maintain system efficiency. Use the recommended materials and tools to avoid contamination; Insulate the refrigerant lines to prevent energy loss and ensure proper drainage. The drain pan and condensate drain must be installed correctly to prevent water damage. Follow the manufacturer’s guidelines for line sizing and routing. Check for any blockages or kinks in the lines, as these can restrict refrigerant flow. Properly test the system for leaks after installation to ensure optimal performance. Always adhere to local regulations and safety standards when handling refrigerants and drainage systems.
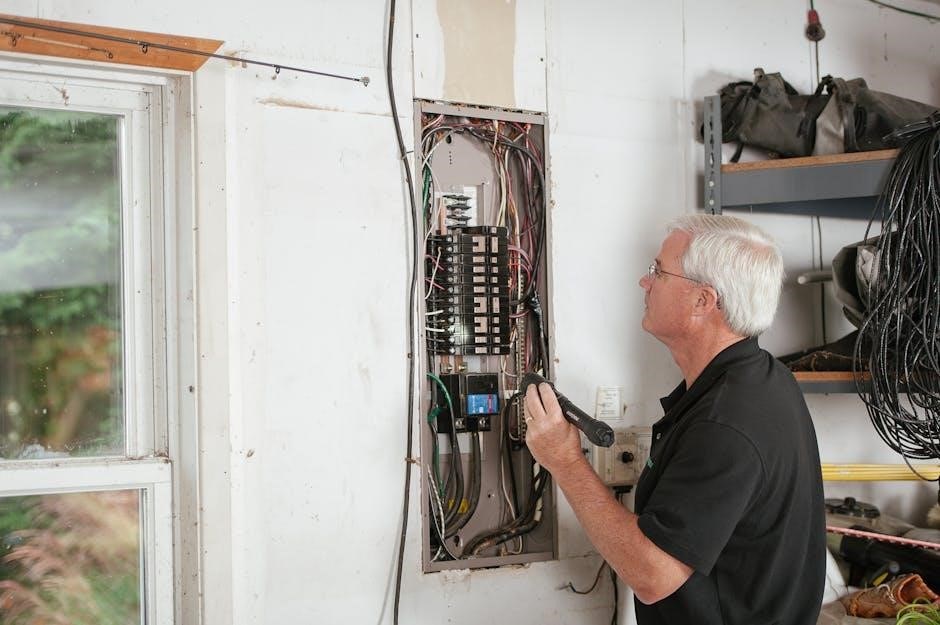
Electrical Connections
This section outlines the electrical connections for your Daikin mini split, ensuring safe and efficient installation. Follow guidelines for wiring, circuit setup, and power supply to prevent hazards and optimize performance.
Power Supply Requirements
The Daikin mini split system requires a stable power supply to function efficiently. For R410A Split Series models, ensure a 230V single-phase power connection. R32 Split Series units typically operate on 220-240V AC. Always verify the voltage rating specified in your unit’s manual to avoid electrical issues. Proper grounding is essential to prevent shocks and ensure safe operation. Use the recommended cable sizes and avoid overloaded circuits. Non-compliance with power supply requirements can lead to system malfunction or safety hazards. Consult a licensed electrician if unsure, and always follow local electrical codes for a secure installation;
Wiring and Circuit Setup
Proper wiring and circuit setup are critical for safe and efficient operation of your Daikin mini split system. Use a dedicated 20-amp circuit for the outdoor unit and a 15-amp circuit for the indoor unit, as specified in the manual. Ensure all wiring connections are secure and comply with local electrical codes. Avoid using extension cords or shared circuits, as this can lead to power fluctuations and system damage. Install a circuit breaker rated for the unit’s power requirements to prevent overloading. Ground the system correctly to avoid electrical shocks. Always refer to the wiring diagram in the manual for precise connections. Improper wiring can void the warranty and pose safety risks, so consulting a licensed electrician is recommended for a reliable setup.

Post-Installation Checks
After installation, perform thorough checks to ensure proper system operation. Test for refrigerant leaks, verify electrical connections, and inspect drainage functionality. These steps ensure efficiency, safety, and prevent future issues.
Leak Testing and System Inspection
Conducting leak testing is crucial to ensure the integrity of your Daikin mini split system. Use a leak detector to check all connections, including refrigerant lines and joints. Inspect the system for any visible damage or improper connections. Proper inspection prevents gas leaks, which can lead to reduced performance or safety hazards. Additionally, verify that all components are securely fastened and aligned. For precise results, refer to the manufacturer’s guidelines for leak testing procedures. Regular inspections help maintain efficiency and extend the system’s lifespan, ensuring reliable operation throughout the year.
Startup and Initial Testing
After completing the installation, power on the system and test its operation. Ensure the power supply is stable and within the recommended voltage range. Test both cooling and heating modes (if applicable) to verify proper functionality. Check the remote control operation to ensure all features work correctly. Inspect airflow from the indoor unit and confirm proper drainage. Listen for unusual noises and visually inspect for leaks or issues. Allow the system to run for at least 30 minutes to ensure stable operation. Record any inconsistencies and address them promptly to ensure optimal performance and reliability.
Troubleshooting Common Issues
This section guides you through identifying and resolving common issues during installation or operation, such as refrigerant leaks, electrical malfunctions, or improper drainage, using the manual’s troubleshooting guidelines.
Diagnosing and Resolving Installation-Related Problems
Diagnosing installation-related issues with your Daikin mini split system involves checking for common faults like refrigerant leaks, improper wiring, or drainage blockages. Start by ensuring all connections are secure and meet the manual’s specifications. If the system doesn’t power on, verify the electrical supply and circuit setup. For leaks, use a leak detection kit as recommended. If issues persist, consult the troubleshooting section or contact a certified technician. Always refer to the manual for specific guidance to prevent further damage and ensure system efficiency. Regular maintenance can help prevent many installation-related problems.
Maintenance and Warranty Information
Regular maintenance ensures optimal performance and extends the lifespan of your Daikin mini split system. Clean filters monthly and inspect coils annually. Warranty coverage varies by model, typically requiring product registration within 60 days of installation. Refer to the warranty section for terms and conditions.
Recommended Maintenance Practices
Regular maintenance is crucial for optimal performance of your Daikin mini split system. Clean or replace air filters every 1-2 months to ensure proper airflow and efficiency. Inspect and clean the indoor and outdoor unit coils annually to prevent dust buildup. Check refrigerant lines for leaks and ensure proper insulation. Drainage systems should be inspected and cleared of blockages to prevent water damage. Schedule professional servicing every 12 months to inspect internal components and ensure system operation. Additionally, power cycles and thermostat settings should be checked regularly to maintain optimal performance.
Understanding the Warranty and Support Options
Daikin offers comprehensive warranty and support options to ensure your mini split system operates smoothly. The standard warranty covers parts and labor for up to 5 years, with extended options available for added peace of mind. Register your product online to activate warranty benefits and access exclusive support services. Daikin’s customer support team is available 24/7 to address installation, maintenance, and repair inquiries. Additionally, authorized service centers provide professional assistance for warranty claims and system troubleshooting. Always refer to the warranty terms and conditions for specific details and ensure all installations are performed by certified technicians to maintain warranty validity.
Leave a Reply
You must be logged in to post a comment.