nasogastric tube removal procedure pdf

The procedure involves safely removing the nasogastric tube once it is no longer needed, ensuring patient comfort and proper technique to avoid complications.

Brief Overview of Nasogastric Tubes

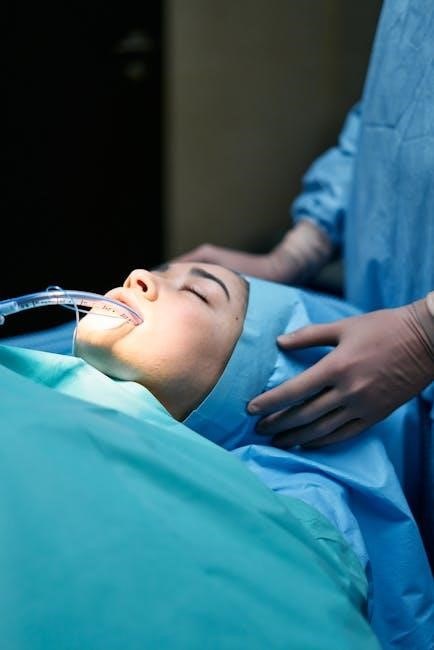
A nasogastric (NG) tube is a flexible catheter inserted through the nose, passing through the nasopharynx, and into the stomach. It is commonly used for feeding, decompression, or medication administration. NG tubes are typically made of silicone or polyurethane, with varying sizes and types suited for different patient needs. They are essential for patients who cannot eat orally due to illness, surgery, or neurological conditions. Proper placement and care are critical to prevent complications such as nasal irritation, sinusitis, or pulmonary aspiration. The tube’s removal is necessary when it is no longer required, ensuring patient comfort and avoiding unnecessary risks. Understanding the basics of NG tubes is fundamental for safe and effective clinical management.

Importance of Proper Removal Techniques

Proper nasogastric tube removal techniques are crucial to prevent complications and ensure patient safety. Improper removal can lead to discomfort, bleeding, or accidental dislodgement of adjacent structures. Correct methods minimize the risk of aspiration and nasopharyngeal trauma. Ensuring the tube is removed gently and smoothly helps maintain patient trust and comfort. Additionally, proper technique prevents lingering irritation or infection, promoting faster recovery. Adhering to established protocols ensures consistency and reduces the likelihood of errors. Proper documentation after removal is also essential for continuity of care. Overall, meticulous attention to removal techniques is vital for optimal patient outcomes and healthcare quality. This step is as important as insertion, requiring equal care and precision to safeguard the patient’s well-being.

Pre-Removal Steps

Before removing the nasogastric tube, verify physician orders and prepare necessary materials to ensure a smooth and safe procedure for the patient.

Verifying Physician Orders

Verifying physician orders is a critical step before nasogastric tube removal. Ensure the order specifies the removal, as the tube should only be taken out when no longer medically necessary. Review the patient’s medical records to confirm the physician’s instructions. If the order is unclear, consult with the healthcare provider before proceeding. This step prevents premature removal, which could lead to complications or the need for reinsertion. Proper documentation of the order verification is essential for legal and patient safety reasons. Additionally, check if any specific conditions or precautions are noted in the orders, such as the need for post-removal monitoring. Always adhere to the healthcare facility’s policies regarding order verification to maintain standardized care practices. This ensures that the removal process is both authorized and safe for the patient.

Preparing Necessary Materials

Preparing the necessary materials is essential for a smooth nasogastric tube removal process. Gather disposable gloves, a biohazard bag for waste disposal, and tissues or gauze for cleaning. A towel or absorbent pad should be placed under the patient’s chin to protect clothing from potential secretions. Ensure access to saline solution to flush the tube if needed, and have a secure container for the discarded tube. If available, a stethoscope may be used to verify tube placement before removal. Proper preparation ensures efficiency and minimizes delays during the procedure. Always follow infection control protocols, such as wearing gloves, to maintain patient safety. Having all materials ready beforehand allows the healthcare provider to focus on the patient’s comfort and procedure success. This step is crucial for maintaining a sterile and organized environment during the removal process.

The Removal Procedure

The removal procedure involves carefully extracting the nasogastric tube, ensuring minimal discomfort and preventing complications, guided by established medical protocols for safe and effective execution.

Step 1: Positioning the Patient

Proper positioning is crucial for safe nasogastric tube removal. The patient should be seated upright or in a semi-upright position to reduce discomfort and prevent aspiration. Ensure the patient’s head is elevated at least 45 degrees to facilitate easy removal and minimize the risk of gastric content reflux. A towel or protective drape should be placed over the patient’s chest to catch any secretions or debris. The patient should be instructed to remain still and avoid swallowing or speaking during the procedure to prevent accidental aspiration. If the patient is unable to sit up, they should be placed in a supine position with their head turned to the side. The healthcare provider should stand on the patient’s right side, ensuring clear access to the tube. Proper positioning ensures patient safety and comfort throughout the removal process.

Step 2: Removing the Tube

With the patient properly positioned, the healthcare provider should gently remove the nasogastric tube. Begin by cutting the tape securing the tube to the patient’s nose and loosening any clamps. Grasp the tube firmly near the nostril and slowly pull it out in one smooth motion, following the natural curve of the nasopharynx. Avoid using force, as this can cause discomfort or injury. If resistance is felt, pause briefly and reassess the positioning. Ensure the balloon, if present (e.g., Foley-type tube), is fully deflated before removal to prevent nasal mucosa tearing. After removal, inspect the tube for integrity and discard it appropriately. Monitor the patient for any signs of distress or bleeding. The process is typically quick, but patience is key to ensuring a safe and comfortable experience for the patient.

Step 3: Post-Removal Care

After removing the nasogastric tube, ensure the patient’s comfort and monitor for any complications. Offer water for sipping if permitted to help soothe the throat. Inspect the nostrils for bleeding or swelling and apply ice packs if necessary. Observe for signs of respiratory distress, nausea, or vomiting. Document the removal process, including the patient’s response and any issues encountered. Provide reassurance to alleviate anxiety. Ensure the patient is comfortable and able to speak or cough without difficulty. If discomfort persists, consider administering prescribed pain relief. Maintain a clean environment and dispose of the tube appropriately. Monitor for any delayed reactions and report concerns to the healthcare team promptly. Proper post-removal care ensures a smooth recovery and minimizes potential complications.

Post-Removal Care

Monitor for complications, ensure patient comfort, and document the removal process. Provide reassurance and address any discomfort or bleeding. Proper care promotes recovery and prevents issues.

Monitoring for Complications

After nasogastric tube removal, it is crucial to monitor for potential complications. Common issues include bleeding, swelling, or discomfort at the removal site. Rare but serious risks may involve nasal perforation or infection. Patients should be observed for signs of respiratory distress, such as coughing or shortness of breath, which could indicate tube fragments retained in the airway. Additionally, watch for gastric leakage or persistent nausea, which may suggest improper removal techniques. Immediate medical attention is required if complications arise. Monitoring ensures early detection and timely intervention, promoting patient safety and recovery. Proper documentation of observations is essential for continuity of care. By closely assessing the patient post-removal, healthcare providers can address any adverse effects promptly and effectively.

Ensuring Patient Comfort

Ensuring patient comfort during and after nasogastric tube removal is essential. Position the patient upright to reduce discomfort and prevent gagging. Use saline solution to moisten the nostrils, minimizing irritation. Provide emotional reassurance to alleviate anxiety. After removal, inspect the nasal passage for any remaining fragments or bleeding. Offer ice packs or topical anesthetics if discomfort persists. Assess the patient’s ability to swallow and breathe normally. Address any concerns or pain promptly. Comfort measures also include monitoring for nausea or vomiting, which may require antiemetic medication. Ensuring a calm and supportive environment helps the patient recover smoothly. Proper post-removal care fosters both physical and emotional well-being, enhancing the overall recovery process. Patient comfort is a priority to prevent long-term distress or complications. Always tailor interventions to individual needs for optimal outcomes. Regular follow-ups ensure sustained comfort and address any emerging issues promptly. Comfort is key to a successful recovery;

Documentation Procedures

Accurate documentation is critical after nasogastric tube removal. Record the date, time, and method of removal in the patient’s medical records. Note any challenges faced or complications encountered during the procedure. Document the patient’s response, including comfort levels and physiological reactions. Include details about post-removal care provided, such as wound cleaning or analgesia administered. Ensure all entries are clear, concise, and signed by the healthcare provider. Proper documentation ensures continuity of care and serves as a legal record of the procedure. It also helps track the patient’s recovery progress and informs future medical decisions. Maintain confidentiality and adhere to institutional policies for recording and storing patient information. Thorough documentation is vital for accountability and patient safety, ensuring all aspects of the removal process are accurately reflected. This step is essential for maintaining high standards of care and legal compliance.

Potential Complications

Common issues include resistance during removal or incomplete tube retrieval. Rare but serious risks involve bleeding, perforation, or tissue damage, especially if force is applied incorrectly.

Common Issues During Removal

Common issues during nasogastric tube removal include resistance when pulling the tube back, which may indicate it has formed a mucosal attachment. If the tube does not come out smoothly, gentle manipulation is advised, but force should be avoided to prevent injury. Another issue is the tube breaking during removal, leaving fragments inside the patient. This can happen if the tube is old or brittle. Additionally, some patients may experience gagging or discomfort during the process, which can be minimized by proper positioning and preparation. It is crucial to follow established protocols to avoid these complications and ensure a safe removal process.

Rare but Serious Risks

Rare but serious risks associated with nasogastric tube removal include perforation of the esophagus or nasal passages, which can lead to severe bleeding or infection. In some cases, the tube may inadvertently enter the trachea during removal, causing respiratory distress. Another rare complication is the dislodgment of the tube into the lungs, which can result in aspiration pneumonia. Additionally, if the tube is forcefully removed and parts are retained, surgical intervention may be required. These risks emphasize the importance of adhering to proper removal techniques and monitoring the patient closely during and after the procedure to ensure their safety and well-being.

The removal of a nasogastric tube is a critical procedure that requires careful adherence to established guidelines to ensure patient safety and comfort. Proper technique, verification of physician orders, and post-removal monitoring are essential to minimize risks and complications. While the process is generally straightforward, rare but serious risks such as perforation, aspiration, or tube misplacement highlight the need for vigilance. Healthcare providers must remain attentive to the patient’s condition throughout the procedure and beyond. By following best practices and maintaining open communication with the patient and their care team, successful removal can be achieved, ensuring the patient’s well-being and preventing adverse outcomes. This procedure underscores the importance of skill, precision, and compassion in healthcare delivery.

accu chek guide me manual

Welcome to the Accu-Chek Guide Me Manual‚ your comprehensive guide to mastering the Accu-Chek Guide Me blood glucose monitoring system. Designed for both new and experienced users‚ this manual provides step-by-step instructions‚ tips‚ and troubleshooting advice to ensure accurate and efficient blood glucose testing. Whether you’re setting up the meter‚ performing tests‚ or integrating with apps‚ this resource will help you maximize the performance of your Accu-Chek Guide Me system for better diabetes management.

Purpose and Scope of the Manual

This manual is designed to provide a clear and comprehensive guide for setting up‚ using‚ and maintaining the Accu-Chek Guide Me blood glucose monitoring system. Its purpose is to ensure users understand how to operate the device accurately and safely. The scope includes step-by-step instructions for initial setup‚ performing blood glucose tests‚ interpreting results‚ and troubleshooting common issues. Additionally‚ it covers the proper use of accessories and integration with compatible apps. This manual is intended for both new and experienced users‚ aiming to enhance their understanding and confidence in managing blood glucose monitoring effectively.

Overview of the Accu-Chek Guide Me System

The Accu-Chek Guide Me System is designed for quick and accurate blood glucose monitoring. It includes a user-friendly meter‚ test strips‚ and a lancet for easy blood sampling. The system integrates seamlessly with the mySugr app via Bluetooth‚ allowing users to track and manage their blood glucose levels efficiently. Its sleek design and advanced features make it an ideal choice for effective diabetes management. The system ensures precise results‚ helping users make informed decisions about their health.

Setting Up the Accu-Chek Guide Me Meter

Begin by unpacking and preparing your Accu-Chek Guide Me Meter. Insert the test strip to activate the meter. Ensure all components are ready for use.

Initial Setup and Configuration

Start by unpacking your Accu-Chek Guide Me Meter and ensuring all components are included. Insert a test strip to activate the meter and follow the on-screen instructions. Set the time and date by navigating through the menu options. Familiarize yourself with the test strip port and lancet location. Ensure the meter is placed on a flat surface and handled with clean‚ dry hands. Refer to the manual for detailed steps to complete the initial setup and configuration process accurately.

Setting the Time and Date

To ensure accurate blood glucose tracking‚ set the time and date on your Accu-Chek Guide Me Meter. Access the menu by pressing the navigation buttons. Select the “Time and Date” option and adjust the values using the arrow keys. Confirm your settings to save them. Note that the meter uses a 12-hour format with AM/PM. Ensure the time and date are correct before performing your first test for precise recording of results. This step is crucial for maintaining accurate test logs and healthcare professional recommendations. Always verify the time zone if traveling across regions. Properly set time and date ensure your blood glucose readings are accurately recorded and aligned with your personal schedule‚ aiding in effective diabetes management and tracking of trends over time. This simple step prevents errors in data synchronization with apps or devices‚ ensuring seamless integration with platforms like the mySugr app for comprehensive health monitoring. Regularly check and update the time and date‚ especially after battery replacement or traveling‚ to maintain consistency in your records. Accurate timekeeping is essential for correlating blood glucose levels with meals‚ medications‚ and activities‚ providing a clear overview of your health status. By following these steps‚ you can ensure your Accu-Chek Guide Me Meter operates efficiently and provides reliable data for better diabetes care. Always refer to the manual for detailed instructions if you encounter any issues during the process. Proper time and date settings are the foundation of accurate blood glucose monitoring and personalized care plans. Adjusting these settings incorrectly can lead to misleading data‚ so double-check your entries before saving. Utilize the meter’s intuitive interface to navigate through the menu effortlessly. If you’re unsure about the correct time zone or format‚ consult the user manual or contact customer support for clarification. Maintain your meter’s settings regularly to uphold the integrity of your blood glucose records and ensure optimal performance of the Accu-Chek Guide Me system. This attention to detail supports your efforts in managing diabetes effectively and staying informed about your health. The time and date settings are essential for generating accurate reports and sharing data with healthcare providers‚ enabling them to make informed decisions about your care. Keep your meter updated to reflect any changes in your schedule or location‚ ensuring your blood glucose data remains precise and relevant. By prioritizing the accuracy of your meter’s time and date‚ you can rely on your Accu-Chek Guide Me system to provide trustworthy results‚ empowering you to take control of your diabetes management confidently. Always remember that accurate time and date settings are vital for the proper functioning of your blood glucose monitor and the effectiveness of your diabetes care plan. If you notice any discrepancies in your test results‚ verify the time and date settings as a first step in troubleshooting. Ensuring your meter is correctly set up helps you avoid unnecessary confusion and ensures that your blood glucose data is recorded accurately. This step is a simple yet critical part of using your Accu-Chek Guide Me Meter effectively. Take a moment to review and update the time and date whenever necessary to maintain the reliability of your blood glucose monitoring system; Properly set time and date settings are essential for the Accu-Chek Guide Me Meter to function correctly and provide accurate results‚ which are crucial for effective diabetes management. Always prioritize this step during the initial setup and after any battery replacement to ensure uninterrupted and accurate monitoring. By doing so‚ you can trust the data your meter provides‚ making informed decisions about your health and well-being. The time and date settings are a fundamental aspect of your meter’s operation‚ and their accuracy directly impacts the reliability of your blood glucose records. Dedicate a few moments to configure these settings correctly‚ and you’ll enjoy precise and trustworthy results from your Accu-Chek Guide Me system. This straightforward process is a key part of maximizing the performance and benefits of your blood glucose monitoring device. Accurate time and date settings ensure that your test results are properly timestamped‚ allowing you to track patterns and trends in your blood glucose levels over time. This information is invaluable for adjusting your diet‚ exercise‚ and medication regimens to achieve optimal glucose control. By maintaining correct time and date settings‚ you can ensure that your Accu-Chek Guide Me Meter remains a reliable and indispensable tool in your diabetes care routine. Always remember to update these settings as needed to continue enjoying accurate and meaningful blood glucose monitoring. The time and date settings are a small but important detail that contributes significantly to the overall functionality and effectiveness of your Accu-Chek Guide Me system. Take the time to set them correctly‚ and you’ll be able to focus on what really matters—managing your diabetes with confidence and precision. Properly configured time and date settings are the cornerstone of accurate blood glucose monitoring‚ enabling you to make informed decisions and maintain better control over your health. Ensure these settings are up to date and correct to get the most out of your Accu-Chek Guide Me Meter and achieve your diabetes management goals. The time and date settings are a critical part of your meter’s operation‚ and their accuracy ensures that your blood glucose data is reliable and actionable. By keeping these settings current and correct‚ you can trust the information your meter provides‚ helping you manage your diabetes more effectively. Always prioritize the accuracy of your meter’s time and date settings to maintain the integrity of your blood glucose records and support your overall health and well-being. The time and date settings on your Accu-Chek Guide Me Meter are essential for accurate blood glucose tracking‚ enabling you to monitor your levels over time and make informed decisions about your care. Ensure these settings are correctly configured to get the most out of your meter and maintain precise records of your health. By taking a few moments to set the time and date accurately‚ you can ensure that your Accu-Chek Guide Me system provides reliable and trustworthy results‚ empowering you to manage your diabetes effectively. Always double-check these settings after any changes or battery replacements to maintain the accuracy of your blood glucose data. Properly set time and date settings are vital for the optimal performance of your Accu-Chek Guide Me Meter‚ ensuring that your test results are accurately recorded and easily interpreted. Take the time to configure these settings correctly‚ and you’ll be able to rely on your meter for precise and meaningful blood glucose monitoring; The time and date settings are a fundamental aspect of your meter’s functionality‚ and their accuracy directly impacts the reliability of your test results. By keeping these settings up to date and correct‚ you can trust the data your meter provides‚ helping you manage your diabetes with confidence and precision. Always ensure that the time and date on your Accu-Chek Guide Me Meter are accurate to maintain the integrity of your blood glucose records and support your overall diabetes care plan. The time and date settings on your meter are crucial for generating accurate test results and maintaining reliable records of your blood glucose levels. Take a moment to set these settings correctly‚ and you’ll enjoy precise and actionable data from your Accu-Chek Guide Me system. Properly configured time and date settings are essential for the optimal performance of your meter‚ enabling you to track your glucose levels effectively and make informed decisions about your health. Always prioritize the accuracy of these settings to ensure that your blood glucose data is reliable and meaningful. The time and date settings are a small but important part of your Accu-Chek Guide Me Meter’s operation‚ and their accuracy ensures that your test results are properly recorded and easily interpreted. By configuring these settings correctly‚ you can trust the information your meter provides‚ helping you manage your diabetes more effectively. Always double-check the time and date settings after any changes or battery replacements to maintain the accuracy of your blood glucose data. Properly set time and date settings are vital for the reliable operation of your Accu-Chek Guide Me Meter‚ ensuring that your test results are accurately recorded and meaningful. Take the time to configure these settings correctly‚ and you’ll be able to rely on your meter for precise blood glucose monitoring. The time and date settings are essential for the proper functioning of your meter‚ and their accuracy directly impacts the reliability of your test results. By keeping these settings current and correct‚ you can trust the data your meter provides‚ helping you manage your diabetes with confidence. Always ensure that the time and date on your Accu-Chek Guide Me Meter are accurate to maintain the integrity of your blood glucose records and support your overall health and well-being. The time and date settings are a critical part of your meter’s operation‚ ensuring that your blood glucose data is recorded accurately and is easily interpreted. By configuring these settings correctly‚ you can rely on your Accu-Chek Guide Me system to provide precise and trustworthy results‚ empowering you to manage your diabetes effectively. Always double-check the time and date settings after any changes or battery replacements to ensure the accuracy of your test results. Properly set time and

Performing a Blood Glucose Test

Performing a blood glucose test: insert the test strip into the Accu-Chek Guide Me‚ obtain a blood sample with the lancet‚ apply it‚ and read result.

Inserting the Test Strip

To insert the test strip‚ align it with the guide on the meter and gently push until it clicks. Ensure the strip is properly seated and the arrows match the meter’s direction. Place the meter on a flat surface for stability. Handle the strip by the edges to avoid contamination. Once inserted‚ the meter will automatically prepare for the test. Proper insertion ensures accurate results and prevents errors during blood glucose testing.

Using the Lancet for Blood Sampling

To use the lancet‚ first‚ ensure it is properly loaded into the meter. Adjust the lancet depth by turning the cap until it stops‚ selecting a comfortable setting for your skin type. Gently press the lancet against your fingertip‚ ensuring the notch aligns with the device. Perform a quick‚ firm puncture to obtain a small blood sample. Use a new lancet for each test to maintain hygiene and avoid infection. Proper technique ensures a sufficient blood sample for accurate glucose readings.

Reading and Interpreting Results

The Accu-Chek Guide Me meter displays blood glucose results in seconds. After testing‚ the meter will show your glucose level on the screen. A checkmark indicates a successful test‚ while an “E” or number signals an error. Use the arrows to scroll through stored results. Interpret results based on your target range‚ set by your healthcare provider; High readings may require insulin or lifestyle adjustments‚ while lows may need immediate treatment. Regularly review stored data to track trends and manage your diabetes effectively.

Control Tests and Accuracy

Why Control Tests Are Important

Control tests are essential to ensure the accuracy and reliability of your Accu-Chek Guide Me meter. They verify that the meter and test strips are functioning correctly‚ providing confidence in your blood glucose readings. Regular control tests help detect any issues with the system‚ such as faulty test strips or meter errors‚ ensuring precise results. This is particularly important after opening a new batch of test strips‚ traveling‚ or exposing the meter to extreme temperatures. Accurate readings are crucial for effective diabetes management‚ making control tests a vital step in maintaining your health.

How to Perform a Control Test

To perform a control test‚ insert a control test strip into the meter and add a small drop of Accu-Chek Guide control solution. The meter will display a result‚ which should match the expected range printed on the control solution bottle. This ensures the meter and test strips are functioning correctly.

Regular control tests help verify system accuracy‚ especially after opening new test strips or exposing the meter to environmental changes. Always follow the manual’s guidelines for optimal results and reliable blood glucose monitoring.

Troubleshooting Common Issues

Welcome to the troubleshooting section of the Accu-Chek Guide Me Manual. This guide helps identify and resolve common issues‚ ensuring accurate blood glucose results and smooth device operation;

tomb raider legend trophy guide

Welcome to the ultimate Tomb Raider: Legend trophy guide! This comprehensive roadmap will help you unlock all 42 trophies, including the elusive platinum, in this HD remastered classic. Lara Croft’s epic adventure awaits—let’s dive in and conquer every challenge together!

1.1 Overview of the Game and Trophy System

Tomb Raider: Legend is a thrilling adventure game where players control Lara Croft, an archaeologist exploring ancient tombs and ruins. The game features a trophy system with 42 achievements: 24 bronze, 14 silver, 3 gold, and 1 platinum. Trophies are earned by completing specific tasks, such as collecting relics, unlocking secret content, and mastering challenges. The system rewards both gameplay progression and exploration, with some trophies tied to finding hidden items like golden rewards and relics. This guide will break down each trophy, providing strategies to unlock them efficiently. Whether you’re a casual player or a completionist, understanding the trophy system is key to fully experiencing Lara’s journey.

1.2 Estimated Trophy Difficulty and Time Required

The trophy difficulty for Tomb Raider: Legend is estimated to be around 3.5/10, making it accessible for most players. Completing the game and unlocking all trophies typically requires 10-20 hours, depending on your skill level and familiarity with the game. You’ll need at least two playthroughs: one for story progression and a second to clean up missed trophies. The game features no glitched or missable trophies, and cheat codes do not disable achievements. This relatively straightforward trophy list makes it an excellent choice for players aiming to earn their first platinum trophy or for fans of the series looking to relive Lara Croft’s adventures.

Trophy Breakdown

Tomb Raider: Legend features a total of 42 trophies, including bronze, silver, gold, and platinum, each offering unique challenges and collectibles to unlock.

2.1 Bronze Trophies: Requirements and Tips

Earning the 24 Bronze trophies requires completing various challenges and collecting specific items. For example, Im a Legend demands equipping only legendary gear, while Copper and Tin for the Win involves collecting all silver rewards. Tips include exploring thoroughly to find hidden items and revisiting levels post-game to gather missed collectibles. Utilize Croft Manor to track progress and unlock additional content. Focus on completing each level’s optional objectives and gathering all relics and rewards to efficiently unlock these trophies. Strategic planning and meticulous exploration will streamline your journey to securing all Bronze achievements.

2.2 Silver Trophies: Challenges and Strategies

Earning the 14 Silver trophies requires skill and persistence. Key achievements include completing the game on Tomb Raider difficulty (The Hard Way) and collecting all gold rewards (GOLD HOARDER). To tackle these, master combat mechanics, utilize stealth, and thoroughly explore levels for hidden items. For You Wear It Well, unlock and equip all outfits by completing specific tasks. Strategic planning and precise execution are crucial for these challenging trophies. Focus on upgrading Lara’s abilities and weapons to handle tougher enemies and puzzles. With dedication and the right approach, securing all Silver trophies will bring you closer to the ultimate Platinum achievement.

2.3 Gold Trophies: Rare Collectibles and Feats

The 3 Gold trophies are reserved for the most dedicated players. These include GOLD HOARDER (collect all gold rewards) and YOU GOT THE SILVER (collect all silver rewards). To achieve these, focus on meticulous exploration of every level, as gold and silver rewards are often hidden in hard-to-reach areas. Use Lara’s abilities, such as her grappling hook and binoculars, to locate these treasures. Additionally, completing specific in-game feats, like mastering combat or solving puzzles efficiently, will unlock these prestigious trophies. Patience and a keen eye for detail are essential to claiming these rare achievements.

2.4 Platinum Trophy: Unlocking the Ultimate Achievement

Earning the Platinum Trophy in Tomb Raider: Legend is the pinnacle of achievement, requiring you to unlock all 42 trophies. This includes 24 Bronze, 14 Silver, 3 Gold, and the final Platinum. To achieve this, you must complete every level, collect all relics and rewards, and master both combat and puzzle-solving. The journey demands dedication, as you’ll need to explore every nook and cranny to ensure no trophy is missed. With no glitched or missable trophies, thorough playthroughs and careful planning are key. Once completed, the Platinum Trophy is your ultimate reward, symbolizing your mastery of Lara Croft’s legendary adventure.

General Tips and Strategies

Mastering Tomb Raider: Legend requires a blend of exploration, combat prowess, and puzzle-solving skills. Always explore thoroughly to uncover hidden collectibles and secrets. Upgrade Lara’s equipment regularly to enhance her abilities. Utilize Croft Manor to unlock special rewards and gain an edge in your adventure. Stay alert in combat and experiment with stealth tactics to overcome challenges efficiently.

3.1 Exploration and Collectible Hunting

Exploration is key to unlocking trophies and progressing in Tomb Raider: Legend. Thoroughly search each level for hidden relics, gold rewards, and secret areas. Use Lara’s grappling hook and other tools to access hard-to-reach locations. Collectibles often reward players with exclusive content and achievements. Keep an eye out for shiny objects and hidden compartments, as they often contain valuable items. Exploring Croft Manor can also unlock special features and bonuses. Patience and attention to detail will help you uncover everything the game has to offer and edge closer to the platinum trophy.

3.2 Combat and Stealth Techniques

Mastering combat and stealth is essential for success in Tomb Raider: Legend. Use cover mechanics to avoid taking damage and employ precise aiming for headshots. The bow is particularly useful for silent takedowns, helping you earn trophies like Im Done Learning. Stealth strategies are crucial for avoiding enemies and conserving ammo. In tougher sections, switch between weapons to exploit enemy weaknesses. Upgrading your arsenal at Croft Manor enhances your combat effectiveness. For the The Hard Way trophy, completing the game on Tomb Raider difficulty demands flawless execution of both combat and stealth. Practice these techniques to overcome challenges and unlock the platinum trophy seamlessly.

Collectibles and Hidden Rewards

Discover the hidden treasures and relics scattered throughout Lara Croft’s adventure. Collecting these rewards unlocks secret content, enhancing gameplay and aiding trophy progression. Explore thoroughly to uncover them all!

4.1 Relics: Locations and Importance

Relics are crucial collectibles in Tomb Raider: Legend, hiding in various levels except the final one. Each level contains one relic, often concealed in hard-to-reach areas. Collecting these not only unlocks special content but also contributes to earning trophies like Copper and Tin for the Win. Use your wits and exploration skills to locate them. Thoroughly search each environment, and don’t hesitate to revisit areas with new tools. Relics are key to 100% completion and add depth to Lara’s journey. Make sure to grab them all to fully experience the game’s secrets and achievements.

4.2 Golden Rewards: Unlocking Secret Content

Golden Rewards are rare collectibles in Tomb Raider: Legend, hidden in each level except the last. Collecting five of these unlocks the 5 Golden Things trophy. These rewards are often concealed in hard-to-reach areas, requiring precise jumps and exploration skills. Use Lara’s abilities, like grappling and climbing, to access hidden platforms. Each Golden Reward contributes to unlocking secret content, such as bonus materials or outfits. Thoroughly search every nook, and consider revisiting levels with new tools. Earning all Golden Rewards is essential for 100% completion and adds depth to the game’s lore and customization options.

Trophy-Specific Challenges

Conquer challenging trophies like “The Hard Way” by beating the game on Tomb Raider difficulty. Master specific feats to unlock rare achievements and showcase your skills.

5.1 Completing the Game on Tomb Raider Difficulty

Completing Tomb Raider: Legend on the hardest difficulty is a true test of skill. This challenge unlocks the “The Hard Way” trophy, requiring mastery of combat, stealth, and resource management. Start by upgrading your weapons early, as enemies are tougher and more aggressive. Use stealth wherever possible to conserve ammo and avoid unnecessary fights. Explore thoroughly to gather health packs and ammo, as they are scarce. Utilize Lara’s abilities, like the grappling hook, to outsmart foes. Practice enemy patterns and save frequently to minimize losses. Persevere, and you’ll unlock this prestigious trophy, along with access to new areas in Croft Manor and exclusive outfits.

Additional Resources and Walkthroughs

Check out recommended guides, videos, and community tips for Tomb Raider: Legend. These resources provide detailed strategies and locations for collectibles, ensuring you never miss a reward.

6.1 Recommended Guides and Videos

For a seamless journey to the platinum trophy, check out the detailed Tomb Raider: Legend trophy guide on PowerPyx and comprehensive walkthroughs on YouTube channels like PowerPyx. These resources offer step-by-step strategies for collectibles, combat, and puzzle-solving. Additionally, community-driven platforms like Reddit’s r/TombRaider and forums provide tips and insights from experienced players. Watch full game walkthroughs on Twitch and YouTube for visual guidance. Utilize these resources to ensure you don’t miss any hidden rewards or challenging achievements, making your path to 100% completion smooth and enjoyable.

tv guide charleston

Charleston TV Guide offers a comprehensive overview of television viewing options, including local channels, cable networks, and satellite services, catering to diverse viewer preferences in Charleston, SC.

1.1 Overview of Charleston’s Television Viewing Options

Charleston offers a diverse range of television viewing options, catering to various preferences and needs. Residents can access local broadcast channels, cable networks, and satellite services, ensuring a wide selection of programming. Over-the-air (OTA) TV provides free access to major networks like ABC, CBS, and NBC, while cable and satellite services offer premium channels and exclusive content. The city is also home to local stations such as WCIV ABC News 4 and WCSC CBS, delivering regional news, sports, and community updates. Additionally, Charleston’s TV lineup includes a mix of entertainment, sports, and weather coverage, making it a vibrant hub for both local and national programming.

1.2 Importance of Local TV Listings for Charleston Residents

Local TV listings play a crucial role in keeping Charleston residents informed and entertained. They provide up-to-date schedules for favorite shows, ensuring viewers never miss important broadcasts. Local listings highlight community events, sports games, and weather updates, which are vital for daily planning. Additionally, they offer insights into cultural programs and local news, fostering a sense of connection to the city. With options to access listings online, via mobile apps, or through traditional guides, Charleston residents can easily stay updated on their preferred programming, making local TV listings an indispensable resource for staying connected and engaged with their community.

Popular TV Channels in Charleston

Charleston’s popular TV channels include major networks like Live 5 News, CBS, ABC, and PBS, offering a mix of news, entertainment, and community-focused programming for residents.

2.1 Major Broadcast Networks in Charleston

Charleston’s major broadcast networks include WCIV ABC News 4, WCSC CBS, and Live 5 News, providing essential updates on local news, weather, and sports. These networks ensure residents stay informed about community events, traffic updates, and national news. Additionally, they offer a variety of entertainment programs, from popular TV shows to live events. Their coverage spans across Charleston and surrounding areas, making them indispensable for local viewers seeking reliable information and diverse programming options.

2.2 Cable and Satellite TV Providers in Charleston

Charleston’s cable and satellite TV providers offer extensive channel lineups, including AT&T U-verse and Charter Spectrum. These services provide access to popular networks, HD channels, and premium content. Residents can choose from various packages tailored to their viewing preferences, ensuring a wide range of entertainment options. Additionally, these providers often include features like DVR and on-demand services, enhancing the overall viewing experience. Their coverage ensures that Charleston viewers have access to both local and national programming, making them key players in the city’s television landscape.

TV Listings by Service Provider

Charleston TV listings are organized by service providers, including Over-the-Air, Cable, and Satellite TV, ensuring viewers can easily find schedules for their preferred channels and programs.

3;1 Over-the-Air (OTA) TV Listings

Over-the-Air (OTA) TV listings in Charleston provide free access to local broadcast channels, offering a variety of programming, including news, sports, and entertainment. Popular OTA channels like WCIV ABC News 4 and WCSC CBS deliver live updates on local events, weather, and sports. Viewers can enjoy shows such as Live 5 News and CBS Mornings without subscription fees. OTA listings are ideal for those preferring free, high-quality TV content, ensuring access to essential information and entertainment. With the use of a digital antenna, residents can easily tune into these channels, making OTA a cost-effective option for Charleston households.

3.2 Cable TV Listings

Cable TV listings in Charleston offer a wide range of channels and programs through providers like AT&T U-verse and Charter Spectrum. These services provide access to major networks, including ABC, CBS, and PBS, as well as premium cable channels. Viewers can enjoy local news from stations like WCIV ABC News 4 and WCSC CBS, along with popular shows and sports events. Cable listings also include HD options, ensuring high-quality viewing experiences. With features like on-demand content and DVR capabilities, cable TV in Charleston caters to diverse entertainment preferences. This makes it a popular choice for residents seeking extensive channel variety and advanced viewing options.

3.3 Satellite TV Listings

Satellite TV listings in Charleston provide extensive channel options through providers like DirecTV and DISH Network. These services offer access to local channels such as WCIV (ABC) and WCSC (CBS), as well as national networks and premium content. Viewers can enjoy HD broadcasts of popular shows, sports, and movies. Satellite TV also includes features like DVR capabilities and exclusive packages for sports enthusiasts. With a wide range of channels available, satellite TV is a flexible option for Charleston residents seeking diverse entertainment choices. This service is particularly popular for its reliability and extensive coverage, making it a strong alternative to cable and OTA options in the area.

Special Features and Local Programming

Charleston TV Guide features a variety of special programs, including Charleston-based shows, live local events, news, sports, and weather updates, as well as cultural and historical content.

4.1 Charleston-Based Shows and Events

Charleston-based shows captivate audiences with unique local charm, including Southern Charm on Bravo, highlighting the city’s elite and historic beauty. Local events like Lowcountry festivals and historical reenactments are also featured.

4.2 Sports and Weather Coverage in Charleston

Charleston’s sports enthusiasts enjoy extensive coverage of local teams and events, including college athletics and regional competitions. The city’s proximity to the coast also highlights water sports like sailing and beach volleyball. For weather updates, Charleston residents rely on accurate forecasts due to its subtropical climate, with hot summers and mild winters. Local news channels such as WCIV ABC News 4 and Live 5 News provide detailed weather reports, including hurricane alerts and storm tracking, essential for the coastal community. These updates ensure residents stay informed about conditions that could impact daily life and outdoor activities.

How to Access Charleston TV Listings

Access Charleston TV listings through online guides, mobile apps, or cable/satellite providers. Check schedules on websites like WCIV ABC News 4 or Live 5 News for updates.

5.1 Online TV Guides and Schedules

Online TV guides provide easy access to Charleston’s broadcast, cable, and satellite listings. Websites like WCIV ABC News 4 and Live 5 News offer detailed schedules, enabling users to plan viewing. Platforms such as Hulu and fuboTV also list local channels. Users can search by date, time, or program name, and filter by provider. Real-time updates ensure accuracy, while mobile apps allow on-the-go access. Features like reminders and favorites enhance convenience. Additionally, online guides often include descriptions and genre tags, helping viewers discover new shows. This convenience makes online TV guides a popular choice for Charleston residents seeking entertainment and local content.

5.2 Mobile Apps for TV Listings

Mobile apps offer a convenient way to access Charleston TV listings on the go. Popular apps like Live 5 News, Hulu, and fuboTV provide detailed schedules and real-time updates. Users can browse by channel, time, or program name, with personalized notifications for favorite shows. Many apps also integrate streaming capabilities, allowing direct access to content; Features like reminders and customizable watchlists enhance user experience. Additionally, apps often include exclusive content and behind-the-scenes footage. With mobile apps, Charleston residents can effortlessly stay updated on local and national programming, ensuring they never miss their favorite shows or events. This accessibility makes TV viewing more flexible and enjoyable.

resident evil 4 ps3 trophy guide

Resident Evil 4 features 12 trophies: 1 Gold‚ 2 Silver‚ and 9 Bronze․ The Platinum trophy requires completing all achievements‚ with a difficulty rating of 6-7/10 and an estimated 30-40 hours for completion․ Key trophies include “A Rock and a Hard Place” for defeating El Gigante and “Astute Appraiser” for selling items effectively․ Some achievements are missable‚ so careful planning is essential during the first playthrough․

Welcome to the Resident Evil 4 PS3 Trophy Guide! This guide is designed to help you unlock all 12 trophies in the game‚ including 1 Gold‚ 2 Silver‚ and 9 Bronze․ The trophies are evenly distributed across various challenges‚ from completing the story to achieving specific in-game feats․ The Platinum trophy‚ which requires earning all other trophies‚ is rated a 6-7/10 in difficulty and can be achieved in approximately 30-40 hours of gameplay․ Some trophies are missable‚ so careful planning is essential during your first playthrough․ Key achievements include defeating iconic bosses like El Gigante and mastering the game’s mechanics․ This guide will walk you through each trophy‚ providing tips and strategies to ensure you unlock them efficiently․ Whether you’re a seasoned trophy hunter or a casual player‚ this guide will help you navigate the challenges of Resident Evil 4 and earn the coveted Platinum trophy․

Platinum Trophy Overview

Earning the Platinum trophy in Resident Evil 4 on PS3 requires a significant time investment and skill․ With an estimated completion time of 30-40 hours‚ the Platinum trophy is challenging but achievable․ Rated 6-7/10 in difficulty‚ it involves completing all 12 trophies‚ including 1 Gold‚ 2 Silver‚ and 9 Bronze․ Key achievements include defeating El Gigante for “A Rock and a Hard Place” and mastering item appraisal for “Astute Appraiser․” Some trophies are missable‚ so careful planning during the first playthrough is crucial․ Completing the game on Normal difficulty and gathering all collectibles are essential steps․ Additional tips include avoiding certain actions that might skip trophies and utilizing the Merchant effectively for side quests․ With dedication and a strategic approach‚ you can unlock the Platinum trophy and showcase your mastery of Resident Evil 4․

Gold Trophies in Resident Evil 4

Resident Evil 4 on PS3 offers one Gold trophy‚ which is the most prestigious achievement in the game․ This trophy‚ often tied to completing the game under specific challenging conditions or achieving a high level of mastery‚ requires skill and dedication․ Players must ensure they meet all criteria without missing any essential steps‚ as some achievements are time-sensitive or dependent on specific actions․ Earning the Gold trophy not only showcases a player’s expertise but also brings them closer to the Platinum trophy․ With careful planning and thorough exploration of the game’s mechanics‚ players can unlock this prestigious award and demonstrate their proficiency in the survival horror classic․

Silver Trophies in Resident Evil 4

Resident Evil 4 on PS3 features two Silver trophies‚ which are mid-tier achievements that require specific actions or milestones․ These trophies add a layer of challenge and encourage players to explore different aspects of the game․ One Silver trophy involves defeating a set number of enemies without taking damage‚ while another may require completing a particular chapter within a time limit․ Earning these trophies not only enhances your gaming experience but also contributes to your overall progress toward the Platinum trophy․ Players should focus on understanding the game’s mechanics and optimizing their strategies to unlock these achievements efficiently․ With persistence and a clear understanding of the requirements‚ obtaining the Silver trophies can be both rewarding and enjoyable‚ enhancing your journey through the world of Resident Evil 4․

Bronze Trophies in Resident Evil 4

Resident Evil 4 on PS3 offers nine Bronze trophies‚ each representing various achievements that players can unlock throughout the game․ These trophies are designed to be more accessible than Silver or Gold ones‚ often tied to specific actions or story milestones․ For instance‚ one Bronze trophy is awarded for ringing the mysterious bell in the village‚ while another is unlocked by summoning the lake’s master․ These achievements encourage players to explore different aspects of the game‚ such as interacting with the environment or completing specific tasks․ Earning Bronze trophies not only adds to your collection but also enhances your overall gaming experience․ With careful exploration and attention to detail‚ players can efficiently unlock these trophies‚ contributing to their journey toward the Platinum trophy․ The Bronze trophies serve as a foundation for your achievement progress in Resident Evil 4‚ making every accomplishment feel rewarding and worthwhile․

Missable Trophies and How to Avoid Them

Several trophies in Resident Evil 4 are considered missable‚ meaning they can be easily overlooked during a single playthrough․ One notable example is the “Never Heard It Coming” trophy‚ which requires defeating a Garrador without triggering its alert․ This achievement demands precise strategy and stealth‚ as startling the Garrador will void the trophy․ Another missable trophy is “In Tune with the Harpoon‚” which involves defeating a specific enemy with a harpoon gun under certain conditions․ To avoid missing these‚ players should thoroughly explore each chapter‚ interact with environmental objects‚ and complete side objectives․ Additionally‚ some trophies tied to Merchant requests must be fulfilled by specific points in the game; failing to do so may require a second playthrough․ By following a detailed guide and keeping track of progress‚ players can ensure they unlock all missable trophies efficiently‚ preventing the need for multiple retries and streamlining their path to the Platinum trophy․

Collectibles Guide: Finding All Clockwork Castellans

Finding all Clockwork Castellans in Resident Evil 4 is essential for unlocking specific rewards and achievements․ These hidden mechanisms are scattered throughout the game’s environments‚ often in hard-to-reach or concealed areas․ To locate them‚ players must thoroughly explore each level‚ examining walls‚ ceilings‚ and interactive objects․ For instance‚ in the Village‚ one Clockwork Castellan is hidden behind a destructible wall near the waterwheel․ In the Castle‚ another can be found in a secret room accessible by solving a puzzle in the library․ A systematic approach is recommended‚ as missing even one can prevent unlocking related trophies․ Using a detailed map or guide can help ensure all 16 Castellans are discovered․ Once all are found and destroyed‚ players are rewarded with exclusive items‚ including the “Handcannon‚” a powerful weapon that simplifies later challenges․ This step is crucial for progression and enhances the overall gameplay experience‚ making it a high-priority task for trophy hunters aiming for the Platinum trophy․ Destroying all Clockwork Castellans also provides a sense of accomplishment and completion‚ ensuring players maximize their in-game achievements․

Merchant Requests and Jack of All Trades Trophy

Completing Merchant Requests is a key part of achieving the “Jack of All Trades” trophy in Resident Evil 4․ The Merchant offers various tasks that require players to sell specific items or combinations of items․ These requests become available as players progress through the game‚ particularly after entering the Castle in Chapter 9․ To unlock the trophy‚ players must fulfill all of the Merchant’s requests‚ which include selling rare items like the “Royal Insignia” and combining items to create valuable treasures․ It’s important to manage inventory space and prioritize which items to keep for these requests․ Selling items in the correct order can maximize profit and ensure all requirements are met․ Missing any request can prevent unlocking the trophy‚ so careful planning and attention to detail are essential․ By systematically completing each task‚ players can earn this bronze trophy and move one step closer to the Platinum․ Organize your item collection and stay vigilant to avoid missing any opportunities during your playthrough․

El Gigante Boss Guide for “A Rock and a Hard Place” Trophy

El Gigante‚ the towering and relentless boss‚ is one of the most challenging encounters in Resident Evil 4․ To unlock the “A Rock and a Hard Place” trophy‚ players must successfully outmaneuver and defeat this massive foe․ The first encounter with El Gigante occurs in the Village section of the game‚ where players are armed with limited ammo and resources․ The key to success lies in staying mobile and avoiding his powerful grabs and ground pounds․ Use the environment to your advantage by luring El Gigante into traps like the bear trap or by exploiting his momentary stunned state after attacks․ Conserve ammo by targeting his weak points and utilizing melee attacks when safe․ Additionally‚ be prepared for subsequent encounters with El Gigante later in the game‚ as they become even more aggressive․ With careful strategy and quick reflexes‚ players can triumph over this formidable enemy and earn the trophy․

Tips for Earning the “Astute Appraiser” Trophy

Earning the “Astute Appraiser” trophy in Resident Evil 4 requires players to sell a single item for at least 10‚000 Pesetas․ This achievement is tied to the game’s economy and item combination system․ To unlock it‚ focus on discovering valuable treasure combinations by experimenting with items in your inventory․ For example‚ combining the “Royal Insignia” with the “Crown” and “Crown Jewel” yields a significant profit․ Additionally‚ purchasing items from the Merchant and selling them at higher prices can also contribute to this trophy․ Timing is crucial; sell items when their value is highest to maximize returns․ Ensure you explore every nook and cranny to find rare treasures and complete all Merchant requests‚ as these often provide high-value items․ By strategically managing your inventory and making smart sales‚ you can efficiently unlock the “Astute Appraiser” trophy and enhance your progress toward the Platinum․

Unlocking the “Never Heard It Coming” Achievement

The “Never Heard It Coming” achievement in Resident Evil 4 requires players to defeat a Garrador without triggering its pursuit․ This achievement is tied to stealth and careful navigation․ To unlock it‚ encounter the Garrador during Chapter 7‚ after meeting with Ramon Salazar․ Equipping the Infrared Scope for the Rifle is crucial‚ as it allows you to spot and avoid deadly laser beams․ Move silently by crouching and avoid breaking nearby objects or stepping on noisy floors․ Use explosive barrels or precise shots to defeat the Garrador quietly․ If it spots you‚ reload the checkpoint to try again․ Completing this achievement rewards players with a Bronze trophy and brings them closer to the Platinum․ Patience and precision are key‚ so take your time and plan your approach carefully․

Trophy Roadmap and Estimated Completion Time

Earning the Platinum trophy in Resident Evil 4 requires a strategic approach․ The estimated completion time is 30-40 hours‚ with a difficulty rating of 6-7/10․ Start by completing the game on Normal difficulty‚ focusing on story progression and miscellaneous trophies like “It Begins With a Ring” and “A Rock and a Hard Place․” During this playthrough‚ collect all Clockwork Castellans and complete Merchant requests for the “Jack of All Trades” trophy․ On subsequent playthroughs‚ aim for collectibles and missable achievements․ The “Astute Appraiser” trophy can be unlocked by selling specific item combinations․ Completing Mercenaries Mode and achieving S-Ranks on maps will also contribute to your progress․ Plan your playthroughs wisely‚ as some trophies require specific actions or item management․ With dedication and careful planning‚ you can unlock all 12 trophies and achieve the Platinum․

Final Tips for Achieving the Platinum Trophy

Achieving the Platinum trophy in Resident Evil 4 requires patience‚ persistence‚ and a well-organized approach․ Start by completing the game on Normal difficulty‚ focusing on story progression and unlocking the majority of trophies naturally․ Use your first playthrough to collect missable trophies like “A Rock and a Hard Place” and “It Begins With a Ring․” On subsequent playthroughs‚ prioritize collectibles‚ such as the Clockwork Castellans‚ and complete Merchant requests for the “Jack of All Trades” trophy․ Don’t overlook the “Astute Appraiser” trophy‚ which requires selling specific item combinations․ Additionally‚ mastering Mercenaries Mode and earning S-Ranks on all maps will significantly contribute to your progress․ Keep track of your achievements and plan your playthroughs strategically to avoid missing any trophies․ With careful planning and dedication‚ you’ll unlock the Platinum trophy and experience everything Resident Evil 4 has to offer․

honeywell 9000 thermostat user manual

Welcome to the Honeywell 9000 Thermostat, a cutting-edge, Wi-Fi-enabled, color touchscreen device designed for smart home comfort and energy efficiency․ This guide helps you maximize its features․

1․1 Overview of the Honeywell 9000 Thermostat

The Honeywell 9000 Thermostat is a Wi-Fi-enabled, color touchscreen device offering advanced temperature control․ It allows remote monitoring and adjustment of your HVAC system via the internet․ Features include schedule setting, email alerts, and automatic software updates․ It also integrates with outdoor weather conditions for enhanced functionality․ Designed for energy efficiency and smart home integration, this thermostat provides a seamless and convenient user experience․

1․2 Key Features and Benefits

The Honeywell 9000 Thermostat boasts a color touchscreen interface, Wi-Fi connectivity, and remote access via the internet․ It offers customizable schedules, energy usage reports, and geofencing for location-based automation; Additionally, it provides humidity control, fan settings, and integration with outdoor weather data․ These features promote energy efficiency, convenience, and smart home compatibility, making it an ideal choice for modern households seeking advanced temperature management․

Installation and Setup

The Honeywell 9000 Thermostat installation is straightforward, requiring wiring setup and physical mounting․ Follow the manual for step-by-step guidance to ensure proper functionality and safe operation․

2․1 Physical Installation Steps

Begin by turning off the power to your HVAC system․ Remove the old thermostat and take note of the wiring connections․ Mount the new Honeywell 9000 Thermostat base plate, ensuring it is level․ Drill holes if necessary and secure with provided screws․ Attach the wires to the corresponding terminals, following the wiring guide․ Finally, snap the thermostat onto the base plate and restore power․ Always follow safety precautions during installation․

2․2 Wiring Instructions and Requirements

Ensure the HVAC system is powered off before wiring․ Match the wires to the correct terminals on the Honeywell 9000 Thermostat, referring to the wiring guide․ Use a screwdriver to secure the wires tightly; Verify compatibility with your HVAC system, typically requiring a 24V AC power supply․ If unsure, consult a professional․ Always follow safety guidelines to avoid electrical issues․ Proper wiring ensures optimal performance and functionality of the thermostat․

2․3 Initial Setup and Configuration

Power on the thermostat and follow the on-screen prompts․ Select your preferred language and system type․ Choose your HVAC configuration (e․g․, heat pump, gas furnace)․ Set your location and preferences for temperature units (Fahrenheit or Celsius)․ Connect to your Wi-Fi network for remote access․ Register your thermostat to enable advanced features․ Finally, set your initial temperature and schedule to start using the device effectively․

User Interface and Navigation

The Honeywell 9000 features a vibrant color touchscreen, offering an intuitive interface for easy navigation․ Adjust temperature, schedules, and settings with a few taps, enjoying a seamless experience․

3․1 Navigating the Color Touchscreen

The Honeywell 9000’s color touchscreen offers a user-friendly interface․ Slide between screens for quick access to temperature, schedules, and settings․ Tap menu icons to adjust comfort levels or view system status; The vibrant display provides clear visuals, while intuitive controls make navigation effortless․ Use the touchscreen to explore features like fan settings, energy reports, and smart home integrations, ensuring a seamless experience tailored to your needs․

3․2 Customizing the Home Screen

Personalize your Honeywell 9000’s home screen to suit your preferences․ Add shortcuts for frequently used settings like temperature adjustment or fan control․ Rearrange icons or hide unused options for a cleaner interface․ Choose from various themes or brightness levels to match your home decor․ Customization ensures quick access to essential features, enhancing your user experience and making thermostat operation more convenient and tailored to your lifestyle․

Smart Home Integration

The Honeywell 9000 Thermostat seamlessly integrates into smart home systems, enabling remote monitoring and control through internet connectivity․ This feature enhances energy efficiency and user convenience significantly․

4․1 Connecting to Wi-Fi

To connect your Honeywell 9000 Thermostat to Wi-Fi, navigate to the menu, select Wi-Fi setup, and choose your network․ Enter the password when prompted․ If the thermostat doesn’t prompt for Wi-Fi connection, manually access the Wi-Fi setup option․ Ensure your router is nearby for a stable connection․ Once connected, you can access remote features and receive updates․ Refer to the user manual for troubleshooting connectivity issues․

4․2 Remote Access and Control via Internet

With the Honeywell 9000 Thermostat, enjoy seamless remote access and control through the internet․ Using the Honeywell Home app, monitor and adjust temperature settings, schedules, and system modes from anywhere․ Receive email alerts for system changes or issues․ Ensure your thermostat is registered and connected to Wi-Fi for full remote functionality, allowing you to manage your home comfort and energy usage effortlessly, even when you’re not at home․

Scheduling and Automation

Set custom schedules for your preferred temperatures throughout the day․ Enable geofencing to automatically adjust settings based on your location, optimizing comfort and energy efficiency seamlessly․

5․1 Creating and Managing Schedules

Navigate to the schedule section on the touchscreen to create custom temperature settings for different times of the day․ Set up to six daily periods, adjusting the temperature, fan, and system mode․ Use the pre-set templates or customize your own for optimal comfort․ Easily edit or override schedules as needed, ensuring energy efficiency and personalized comfort․ Geofencing integration allows automatic adjustments based on your location, enhancing smart home automation․

5․2 Geofencing and Location-Based Automation

Enable geofencing to automatically adjust your thermostat based on your location․ Set a radius around your home, and the thermostat will switch to energy-saving mode when you leave and resume comfort settings as you return․ This feature integrates seamlessly with your smartphone’s location services, optimizing energy efficiency without manual adjustments․ Customize the radius and preferences in the app for a tailored experience․

Energy Efficiency and Savings

The Honeywell 9000 Thermostat offers advanced energy-saving modes and settings to reduce consumption․ Monitor energy usage reports to optimize efficiency and lower utility bills effectively․

6․1 Energy-Saving Modes and Settings

The Honeywell 9000 Thermostat features advanced energy-saving modes, including Smart Recovery and Eco Mode, designed to optimize heating and cooling usage․ These settings help reduce energy consumption by learning your schedule and preferences․ The thermostat also supports geofencing, adjusting temperatures based on your location․ Additionally, it offers customizable energy reports to track usage and identify savings opportunities, ensuring your system operates efficiently while maintaining comfort․

6․2 Monitoring Energy Usage and Reports

The Honeywell 9000 Thermostat provides detailed energy usage reports, accessible via the touchscreen or the Honeywell Home app․ These reports offer insights into your heating and cooling consumption, helping you identify trends and opportunities to save energy․ Customizable alerts notify you of unusual usage patterns, enabling proactive adjustments․ Historical data is stored for up to 12 months, allowing you to track your progress and refine your energy-saving strategies effectively․

Advanced Features

The Honeywell 9000 Thermostat offers advanced features like smart fan operation, humidity control, and geofencing, enhancing comfort and efficiency․ These features work seamlessly with smart home systems․

7․1 Fan Settings and Air Circulation

The Honeywell 9000 Thermostat features advanced fan settings for optimal air circulation․ Users can adjust fan speed manually or set automatic modes to improve indoor air quality and reduce energy use․ The thermostat also supports smart circulation, which runs the fan briefly to ensure even temperature distribution․ Additionally, the fan can be programmed to run continuously for enhanced comfort․ These settings are accessible via the touchscreen or remote internet control, making it easy to customize your home’s airflow․ The system integrates seamlessly with smart home devices for a unified experience․

7․2 Humidity Control and Outdoor Weather Integration

The Honeywell 9000 Thermostat offers advanced humidity control, ensuring balanced indoor air quality․ It integrates with outdoor weather data via Wi-Fi, allowing you to monitor temperature and humidity levels․ This feature enables smart adjustments to your heating and cooling system․ The thermostat can automatically optimize settings based on outdoor conditions, enhancing comfort and energy efficiency․ Customizable alerts for humidity levels are also available, providing greater control over your home environment․

Maintenance and Troubleshooting

Regular maintenance and troubleshooting ensure optimal performance of your Honeywell 9000 Thermostat․ This section provides solutions for common issues and tips to keep your system running smoothly․

8․1 Common Issues and Solutions

  • Connection Issues: Restart the thermostat and ensure stable Wi-Fi connectivity․
  • Display Malfunction: Power cycle the device or reset settings to factory defaults․
  • Temperature Inaccuracy: Recalibrate the thermostat for precise readings․
  • System Response Delay: Check wiring connections and update software if available․

8․2 Air Filter Maintenance and Alerts

The Honeywell 9000 Thermostat includes air filter maintenance alerts to ensure optimal performance․ Replace the air filter every 1-3 months or as indicated by the alert․ Clean filters improve airflow, reduce energy costs, and extend system lifespan․ Set reminders through the thermostat or app for timely replacements․ Neglecting filter maintenance may lead to poor system performance and increased energy consumption․

Registration and Updates

Register your Honeywell 9000 Thermostat to access online features and receive important software updates․ Visit Honeywell’s website or use the app to complete registration and enable remote control․

9․1 Registering Your Thermostat

Registering your Honeywell 9000 Thermostat is essential to unlock remote access and updates․ Visit Honeywell’s official website or use the Honeywell Home app to create an account․ Follow the on-screen instructions to link your thermostat to your account․ Ensure your thermostat is connected to Wi-Fi during registration․ Once registered, you can monitor and control your thermostat remotely, receive notifications, and access the latest software updates for optimal performance․

9․2 Receiving Software Updates

Your Honeywell 9000 Thermostat automatically checks for software updates when connected to Wi-Fi․ Updates are downloaded and installed in the background, enhancing features and performance․ Ensure your thermostat is registered and linked to your Honeywell Home account to receive notifications for updates․ A stable internet connection is required for seamless updates․ Regular updates ensure your thermostat stays optimized, secure, and equipped with the latest advancements in smart home technology․

Safety Precautions

Always follow safety guidelines when installing or using the Honeywell 9000 Thermostat․ Avoid electrical hazards, ensure proper wiring, and keep the device out of reach of children․ Follow the manufacturer’s instructions carefully to prevent damage or injury․

10․1 Safety Guidelines for Installation and Use

Always turn off power at the circuit breaker before installing the Honeywell 9000 Thermostat․ Avoid exposing the device to water or extreme temperatures․ Use proper wiring techniques to prevent electrical hazards․ Keep the thermostat out of reach of children․ Follow all safety instructions provided in the manual to ensure safe operation and avoid potential risks․ Regularly inspect the device for damage and address any issues promptly․

Technical Specifications

The Honeywell 9000 Thermostat features a color touchscreen, Wi-Fi connectivity, and compatibility with most HVAC systems․ It supports stages of heating and cooling for precise temperature control․

11․1 Compatibility and System Requirements

The Honeywell 9000 Thermostat is compatible with most HVAC systems, including gas, oil, electric, and heat pumps․ It supports up to 3 stages of heating and 2 stages of cooling․ Requires a 24V AC power supply and a common wire (C-wire) for Wi-Fi functionality․ Works with single or dual transformer systems and supports humidifiers, dehumidifiers, and ventilation systems․ Ensure compatibility with your specific HVAC setup before installation for optimal performance․

Warranty and Support

The Honeywell 9000 Thermostat comes with a limited warranty and offers extensive support options, including online resources and customer service for troubleshooting and repairs․

12․1 Warranty Information

The Honeywell 9000 Thermostat is backed by a limited warranty, typically covering parts and labor for a specified period․ Registration is required to validate the warranty․ The warranty period varies by region and product, ensuring protection against defects in materials and workmanship․ For detailed terms, refer to the official Honeywell website or contact customer support at Honeywell Home or call 1-800-645-7490․

12․2 Contacting Honeywell Support

For assistance with your Honeywell 9000 Thermostat, visit the official Honeywell Home website․ Contact support via phone at 1-800-645-7490 or email through their online portal․ Live chat is also available for quick inquiries․ For troubleshooting, refer to the user manual or explore the FAQs section․ Representatives are available 24/7 to address your concerns and provide solutions․

The Honeywell 9000 Thermostat offers a blend of smart features, energy efficiency, and user-friendly design, making it an excellent choice for modern homes․ With its color touchscreen, Wi-Fi connectivity, and advanced automation, it simplifies temperature control while saving energy․ By following this guide, you can fully utilize its capabilities, ensuring comfort and convenience․ For further assistance, Honeywell’s support resources are always available to help you get the most out of your thermostat․

jesus storybook bible advent pdf

Celebrate the Advent season with the Jesus Storybook Bible Advent Plan, a 24-day guide to prepare your heart for Christmas. This thoughtful plan pairs daily readings from the beloved Jesus Storybook Bible with meaningful activities, crafts, and reflections, helping families discover the true meaning of Advent. Each day builds anticipation, tracing God’s rescue plan from creation to Jesus’ birth, making it a joyful and spiritually enriching experience for all ages.

Overview of the Advent Season and Its Significance

Advent is a sacred season of preparation and anticipation, marking the four Sundays leading up to Christmas. It symbolizes the wait for Jesus’ birth and His ultimate return, blending joy and reflection. The term “Advent” means “coming,” emphasizing the celebration of Jesus’ arrival and His redemption. Families worldwide observe Advent with calendars, wreaths, and devotionals to focus on prayer, giving, and hope. The Jesus Storybook Bible Advent Plan aligns with this tradition, offering a 24-day journey through Scripture, from creation to the Nativity, highlighting God’s rescue plan. This period fosters spiritual renewal and unity, guiding hearts to embrace the true meaning of Christmas—God’s love incarnate in Jesus. By exploring these stories, families deepen their faith and anticipation, making Advent a meaningful and transformative experience.

Understanding the Jesus Storybook Bible

The Jesus Storybook Bible is a beloved children’s Bible that shares the Gospel through engaging stories and vibrant illustrations. Authored by Sally Lloyd-Jones, it weaves Old and New Testament narratives into one cohesive story, revealing Jesus as the thread connecting all of Scripture. Each story highlights God’s love and redemption plan, making it accessible for children while resonating with adults. This Bible is celebrated for its ability to present complex theological concepts in a simple, heartfelt manner. It serves as the perfect companion for the Advent season, offering a clear and compelling narrative of God’s promises fulfilled in Jesus. The Jesus Storybook Bible Advent Plan pairs beautifully with this resource, guiding families through a 24-day journey of reflection and celebration.

Daily Reading Plan for Advent

The Jesus Storybook Bible Advent Plan offers a 24-day reading journey, starting December 1 with “The Story and the Song,” guiding families to Christmas through meaningful Bible stories.

December 1: The Story and the Song

Begin your Advent journey with “The Story and the Song,” a captivating introduction to the Jesus Storybook Bible Advent Plan. This first day sets the tone, exploring the grand narrative of God’s love and redemption. Through beautiful storytelling, the chapter highlights the central theme of Advent: anticipation and preparation for Jesus’ arrival. Families are encouraged to reflect on how the story of creation and the promise of a Savior lay the foundation for Christmas. The accompanying activities and prayers help deepen understanding and foster meaningful conversations. This opening day reminds us that Christmas is not just a celebration but a story of God’s heart, inviting everyone to be part of His great rescue plan. A perfect start to a meaningful Advent season.

December 2: The Song of Creation

On December 2, the Advent journey continues with “The Song of Creation,” a beautiful exploration of God’s magnificent act of bringing the world into being. This story highlights the wonder of creation, emphasizing how every part of the world reflects God’s love and perfection. The chapter invites families to marvel at the beauty of God’s design and understand the significance of creation in the larger story of redemption. Activities and reflections from the Jesus Storybook Bible Advent PDF encourage children and parents to discuss God’s creativity and His plan for humanity. This day reminds us that Christmas is deeply rooted in the story of creation, where God first revealed His heart of love and rescue. It’s a powerful reminder of how creation points to the ultimate gift of Jesus.

December 3: The Terrible Lie

On December 3, the Advent journey explores “The Terrible Lie,” a pivotal story in the Jesus Storybook Bible that reveals the moment humanity turned away from God. This chapter recounts the Garden of Eden, where Adam and Eve believed Satan’s deceit, leading to sin entering the world. The story emphasizes the brokenness that resulted from this lie and the deep sorrow it brought to God’s heart. Yet, even in this darkness, the seeds of God’s rescue plan are sown. The Jesus Storybook Bible Advent PDF provides reflections and activities to help families understand the significance of this event and how it points to the ultimate redemption through Jesus. This day invites us to reflect on the consequences of sin and the beginning of God’s promise to restore His relationship with humanity.

December 4: A New Beginning

December 4 focuses on “A New Beginning,” a story of hope and renewal from the Jesus Storybook Bible. This chapter recounts the story of Noah, a man who trusted God despite the wickedness of the world. God, seeing Noah’s faithfulness, instructed him to build an ark to save his family and two of every kind of animal. The flood that followed cleansed the earth, and after the waters receded, God made a covenant with Noah, symbolized by the rainbow. This story highlights God’s mercy and promise of a fresh start. The Jesus Storybook Bible Advent PDF includes reflections and activities to explore this narrative, helping families connect Noah’s story to the larger narrative of God’s rescue plan. It invites us to reflect on the hope of new beginnings and the faithfulness of God, even in challenging times.

December 5: A Giant Staircase to Heaven

December 5 explores the story of the Tower of Babel, a powerful narrative from the Jesus Storybook Bible. This account reveals humanity’s pride and ambition as they attempted to build a staircase to heaven, showcasing their desire to reach God through their own efforts. God, however, saw the arrogance in their hearts and confounded their language, scattering the people across the earth. This story underscores the consequences of pride and the need for humility. The Advent PDF provides reflections and activities to delve into this story, helping families understand the deeper theme of human rebellion and God’s response. It invites us to reflect on our own hearts and the ultimate rescue plan God would unfold through Jesus, emphasizing the need for humility and trust in His divine plan.

December 6: Son of Laughter

December 6 focuses on the story of Isaac, the promised son of Abraham and Sarah, a narrative filled with joy and fulfillment. The Jesus Storybook Bible highlights how God’s promise of a child brought laughter and delight to a couple who had long awaited a family. Despite their initial doubt, God’s faithfulness shone through, reminding us that His timing and plans are perfect. This story connects to the Advent theme of waiting and trusting in God’s promises, even when they seem impossible. The Advent PDF includes reflections and activities to explore this story, helping families grasp the deeper meaning of God’s faithfulness and the joy of His rescue plan, which ultimately points to Jesus.

December 7: The Present

December 7 explores the story of Moses and the bronze snake, a powerful symbol of God’s mercy and healing. The Jesus Storybook Bible reveals how the Israelites, bitten by venomous snakes, were saved by looking upon the bronze serpent Moses lifted up. This story foreshadows Jesus, who would later say, “And as Moses lifted up the serpent in the wilderness, so must the Son of Man be lifted up” (John 3:14). The Advent PDF includes reflections and activities to help families connect this Old Testament story to the coming of Jesus, emphasizing the theme of salvation and healing. This day’s reading invites families to reflect on God’s faithfulness and the ultimate gift of Jesus, whose arrival Advent anticipates. The story reminds us of the profound truth that looking to Jesus brings life and redemption.

December 8: The Girl No One Wanted

December 8 focuses on the story of Leah, a woman who felt unloved and unwanted, yet found her worth in God’s plan. The Jesus Storybook Bible shares how Leah, though overshadowed by her sister Rachel, experienced God’s faithfulness. Despite feeling unseen, Leah became a mother to important tribes of Israel, showing God’s love for the overlooked. This story ties into Advent’s theme of God’s rescue plan, highlighting how He values those who feel marginalized. The Advent PDF provides reflections and activities to explore Leah’s journey, helping families connect her story to the coming of Jesus. This day’s reading invites gratitude for God’s love and anticipation of His gift to the world—Jesus, who brings hope to all who feel unwanted.

Additional Resources and Activities

Enhance your Advent journey with the Jesus Storybook Bible Advent Activity Book, featuring crafts, recipes, and reflections. Jesse Tree ornaments and family traditions deepen the experience, fostering meaningful connections and spiritual growth as you prepare for Christmas.

Advent Activity Book and Crafts

The Jesus Storybook Bible Advent Activity Book is a vibrant companion to your Advent journey, offering 24 days of engaging recipes, crafts, and family-friendly activities. Each day aligns with the corresponding story from the Jesus Storybook Bible, creating a hands-on experience to deepen understanding and excitement. From decorating Jesse Tree ornaments to cooking festive treats, these activities bring the biblical narrative to life. Printable resources and crafts are designed to be simple yet meaningful, allowing families to reflect on God’s rescue plan. The Activity Book also includes devotionals and prayers, making it a comprehensive tool for spiritual growth and celebration. Perfect for children and adults alike, it transforms Advent into a season of joy, learning, and connection, all while preparing hearts for the true meaning of Christmas.

Jesse Tree Ornaments and Their Meaning

The Jesse Tree ornaments are a cherished part of the Advent tradition, symbolizing the lineage of Jesus and God’s great rescue plan. Each ornament represents a key figure or event from the Old Testament to the birth of Christ, creating a visual timeline of salvation history. Families place one ornament on the tree each day, retelling the stories from the Jesus Storybook Bible and connecting them to the Messiah’s arrival. The ornaments are often handcrafted or printed, with symbols like the apple for Adam and Eve or the ladder for Jacob’s dream. This meaningful practice helps children and adults alike trace God’s faithfulness through generations, fostering a deeper understanding of the gospel story. As the tree fills, it becomes a beautiful reminder of how every story points to Jesus, the ultimate gift of Advent.

Family Traditions and Celebrations

Family traditions and celebrations during Advent create lasting memories and deepen the spiritual journey. Many families incorporate the Jesus Storybook Bible into their daily rituals, reading together by candlelight or sharing reflections around the dinner table. Activities like baking Christmas cookies, singing carols, or crafting handmade decorations are paired with the Advent reading plan, blending faith and joy. Parents can use the provided crafts and recipes from the Advent Activity Book to engage children, teaching them the significance of each tradition. These practices not only strengthen family bonds but also help children understand the true meaning of Christmas. By combining storytelling, prayer, and festive activities, families can create a Christ-centered celebration that honors the birth of Jesus and fosters a sense of anticipation and gratitude throughout the season.

The Jesus Storybook Bible Advent Plan offers a meaningful journey through Advent, helping families reflect on God’s love and prepare for Christmas with joy and gratitude.

Reflections on the Advent Journey

The Jesus Storybook Bible Advent Plan invites families to embark on a transformative journey, reflecting on God’s love and redemption through daily stories and activities. Each day’s reading and craft deepen understanding of the Nativity’s significance, fostering a sense of anticipation and hope. As families trace God’s rescue plan from creation to Jesus’ birth, the true meaning of Advent shines through. This journey not only enriches faith but also creates lasting memories, encouraging prayer and gratitude. By focusing on the heart of God’s story, the Advent Plan becomes a powerful tool for spiritual growth and celebration, preparing hearts for the joy of Christmas.

Preparing for Christmas with the Jesus Storybook Bible

Prepare your heart and home for Christmas with the Jesus Storybook Bible Advent Plan, a meaningful way to focus on the true meaning of the season. This 24-day journey guides families through the Bible’s overarching narrative, from creation to the birth of Jesus, emphasizing God’s rescue plan. Each day’s reading, paired with thoughtful activities and reflections, helps children and adults alike connect with the story of Jesus. The accompanying Advent Activity Book offers crafts, songs, and traditions to enrich your celebration. As you explore the stories, prayers, and questions provided, your family will deepen its understanding of God’s love and the significance of Advent. This plan ensures that the season is not just about presents but about preparing your heart to welcome Jesus anew.

rinnai portable air conditioner manual

Welcome to the Rinnai Portable Air Conditioner manual. This guide provides essential information for safe and efficient operation, ensuring optimal performance and user satisfaction.

1.1 Overview of the Rinnai Portable Air Conditioner

The Rinnai Portable Air Conditioner is a versatile cooling solution designed for efficient room climate control. Models like RPC35WA and RPC41WA offer cooling, dehumidifying, and fan functions, ensuring comfort in various spaces. Equipped with a remote control and timer, it provides convenient operation, allowing users to customize settings effortlessly for optimal performance and energy efficiency.

1.2 Importance of Reading the Manual

Reading the manual is crucial for understanding the Rinnai Portable Air Conditioner’s features, safe installation, and proper operation. It ensures users grasp essential safety precautions, maintenance tips, and troubleshooting steps, preventing potential malfunctions or damage. Failure to follow instructions can lead to equipment issues, personal injury, or property damage, making this guide indispensable for optimal performance and user safety.

Safety Precautions and Warnings

Always follow safety guidelines to avoid hazards. Ensure proper installation, use on stable surfaces, and keep the unit away from flammable materials. Failure to comply may result in injury or damage.

2.1 General Safety Guidelines

Always read and follow the manual carefully. Ensure the unit is placed on a stable, level surface and keep it away from flammable materials. Avoid exposing the air conditioner to direct water contact. Only authorized personnel should perform repairs; Properly ventilate the room and follow all manufacturer instructions to ensure safe operation and prevent potential hazards.

2.2 Electrical Safety Considerations

Always adhere to electrical safety guidelines when operating your Rinnai Portable Air Conditioner. Use a dedicated, grounded power outlet and avoid extension cords. Ensure the unit matches the voltage rating of your power supply. Keep electrical components away from water to prevent shocks or malfunctions. Only qualified technicians should perform repairs to maintain safety and compliance.

2.3 Proper Installation and Usage Warnings

Ensure the air conditioner is installed on a stable, level surface and properly vented to avoid performance issues. Always follow the manufacturer’s instructions for installation. Avoid tilting the unit, as this can cause water leakage or damage. Use the unit only in well-ventilated areas and never modify its components. Proper installation by a qualified person is recommended if unsure.

Installation and Setup

Proper installation ensures efficient performance. Place the unit on a stable surface, ensure correct ventilation, and follow manufacturer guidelines for setup. Adhere to all safety instructions.

3.1 Unpacking and Preparation

Unpack the Rinnai portable air conditioner carefully, ensuring all components are included and undamaged. Place the unit upright on a stable, level surface. Remove all packaging materials and prepare the area for installation. Ensure the unit is positioned correctly before proceeding with any setup or operation. Follow all safety guidelines provided in the manual.

3.2 Ventilation Requirements

Proper ventilation is essential for the Rinnai portable air conditioner to function efficiently. Ensure the unit is placed in a well-ventilated area, and use the provided exhaust hose to vent hot air outside. Avoid obstructing the air intake or outlet. Maintain adequate airflow to prevent overheating and ensure optimal cooling performance. Follow the manual’s ventilation guidelines strictly.

3.3 Positioning the Unit for Optimal Performance

Position the Rinnai portable air conditioner on a stable, level surface away from direct sunlight and heat sources. Ensure adequate space around the unit for proper airflow. Place the exhaust hose near a window or vent to expel hot air efficiently. Avoid blocking the air intake or outlet to maintain optimal cooling performance and energy efficiency.

Operating the Rinnai Portable Air Conditioner

Press the ON/OFF button to power on the unit. Use the remote control to adjust temperature, fan speed, and operation modes. This section provides a comprehensive guide for smooth operation.

4.1 Basic Functions and Controls

The Rinnai Portable Air Conditioner features straightforward controls, including power, temperature adjustment, fan speed, and mode selection. Use the remote control or unit buttons to activate cooling, fan, or dehumidify modes. The display screen shows current settings, ensuring easy operation. Press the ON/OFF button to start or stop the unit, and adjust settings as needed for comfort.

4.2 Using the Remote Control

Operate your Rinnai Portable Air Conditioner effortlessly with the remote control. Press the ON/OFF button to power the unit. Use the temperature adjustment buttons to set your desired temperature. Select modes like Cool, Fan, or Dry using the mode button. Adjust fan speed with the corresponding buttons. The remote also allows timer and sleep mode activation for added convenience.

4.3 Adjusting Temperature and Modes

Adjust the temperature using the remote control’s temperature adjustment buttons. Select modes such as Cool, Fan, or Dry to suit your needs. Use the mode button to cycle through options. The remote also allows switching between Celsius and Fahrenheit. Adjust fan speed for customized airflow. Ensure optimal comfort by precisely controlling temperature and mode settings with ease.

4;4 Timer and Sleep Mode Features

Set the timer to turn the unit on or off within a 24-hour period for energy efficiency. Activate sleep mode to automatically adjust temperature and reduce noise. The timer ensures convenient operation, while sleep mode enhances comfort during rest. Use these features to optimize energy usage and maintain a quiet, restful environment effortlessly.

Maintenance and Cleaning

Regular maintenance ensures optimal performance and longevity. Clean air filters and drain condensation water regularly. Refer to specific sections for detailed cleaning and maintenance instructions.

5.1 Cleaning the Air Filters

Regularly clean the air filters to ensure efficient cooling and airflow. Remove the filters, wash them with mild detergent, and rinse thoroughly. Allow them to dry completely before reinstalling. Cleaning frequency depends on usage and environmental conditions to maintain optimal performance and prevent dust buildup.

5.2 Draining Condensation Water

Regularly drain condensation water to ensure efficient operation. Locate the water drain plug, typically at the bottom, and attach the provided hose. Direct the hose to a suitable drainage location; For models with internal tanks, empty them when full. Proper drainage prevents water overflow and maintains unit efficiency, following manufacturer instructions for safe disposal.

5.3 Regular Maintenance Tips

Regular maintenance ensures optimal performance and longevity. Clean or replace air filters every 2-3 months to improve airflow and efficiency. Check for blockages in the air intake and exhaust hose. Inspect and clean the condenser coils annually to prevent dust buildup. Ensure the water tank and drain hose are free from blockages. Schedule professional maintenance annually for thorough inspection and servicing. Replace worn-out parts promptly to maintain performance and safety.

Troubleshooting Common Issues

Identify and resolve common issues like error codes, cooling performance problems, or unusual noises. Refer to the troubleshooting section in the manual for detailed solutions and guidance.

6.1 Identifying Error Codes

Refer to the manual for error code explanations. Codes like “E1” indicate sensor issues. Turn off the unit, restart, and ensure proper installation. If issues persist, contact Rinnai support for assistance.

6.2 Solving Cooling Performance Problems

If cooling performance is inadequate, ensure proper ventilation and check for blockages in air filters. Verify correct installation and that the unit is sized appropriately for the room. Ensure the condenser is not obstructed. If issues persist, refer to the manual or contact Rinnai support for professional assistance.

6.3 Addressing Noise or Vibration Issues

Ensure the unit is placed on a stable, level surface to reduce vibrations. Check for loose parts and tighten any screws. Proper installation and balanced positioning are crucial. Clean air filters regularly to prevent increased noise from blocked airflow. If issues remain, contact Rinnai customer support for professional assistance.

Remote Control Features

The remote control offers convenient operation of your Rinnai Portable Air Conditioner, including ON/OFF, temperature adjustment, mode selection, timer, and swing function. It ensures easy control and customization of settings for optimal comfort.

7.1 Functions and Button Layout

The remote control features intuitive buttons for easy operation, including power, temperature adjustment, mode selection (Cool, Heat, Dry, Fan), timer, and swing function. The layout is designed for intuitive navigation, with clear labels ensuring seamless control of your Rinnai Portable Air Conditioner’s settings. This design enhances user experience by providing quick access to essential functions for optimal comfort.

7.2 Pairing the Remote with the Unit

To pair the remote with your Rinnai Portable Air Conditioner, ensure the unit is powered on and the remote is within range. Press and hold the “PAIR” button on the remote until the display flashes. Release and wait for confirmation. This process ensures seamless communication between the remote and the air conditioner for smooth operation.

7.3 Customizing Settings via Remote

Use the remote to customize your Rinnai Portable Air Conditioner settings. Adjust temperature, select modes (Cool, Heat, Dry, Fan), and set the timer or sleep mode. Navigate through options using the arrow buttons and confirm changes with the “OK” button. This allows personalized comfort and energy efficiency, ensuring optimal performance tailored to your needs.

Additional Features and Settings

Explore advanced features like timer functionality, sleep mode, and swing function. These settings enhance energy efficiency and comfort, allowing customized operation tailored to your preferences.

8.1 Timer Functionality

The timer allows you to set specific on/off times, optimizing energy usage. Program your air conditioner to start cooling before you arrive or turn off while you sleep, enhancing convenience and efficiency. This feature ensures your space remains comfortable without unnecessary energy consumption, tailored to your daily schedule and preferences.

8.2 Sleep Mode Operation

Activate Sleep Mode to enjoy quiet operation and energy savings. The air conditioner adjusts temperature settings automatically, maintaining comfort while reducing energy consumption. This feature is ideal for overnight use, ensuring a restful environment without constant noise or excessive power usage, making it both convenient and eco-friendly for uninterrupted sleep.

8.3 Swing Function for Air Distribution

The swing function enhances air distribution by automatically adjusting the airflow direction. This feature ensures even cooling across the room, eliminating hot spots. Activate it via the remote control to optimize comfort and efficiency. The swinging louvers circulate air effectively, making the space feel cooler and more comfortable, while maintaining a consistent temperature distribution throughout.

Technical Specifications

The Rinnai Portable Air Conditioner features cooling capacities of 13,500 or 14,000 BTU, with power input ranging from 1,200 to 1,400 watts. It ensures efficient operation and energy savings, making it suitable for various room sizes while maintaining optimal performance and comfort.

9.1 Cooling Capacity and Power Consumption

The Rinnai Portable Air Conditioner offers cooling capacities of 13,500 or 14,000 BTU, with a power input of 1,200 to 1,400 watts. This ensures efficient operation across various room sizes while maintaining optimal performance and energy efficiency. The unit is designed to provide consistent cooling with minimal energy consumption, making it both powerful and cost-effective for home use.

9.2 Dimensions and Weight

The Rinnai Portable Air Conditioner measures approximately 29.5 inches in height, 18.5 inches in width, and 14.5 inches in depth, weighing around 68 pounds. These compact dimensions and manageable weight make it easy to move and position in various rooms, ensuring versatility and convenience for users seeking efficient cooling solutions in different spaces.

9.3 Noise Levels and Energy Efficiency

The Rinnai Portable Air Conditioner operates at noise levels ranging from 38 to 45 dBA, ensuring quiet performance. With an energy efficiency rating of 10.5 EER, it balances cooling power with energy conservation. Designed for eco-friendly operation, it minimizes environmental impact while maintaining optimal cooling efficiency for a sustainable and comfortable experience.

Frequently Asked Questions

Common questions include how to operate the unit, clean filters, and troubleshoot issues. Refer to the manual for detailed guidance on these topics and more.

10.1 Common User Queries

Users often inquire about operation, maintenance, and troubleshooting. Common questions include how to clean filters, drain condensation, and resolve cooling issues. Remote control functionality and optimal placement are also frequently discussed. These topics are addressed in detail within the manual to ensure smooth operation and maintenance of the Rinnai portable air conditioner.

10.2 Clarifications on Usage and Maintenance

For optimal performance, ensure proper usage and maintenance. Clean filters regularly and drain condensation to prevent issues. Always operate the unit upright and on a level surface. Avoid modifications or unauthorized repairs. Refer to the manual for detailed guidance on maintaining your Rinnai portable air conditioner effectively and safely.

Warranty and Customer Support

Rinnai provides a comprehensive warranty for their portable air conditioners. For inquiries or claims, contact their customer support team. Ensure to follow manual guidelines for warranty validity.

11.1 Warranty Terms and Conditions

The Rinnai Portable Air Conditioner is backed by a comprehensive warranty. The standard warranty period covers parts and labor for defects in materials and workmanship. Registration is required for warranty activation. Ensure proper installation, maintenance, and usage as per the manual to maintain warranty validity. Terms may vary depending on regional regulations and policies.

11.2 Contacting Rinnai Customer Service

For assistance, contact Rinnai Customer Service via phone at 1-800-RINNAI (1-800-746-624) or visit their official website. Support is available Monday-Friday, 8 AM-8 PM EST. Online, you can submit inquiries, access FAQs, or live chat. Ensure to have your model number ready for efficient service and troubleshooting.

Environmental Considerations

Properly dispose of the unit and batteries to prevent environmental harm. Follow local recycling guidelines and consider energy-saving practices to reduce your ecological footprint effectively.

12.1 Proper Disposal of the Unit

Dispose of the Rinnai portable air conditioner responsibly. Recycle components like refrigerants and metals through authorized facilities. Do not discard in regular waste. Ensure compliance with local regulations to minimize environmental impact and promote sustainable practices.

12.2 Energy-Saving Tips

Optimize energy use with your Rinnai portable air conditioner by adjusting temperature settings and using the timer function. Enable sleep mode to reduce power consumption during extended periods. Ensure proper ventilation and maintain clean filters for efficient operation. Regularly inspect and clean the unit to maximize performance and minimize energy waste, promoting eco-friendly usage.

hidden figures movie watching notes guide answer key

The movie Hidden Figures tells the inspiring story of Katherine Johnson‚ Dorothy Vaughan‚ and Mary Jackson‚ African American women who overcame racial and gender barriers to contribute to NASA’s success during the Space Race‚ highlighting their resilience and groundbreaking achievements.

Historical Context and Significance

The film Hidden Figures is set during the early years of the Space Race‚ a pivotal era in American history marked by segregation and racial inequality. The story highlights the contributions of African American women mathematicians and engineers at NASA‚ whose work was crucial to the success of historic missions like Apollo 11. Against the backdrop of the Civil Rights Movement‚ these women challenged systemic racism and gender barriers‚ proving their intellectual prowess and breaking stereotypes. Their achievements not only advanced scientific progress but also inspired future generations to pursue STEM careers‚ making their stories a cornerstone of American history and a testament to resilience and equality.

Structure of the Study Guide

This study guide is divided into chapters‚ each focusing on specific sections of the book and film Hidden Figures. It includes summaries‚ analysis‚ and expert insights to enhance understanding. Key features such as portfolio covers‚ checklists‚ and activity options allow students to track progress. The guide is designed to be flexible‚ with activities tailored to different learning needs. Each chapter aligns with the book’s narrative‚ offering in-depth looks at characters‚ themes‚ and historical context. Additional resources like flashcards and discussion questions are provided to reinforce learning. The structure ensures a comprehensive exploration of the material‚ making it easy for students to engage with the content and retain key information effectively.

Key Characters in Hidden Figures

The film highlights Katherine Johnson‚ Dorothy Vaughan‚ and Mary Jackson‚ African American women whose mathematical and engineering skills were pivotal to NASA’s success during the Space Race.

Katherine Johnson: Her Role and Contributions

Katherine Johnson was a brilliant mathematician who played a crucial role at NASA‚ calculating trajectories for historic space missions. Her exceptional accuracy earned her the nickname “the human computer.” Starting in 1953‚ she worked in the segregated West Area Computers division before transitioning to the Flight Research Division. Johnson’s calculations were instrumental in the success of Alan Shepard’s 1961 Mercury mission and John Glenn’s 1962 orbital flight. Her work ensured the safety and precision of NASA’s operations during the Space Race. Despite facing racial and gender barriers‚ Johnson’s intellect and perseverance broke down obstacles‚ paving the way for future generations. Her contributions remain a testament to her groundbreaking legacy in STEM.

Dorothy Vaughan: Leadership and Challenges

Dorothy Vaughan was a trailblazing mathematician and supervisor at NASA‚ leading the West Area Computers‚ a segregated group of African American women. She championed equality and fought for promotions and fair pay for her team‚ often facing resistance from management. Vaughan’s leadership extended beyond her role; she empowered her colleagues to pursue higher education and career advancement. Despite the challenges of racial segregation and gender bias‚ she remained steadfast in her determination to dismantle barriers. Her efforts ultimately led to the integration of the computing pool‚ breaking down racial divides. Vaughan’s resilience and strategic thinking left a lasting impact on NASA’s operations and paved the way for future generations of women in STEM.

Mary Jackson: Breaking Barriers in Engineering

Mary Jackson‚ a determined and ambitious mathematician‚ became NASA’s first African American female engineer. She began her career as a “computer” but pursued engineering‚ overcoming racial and gender obstacles. With the support of her supervisor and her own perseverance‚ Jackson completed engineering courses‚ earning her promotion. Her work involved analyzing data from wind tunnel tests‚ contributing to critical aerospace developments. Jackson’s achievements shattered barriers‚ inspiring others to pursue STEM careers. Her legacy extends beyond her technical contributions‚ as she actively mentored women and advocated for diversity and inclusion in the workplace. Her story exemplifies courage‚ resilience‚ and the power of breaking societal and professional barriers.

Major Themes and Lessons

The film explores themes of equality‚ racial discrimination‚ courage‚ perseverance‚ and the importance of STEM education‚ highlighting the power of resilience and breaking societal barriers.

Equality and Racial Discrimination

The movie vividly portrays the racial barriers faced by African American women in a segregated NASA workforce during the 1960s. Characters like Katherine Johnson‚ Dorothy Vaughan‚ and Mary Jackson encounter discrimination in their professional lives‚ from segregated facilities to limited career opportunities. Despite these challenges‚ their resilience and determination challenge societal norms and contribute to breaking down racial and gender stereotypes. The film highlights systemic inequalities and the courage required to overcome them‚ emphasizing the importance of equality in the workplace and society. Their stories inspire reflection on the ongoing struggle for racial justice and the power of individual and collective action to drive change.

Courage and Perseverance

The film showcases the unwavering courage and perseverance of Katherine Johnson‚ Dorothy Vaughan‚ and Mary Jackson as they navigate a workplace dominated by racial and gender biases. Despite facing discrimination‚ these women demonstrate extraordinary resilience‚ challenging societal norms and overcoming obstacles to achieve their goals. Katherine’s determination to excel in her role as a mathematician‚ Dorothy’s leadership in advocating for her team‚ and Mary’s pursuit of an engineering career highlight their courage. Their perseverance not only fuels their personal success but also inspires others‚ ultimately contributing to NASA’s achievements. Their stories underscore the transformative power of courage and determination in the face of adversity.

The Importance of STEM Education

The movie emphasizes the critical role of STEM education in empowering individuals‚ particularly women of color‚ to pursue careers in science‚ technology‚ engineering‚ and mathematics. Katherine Johnson’s exceptional mathematical skills‚ Dorothy Vaughan’s expertise in computer programming‚ and Mary Jackson’s determination to become an engineer highlight the transformative impact of STEM education. The film illustrates how access to quality education and mentorship can bridge societal gaps and unlock opportunities for underrepresented groups. By showcasing these women’s achievements‚ Hidden Figures inspires future generations to embrace STEM fields‚ promoting diversity and innovation in these disciplines. Their stories serve as a powerful reminder of the importance of equitable access to STEM education.

Movie-Watching Notes and Analysis

This section provides a comprehensive movie-watching guide‚ including discussion questions‚ scene analysis‚ and historical context‚ to enhance understanding and critical thinking about the film’s themes and characters.

Plot Summary and Key Scenes

The film Hidden Figures follows the lives of Katherine Johnson‚ Dorothy Vaughan‚ and Mary Jackson‚ three African American women working at NASA during the Space Race. The plot highlights their struggles against racism and sexism while contributing to historic missions. Key scenes include Katherine’s mathematical genius shining during a critical launch‚ Dorothy’s leadership in the segregated “colored” computing unit‚ and Mary’s determination to become an engineer. The movie also explores their personal lives and the societal challenges they faced. Pivotal moments‚ such as Katherine running miles to use a “colored” restroom and Mary’s court battle to attend engineering classes‚ underscore their resilience. The film culminates with the successful Apollo 11 launch‚ showcasing their indispensable roles in NASA’s triumph.

Character Development and Relationships

The film Hidden Figures masterfully portrays the growth and interconnected lives of its protagonists. Katherine Johnson evolves from a shy mathematician to a confident leader‚ earning respect in a male-dominated field. Dorothy Vaughan emerges as a steadfast leader‚ advocating for her team and guiding Katherine’s career. Mary Jackson’s determination to become an engineer highlights her courage and ambition. Their friendships and mutual support form the emotional core of the story. Additionally‚ the film explores their relationships with their husbands‚ showcasing the balance between personal and professional lives. These dynamics emphasize themes of unity‚ resilience‚ and the power of female solidarity in overcoming adversity.

Historical Accuracy and Artistic Liberties

The film Hidden Figures balances historical accuracy with creative liberties to enhance storytelling. While the core achievements of Katherine Johnson‚ Dorothy Vaughan‚ and Mary Jackson are rooted in reality‚ some events were condensed or dramatized for cinematic impact. For instance‚ Katherine’s role in the Apollo 11 mission was accurate‚ but her direct interactions with astronauts were amplified for drama. The portrayal of racial segregation and gender discrimination reflects the era’s realities‚ though specific scenes were exaggerated to emphasize the challenges faced. Despite these artistic adjustments‚ the film remains true to the spirit of the women’s contributions and their groundbreaking impact on NASA’s success during the Space Race.

Discussion Questions and Critical Thinking

How do the characters overcome racial and gender barriers in their careers? What role does education play in their success? How do societal norms influence their opportunities?

Questions for Reflection and Debate

Reflect on the societal norms portrayed in the film and discuss how they impact the characters’ opportunities. How do Katherine‚ Dorothy‚ and Mary challenge these norms? Consider the role of mentorship in their journeys—how do their mentors influence their careers? What lessons can be learned from their perseverance in the face of adversity? How do their achievements contribute to broader societal change? Debate the significance of representation in STEM fields and its impact on future generations. How do the characters balance personal ambition with collective progress? What message do their stories convey about the importance of equality and diversity in the workplace?

Connecting the Movie to Real-Life Issues

The film Hidden Figures sheds light on real-life issues such as racial and gender discrimination‚ highlighting the struggles faced by African American women in STEM careers. The characters’ experiences mirror the broader societal challenges of the 1960s‚ showcasing the resilience required to overcome systemic barriers. These themes remain relevant today‚ as modern discussions around diversity and inclusion continue to evolve. The movie serves as a powerful reminder of the importance of addressing these issues to create equitable opportunities for all. By exploring these connections‚ viewers can reflect on how historical struggles influence contemporary efforts to promote equality and representation in various fields.

Study Guide Resources and References

SparkNotes‚ LitCharts‚ and StudyPool offer detailed analyses‚ summaries‚ and discussion questions for Hidden Figures. These resources provide insights into themes‚ characters‚ and historical context‚ aiding deeper understanding and study.

Recommended Reading and Additional Materials

For a deeper understanding of Hidden Figures‚ explore Margot Lee Shetterly’s book‚ which inspired the film. SparkNotes and LitCharts provide chapter summaries‚ analyses‚ and discussion questions. StudyPool offers Q&A discussions and expert insights‚ while Quizlet features flashcards for key terms and concepts. Additional resources include guided notes‚ character reference charts‚ and historical context documents. These materials enhance comprehension of the movie’s themes‚ such as equality and perseverance‚ and offer a richer perspective on the lives of Katherine Johnson‚ Dorothy Vaughan‚ and Mary Jackson. They are ideal for students and educators seeking to integrate the film into STEM or history curricula;

Online Study Aids and Flashcards

Enhance your study of Hidden Figures with online resources like Quizlet‚ which offers flashcards for key terms‚ characters‚ and concepts. SparkNotes and LitCharts provide detailed summaries‚ analyses‚ and discussion questions to deepen understanding. StudyPool hosts Q&A discussions and expert insights‚ while additional flashcards and study guides are available for exam preparation. These tools are ideal for students and educators‚ offering a comprehensive approach to exploring the film’s themes‚ characters‚ and historical context. They are designed to support critical thinking and provide a structured way to engage with the material‚ making them invaluable for both individual and classroom use.

Hidden Figures is more than a film; it’s a testament to the power of resilience‚ equality‚ and the importance of STEM education. The stories of Katherine Johnson‚ Dorothy Vaughan‚ and Mary Jackson inspire us to challenge societal norms and strive for excellence. Their contributions to NASA and the Space Race highlight the transformative impact of diversity and inclusion. The movie serves as a powerful educational tool‚ encouraging reflection on historical and contemporary issues; By exploring the study guides‚ flashcards‚ and discussion questions‚ viewers can deepen their understanding of the film’s themes and their relevance today. Hidden Figures reminds us that everyone deserves the opportunity to shine‚ regardless of race or gender.

safety 1st grand 2-in-1 booster car seat manual

Welcome to the Safety 1st Grand 2-in-1 Booster Car Seat manual‚ your essential guide for safe installation‚ usage‚ and maintenance of this versatile car seat.

Overview of the Manual and its Importance

This manual provides comprehensive guidance for the Safety 1st Grand 2-in-1 Booster Car Seat‚ ensuring proper installation‚ usage‚ and maintenance. It covers both forward-facing and booster modes‚ with detailed instructions for securing your child safely. The manual emphasizes adherence to safety standards‚ weight limits‚ and harness adjustments‚ crucial for optimal protection. By following the guidelines‚ parents can ensure compliance with federal regulations‚ prolong the seat’s lifespan‚ and maintain their child’s safety. Regular updates and clear instructions make this manual an indispensable resource for responsible car seat usage.

Key Features of the Safety 1st Grand 2-in-1 Booster Car Seat

The Safety 1st Grand 2-in-1 Booster Car Seat is designed for versatility and safety‚ accommodating children from 30-100 pounds. It features a 5-point harness for forward-facing use (30-65 lbs) and converts to a belt-positioning booster (40-100 lbs). The seat includes adjustable height settings‚ a removable and washable cover‚ and a built-in cup holder for convenience. Its lightweight design and easy-transition system make it a practical choice for growing children‚ ensuring comfort and protection across various stages of development.

Installation and Setup Guidelines

This section provides step-by-step instructions for securely installing the Safety 1st Grand 2-in-1 Booster Car Seat in both forward-facing and booster modes‚ ensuring proper fit and safety.

Forward-Facing Mode Installation Steps

For forward-facing mode‚ ensure your child weighs between 30-65 lbs (13.6-29 kg) and measures 32-49 inches (81.3-125 cm) tall. Place the seat in the vehicle’s rear or front seat‚ following the manual’s guidance for proper positioning. Secure the seat using the vehicle’s seat belt or LATCH system‚ tightening it firmly to eliminate any slack. Attach and tighten the tether to the vehicle’s anchor point for added stability. Always refer to the manual for specific installation steps and safety precautions to ensure a secure fit for your child.

Booster Mode Installation Instructions

For booster mode‚ ensure your child weighs between 40-120 lbs (18.1-54.4 kg) and measures 43-57 inches (109.2-144.8 cm) tall. Place the booster in the vehicle’s back seat‚ positioning it upright against the vehicle seat. Secure the booster using the vehicle’s seat belt‚ ensuring the lap belt is snug across the child’s hips and the shoulder belt rests comfortably across their chest. Always refer to the manual for specific booster mode instructions and ensure proper fit to maximize safety and compliance with regulations.

Transitioning Between Modes

Transitioning from high-back to belt-positioning booster is seamless‚ ensuring proper fit and safety for children as they grow. Always follow the manual’s conversion steps for a secure adjustment and optimal safety.

Converting from High Back to Belt-Positioning Booster

Converting the Safety 1st Grand 2-in-1 Booster Car Seat from high-back to belt-positioning booster mode is a straightforward process designed to accommodate growing children; Begin by removing the harness‚ then adjust the seat’s backrest and headrest to ensure proper fit. Ensure the vehicle’s seat belt correctly positions across the child’s shoulder and lap for optimal safety. Always refer to the manual for specific instructions to guarantee a secure and safe transition‚ ensuring your child’s protection as they outgrow the high-back mode.

Adjusting the Seat for Proper Fit

Adjusting the Safety 1st Grand 2-in-1 Booster Car Seat ensures a secure and comfortable fit for your child. Begin by positioning the headrest to align with your child’s shoulders‚ ensuring proper harness or seat belt placement. The backrest and seat depth can be adjusted to accommodate your child’s height and weight. Always check that the seat belt crosses the shoulder and lap correctly in booster mode. Regularly inspect and adjust the fit as your child grows to maintain optimal safety and comfort. Refer to the manual for detailed guidance on making these adjustments safely and effectively.

Safety Standards and Compliance

The Safety 1st Grand 2-in-1 Booster Car Seat meets rigorous federal and international safety standards‚ ensuring compliance with regulatory requirements for child passenger safety and protection.

Meeting Federal and International Safety Regulations

The Safety 1st Grand 2-in-1 Booster Car Seat adheres to strict federal and international safety standards‚ ensuring optimal protection for children. It meets or exceeds FMVSS 213 requirements and is certified for use in both forward-facing and booster modes. Rigorous testing includes crash simulations and material durability checks. The seat is designed to accommodate children from 30-65 lbs (13.6-29 kg) in forward-facing mode and 40-100 lbs (18.1-45.4 kg) in booster mode‚ aligning with global safety benchmarks. Compliance is verified through independent third-party testing for reliability and performance.

Weight and Height Limits for Safe Usage

The Safety 1st Grand 2-in-1 Booster Car Seat has specific weight and height limits to ensure safe usage. In forward-facing mode‚ it accommodates children weighing 30-65 lbs (13.6-29 kg) and measuring 32-49 inches (81.3-125 cm) tall. For booster mode‚ the weight range is 40-100 lbs (18.1-45.4 kg)‚ with a height of 43-57 inches (109.2-144.8 cm). Always refer to the manual to verify these limits and ensure proper fit for your child‚ as exceeding these could compromise safety and compliance with regulatory standards.

Maintenance and Cleaning

Regular inspection and cleaning are crucial for maintaining the Safety 1st Grand 2-in-1 Booster Car Seat’s condition. Use mild soap‚ avoid harsh chemicals‚ and follow the manual’s guidelines.

Regular Inspection and Care Tips

Regular inspection ensures the Safety 1st Grand 2-in-1 Booster Car Seat remains safe and functional. Check for wear‚ damage‚ or loose parts‚ and clean the seat with mild soap and water. Avoid harsh chemicals that may degrade materials. Store the seat in a dry‚ cool place when not in use. Inspect harness straps for fraying or tears and ensure buckles are secure. Refer to the manual for detailed cleaning instructions and maintenance schedules to prolong the seat’s lifespan and ensure optimal performance for your child’s safety.

Cleaning the Seat and Harness

Regular cleaning of the Safety 1st Grand 2-in-1 Booster Car Seat is essential for hygiene and durability. Use mild soap and warm water to wipe down the seat and harness. Avoid harsh chemicals‚ bleach‚ or abrasive cleaners‚ as they may damage the materials. For tough stains‚ gently scrub with a soft-bristle brush. Allow the seat to air-dry completely before reuse. Do not machine wash or dry any parts. Refer to the manual for detailed cleaning instructions to ensure the seat remains safe and functional for your child.

Troubleshooting Common Issues

Check harness tightness and positioning for proper fit. Ensure the seat belt is correctly routed and snug. Refer to the manual for solutions to common issues.

Resolving Harness Tightness and Positioning Problems

Ensure the harness is snug but not overly tight. Loosen the harness by pulling the adjustment strap‚ then reposition your child. Tighten the harness until snug‚ ensuring proper fit. The chest clip should be at armpit level. If straps are too tight‚ adjust the shoulder straps upward or loosen the harness. For booster mode‚ check the seat belt fits correctly across the shoulder and hips. Regularly inspect for proper alignment and fit to ensure safety and comfort for your child.

Addressing Belt-Positioning Booster Fit Concerns

Ensure proper fit by adjusting the booster’s height to align the seat belt correctly. The lap belt should lie snugly across the child’s thighs‚ and the shoulder belt should rest across the chest‚ away from the neck. If the belt positions incorrectly‚ check the booster’s guides and adjust as needed. Always refer to your vehicle’s manual for seat belt usage. Regularly inspect the booster’s fit to ensure optimal safety and comfort for your child during travel.

Comparison with Other Booster Car Seats

The Safety 1st Grand 2-in-1 Booster Car Seat stands out for its versatility‚ supporting both high-back and belt-positioning modes with an extensive weight range of 30-100 lbs.

Distinguishing Features and Benefits

The Safety 1st Grand 2-in-1 Booster Car Seat offers a unique 2-in-1 design‚ transitioning from a high-back booster to a belt-positioning booster. It supports children from 30-100 lbs and up to 57 inches tall‚ providing long-lasting use. The seat features a 5-point harness for younger children and adapts to belt-positioning for older kids. Its adjustable headrest and multiple recline positions ensure comfort and proper fit. The lightweight design and easy installation make it a practical choice for families. This versatility‚ combined with superior safety features‚ sets it apart from other booster car seats.

User Feedback and Recommendations

Parents praise the Safety 1st Grand 2-in-1 Booster Car Seat for its versatility and ease of use. Many highlight its ability to grow with their child‚ from forward-facing to booster mode. The adjustable features and comfortable design are frequently commended. Some users note that the manual could be clearer for first-time installers. Overall‚ it’s highly recommended for its safety‚ durability‚ and value‚ making it a top choice for families seeking a reliable car seat that adapts to their child’s needs over time.

Additional Resources and Support

Access the full manual online at safety1st.com or contact customer service for further assistance with installation‚ troubleshooting‚ or general inquiries about the car seat.

Accessing the Full Manual and Guides Online

The Safety 1st Grand 2-in-1 Booster Car Seat manual is available for free download on the official Safety 1st website. Visit safety1st.com‚ navigate to the support section‚ and search for the specific model. The manual is provided in PDF format‚ making it easy to access and print. It includes detailed installation instructions‚ safety guidelines‚ and troubleshooting tips. Ensure you download the correct version for your car seat model to get accurate information. This resource is essential for proper usage and maintenance of your booster car seat.

Contacting Customer Service for Assistance

For questions or concerns about the Safety 1st Grand 2-in-1 Booster Car Seat‚ contact customer service through the official Safety 1st website. Visit the “Support” section to find contact options‚ including email‚ phone‚ or live chat. Provide your product model number (e.g.‚ BC149) and a detailed description of your inquiry for prompt assistance. Representatives are available during business hours to address installation‚ maintenance‚ or warranty-related issues. Ensure to have your product details ready for efficient support. This service is available in multiple languages‚ including English‚ for your convenience.

Page 11 of 44

Powered by WordPress & Theme by Anders Norén