beginner crochet octopus pattern pdf

Crochet octopus patterns are a delightful way for beginners to dive into amigurumi, offering a fun and rewarding project with basic stitches and quick results․

Overview of the Popularity of Octopus Amigurumi

Octopus amigurumi patterns have gained immense popularity due to their adorable designs, versatility, and charm․ Their reversible feature and cuddly appearance make them a favorite among crocheters․ Many creators love these patterns for their simplicity, as they often use basic stitches and quick-to-complete designs․ The octopus’s unique shape and expressive arms also make it a standout project for gifts, nursery decor, or personal enjoyment, fostering a sense of accomplishment for crafters of all skill levels․

Why Octopus Patterns Are Ideal for Beginners

Octopus patterns are perfect for beginners due to their use of basic stitches like single crochet and half double crochet․ These patterns typically involve simple techniques, such as creating arms and stuffing, which are easy to master․ The quick completion time, often under 20 minutes for mini versions, provides instant gratification․ Projects like the “Octo Ollie” pattern cater specifically to newcomers, making octopus amigurumi an excellent choice for building confidence and skill in crochet․

Basic Crochet Stitches Required for an Octopus Pattern

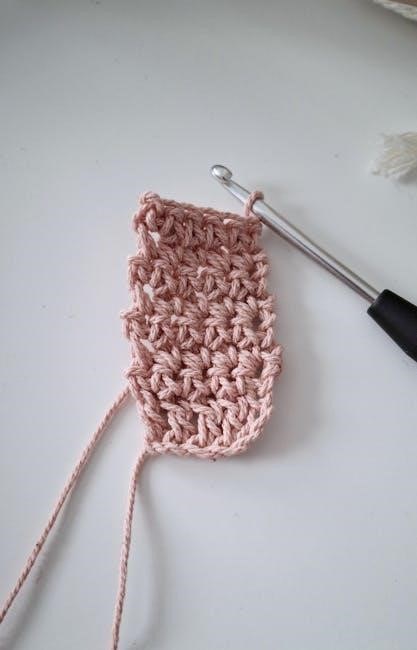
Mastering basic stitches like single crochet (SC) and half double crochet (HDC) is essential for creating an octopus․ These stitches build the shape and texture needed for a realistic look, and are quick to learn for beginners․ Slip stitching is also used to join rounds seamlessly, ensuring a polished finish․

Single Crochet (SC) and Its Importance

The single crochet (SC) stitch is a fundamental technique in crocheting an octopus, offering a smooth, even fabric perfect for the body and arms․ It is easy to learn, making it ideal for beginners․ The SC stitch provides structure and texture, allowing the octopus to maintain its shape while remaining soft․ Proper tension is key to ensure the stitches are not too tight or loose, creating a balanced and cuddly finish․ Practice this stitch to master the basics of amigurumi crochet patterns effortlessly․

Half Double Crochet (HDC) for Shape and Texture

The half double crochet (HDC) stitch adds versatility to your octopus project, creating a slightly taller stitch than single crochet․ It enhances shape and texture, making it perfect for forming the octopus’s body and arms․ The HDC stitch is easy to master and works up quickly, providing a soft yet defined fabric․ It’s ideal for beginners, as it offers a gentle learning curve while adding dimension to your amigurumi design․ Use it to create a realistic and cuddly octopus with minimal effort․

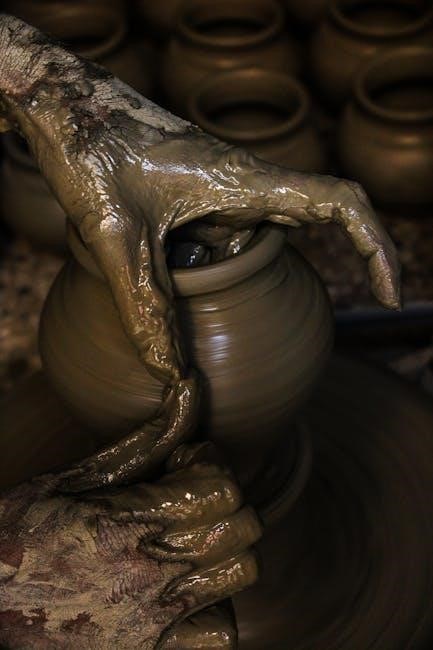
Amigurumi Techniques for a Realistic Octopus

Amigurumi techniques bring your octopus to life with realistic details․ Use shaping, stuffing, and stitch placement to create a lifelike appearance while maintaining softness and charm․

Creating Arms and Suction Cups

Crocheting arms and suction cups adds realism to your octopus․ Use single crochet stitches to form the arms, ensuring they are evenly sized and spaced․
Suction cups can be created by crocheting small circles or using texture stitches, adding a lifelike detail․
These elements are simple yet effective, making your octopus both charming and authentic, perfect for beginners exploring amigurumi techniques․

Stuffing and Shaping the Body

Proper stuffing and shaping are essential for a realistic octopus․ Use polyester fiberfill to fill the body firmly but not overly, ensuring a soft, cuddly texture․
Shape the body gently to maintain a rounded form, avoiding lumps or flat spots․
These steps bring your octopus to life, making it both durable and adorable for beginners mastering amigurumi techniques․ Balance is key for a natural look․

Free vs․ Paid Crochet Octopus Patterns

Free crochet octopus patterns are widely available online, offering a great starting point for beginners․ They often include basic stitches and simple designs․ However, paid patterns provide more detailed instructions, additional support, and sometimes video tutorials, making them worth the investment for those seeking a polished finish․

Where to Find Reliable Free Patterns

Reliable free crochet octopus patterns can be found on platforms like Moogly, Crochetville, and Ravelry․ These websites offer beginner-friendly designs with step-by-step guides and photos․ Social media platforms and blogs also share free patterns, often with video tutorials․ Additionally, Etsy and Crochet Corner feature free and paid patterns, including starter kits with yarn and tools․ Look for patterns with clear instructions and reviews to ensure they suit your skill level and project goals․

Benefits of Purchasing Premium Patterns

Purchasing premium crochet octopus patterns offers detailed instructions, video tutorials, and 24/7 support, making them ideal for beginners․ These patterns often include high-quality materials like yarn and tools, ensuring a polished finish․ They also provide error-free designs and customization options, saving time and frustration․ Additionally, premium patterns support creators, fostering the crochet community and enabling them to produce more content for learners of all levels․

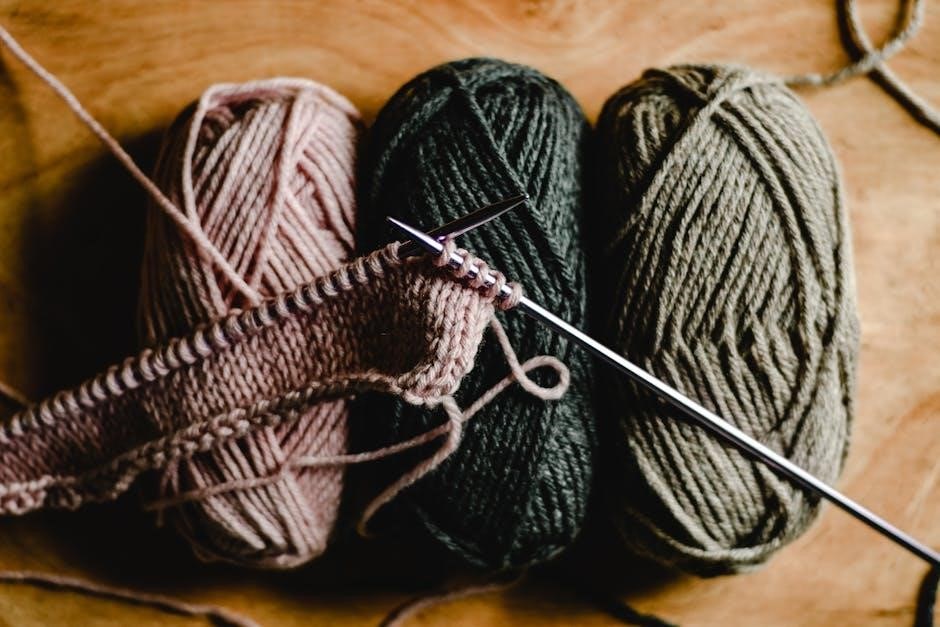
Tips for Choosing the Right Yarn and Hook

Choosing the right yarn and hook is essential for a beginner-friendly crochet octopus․ Opt for soft, durable yarns like acrylic or cotton blends and a hook size that ensures the perfect texture and size for your project․

Recommended Yarn Types for Softness and Durability

For a beginner-friendly crochet octopus, choose yarns that balance softness and durability․ Acrylic yarns like Bernat Baby Blanket or Lion Brand Vanna’s Choice are ideal, offering a plush texture and easy care․ Cotton blends, such as Red Heart Soft, provide a natural feel and durability․ These yarns are perfect for amigurumi, as they hold their shape well and create a cuddly, lifelike finish for your octopus project․

Hook Sizes for Different Octopus Sizes

Choosing the right hook size is crucial for achieving the desired octopus size․ For mini octopuses, a 2․5mm to 3․5mm hook works well, while larger projects may require a 4mm or 5mm hook․ Using the correct hook size ensures even stitches and the right proportions․ Always check the pattern’s recommended hook size to maintain consistency․ This ensures your octopus turns out cuddly and well-shaped, whether you’re making a tiny charm or a larger plush toy․

Smaller hooks create tighter stitches, perfect for detailed mini octopuses, while larger hooks allow for looser stitches, ideal for bigger, softer designs․ Balancing hook size with yarn weight ensures your octopus is durable and adorable․ Remember, the right hook size helps keep stuffing inside and maintains the shape, making your crochet project a success․

Quick and Easy Octopus Crochet Projects

Discover charming patterns like the “Octo Ollie,” a fun and speedy project that works up in under 20 minutes using basic stitches, perfect for gifts or practice․

The “Octo Ollie” Pattern for Beginners

The “Octo Ollie” pattern is a no-sew, free crochet pattern designed for beginners, featuring basic stitches and a quick completion time of under 20 minutes․ This adorable mini octopus project is perfect for those new to amigurumi, requiring minimal materials and offering instant gratification․ Its simple design makes it ideal for practicing essential crochet skills while creating a charming, portable piece․ Great for gifts, craft fairs, or personal enjoyment, “Octo Ollie” is a delightful introduction to crocheting octopuses․

20-Minute Mini Octopus Patterns

20-minute mini octopus patterns are perfect for quick crochet projects, offering a fun and fast way to create adorable amigurumi․ These patterns are designed for beginners, using basic stitches and minimal materials․ They are ideal for gifts, decorations, or practice, allowing you to complete a charming octopus in no time․ Their simplicity and speed make them great for those new to crochet or looking for instant gratification․ These patterns are also excellent for mastering essential amigurumi techniques in a short time․

Common Mistakes to Avoid When Crocheting an Octopus

Avoid overstuffing and uneven tension, which can distort the octopus shape․ Ensure arms are evenly spaced and stitches are consistent for a balanced, professional finish․

Overstuffing and Its Effects

Overstuffing is a common mistake that can make your octopus look bulky and misshapen․ It restricts the natural movement of the arms and can cause the body to appear rigid․ To avoid this, stuff the octopus body moderately, ensuring it remains soft and pliable․ Use small amounts of stuffing at a time, checking the shape as you go․ A well-stuffed octopus should retain its cuddly appearance without feeling stiff or overly firm to the touch․

Ensuring Even Stitch Tension

Maintaining even stitch tension is crucial for a professional-looking octopus․ Uneven stitches can distort the shape or make the arms appear misaligned․ To achieve consistency, use the correct hook size and yarn weight specified in your pattern․ Crochet at a comfortable speed, avoiding pulling the yarn too tightly or leaving it too loose․ Regularly check your tension by comparing it to the gauge provided in the pattern․ This ensures your octopus turns out soft, even, and adorable․

Where to Find More Resources and Patterns

Discover beginner-friendly crochet octopus patterns on popular platforms like Etsy, Pinterest, and Moogly․ These sites offer free and paid PDFs, tutorials, and communities for support․

Recommended Websites and Communities

Etsy, Pinterest, and Moogly are excellent sources for beginner-friendly crochet octopus patterns․ Ravelry offers a vast library of designs, while Facebook crochet groups provide support․ YouTube channels like The Crochet Crowd share step-by-step tutorials․ These platforms cater to both free and premium patterns, ensuring you find the perfect project․ Joining these communities can enhance your learning experience and connect you with fellow crafters for tips and inspiration․

Video Tutorials for Visual Learners

YouTube channels like The Crochet Crowd and Moogly offer excellent video tutorials for beginners․ These step-by-step guides demonstrate techniques like creating arms and suction cups․ Fiber Flux also provides clear, real-time demonstrations of amigurumi methods․ These tutorials are perfect for visual learners, breaking down complex steps into manageable parts․ They complement written patterns, helping crafters master the octopus project with confidence and precision․

ge house alarm manual

Welcome to the GE House Alarm Manual, your comprehensive guide to understanding and operating the GE Security system. This manual provides essential instructions for installation, programming, and troubleshooting, ensuring your home remains safe and secure.

Overview of the GE House Alarm System

The GE House Alarm System is a comprehensive security solution designed to protect your home and family. It features advanced components like touchscreens, wireless sensors, and IP-based receivers for reliable monitoring. The system integrates seamlessly with other GE devices, offering real-time alerts and customizable settings. With options for smart home integration, it provides enhanced control and peace of mind. This system is built to adapt to your needs, ensuring maximum security and convenience.

Importance of the Manual for System Operation

This manual is essential for mastering the GE House Alarm System. It provides clear instructions for installation, programming, and daily operation, ensuring optimal performance. By following the guidelines, users can customize settings, understand error codes, and troubleshoot issues efficiently. The manual also highlights safety protocols and emergency procedures, making it a vital resource for maintaining security and peace of mind. Keep it accessible for quick reference to ensure your system operates effectively at all times.

System Components and Hardware

The GE House Alarm System consists of key components like sensors, control panels, and sirens. These elements work together to provide reliable security and real-time monitoring capabilities.

Key Hardware Components of the GE Alarm System

The GE Alarm System includes essential hardware components such as the control panel, sensors, sirens, and keypads. These elements ensure comprehensive security coverage for your home. Sensors detect intrusions or hazards, while sirens alert during alarms. The control panel acts as the system’s brain, managing all operations. Additional components like communication modules and power supplies ensure reliable performance. Each part is designed to integrate seamlessly, providing a robust security solution.

Compatibility with Other GE Security Devices

The GE Alarm System seamlessly integrates with a range of GE Security devices, enhancing your home’s protection. From wireless sensors to smart home systems, compatibility ensures a unified security network. Additional devices like smoke detectors and cameras can be easily connected, offering comprehensive coverage. This integration allows users to monitor and control all security elements from a single interface, optimizing safety and convenience for a connected home environment.

Installation Instructions

Welcome to the GE House Alarm Manual installation section. This guide provides step-by-step instructions for a successful setup, ensuring your system is installed correctly and efficiently.

Pre-Installation Checklist

Before installing your GE House Alarm System, ensure you have all necessary components, power sources, and tools. Verify network compatibility and sensor placements. Check for any existing wiring or security systems to integrate seamlessly. Ensure the system is compatible with your home’s infrastructure. Review local regulations and safety guidelines. Familiarize yourself with the manual and installation steps. Prepare a backup power source and test all devices post-installation. This checklist ensures a smooth and efficient setup process.

Step-by-Step Installation Guide

Begin by mounting the control panel in a central location. Ensure all sensors and wiring are within range. 2. Install door and window sensors, securing magnets for proper alignment. 3. Mount motion detectors in strategic areas, avoiding direct sunlight. 4. Connect all wiring to the control panel, following the diagram. 5. Power on the system and test each sensor to ensure functionality. 6. Program the system with your preferred codes and settings. 7. Test the alarm sirens and communication features. 8. Sync all devices to ensure seamless operation. Complete these steps carefully for reliable security coverage.

Connecting the System to a Network

To connect your GE House Alarm System to a network, start by linking the control panel to your router using an RJ31X jack. Ensure the jack is installed correctly and in series with other devices. Next, configure the network settings in the system menu, entering your Wi-Fi password or Ethernet details. Once connected, test remote monitoring features to confirm functionality. This setup enables real-time alerts and remote system control, enhancing your home security capabilities.

Programming the Alarm System

Programming your GE Alarm System allows you to customize settings, set codes, and configure advanced features for enhanced security. Follow the step-by-step guide for easy setup;

Basic Programming for Beginners

Start with the default master code 1234 to access basic settings. Learn to change codes, arm/disarm zones, and program sensors. Identify zones using the keypad and refer to the manual for troubleshooting common issues. Understand how to reset sensors and test the system. This section guides you through simple steps to configure your GE Alarm System for everyday use, ensuring security and ease of operation.

Advanced Programming Features

Explore advanced programming options to customize your GE Alarm System. Set custom user codes, program zones for specific responses, and integrate with smart home devices. Use multi-format compatibility to connect with various security software. Learn to manage remote outputs and create tailored scenarios for enhanced security. This section helps you unlock the full potential of your system, ensuring it meets your unique needs and preferences for a secure and automated home environment.

Arming and Disarming the System

Master the arming and disarming processes with ease. Use designated codes or key fobs to activate/deactivate the system. Utilize exit delays for smooth transitions and ensure all zones are clear before rearming.

How to Arm the System

To arm the system, enter your master code on the keypad and press “ARM.” Select “Stay” for home mode or “Away” for full protection. Ensure all zones are clear before arming. The system will confirm arming with a beep and status light. If a zone is faulted, address it before retrying. For quick arming, use a key fob or remote accessory. Always verify the arming status to ensure your home is secure.

How to Disarm the System

To disarm the system, enter your master code on the keypad; Press “DISARM” to deactivate all zones. If using a key fob, press and hold the disarm button until the system confirms. For remote disarming, use the GE Security app. If an accidental alarm occurs, disarm immediately to avoid false alerts. Ensure the system status light turns off and no alarms sound. Always verify disarm confirmation to maintain system readiness and prevent unintended triggers.

Monitoring and Responding to Alarms

Monitor real-time alerts via the GE Security app. Check system status and respond promptly to alarms. Use emergency protocols for verified threats and reset false alarms immediately.

Real-Time Monitoring Features

The GE House Alarm System offers advanced real-time monitoring features, enabling users to track system status, sensor activity, and zone alerts via the GE Security app. Receive instant notifications for security breaches, fire alarms, or motion detection. Customize alert settings to prioritize critical events and reduce false alarms. The system also provides detailed logs of past incidents, allowing for comprehensive review and analysis. Ensure continuous protection with 24/7 monitoring capabilities tailored to your home security needs.

Understanding Alarm Responses and Emergency Procedures

Understand how your GE House Alarm System responds to triggers and emergencies. The system alerts users through sirens and notifications when sensors detect breaches or hazards. In case of fire, smoke, or unauthorized entry, follow evacuation routes and contact emergency services immediately. Familiarize yourself with the panel’s indicators and error codes to address issues promptly. Ensure all household members know the emergency protocols to ensure safety and effective response during alarms.

Troubleshooting Common Issues

Identify and resolve system errors promptly using error codes and diagnostic tools. Check sensor connections, power issues, and software updates to ensure optimal system performance and reliability.

Identifying and Resolving Common System Errors

Common issues include sensor malfunctions, power outages, and communication errors. Use the system’s error codes to identify problems. Check sensor connections, ensure proper power supply, and verify network connectivity. Restart the system if necessary. For recurring issues, update software or consult the user manual. If unresolved, contact a certified technician to ensure system reliability and security. Regular maintenance and updates help prevent errors and maintain optimal performance. Always refer to the manual for specific troubleshooting steps.

Understanding Error Codes and Alarms

The GE House Alarm System displays error codes to indicate specific issues, such as sensor malfunctions or communication failures. Codes like “System Malfunction (Code 12)” or “Sensor Fault (Code 34)” help identify problems quickly. Refer to the user manual for a detailed list of codes and their meanings. Understanding these codes allows you to address issues promptly, ensuring your system operates effectively. If unsure, consult the manual or contact a certified technician for assistance. Regularly monitoring error codes helps maintain system reliability and security. Always keep the manual handy for quick reference.

Maintenance and Updates

Regularly check sensors, batteries, and wiring for optimal performance. Update system software to ensure compatibility and security. Always follow manufacturer guidelines for maintenance and updates.

Regular Maintenance Tips for Optimal Performance

Regularly inspect sensors, wires, and batteries to ensure proper function. Test alarm systems monthly and update software periodically. Clean sensors to avoid false alarms. Check for loose connections and replace worn-out parts. Refer to the manual for detailed maintenance schedules and procedures. Always follow manufacturer guidelines to maintain system efficiency and reliability. Consult a professional if issues persist beyond basic troubleshooting steps outlined in the manual.

Updating System Software and Firmware

Regular software and firmware updates are crucial for maintaining the performance and security of your GE Security system. Always check for updates via the system interface or manufacturer’s website. Download and install updates promptly to ensure you have the latest features and security patches. Restart the system after updates to apply changes. Follow the manual’s instructions for a smooth update process. Keep your system up-to-date to enhance functionality and protect against potential vulnerabilities.

Advanced Features and Customization

Explore advanced customization options to tailor your GE Security system to your specific needs. Integrate with smart home systems, program custom responses, and utilize remote management features for enhanced control and flexibility.

Customizing System Settings for Specific Needs

Customize your GE Security system to meet your unique security requirements. Program zones, set arming levels, and define response protocols. Utilize remote management features to adjust settings from your smartphone. The system allows integration with smart home devices, enabling seamless control. Advanced options include custom user codes and emergency response plans. Refer to the manual for step-by-step guidance on tailoring your system for maximum security and convenience.

Integrating with Smart Home Systems

The GE Security system seamlessly integrates with smart home devices, enhancing convenience and control. Compatible with Z-Wave and Wi-Fi technologies, it allows voice command operation through platforms like Amazon Alexa. Users can monitor and manage their security system via smartphone apps. Integration with smart door locks, lights, and thermostats ensures a unified home automation experience. Refer to the manual for detailed instructions on connecting your system to smart home networks for enhanced functionality and security.

This manual has guided you through the GE House Alarm System’s operation, ensuring your home’s safety. Proper installation, regular maintenance, and understanding emergency procedures are vital for optimal performance. Refer to this guide for troubleshooting and advanced customization options.

Final Tips for Effective System Usage

Regularly test sensors and ensure all components are functioning properly. Keep backup power sources charged and easily accessible. Familiarize all household members with arming, disarming, and emergency procedures. Periodically review and update alarm codes to maintain security. Always refer to this manual for troubleshooting common issues and optimizing system performance. By following these guidelines, you can ensure your GE House Alarm System operates effectively, providing reliable protection for your home and family;

Resources for Further Assistance

For additional support, visit the official GE Security website or contact their customer service. Refer to the GE Concord 4 User Guide or Simon XT User Manual for model-specific instructions. Local security dealers can also provide professional assistance. Ensure to keep this manual accessible for future reference. For troubleshooting, consult the GE Appliances owner manuals or reach out to certified installers; Utilize online forums and official resources to stay updated on system maintenance and advanced features.

emergency lighting wiring guide

Emergency lighting wiring ensures safety during power outages by providing reliable illumination. This guide covers essential steps, legal requirements, and best practices for proper installation and compliance with standards.

1.1 Importance of Emergency Lighting Systems

Emergency lighting systems are crucial for safety during power outages or failures. They illuminate escape routes, prevent accidents, and ensure visibility in low-light conditions. Compliance with regulations like BS 5266 ensures reliability and safety, making these systems indispensable in commercial and industrial settings. Proper installation and maintenance are vital to uphold their functionality and protect occupants effectively.

1.2 Brief Overview of Wiring Requirements

Emergency lighting systems require a dedicated circuit to ensure reliability during power outages. Wiring must comply with safety standards like BS 5266, using appropriate materials and connections. Battery backup systems are essential, and wiring should be clearly marked for easy identification. Regular testing and maintenance are critical to ensure the system functions correctly when needed, providing a safe environment for occupants.

Tools and Materials Needed for Installation

Essential tools include screwdrivers, wire strippers, and electrical testers. Materials required are high-quality wires, mounting hardware, and a keyhole saw for precise cuts during installation.

2.1 Essential Tools: Screwdrivers, Wire Strippers, and Electrical Testers

Screwdrivers are used for mounting fixtures and connecting components. Wire strippers prepare cables for secure connections. Electrical testers ensure circuits are safe to work on, preventing accidents. These tools are indispensable for efficient and safe installations, ensuring compliance with wiring standards and practices.

2.2 Required Materials: Wires, Mounting Hardware, and Keyhole Saw

High-quality wires ensure reliable connections, while mounting hardware secures fixtures firmly. A keyhole saw is essential for cutting openings in walls or ceilings for cable installation. These materials are crucial for a professional and durable emergency lighting system, ensuring safety and compliance with installation standards.

Understanding Emergency Lighting Systems

Emergency lighting systems provide illumination during power outages, ensuring safety and visibility. They include battery backup systems and are designed to comply with legal and safety regulations.

3.1 Types of Emergency Lighting: Exit Signs and Standby Lighting

Emergency lighting includes exit signs and standby lighting. Exit signs direct occupants to exits during emergencies, while standby lighting provides illumination in work areas. Both types ensure safety and visibility when primary power fails, aiding evacuation and reducing risks. Proper installation and wiring are critical for their reliability and effectiveness in critical situations.

3.2 Battery Backup Systems and Their Role

Battery backup systems are integral to emergency lighting, ensuring continuous operation during power outages. These systems, often integrated into lighting units, provide reliable power when the primary supply fails. They automatically switch to battery mode, maintaining illumination and safety. Regular testing is essential to ensure their functionality and compliance with safety standards, guaranteeing they perform when needed most.

Legal and Safety Regulations

Adhering to legal and safety regulations is crucial for emergency lighting systems. Standards like BS 5266 and OSHA requirements ensure systems are reliable and safe during power outages.

4.1 BS 5266 Standards for Emergency Lighting

BS 5266 provides detailed guidelines for emergency lighting systems, covering design, installation, and maintenance. It ensures systems are reliable, with clear escape routes illuminated during power failures, aligning with UK fire safety regulations.

4.2 OSHA Requirements for Emergency Lighting Systems

OSHA mandates that emergency lighting systems must provide adequate illumination for safe evacuation during power failures. Systems should include backup power sources, regular testing, and proper placement of exit signs. Compliance ensures employee safety and adherence to workplace safety standards.

Wiring and Installation Guidelines

Proper wiring and installation ensure emergency lighting functions reliably. Follow safety protocols, use correct wire sizes, and secure all connections. Adhere to local electrical codes for compliance.

5.1 How to Wire Emergency Lights: Step-by-Step Process

Turn off the power supply and test for zero voltage using an electrical tester.

Connect the live, neutral, and earth wires to the emergency light’s terminal block.

Install a battery backup system for continuous operation during power outages.

Test the lighting system to ensure proper function under emergency conditions.

Document the wiring layout for future maintenance and compliance checks.

5.2 Connecting Emergency Lights to the Main Circuit

Ensure the emergency lights are connected to the main circuit via a dedicated or shared line, depending on local regulations. They must be wired to activate automatically during a power failure, typically through a sensor or relay. Proper connection ensures reliable operation and compliance with safety standards, guaranteeing illumination during emergencies.

Testing and Maintenance

Regular testing and maintenance are crucial for ensuring reliability. Perform monthly functional tests and annual inspections. Clean light fittings, check battery levels, and replace worn components. Record all activities for compliance.

6.1 Regular Testing Procedures for Emergency Lighting

Regular testing ensures emergency lighting systems function correctly. Perform monthly checks by simulating a power failure to test illumination and duration. Annual inspections involve checking battery health, cleaning luminaires, and verifying circuit integrity. Detailed records must be maintained for compliance with safety regulations and standards like BS 5266.

6.2 Maintenance Requirements to Ensure Reliability

Maintenance is crucial for reliable emergency lighting. Replace faulty lamps and batteries promptly. Clean fixtures regularly to avoid dust buildup. Inspect wiring and connections for damage or wear. Ensure test switches function correctly and circuits are unobstructed. Schedule professional inspections annually to comply with regulations and maintain system efficiency, ensuring safety during emergencies.

Common Mistakes to Avoid

  • Incorrect wiring practices can lead to system failures during emergencies.
  • Neglecting regular testing and maintenance compromises reliability and safety.

7.1 Incorrect Wiring Practices

Incorrect wiring practices, such as not connecting emergency lights to the primary circuit or using the wrong wire size, can lead to system failures. Improper connections may cause overloading or short circuits, risking safety. Always ensure wires are securely fastened and circuits are correctly configured to avoid malfunctions during emergencies. Adherence to standards like BS 5266 is crucial for reliability.

7.2 Neglecting Regular Testing and Maintenance

Neglecting regular testing and maintenance of emergency lighting systems can lead to critical failures during power outages. Dust buildup, dead batteries, and faulty wiring often go unnoticed, reducing system reliability. Monthly functional tests and annual inspections are essential to ensure all components, including battery backups, are operational. Failure to maintain systems can result in legal non-compliance and safety risks during emergencies.

Best Practices for Reliable Installation

Adhere to local regulations, use high-quality materials, and ensure proper wiring connections. Regular testing and inspections guarantee system reliability and compliance with safety standards.

8.1 Ensuring Compliance with Local Regulations

Compliance with local regulations is crucial for emergency lighting systems. Familiarize yourself with standards like BS 5266 and OSHA requirements to ensure installations meet safety and legal expectations. Regular inspections and adherence to guidelines help maintain system reliability and avoid potential penalties. Always verify local codes to tailor installations appropriately for specific regions and building types.

8.2 Using High-Quality Materials and Tools

Using high-quality materials and tools is essential for a reliable emergency lighting system. Durable wires and mounting hardware, along with tools like screwdrivers and wire strippers, ensure proper installation and prevent failures. Low-quality alternatives can lead to dangerous malfunctions, compromising safety. Adhering to quality standards ensures precise connections and long-lasting performance, crucial for emergency situations.

Emergency Lighting in High-Risk Areas

Emergency lighting in high-risk areas ensures safety in hazardous environments. Specialized systems, like explosion-proof lights, are essential for chemical plants or areas with flammable materials, ensuring reliability during emergencies.

9.1 Identifying High-Risk Zones in Buildings

Identifying high-risk zones involves pinpointing areas prone to hazards, such as chemical storage, kitchens, and large assembly spaces. These zones require enhanced emergency lighting to ensure safety during evacuations. Proper identification ensures compliance with regulations like BS 5266 and OSHA standards, guaranteeing reliable illumination in critical situations.

9.2 Special Considerations for Hazardous Locations

Hazardous locations require explosion-proof emergency lighting fixtures and sealed wiring to prevent ignition of flammable substances. Compliance with specific standards like ATEX or IECEx is critical. These areas demand enhanced reliability, with backup power systems ensuring continuous operation. Regular testing and maintenance are essential to guarantee functionality in high-risk environments.

Integration with Fire Alarm Systems

Emergency lighting integrates seamlessly with fire alarm systems to ensure synchronized operation during emergencies. This coordination enhances safety by providing illuminated escape routes and clear signaling, ensuring reliability and compliance with safety standards.

10.1 How Emergency Lighting Interacts with Fire Alarms

Emergency lighting systems interact with fire alarms by activating when fire alarms detect potential hazards, ensuring illuminated escape routes and clear signaling. This synchronization is crucial for safe evacuation, as it provides visual guidance and maintains power to essential lighting, enhancing overall safety and compliance with emergency response standards effectively during critical situations.

10.2 Synchronized Testing of Both Systems

Synchronized testing ensures fire alarms and emergency lighting function together seamlessly during emergencies. This involves simulating power failures and activating alarm signals to verify lighting activation and duration, ensuring compliance with safety standards and reliable performance. Regular testing is essential to maintain system integrity and readiness for real emergencies, guaranteeing safety and efficiency in critical situations. Proper scheduling and documentation are required.

Real-World Applications and Case Studies

Emergency lighting systems are crucial in hospitals, stadiums, and high-traffic areas. Case studies highlight successful installations ensuring safety during power outages, while others reveal lessons learned from past challenges, improving future designs and implementations.

11.1 Examples of Successful Emergency Lighting Installations

Hospitals and large commercial buildings have implemented emergency lighting systems, ensuring continuous operation during outages. These installations highlight the importance of proper wiring, battery backup integration, and compliance with regulations like BS 5266. Successful cases demonstrate how well-designed systems enhance safety, providing clear exit paths and maintaining visibility in critical situations.

11.2 Lessons Learned from Past Installations

Past installations reveal common mistakes, such as non-compliant wiring and inadequate battery systems. Regular inspections and maintenance are crucial to prevent failures. Proper synchronization with fire alarms and exit signs ensures effective evacuation. Correct wiring techniques and adherence to standards like BS 5266 are essential for reliable operation. These lessons emphasize the importance of thorough planning and professional execution.

Emergency lighting wiring is crucial for safety, ensuring reliable illumination during power outages. Adherence to standards, proper installation, and regular maintenance are key to saving lives and preventing accidents.

12.1 Summary of Key Points

Emergency lighting wiring is essential for safety, ensuring compliance with regulations like BS 5266 and OSHA. Proper installation, regular testing, and maintenance are critical. Battery backup systems, correct wiring practices, and high-quality materials ensure reliability. Understanding legal standards and avoiding common mistakes like incorrect wiring or neglecting maintenance are vital for dependable operation during emergencies.

12.2 Future Trends in Emergency Lighting Technology

Future trends include AI integration for smarter systems, energy-efficient LED advancements, and IoT connectivity for real-time monitoring. Smart emergency lights will adapt brightness based on conditions, while centralized control via cloud platforms enhances maintenance efficiency. These innovations aim to improve safety, reduce costs, and ensure compliance with evolving regulations.

velux flashing kit installation instructions

Proper installation ensures optimal performance and prevents leaks․ Follow the provided instructions carefully‚ inspect the kit before starting‚ and prepare the roof surface․ Compatibility with roofing material is essential for a secure fit and long-lasting sealing․

Overview of the Installation Process

The installation of a VELUX flashing kit is a structured process designed to ensure a watertight and durable connection between the roof window and the roof structure․ It begins with unboxing and inspecting the kit to verify all components are included․ Next‚ the roof opening and window frame must be properly prepared to accommodate the flashing․ The flashing kit is then installed according to the specific roofing material‚ whether tiles‚ corrugated metal‚ or flat roofing․ This step requires careful alignment and secure fastening to prevent gaps․ Finally‚ the installation is completed with sealing and adjustments to ensure a leak-proof fit․ The process is straightforward when following the manufacturer’s instructions‚ but it demands attention to detail to achieve optimal results․ Proper installation ensures long-term performance‚ energy efficiency‚ and protection against weather conditions․

Preparation and Tools Required

Before starting the installation‚ ensure you have all necessary tools and materials․ Essential tools include a utility knife‚ screwdrivers‚ a tape measure‚ and a level․ A ladder or scaffolding is required for safe roof access․ Check the flashing kit for completeness and inspect the roof for any obstructions or damaged areas․ Clean the roof and window frame to ensure a proper seal․ Depending on the roofing material‚ additional tools like a tile cutter or metal snips may be needed․ Follow the manufacturer’s guidelines for specific requirements․ Proper preparation and having the right tools on hand are crucial for a smooth and successful installation․ Always refer to the provided instructions for a detailed list of required items and any specific preparation steps tailored to your roofing type․ Adequate preparation ensures a professional finish and prevents potential issues during and after installation․

Step-by-Step Installation Guide

The Step-by-Step Installation Guide provides a detailed process for installing the VELUX flashing kit․ Start by unboxing and inspecting all components․ Follow the instructions for preparing the roof opening and installing the flashing kit correctly․ Ensure all steps are completed to achieve a secure‚ leak-proof installation․

Unboxing and Checking the VELUX Flashing Kit

Begin by carefully unboxing the VELUX flashing kit to ensure all components are included․ Inspect the kit for any signs of damage or wear․ Verify that you have the correct type of flashing for your roofing material․ The kit typically includes diaphragms‚ gaskets‚ and installation hardware․ Check the product manual to confirm compatibility with your VELUX window model․ Familiarize yourself with each part to understand its purpose in the installation process․ Proper inspection ensures a smooth installation and prevents potential issues down the line․ Make sure to follow the provided instructions for any specific checks or preparation required before proceeding․ A thorough review of the contents and their condition is essential for a successful installation․

Preparing the Roof Opening and Window Frame

Before installing the VELUX flashing kit‚ ensure the roof opening matches the window dimensions․ Measure the opening carefully to confirm compatibility․ Remove any existing roofing materials around the opening to create a clean area for the flashing․ Inspect the window frame for damage or debris and clean it if necessary․ Properly align the window frame with the roof opening‚ ensuring it is level and securely positioned․ Use the provided template or guidelines from the installation manual to mark the area accurately․ Double-check the structural integrity of the roof around the opening to avoid any issues during installation․ Ensure all surfaces are dry and free of obstructions to guarantee a proper fit and seal․ This step is crucial for a leak-proof and secure installation․

Installing the Flashing Kit on the Roof

Once the window frame is in place‚ begin by unboxing and organizing the flashing kit components․ Start with the base flashing‚ carefully aligning it with the roof opening and window frame․ Secure the base flashing using the provided fasteners‚ ensuring a tight seal․ Next‚ install the side flashings‚ starting from the bottom and working upwards․ These should be evenly spaced and firmly attached to prevent water infiltration․ For tiled or profiled roofs‚ ensure the flashing is compatible and fits snugly around the roof materials․ Follow the manufacturer’s instructions for specific materials‚ such as metal or slate․ After securing all flashings‚ inspect the area for gaps or loose fasteners․ Tighten any components as needed and ensure the flashing is evenly seated around the window frame; Proper installation of the flashing kit is crucial for a leak-proof and durable seal․

Final Adjustments and Sealing

After securing the flashing kit‚ perform a thorough inspection to ensure all components are properly aligned and fastened․ Gently tighten any loose fasteners and verify that the flashing is evenly seated around the window frame․ Apply a weatherproof sealant‚ such as silicone or polyurethane-based adhesive‚ around the edges of the flashing to create a watertight bond with the roof․ Pay special attention to corners‚ overlaps‚ and areas where the flashing meets the roofing material․ Use a caulking gun to apply the sealant smoothly and evenly‚ ensuring no gaps remain․ Allow the sealant to cure as per the manufacturer’s instructions before exposing the installation to weather conditions․ Finally‚ inspect the entire installation from both the interior and exterior to confirm that all seals are intact and the flashing is securely attached․ Proper sealing ensures long-term durability and prevents water infiltration․

Additional Considerations

Ensure compatibility with roofing material and follow best practices for a leak-proof seal․ Regular maintenance and inspections are crucial to uphold the integrity and longevity of the flashing system․

Flashing Configuration for Different Roofing Materials

VELUX flashing kits are designed to accommodate various roofing materials‚ ensuring a secure and weather-tight seal․ For pitched roofs‚ the EDW flashing kit is ideal‚ offering compatibility with tiles up to 120mm in profile․ Flat roofing materials require the EDL flashing kit‚ which provides a sleek‚ low-profile solution․ Curb-mounted installations benefit from the ECL flashing kit‚ designed for existing curbs and ensuring proper drainage․ Each kit includes components tailored to specific roofing types‚ such as underlay trays and side flashings‚ to prevent leaks and ensure longevity․ Proper configuration depends on the roof pitch and material‚ so consult the installation manual for guidance․ Always use VELUX-approved components to maintain warranty validity and performance․ Regular inspections and maintenance are recommended to uphold the integrity of the flashing system and prevent potential issues․

Best Practices for a Leak-Proof Installation

A leak-proof installation begins with proper preparation and adherence to VELUX guidelines․ Ensure the roof opening matches the window dimensions precisely‚ and the surface is clean and dry․ Use the correct flashing kit for your roofing material‚ as improper configuration can lead to water ingress․ Apply a continuous bead of VELUX-approved sealant around the window frame and flashing edges to create a watertight bond․ Tighten all screws evenly to avoid warping the frame․ Inspect the flashing for proper alignment and seating‚ ensuring no gaps exist between the flashing and the roof․ Regularly inspect the installation for signs of wear or damage‚ addressing issues promptly․ Always follow the manufacturer’s instructions for flashing configuration and sealing methods․ Proper installation ensures long-term durability and prevents costly repairs․ For complex scenarios‚ consult a professional to guarantee a leak-proof result․

msa altair 5x user manual

Welcome to the MSA Altair 5X User Manual, your comprehensive guide to understanding and operating the Altair 5X Multigas Detector. This manual provides essential information on device features, safety precautions, and proper usage to ensure safe and effective operation. Designed for trained personnel, it covers everything from initial setup to maintenance and troubleshooting, helping you maximize the device’s performance and reliability in hazardous environments.

1.1 Overview of the MSA Altair 5X Multigas Detector

The MSA Altair 5X Multigas Detector is a advanced portable device designed to detect multiple gases and vapors in hazardous environments. It features cutting-edge sensor technology, wireless connectivity, and real-time monitoring capabilities. The detector is built for durability and reliability, ensuring accurate readings in challenging conditions. With its intuitive interface and customizable settings, the Altair 5X is a vital tool for workplace safety, providing critical alerts and ensuring compliance with safety standards.

1.2 Importance of Reading the Manual

Reading the MSA Altair 5X User Manual is crucial for safe and effective use of the device. It provides detailed instructions on operation, maintenance, and troubleshooting, ensuring compliance with safety standards. Understanding the manual helps users interpret gas readings, respond to alarms, and perform calibration correctly. Proper usage, as outlined in the manual, is essential for reliable performance in hazardous environments and to protect both the user and others from potential risks.

Key Features and Benefits of the MSA Altair 5X

The MSA Altair 5X features advanced sensor technology, wireless connectivity, and long battery life, ensuring reliable gas detection and real-time data transmission in hazardous environments.

2.1 Advanced Sensor Technology

The MSA Altair 5X boasts cutting-edge sensor technology, enabling rapid and accurate detection of multiple gases. Its dual-tox sensor simultaneously monitors CO and H2S, while an optional infrared sensor detects CO2 or combustible gases. This advanced system ensures faster response times, enhancing worker safety in hazardous environments. The sensor technology is designed for reliability and durability, providing consistent performance across various conditions.

2.2 Wireless Connectivity and Data Transmission

The Altair 5X features wireless connectivity, enabling seamless data transmission to compatible devices. This capability allows real-time monitoring and remote data access, enhancing incident response and safety management. Using MSA Link software, users can easily transmit data from the detector, facilitating efficient record-keeping and compliance reporting. Wireless connectivity also supports firmware updates, ensuring the device stays current with the latest advancements in gas detection technology.

Safety Precautions and Warnings

Always read and follow the manual carefully. Use the device only as intended. Perform regular calibration and maintenance. Avoid high-temperature environments and ensure proper ventilation. Never ignore alarms or warnings, as this can lead to unsafe conditions; Adhere to all safety guidelines to ensure reliable operation and personal safety in hazardous environments.

3.1 General Safety Guidelines

Always read and follow the manual carefully. Ensure proper training before using the device. Use the detector only for its intended purpose. Perform regular maintenance and calibration. Avoid exposing the device to extreme temperatures or physical shock. Never ignore alarms or warnings. Ensure the device is properly configured for the specific gas hazards present. Follow all safety instructions to prevent accidents and ensure reliable performance in hazardous environments. Proper use enhances safety and effectiveness.

3.2 Hazardous Atmosphere Precautions

The MSA Altair 5X is designed for use in hazardous atmospheres but must be operated with caution. Always ensure the device is properly calibrated and configured for the specific gases present. Avoid entering areas with gas concentrations exceeding the detector’s limits. Never use the device in environments with high gas levels without proper protective equipment. If the detector alarms, evacuate the area immediately and follow safety protocols. Regular calibration is crucial after exposure to extreme conditions or physical shock.

Installation and Setup

Unpack and inventory all components carefully, ensuring no damage. Proceed with initial configuration, following the manual to set up sensors, wireless connectivity, and device settings properly.

4.1 Unpacking and Inventory

Begin by carefully unpacking the Altair 5X Multigas Detector and verifying all components against the provided inventory list. Ensure the device, sensors, batteries, and accessories are included and free from damage. This step is crucial to ensure proper functionality and compliance with safety standards. Handle the device with care to avoid damage, especially the sensors, which are sensitive to physical shock. Once unpacked, store unused items in a protective case to maintain their condition. Always refer to the manual for specific unpacking instructions to prevent any potential issues.

4.2 Initial Configuration and Settings

After unpacking, proceed to configure the Altair 5X according to your operational needs. Power on the device and navigate through the menu to set up gas types, alarm levels, and wireless communication options. Ensure all settings align with your workplace requirements and safety protocols. Proper configuration is critical for accurate gas detection and reliable performance. Refer to the manual for detailed instructions on customizing settings to meet specific monitoring demands. Always save configurations before exiting the setup menu to ensure they are retained for future use.

Calibration and Maintenance

Regular calibration and maintenance are essential for ensuring the accuracy and reliability of the Altair 5X. Follow the manual’s guidelines for sensor checks, gas calibration, and routine cleaning to maintain optimal performance and extend the device’s lifespan.

5.1 Calibration Procedures

Calibration is critical for ensuring the Altair 5X operates accurately. Use MSA-approved calibration gases and follow the manual’s step-by-step instructions. Perform single-point or multi-point calibration based on sensor types. Calibration should occur after sensor replacement, exposure to high contaminant levels, or physical shock. Regular checks ensure reliable gas detection and alarm functionality. Refer to the manual for detailed calibration methods and frequency recommendations to maintain device performance and safety standards.

5.2 Routine Maintenance Tips

Regular maintenance ensures optimal performance of the Altair 5X. Clean the exterior with a soft cloth and mild detergent, avoiding sensors and openings. Check sensors for damage or blockages and replace them as needed. Store the device in a dry, cool place when not in use. Perform functional tests periodically and update software via MSA Link. Follow the manual for detailed maintenance schedules and procedures to prolong device lifespan and reliability.

Understanding the Display and Alarms

The Altair 5X display provides real-time gas level readings, alarm status, and battery life. Audible and visual alarms alert users to hazardous conditions, ensuring prompt responses to safety threats.

6.1 Interpreting Gas Readings

The MSA Altair 5X display shows real-time gas concentrations for detected gases, including combustible gases, CO, H2S, and O2. Readings are updated continuously, ensuring accurate monitoring. The device provides numerical values and bar graphs for easy interpretation. For combustible gases, readings are displayed as a percentage of the lower explosive limit (LEL). For toxic gases like CO and H2S, readings are shown in ppm. Oxygen levels are displayed as a percentage of the atmosphere. Understanding these readings is critical for assessing safety and taking appropriate actions. Always refer to the manual for specific gas interpretation guidelines.

6.2 Alarm Conditions and Responses

The MSA Altair 5X triggers alarms for dangerous gas levels or low oxygen; Visual, audible, and vibrational alerts notify users of potential hazards. Alarms activate when gas concentrations exceed safe thresholds or oxygen levels drop below 19.5%. Users must immediately evacuate the area, wear breathing apparatus if required, and follow established safety protocols. Never ignore alarms; always investigate and resolve the hazard promptly. Refer to the manual for specific alarm response procedures.

Troubleshooting Common Issues

This section addresses common issues like sensor faults, connectivity problems, and error codes. It provides solutions such as calibration checks and diagnostic procedures for optimal device performance.

7.1 Diagnostic Modes and Error Codes

The MSA Altair 5X features advanced diagnostic modes to identify and address issues promptly. Error codes provide specific insights into device malfunctions, such as sensor failures or connectivity problems. By accessing diagnostic modes, users can perform self-tests and view detailed error logs. Refer to the manual for code interpretations and troubleshooting steps. Addressing these issues ensures optimal performance and reliability in hazardous environments. Always consult the manual or contact MSA support for assistance

7.2 Resolving Sensor Faults

Sensor faults on the MSA Altair 5X can often be resolved by checking connections, cleaning sensors, or recalibrating the device. If a sensor fails, ensure it is properly seated and free from contaminants. For persistent issues, refer to the manual for recalibration procedures or replace the sensor if damaged. Always use MSA-approved replacement parts. If problems remain, contact MSA support for further assistance. Regular maintenance ensures accurate gas detection and device reliability.

MSA Support and Resources

MSA offers comprehensive support, including online resources, manuals, and dedicated customer service. Visit the MSA website for troubleshooting guides, software updates, and contact information. For immediate assistance, call 1-800-MSA-2222 in North America or 1-724-776-8626 internationally. Additional documentation and training materials are available to ensure optimal use of your Altair 5X device.

8.1 Contacting MSA Customer Service

For assistance with the Altair 5X, contact MSA Customer Service at 1-800-MSA-2222 (North America) or 1-724-776-8626 (international). Visit the MSA website for additional resources, including manuals, troubleshooting guides, and software updates. MSA’s dedicated support team is available to address any questions or concerns, ensuring optimal performance and safety of your device in hazardous environments. Reach out for expert guidance on maintenance, repairs, or technical inquiries.

8.2 Accessing Additional Documentation

Additional documentation for the MSA Altair 5X is available on the MSA website. Visit MSA’s official site to access the full Instruction Manual: ALTAIR 5X Multigas Detector (EN) and Instruction Manual: ALTAIR 5X PID Multigas Detector (EN). These resources provide detailed operating instructions, troubleshooting guides, and technical specifications. Order No. 10102623/01 is also available for supplementary information. Refer to these documents for comprehensive support and maintenance guidance.

Compliance and Regulatory Information

The MSA Altair 5X complies with international safety standards and certifications. Devices for the Russian Federation, Kazakhstan, and Belarus include approval documents. Ensure compliance with regional regulations.

9.1 Certifications and Approvals

The MSA Altair 5X Multigas Detector holds various certifications, ensuring compliance with global safety standards. It is CSA-certified for use in hazardous environments. The device meets stringent regulations for gas detection, including those for combustible gases and oxygen levels. Specific models, like the Altair 5X IR, are designed with infrared sensors for precise CO2 detection. All units are rigorously tested to guarantee reliability and performance in diverse industrial settings.

9.2 Regional Compliance Requirements

The MSA Altair 5X Multigas Detector complies with regional safety regulations worldwide. In North America, it meets CSA standards for hazardous locations. For Europe, it adheres to ATEX directives for explosive atmospheres. Devices shipped to the Russian Federation, Kazakhstan, and Belarus include a passport with approved certification. The detector is configured to meet specific regional norms, ensuring compliance and safe operation across global markets and regulatory environments.

the book of genesis pdf

The Book of Genesis, the first book of the Bible, explores creation, early humanity, and foundational themes of sin and redemption. Its stories, such as Adam and Eve, are central to religious and cultural narratives. Available in PDF formats like the KJV, Genesis is widely studied for its historical and theological significance, offering insights into ancient traditions and divine covenant. Accessing the PDF version provides a convenient way to delve into its rich content for personal or scholarly exploration.

Overview of the Book of Genesis

The Book of Genesis is the first book of the Bible and the Torah, serving as the foundational narrative of creation and early human history. It explores themes of divine sovereignty, human rebellion, and redemption. The book begins with the creation of the world and humanity, followed by stories of Adam and Eve, Noah’s Ark, and the Tower of Babel. Genesis also introduces key figures like Abraham, Isaac, and Jacob, whose lives shape the covenant between God and His people. The book concludes with the story of Joseph in Egypt, setting the stage for Israel’s history. Its rich narratives and theological themes have made Genesis a cornerstone of religious and cultural study, with its teachings influencing art, literature, and philosophy for centuries. The availability of Genesis in PDF formats has made it easily accessible for study and reflection.

Historical and Cultural Significance

The Book of Genesis holds profound historical and cultural significance, shaping religious, ethical, and legal systems across civilizations. As the first book of the Bible, it provides foundational narratives about creation, humanity’s relationship with God, and early ancestral histories. Its stories, such as the creation of the world and the flood of Noah, have influenced art, literature, and philosophy for millennia. Genesis also introduces key themes like covenant, sin, and redemption, which are central to Jewish, Christian, and Islamic traditions. Its impact extends beyond theology, offering insights into ancient Near Eastern cultures and societal values. The availability of Genesis in PDF formats ensures its teachings remain accessible for modern study, preserving its role as a cornerstone of cultural and religious heritage.

Key Themes and Stories in Genesis

Genesis presents pivotal themes like creation, sin, and redemption, with stories such as Adam and Eve, Noah’s Ark, and the Tower of Babel shaping human understanding and faith.

Creation Narrative (Genesis 1-2)

The creation narrative in Genesis 1-2 describes God’s orderly creation of the world in six days, culminating in the formation of humanity in His image. Genesis 1 emphasizes God’s sovereignty and the structured progression of creation, while Genesis 2 focuses on the intimate relationship between God, Adam, and Eve in the Garden of Eden. These chapters explore themes of divine purpose, the uniqueness of humanity, and the inherent goodness of creation. The narrative serves as the foundation for understanding human identity, morality, and the divine plan. It has sparked theological, scientific, and philosophical discussions, shaping interpretations of human existence and the natural world. The PDF versions of Genesis provide accessible ways to study these foundational texts.

The Story of Adam and Eve

The story of Adam and Eve, found in Genesis 2-3, recounts the creation of humanity and the first sin. Adam, formed from the earth, and Eve, created from his rib, were placed in the Garden of Eden to care for it. They were given freedom with one restriction: not to eat from the tree of knowledge of good and evil. Tempted by the serpent, Eve ate the forbidden fruit, and Adam followed, leading to their expulsion from Eden. This narrative explores themes of obedience, free will, and the origin of sin. It serves as a foundational story for understanding human nature and divine judgment. The PDF versions of Genesis provide detailed accounts of this pivotal event, enabling deeper study of its theological implications.

Noah’s Ark and the Flood

The story of Noah’s Ark and the Flood, detailed in Genesis 6-9, describes God’s judgment on humanity due to widespread wickedness. Noah, a righteous man, was instructed to build an ark to save himself, his family, and two of every kind of animal. The Flood, a divine punishment, devastated the earth, eradicating all life except those on the ark. After the waters receded, God established a covenant with Noah, promising never to destroy the earth with a flood again, symbolized by the rainbow. This narrative emphasizes themes of redemption, obedience, and divine mercy; The PDF versions of Genesis provide a comprehensive account of this epic event, allowing readers to explore its theological and historical significance in depth.

Scientific and Archaeological Connections

The Book of Genesis connects with science and archaeology, offering insights into ancient history and creation, accessible via PDF for deeper study.

Genesis and Modern Science

The Book of Genesis, particularly its creation narrative, has sparked debates between religious and scientific perspectives. While Genesis describes a seven-day creation, modern science posits theories like the Big Bang and evolution. Some scholars explore parallels, such as the order of creation mirroring scientific timelines, while others highlight differences. The flood narrative in Genesis has been linked to ancient geological events, like the Black Sea Flood, offering a bridge between myth and history. Additionally, genetic diversity mentioned in Genesis aligns with scientific theories of population migration. Despite differing perspectives, studying Genesis alongside modern science provides a richer understanding of human history and the universe, encouraging dialogue between faith and reason.

Archaeological Evidence Related to Genesis

Archaeological discoveries have shed light on the historical context of the Book of Genesis, offering insights into its narratives. The existence of ancient cities like Jericho and Babylon, mentioned in Genesis, has been confirmed by excavations. The story of Noah’s Ark and the flood has drawn parallels with ancient Mesopotamian flood legends, such as the Epic of Gilgamesh, suggesting shared cultural memories. Additionally, archaeological findings in the Near East align with biblical accounts of early civilizations, including the patriarchal period described in Genesis. While not proving the supernatural elements, these discoveries provide a historical framework that supports the biblical text’s cultural and geographical accuracy. Such evidence bridges the gap between faith and history, enriching the study of Genesis.

Downloading the Book of Genesis in PDF

The Book of Genesis is available in PDF for easy reading and study of its stories and teachings. This format is popular for its convenience.

Free PDF Downloads of the Book of Genesis

Free PDF downloads of the Book of Genesis are widely available online, offering accessible reading and study of its foundational stories and teachings. These downloads provide an easy way to explore the creation narrative, the story of Adam and Eve, and other significant events. Many websites offer the PDF version in various translations, such as the King James Version (KJV), making it convenient for readers to choose their preferred format. Additionally, these downloads are often compatible with multiple devices, ensuring that the text can be accessed anytime and anywhere. This accessibility has made the PDF version a popular choice for both personal and educational purposes, fostering a deeper understanding of Genesis.

How to Access the PDF Version Legally

To access the Book of Genesis in PDF format legally, users can download it from reputable sources such as official religious websites, academic platforms, or public domain archives. Many versions, including the King James Version (KJV), are available for free due to their public domain status. Websites offering these downloads often provide clear instructions and ensure compliance with copyright laws. Users should avoid unauthorized or paid sites unless explicitly permitted by the publisher. Downloading from trusted sources guarantees both legal access and the integrity of the text. Always verify the source to ensure the PDF is shared legally and ethically.

Study Guides and Resources

Study guides and resources for the Book of Genesis PDF enhance understanding of its themes, narratives, and historical context. These tools offer in-depth analyses and commentary, aiding readers in exploring complex theological concepts and biblical interpretations. Additional resources include maps, timelines, and scholarly articles that complement the PDF text. Utilizing these materials fosters a deeper engagement with Genesis, making it ideal for both personal study and academic research.

Using the PDF for Bible Study

Using the Book of Genesis PDF for Bible study offers a convenient and accessible way to explore the text. The digital format allows readers to easily navigate through chapters, highlight key verses, and annotate insights. Study guides and commentaries available with the PDF provide deeper context, helping to uncover theological themes and historical background. Maps, timelines, and cross-references within the PDF enhance comprehension of events like creation, the flood, and patriarchal narratives. Additionally, the portability of the PDF makes it ideal for group studies, enabling participants to access the material on various devices. This format supports both individual reflection and collaborative learning, enriching the study experience.

Additional Resources for Understanding Genesis

Beyond the PDF version of Genesis, numerous resources enhance understanding of its rich narratives and themes. Commentaries and study guides provide historical context, theological insights, and cultural background, aiding deeper analysis. Scholarly articles and books offer interpretations of key stories, such as creation and the flood, while video lectures and podcasts present modern perspectives. Maps, timelines, and archaeological findings further illuminate the historical setting of Genesis. Additionally, devotionals and reflection guides help apply its teachings to personal faith journeys. These resources collectively enrich the study of Genesis, making it accessible and meaningful for diverse audiences seeking to explore its significance in religious and cultural contexts.

vf commodore workshop manual pdf download free

The VF Commodore Workshop Manual is an essential guide for DIY enthusiasts and professionals, offering comprehensive details for repairs, maintenance, and troubleshooting. Available as a free PDF download, it provides detailed instructions, wiring diagrams, and technical specifications, empowering users to handle various tasks efficiently. This manual is a valuable resource for anyone looking to service or repair their VF Commodore, ensuring optimal performance and longevity of the vehicle.

What is the VF Commodore?

The VF Commodore is an executive car produced by Holden from 2013 to 2017. It represents the final iteration of the Commodore line, available in sedan, wagon, ute, and high-performance HSV variants. Known for its advanced features, the VF Commodore combines comfort, performance, and technology, making it a popular choice in Australia. Its production spanned four years, with models tailored for diverse driving preferences and requirements.

Why is the Workshop Manual Important?

The Workshop Manual is crucial for VF Commodore owners, offering detailed repair procedures, maintenance schedules, and troubleshooting guides. It empowers users to perform DIY tasks confidently, reducing reliance on professional services and saving costs. With comprehensive coverage, it ensures proper vehicle care, enhances safety, and extends the car’s lifespan. Accessing this manual is essential for anyone aiming to maintain or repair their VF Commodore effectively and efficiently.

Benefits of Using the VF Commodore Workshop Manual

The VF Commodore Workshop Manual empowers users with detailed repair guidance, enabling cost-effective DIY maintenance and professional-level repairs. It ensures optimal vehicle performance and longevity, while being freely accessible as a PDF download.

Comprehensive Coverage of Repairs and Maintenance

The VF Commodore Workshop Manual offers extensive instructions for various repairs and maintenance tasks. From basic oil changes to complex engine overhauls, it provides step-by-step procedures, diagrams, and specifications. This ensures that users can address all aspects of their vehicle’s upkeep with confidence, covering mechanical, electrical, and bodywork components comprehensively. The manual’s detailed nature makes it an invaluable resource for both novice and experienced individuals.

Cost Savings on Professional Services

The VF Commodore Workshop Manual enables significant cost savings by reducing reliance on professional services. With detailed repair and maintenance instructions, users can perform tasks independently, avoiding expensive labor charges. This empowers vehicle owners to handle routine maintenance, minor repairs, and even complex overhauls, thereby lowering overall ownership costs and extending the vehicle’s lifespan through proper care.

Empowerment for DIY Enthusiasts

The VF Commodore Workshop Manual is a lifeline for DIY enthusiasts, providing clear, step-by-step instructions and detailed schematics. It empowers car owners to take control of their vehicle’s maintenance and repairs, fostering confidence and independence. Whether it’s a simple oil change or a complex engine overhaul, the manual equips enthusiasts with the knowledge to tackle tasks efficiently, transforming them into skilled amateur mechanics.

Where to Download the VF Commodore Workshop Manual for Free

Download the VF Commodore Workshop Manual for free from official Holden resources, forums, or dedicated PDF platforms. These sources offer comprehensive guides for 2013-2017 models.

Official Holden Websites and Resources

Visit the official Holden website or its authorized service portals to access the VF Commodore Workshop Manual for free. Holden’s main website often provides direct links to service manuals, including the VF Commodore, covering years 2013-2017. Additionally, Holden’s customer service or support sections may offer downloadable PDF versions of the manual, ensuring authenticity and reliability for DIY repairs and maintenance.

Third-Party Forums and Communities

Third-party forums and automotive communities often share links to download the VF Commodore Workshop Manual for free. Websites like Just Give Me The Damn Manual and Holden-specific forums provide accessible PDF versions. These platforms, frequented by DIY enthusiasts and mechanics, offer a convenient way to obtain the manual without visiting official sites. However, always verify the authenticity of the document to ensure accuracy and avoid potential errors.

Free PDF Download Platforms

Several free PDF download platforms offer the VF Commodore Workshop Manual, including ManualsLib, PDFShare, and other online repositories. These sites provide direct links to download the manual, often categorized by vehicle model and year. The manuals typically include detailed repair procedures, wiring diagrams, and technical specifications. Users can access these resources without registration, making it a convenient option for DIY enthusiasts and professionals alike. Always verify the document’s authenticity to ensure accuracy and completeness.

Key Features of the VF Commodore Workshop Manual

The VF Commodore Workshop Manual offers detailed repair and maintenance procedures, wiring diagrams, and technical specifications. It covers over 10,000 pages, ensuring comprehensive guidance for professionals and DIY enthusiasts. The manual includes step-by-step instructions, troubleshooting tips, and schematics, making it an invaluable resource for servicing and maintaining the VF Commodore effectively. Its extensive coverage ensures all aspects of the vehicle are addressed, from basic maintenance to complex repairs.

Detailed Repair and Maintenance Procedures

The VF Commodore Workshop Manual provides step-by-step instructions for various repairs and maintenance tasks, from basic oil changes to complex engine overhauls. It includes detailed wiring diagrams, troubleshooting guides, and specifications for precise repairs. The manual covers brake systems, timing belt replacements, and fluid replacements, ensuring clarity and accuracy for both professionals and DIY enthusiasts. Its comprehensive approach makes it an indispensable tool for maintaining and repairing the VF Commodore effectively.

Wiring Diagrams and Schematics

The VF Commodore Workshop Manual includes detailed wiring diagrams and schematics, essential for understanding the vehicle’s electrical systems. These diagrams provide clear visual representations of circuits, connectors, and components, aiding in troubleshooting, repairs, and custom installations. With precise labeling and comprehensive coverage, they empower users to diagnose and resolve electrical issues confidently, ensuring proper functionality and safety in all systems.

Technical Specifications and Guidelines

The VF Commodore Workshop Manual provides detailed technical specifications and guidelines for repairs and maintenance. It includes torque values, fluid capacities, and diagnostic procedures, ensuring accurate and safe servicing. The manual covers engine, transmission, suspension, and electrical systems, offering precise instructions for component replacement and calibration. Adherence to these guidelines guarantees compliance with manufacturer standards, maintaining vehicle performance and reliability.

Common DIY Projects Using the Workshop Manual

Common DIY projects include oil changes, brake maintenance, and timing belt replacements. The manual provides step-by-step instructions for these tasks, empowering owners to maintain their vehicles effectively.

  • Oil and fluid replacement
  • Brake system maintenance
  • Timing belt replacement

Oil Change and Fluid Replacement

The VF Commodore Workshop Manual provides detailed guidance for performing oil changes and fluid replacements. It outlines the correct oils and fluids to use, ensuring optimal engine performance and longevity. Step-by-step instructions cover draining, filter replacement, and refilling processes. Additionally, the manual includes tips for proper disposal of used fluids and filters, promoting environmentally responsible maintenance practices. This section is essential for DIY enthusiasts aiming to keep their vehicle in top condition.

  • Recommended oil viscosity and types
  • Fluid capacity specifications
  • Safety precautions during the process

Brake System Maintenance

The VF Commodore Workshop Manual offers detailed procedures for brake system maintenance, including pad replacement, rotor resurfacing, and fluid checks. It provides step-by-step instructions for inspecting brake components and bleeding the system. The manual emphasizes safety, ensuring proper function and reliability. DIY enthusiasts and professionals alike can rely on this guide to maintain optimal braking performance and ensure vehicle safety on the road.

  • Step-by-step brake pad replacement
  • Rotor inspection and resurfacing
  • Brake fluid replacement guidelines
  • Safety tips for working with brakes

Timing Belt Replacement

The VF Commodore Workshop Manual provides detailed instructions for timing belt replacement, ensuring precise alignment and tensioning. It outlines tools needed, torque specifications, and steps to avoid engine damage. The guide is essential for maintaining engine integrity and preventing costly repairs. Whether you’re a DIY enthusiast or a professional, this section offers clear, actionable guidance for a successful replacement process.

  • Detailed step-by-step replacement instructions
  • Specifications for proper torque and alignment
  • Essential tools and precautions

The Importance of Regular Maintenance

Regular maintenance is crucial for extending the lifespan of your VF Commodore and preventing costly repairs. The workshop manual provides scheduled intervals and troubleshooting guides to ensure optimal performance and safety.

  • Prevents unexpected breakdowns
  • Ensures safety on the road
  • Follows manufacturer-recommended schedules

Scheduled Maintenance Intervals

The VF Commodore Workshop Manual outlines specific maintenance schedules to ensure your vehicle runs smoothly. Regular checks every 15,000 km or 12 months are recommended. These intervals cover essential tasks like oil changes, tyre rotations, and fluid inspections. Following these guidelines helps prevent breakdowns and ensures compliance with Holden’s factory recommendations, keeping your Commodore in peak condition.

  • Oil and filter replacement
  • Tyre pressure checks
  • Brake system inspections

Troubleshooting Common Issues

The VF Commodore Workshop Manual provides detailed troubleshooting guides for common problems. From error lights to battery issues, the manual helps identify symptoms and solutions. It includes diagnostic procedures, such as checking fault codes and testing electrical systems. This section empowers drivers to address issues promptly, reducing the need for costly repairs and ensuring the vehicle operates efficiently. Regular reviews of this section can help prevent recurring problems.

VF Commodore Model Variations and Their Manuals

The VF Commodore Workshop Manual covers various models, including Sedan, Sportwagon, Ute, Caprice, and HSV variants. Each manual is tailored to the specific features and systems of the model, ensuring accurate repairs and maintenance. This comprehensive approach guarantees that all VF Commodore owners have access to detailed instructions for their particular vehicle.

Sedan and Wagon Models

The VF Commodore Workshop Manual includes detailed coverage for Sedan and Sportwagon models, addressing their unique mechanical and electrical systems. The manual provides specific instructions for repairs, maintenance, and troubleshooting tailored to these body styles. It covers engine variations, transmission types, and model-specific features, ensuring comprehensive guidance for both DIY enthusiasts and professional mechanics. This makes it an indispensable resource for maintaining and repairing these popular VF Commodore variants effectively.

Ute and HSV Variants

The VF Commodore Workshop Manual also covers Ute and HSV models, providing detailed repair procedures and specifications tailored to these high-performance variants. It includes wiring diagrams, part numbers, and technical guidelines specific to Ute and HSV versions. This ensures owners and mechanics can address unique features and maintain optimal performance. The manual is a valuable resource for servicing these specialized models, offering comprehensive guidance for both routine maintenance and complex repairs.

Safety Precautions When Using the Workshop Manual

Always adhere to safety guidelines when using the VF Commodore Workshop Manual. Wear protective gear, ensure proper ventilation, and follow warnings for airbags and electrical systems. Be cautious when handling sharp or heavy components, and disconnect the battery before starting complex repairs to avoid accidents or injuries. Strictly follow all safety instructions provided in the manual to ensure a safe working environment.

Airbag and Safety System Warnings

When working with the VF Commodore, always deactivate the airbag system before repairs to prevent accidental deployment. Use the correct scan tool to ensure the system is safely disabled. Never tamper with airbag components without proper training, as this can lead to serious injury or system failure. Follow all safety protocols outlined in the manual to avoid risks associated with airbag and safety system maintenance.

General Safety Guidelines for Repairs

Always wear protective gear, including gloves and safety glasses, when performing repairs. Ensure the vehicle is on level ground and apply the parking brake. Disconnect the battery before starting electrical work. Use jack stands for added stability when working underneath the car. Follow proper torque specifications and use approved tools to avoid damage or injury. Keep loose clothing tied back and avoid jewelry that could get caught in moving parts. Ensure proper ventilation when working with chemicals or paints. Dispose of hazardous materials responsibly to protect the environment. Never bypass safety systems or skip critical steps outlined in the manual. Stay alert and avoid distractions while working on the vehicle. Regularly inspect tools and equipment for damage or wear. Keep a fire extinguisher nearby and maintain a clean workspace to reduce tripping hazards. Be mindful of sharp edges and hot surfaces when handling parts. Always refer to the manual for specific safety precautions related to your task. If unsure about a procedure, consult a professional or seek additional resources. Remember, safety should always be your top priority when working on your VF Commodore. By following these guidelines, you can minimize risks and ensure a safe repair process.

The VF Commodore Workshop Manual is a crucial resource for owners and enthusiasts, offering detailed guidance for repairs and maintenance. Empowering both DIYers and professionals, it provides comprehensive instructions and diagrams. Available as a free PDF download, it ensures accessibility for everyone. By following this manual, users can confidently tackle tasks, from routine maintenance to complex repairs, fostering a sense of accomplishment and vehicle longevity. It’s an indispensable guide for anyone passionate about their Commodore.

summer waves pool pump manual pdf

Welcome to the Summer Waves Pool Pump Manual, a comprehensive guide for safe and effective operation․ This manual provides detailed instructions for installation, maintenance, and troubleshooting to ensure optimal performance and longevity of your pool pump system․

Overview of the Summer Waves Pool Pump System

The Summer Waves Pool Pump System is a crucial component for maintaining clean and clear pool water․ It operates by circulating water through a filtration and chemical treatment process, ensuring optimal water quality․ The system includes a basin, pump, and filter, designed to work seamlessly together․ Proper installation and setup are essential for efficient operation․ Regular maintenance, such as cleaning the filter cartridge, is recommended to prolong the system’s lifespan․ Always follow the manual’s guidelines for safe and effective use of the pool pump system․

Importance of Reading the Manual Before Use

Reading the Summer Waves Pool Pump Manual is essential for safe and effective operation․ It provides critical information on installation, maintenance, and troubleshooting, ensuring optimal performance․ The manual highlights safety precautions to prevent accidents and outlines proper usage guidelines․ By understanding the system’s components and functions, users can avoid common errors and extend the pump’s lifespan․ Familiarizing yourself with the manual helps resolve issues quickly and ensures compliance with safety standards․ Always refer to the manual before starting or maintaining your pool pump system for the best results․

Key Components of the Summer Waves Pool Pump

The Summer Waves Pool Pump features a durable basin, powerful pump, and efficient filter system․ These components work together to ensure clean and circulated water․

Basin, Pump, and Filter Overview

The basin collects and holds water, ensuring a steady supply for circulation․ The pump generates the necessary pressure to move water through the system․ The filter removes debris and contaminants, maintaining clean and clear water․ Together, these components work seamlessly to keep your pool water clean and safe for use․ Proper maintenance of these parts is essential for optimal performance and longevity of the system․

Understanding the Pump’s Water Circulation Cycle

The pump draws water from the pool basin, pushing it through the filter to remove dirt and debris․ Clean water is then recirculated back into the pool․ This continuous cycle ensures water remains clear and safe for swimming․ Regular maintenance, such as cleaning the filter, is crucial for maintaining proper flow and efficiency․

Using genuine Summer Waves replacement parts helps maintain optimal performance and extends the lifespan of your pool pump system․ Proper care ensures consistent water circulation and a clean swimming environment․

Installation Guidelines for the Summer Waves Pool Pump

Install the pump in a well-ventilated area near the pool, ensuring it is level and securely connected to the pool system․ Follow the manual’s instructions for proper setup and connections to avoid damage or malfunction․ Use genuine Summer Waves parts for optimal performance and to maintain warranty coverage․ Regular maintenance, like cleaning the filter, is essential for prolonging the pump’s lifespan and ensuring efficient water circulation․ Proper installation and care will help keep your pool water clean and safe for swimming․ Always refer to the provided manual for specific installation steps and safety precautions to ensure a safe and effective setup․ By following these guidelines, you can enjoy a hassle-free and efficient pool maintenance experience with your Summer Waves Pool Pump․ Additionally, make sure all electrical connections are secure and meet safety standards to prevent any potential hazards․ Finally, test the pump after installation to ensure it operates smoothly and quietly, providing consistent water flow for a clean and enjoyable pool environment․

steps for Setting Up the Pump in the Pool Area

Steps for Setting Up the Pump in the Pool Area

Place the pump on a level surface near the pool, ensuring proper ventilation․ Connect the pump to the pool system, following the manual’s instructions for secure and leak-free connections․ Install the filter cartridge and prime the pump before starting․ Connect the power supply, ensuring all electrical connections meet safety standards․ Test the pump to confirm smooth operation and proper water flow․ Regularly inspect and maintain the pump to ensure optimal performance and longevity․ Always refer to the manual for specific setup details and safety precautions to avoid damage or malfunction․

Ensuring Proper Ventilation and Placement

Proper ventilation is crucial for efficient pump operation․ Place the pump on a level, dry surface away from direct water exposure․ Ensure the area is well-ventilated to prevent moisture buildup․ Avoid placing the pump in confined or poorly ventilated spaces, as this can lead to overheating․ Keep the pump at least 12 inches away from any water source to prevent electrical hazards․ Ensure the pump is not exposed to direct sunlight or flammable materials․ Proper placement and ventilation will enhance performance, safety, and longevity of the pump․ Always follow manual guidelines for ideal positioning․

Safety Precautions and Warnings

Always follow safety guidelines to prevent accidents․ Keep the pump away from water and flammable materials․ Supervise children and ensure proper installation․ Use genuine parts only․

General Safety Guidelines for Pool Pump Operation

Always follow safety guidelines to ensure safe operation․ Keep the pump away from water and flammable materials․ Supervise children and avoid touching electrical components․ Use genuine Summer Waves parts only․ Regularly inspect for damage or wear․ Ensure proper ventilation and avoid overloading the system․ Never operate the pump near open flames or sparks․ Follow all warnings and instructions in the manual to prevent accidents and ensure optimal performance․ Maintain a safe distance from the pump while it is in operation․

Warnings to Avoid Serious Injury or Damage

Never submerge the pump in water or operate it near flammable materials․ Ensure all electrical connections are secure and avoid overloading․ Use only genuine Summer Waves parts to prevent malfunctions․ Monitor for sharp edges or loose components that could cause injury․ Keep the pump away from children and pets․ Regularly inspect for wear or damage․ Failure to follow these precautions may result in serious injury, electrical hazards, or equipment damage․ Always adhere to the manual’s guidelines to ensure safe operation and prevent potential risks․

Maintenance and Care Tips

Regularly clean the filter cartridge and replace it with genuine Summer Waves parts to ensure optimal performance․ Check for wear and tear, and ensure proper ventilation to prevent damage․

Regular Cleaning of the Filter Cartridge

Regular cleaning of the filter cartridge is essential for maintaining your pool pump’s efficiency․ Use a garden hose to rinse debris, and soak the cartridge in a cleaning solution if necessary․ Ensure it is completely dry before reinstalling․ Frequent cleaning prevents clogging and prolongs the cartridge’s lifespan․ Always refer to the Summer Waves Pool Pump Manual for specific guidance on cleaning schedules and methods․

Replacing the Filter Cartridge with Genuine Parts

Always replace the filter cartridge with genuine Polygroup or Summer Waves parts to ensure optimal performance and maintain warranty coverage․ Turn off the pump and relieve pressure before removal․ Dispose of the old cartridge responsibly․ Align the new cartridge securely and tighten according to the manual․ Proper replacement prevents damage and ensures clean water circulation․ Refer to the Summer Waves Pool Pump Manual for step-by-step instructions and guidelines․

Troubleshooting Common Issues

This section covers common issues like leaks or unusual noise․ Check for blockages, loose connections, or worn parts․ Refer to the manual for detailed solutions․

Identifying and Resolving Pump Malfunctions

Identify pump malfunctions by checking for unusual noises, leaks, or reduced water flow․ Inspect the filter cartridge for blockages or damage and clean or replace it as needed․ Ensure all connections are secure and properly sealed․ If the pump does not start, verify power supply and circuit breaker status․ For persistent issues, consult the troubleshooting section in the manual or contact Summer Waves customer support for assistance․ Regular maintenance and genuine parts can prevent many common problems․ Always follow safety guidelines when addressing malfunctions․

Addressing Leaks or Noise Problems

Inspect the pump and connections for any signs of leaks or wear․ Tighten loose fittings and replace damaged O-rings or gaskets․ Noise issues may arise from improper installation or debris in the pump․ Ensure the pump is level and securely fastened․ Clean the impeller and housing regularly to remove blockages․ If noise persists, check for misaligned parts or worn components that may need replacement․ Addressing these issues promptly prevents further damage and ensures smooth operation of the pool pump system․

Warranty and Customer Support

Your Summer Waves Pool Pump is backed by a comprehensive warranty․ For inquiries or support, contact Summer Waves customer service directly․ Use genuine parts for warranty validity․

Understanding the Warranty Coverage

The Summer Waves Pool Pump is covered by a limited warranty ensuring protection against defects in materials and workmanship․ The warranty period varies depending on the product and components, with specific terms outlined in the manual․ Coverage includes repairs or replacements of defective parts when used as directed․ To maintain warranty validity, only genuine Summer Waves replacement parts should be used․ For detailed warranty terms and conditions, refer to the manual or contact Summer Waves customer support directly․

Contacting Summer Waves Customer Service

For assistance with your Summer Waves Pool Pump, contact customer service via phone, email, or through their official website․ Representatives are available to address questions, concerns, and warranty inquiries․ Visit the Summer Waves website for contact details and support resources․ Ensure to have your product serial number and manual handy for efficient service․ The customer service team is committed to providing timely and effective support to ensure your pool pump operates at its best․

Best Practices for Prolonging Pump Life

Regularly clean the filter cartridge, use genuine Summer Waves parts, and follow maintenance schedules․ Proper operation and storage will extend the pump’s lifespan and efficiency․

Using Genuine Summer Waves Replacement Parts

Using genuine Summer Waves replacement parts is essential for maintaining your pool pump’s performance and warranty․ Genuine parts ensure compatibility, efficiency, and safety․ Avoid third-party components that may cause malfunctions or damage․ Always refer to the manual for part numbers and installation instructions․ Regularly inspect and replace worn or damaged parts to prevent system failure․ Genuine parts are designed to meet Summer Waves’ quality standards, ensuring optimal operation and extending the pump’s lifespan․

Scheduling Regular Maintenance Checks

Regular maintenance checks are crucial for ensuring the longevity and efficiency of your Summer Waves pool pump․ Schedule routine inspections to clean the filter cartridge, check for wear and tear, and ensure all connections are secure․ Proper ventilation and alignment of components are vital for optimal performance․ Refer to the manual for recommended maintenance intervals and procedures․ Regular checks help prevent malfunctions, extend the pump’s lifespan, and maintain clean, safe pool water for an enjoyable swimming experience․

Final Tips for Optimal Pool Pump Performance

For peak performance, clean the filter cartridge regularly and replace it with genuine Summer Waves parts․ Schedule routine maintenance and ensure proper ventilation․ Monitor water levels and avoid overloading the pump․ Always follow the manual’s guidelines to prevent damage and ensure safe operation․ Regular checks and timely replacements will extend the life of your pool pump, keeping your pool clean and safe for enjoyable swimming experiences throughout the season․

Additional Resources

Download the Summer Waves Pool Pump Manual PDF for detailed instructions and troubleshooting․ Explore recommended tools and accessories for enhanced pool maintenance and performance․

Downloading the Summer Waves Pool Pump Manual PDF

To access the Summer Waves Pool Pump Manual PDF, visit the official Summer Waves website or authorized distributors․ Search for your specific pool pump model, and download the manual for free․ Ensure the PDF is from a trusted source to avoid incorrect or outdated information․ The manual includes detailed installation, maintenance, and troubleshooting guides․ If you encounter issues, contact Summer Waves customer support for assistance․ Always refer to the official manual for accurate instructions to ensure safe and efficient operation of your pool pump system․

Recommended Tools and Accessories for Pool Maintenance

For optimal pool maintenance, use a pool skimmer to remove debris and a vacuum head for thorough cleaning․ Invest in a water test kit to monitor chemical levels․ Regularly check and clean the filter cartridge using genuine Summer Waves parts․ A pool cover is essential for protecting the pool when not in use․ Keep a lubricant handy for moving parts and ensure all tools are stored properly․ Avoid using non-genuine accessories, as they may damage your system or void the warranty․ Always refer to the manual for specific tool recommendations tailored to your pool pump model․

letter s worksheets pdf

Letter S worksheets PDFs offer engaging tools for teaching letter recognition‚ tracing‚ and writing skills. They include tracing exercises‚ coloring pages‚ and interactive activities to make learning fun and effective for young learners.

1.1 Importance of Letter Recognition in Early Education

Letter recognition is a cornerstone of early education‚ laying the foundation for reading and writing skills. It helps children understand the relationship between sounds and symbols‚ crucial for phonics and spelling. Recognizing letters like “S” enhances vocabulary and comprehension. Early exposure builds confidence and curiosity‚ fostering a love for learning. Interactive tools‚ such as tracing and coloring worksheets‚ make this process engaging. By mastering letter recognition‚ children gain essential skills needed for academic success.

1.2 Benefits of Using Printable Worksheets for Learning

Printable worksheets offer a structured and engaging way to support early learning; They provide repetition and practice‚ essential for mastering letter recognition and writing skills. Worksheets cater to different learning styles‚ with activities like tracing‚ coloring‚ and matching‚ making learning interactive and fun. They are also cost-effective and easily accessible‚ allowing teachers and parents to customize learning experiences. Printable worksheets promote fine motor skills through tracing exercises and help children develop handwriting accuracy. Additionally‚ they offer a sense of accomplishment as children complete tasks‚ boosting confidence and motivation; These tools are versatile‚ making them ideal for both classroom and home use‚ ensuring consistent learning progress.

Types of Letter S Worksheets Available

Letter S worksheets include tracing exercises‚ coloring pages‚ and recognition activities; They offer varied learning experiences‚ catering to different skills and interests for young learners.

2.1 Tracing Worksheets for Uppercase and Lowercase S

Tracing worksheets for uppercase and lowercase S are essential for developing fine motor skills and handwriting. These worksheets feature dotted letters‚ guiding children to trace accurately. They help distinguish between uppercase and lowercase letters‚ improving letter formation and recognition. Many PDFs include dot-to-dot activities‚ making the process engaging and fun. Parents and teachers can print these worksheets easily‚ providing a structured yet enjoyable learning experience. Regular practice with these tracing exercises ensures mastery of the letter S‚ preparing children for more complex writing tasks in the future.

2.2 Coloring Pages with Letter S Themes

Coloring pages with letter S themes are a vibrant way to engage young learners while reinforcing letter recognition and phonics skills. These worksheets often feature illustrations of objects starting with the letter S‚ such as snakes‚ sunflowers‚ or soccer balls‚ allowing children to associate the letter with familiar items. The activities combine creativity with learning‚ as kids color and identify S-themed pictures. Many PDFs include interactive elements‚ like “color all the S letters” exercises‚ making the process both fun and educational. These coloring pages are ideal for preschoolers and kindergarteners‚ helping them develop color recognition while strengthening their understanding of the letter S in a playful manner.

2.3 Letter Recognition and Identification Activities

Letter recognition and identification activities in Letter S worksheets PDFs are designed to help children identify and distinguish the letter S from other letters. These exercises often include matching games‚ where children connect uppercase and lowercase S letters‚ as well as identifying S letters in a set of letters. Some worksheets feature pictures of objects starting with the letter S‚ such as snakes or sunflowers‚ and ask children to circle or color the S letters. These activities enhance visual recognition and phonetic awareness‚ making learning interactive and enjoyable. They also help children develop essential skills for reading and writing‚ ensuring a strong foundation in letter identification. These exercises are particularly effective for preschoolers and early elementary students learning the alphabet.

Key Features of Effective Letter S Worksheets

Effective Letter S worksheets feature clear layouts‚ dotted letters for tracing‚ and engaging visuals. They include interactive activities‚ skill progression‚ and customization options to cater to different learning needs.

3.1 Dotted Letters for Tracing Practice

Dotted letters are a cornerstone of effective Letter S worksheets‚ providing clear guides for tracing. These templates help children develop fine motor skills and handwriting accuracy by following the dots to form both uppercase and lowercase S. The structured approach ensures that learners can practice consistently‚ building muscle memory and confidence. Many worksheets include both capital and lowercase versions‚ allowing for comprehensive practice. The dotted format is particularly beneficial for young learners‚ as it simplifies the process of learning complex letter shapes. By tracing over the dots‚ children can grasp the correct formation of the letter S‚ making it easier to transition to independent writing later on. This method is widely praised for its effectiveness in early education.

3;2 Interactive Activities for Engagement

Interactive activities in Letter S worksheets are designed to captivate young learners and deepen their understanding. These include coloring pages‚ matching games‚ and cut-and-paste exercises that make learning dynamic. Coloring pages‚ for instance‚ allow children to associate the letter S with objects or animals‚ enhancing visual recognition. Matching games‚ where kids link the letter S to corresponding pictures‚ reinforce memory and cognitive skills. Cut-and-paste activities encourage fine motor precision while familiarizing students with the letter’s shape. These engaging tasks transform traditional learning into a playful experience‚ keeping children focused and motivated. By integrating fun with education‚ interactive activities ensure that learning the letter S is both enjoyable and effective for early learners. Such features make Letter S worksheets a valuable resource for teachers and parents alike.

3.3 Customization Options for Teachers and Parents

Letter S worksheets PDFs often include customization options‚ allowing teachers and parents to tailor activities to individual needs. Many resources enable users to modify fonts‚ text size‚ and content‚ ensuring the material suits various learning styles. For instance‚ educators can add specific words or images related to the letter S to reinforce vocabulary. Some worksheets also allow customization of tracing exercises‚ offering dotted letters for precise practice. These adaptable features empower teachers and parents to create personalized learning experiences‚ making the worksheets versatile tools for both classroom and home use. Customization ensures that the activities remain engaging and relevant for diverse learners‚ enhancing their effectiveness in teaching the letter S. This flexibility makes Letter S worksheets a valuable asset for educators and caregivers.

Age-Specific Letter S Worksheets

Worksheets are designed for different age groups‚ catering to preschoolers‚ kindergartners‚ and early elementary students. Activities include tracing‚ coloring‚ and identifying the letter S‚ tailored to developmental stages.

4.1 Worksheets for Preschoolers (2-3 Years)

Worksheets designed for preschoolers aged 2-3 years focus on foundational skills like tracing‚ coloring‚ and identifying the letter S. These activities are simple‚ engaging‚ and tailored to young learners’ developmental stages. Tracing exercises with dotted letters help improve fine motor skills‚ while coloring pages introduce the letter S in a fun‚ visual way. Interactive elements like matching games and identifying objects starting with the S sound encourage early phonological awareness. These worksheets are perfect for introducing toddlers to the basics of letter recognition and writing‚ making learning an enjoyable and creative experience. They are easy to print and use in both classroom and home settings‚ providing a solid start for early education.

4.2 Worksheets for Kindergarten and Early Elementary (4-5 Years)

Worksheets for kindergarten and early elementary students (4-5 years) are designed to build on foundational skills‚ focusing on writing‚ phonetics‚ and letter recognition. Activities include tracing uppercase and lowercase S‚ identifying objects starting with the “s” sound‚ and coloring pages with S-themed visuals. These exercises help refine handwriting‚ improve phonological awareness‚ and reinforce letter association. Interactive elements like matching games and word searches add engagement. The worksheets are structured to align with curriculum goals‚ making them ideal for classroom use. They also cater to home learning‚ offering parents a resource to support their child’s educational journey. These tools are essential for fostering confidence and fluency in early learners.

Additional Resources for Learning Letter S

Explore free printable templates‚ PDFs‚ and online tools for customizing worksheets. These resources offer varied activities‚ ensuring engaging and comprehensive learning experiences tailored to curriculum needs.

5.1 Free Printable Templates and PDFs

Free printable templates and PDFs for letter S worksheets are widely available online‚ offering a variety of activities to suit different learning needs. These resources include tracing worksheets for uppercase and lowercase letters‚ coloring pages featuring items that start with the letter S‚ and interactive exercises like dot-to-dot tracing. Many templates are designed for specific age groups‚ such as preschoolers or kindergarten students‚ ensuring age-appropriate challenges. Websites like worksheetspack.com and others provide downloadable PDFs that can be easily printed at home or in the classroom. Some templates also offer customization options‚ allowing teachers and parents to tailor the content to individual needs. These free resources make learning the letter S fun and engaging‚ while also reinforcing essential skills like handwriting and letter recognition.

5.2 Online Tools for Customizing Worksheets

Online tools for customizing letter S worksheets offer flexibility and personalization‚ allowing teachers and parents to create tailored learning experiences. Websites like worksheetspack.com provide options to modify fonts‚ text‚ and layout‚ ensuring the content meets specific educational needs; These tools enable the creation of unique worksheets that cater to different age groups and skill levels. For instance‚ you can design tracing exercises with dotted letters or incorporate images for interactive activities. Customization options enhance engagement and make learning the letter S more effective; By utilizing these online resources‚ educators can ensure their students receive materials that align with their curriculum and learning objectives‚ fostering a more dynamic and personalized approach to education.

liebowitz social anxiety scale pdf

The Liebowitz Social Anxiety Scale (LSAS) is a widely used 24-item instrument designed to assess fear and avoidance in social situations, aiding in diagnosing and managing social anxiety disorder․

1․1 Overview of the LSAS

The Liebowitz Social Anxiety Scale (LSAS) is a 24-item instrument assessing fear and avoidance in social situations․ It evaluates both performance and interaction scenarios, providing insights into the severity of social anxiety․ The scale includes two versions: a clinician-administered (LSAS-CA) and a self-report (LSAS-SR) format, ensuring flexibility in clinical and research settings․ Widely used globally, the LSAS has been validated in multiple languages and cultures, demonstrating strong reliability and validity․ Its versatility makes it a key tool in diagnosing and managing social anxiety disorder (SAD) across diverse populations․

1․2 Historical Background and Development

The Liebowitz Social Anxiety Scale (LSAS) was originally developed in the 1980s by Dr․ Michael R․ Liebowitz to assess social phobia comprehensively․ Initially called the Liebowitz Social Phobia Scale (LSPS), it was later refined into the LSAS in 2000 to better reflect the evolving understanding of social anxiety disorder (SAD)․ The scale has since become a gold standard in both clinical practice and research, widely adopted globally for its reliability and validity; Its development marked a significant advancement in the field, enabling accurate assessment of social anxiety symptoms and their impact on daily functioning․

Structure and Scoring of the Liebowitz Social Anxiety Scale

The LSAS is a 24-item scale assessing fear/avoidance in social situations․ Each item is rated 0-3, with total scores ranging from 0-72, indicating severity levels․

2․1 Subscales and Items

The LSAS consists of 24 items, each assessing fear and avoidance in specific social situations․ These items are divided into two subscales: social interaction and performance․ The social interaction subscale evaluates anxiety in situations like meeting new people or joining a conversation, while the performance subscale focuses on anxiety related to public speaking, eating in public, or writing in front of others․ Each item is rated on a 4-point Likert scale, from 0 (no fear) to 3 (severe fear), providing a comprehensive assessment of social anxiety severity․

2․2 Scoring Methodology and Interpretation

The LSAS is scored by summing the ratings of its 24 items, each ranging from 0 (no fear) to 3 (severe fear), resulting in a total score between 0 and 72․ Higher scores indicate greater social anxiety severity․ The scale is divided into two subscales: social interaction (11 items) and performance (13 items), each scored separately․ Clinical interpretation often categorizes scores as mild (0-30), moderate (30-50), severe (50-65), and extreme (≥65)․ This scoring system enables clinicians to assess symptom severity and monitor treatment progress effectively․

Psychometric Properties of the LSAS

The LSAS demonstrates strong psychometric properties, with high internal consistency and reliability․ It has been validated across diverse populations as a reliable measure of social anxiety severity․

3․1 Reliability and Internal Consistency

The LSAS exhibits strong internal consistency, with Cronbach’s alpha values ranging from 0․89 to 0․94, indicating high reliability․ Its consistent performance across diverse populations underscores its robustness as a clinical tool for assessing social anxiety severity․ This reliability ensures that the scale accurately captures both fear and avoidance dimensions, making it a dependable measure for both research and clinical settings․

3․2 Validity and Treatment Sensitivity

The LSAS demonstrates strong validity, effectively measuring social anxiety severity across various populations․ It is highly sensitive to treatment effects, making it a valuable tool for assessing therapeutic outcomes․ Studies show consistent correlations between LSAS scores and improvements in clinical trials, validating its use as a primary endpoint in research․ Its sensitivity to change ensures accurate monitoring of symptom reduction, further establishing its reliability in both clinical and research settings․

Clinical Applications of the LSAS

The LSAS is extensively used in clinical settings to diagnose and monitor social anxiety disorder, aiding therapists and clinicians in tailoring treatments and assessing progress effectively․

4․1 Use in Diagnosing Social Anxiety Disorder (SAD)

The LSAS is instrumental in diagnosing SAD by evaluating fear and avoidance across social and performance situations․ Clinicians use the scale to assess symptom severity, identifying patterns that align with DSM-5 criteria․ The 24-item structure allows for a comprehensive evaluation, distinguishing between different levels of anxiety and avoidance․ This tool helps in differentiating SAD from other anxiety disorders, ensuring accurate diagnoses and targeted interventions․ Its reliability and validity make it a cornerstone in clinical assessments for SAD․

4․2 Role in Clinical Trials and Research

The LSAS is widely used as a primary endpoint in clinical trials to evaluate the efficacy of treatments for social anxiety disorder․ Its sensitivity to change allows researchers to measure symptom improvement accurately․ In Phase 3 studies, the LSAS has been employed to assess the real-world effects of interventions like fasedienol; The scale’s reliability and validity make it a preferred tool for demonstrating treatment outcomes․ Its application in research ensures standardized evaluation, aiding in the development of evidence-based therapies for social anxiety․

Real-World Studies and FDA Feedback

The LSAS is integral in real-world studies assessing treatments like fasedienol․ FDA feedback highlights its role in Phase 3 trials as a primary endpoint, ensuring reliable outcomes documented in the LSAS PDF․

5․1 Use of LSAS in Phase 3 Clinical Studies

The LSAS has been employed as the primary efficacy endpoint in Phase 3 clinical studies evaluating treatments for social anxiety disorder, such as fasedienol․ Its structured format allows for precise measurement of symptom severity, facilitating robust data collection․ Additionally, the availability of the LSAS PDF ensures uniform administration across study sites, enhancing consistency and reliability․ This widespread use underscores its validity and sensitivity in capturing treatment effects, making it a cornerstone in clinical research․

5․2 FDA Feedback on Study Design

The FDA has provided positive feedback on study designs utilizing the LSAS as a primary endpoint, emphasizing its reliability and sensitivity in measuring treatment effects․ Researchers have incorporated this feedback to refine study protocols, ensuring alignment with regulatory expectations․ The FDA’s input has been instrumental in optimizing study designs, particularly in Phase 3 trials evaluating novel therapies like fasedienol․ This collaboration has enhanced the scientific rigor and clinical relevance of studies, ensuring patient-centric outcomes remain a focal point in treatment development․

Cross-Cultural and International Use

The LSAS has been successfully translated and validated for use in diverse cultures, including Latin American countries, Spain, Portugal, and Japan, ensuring its global applicability․

6․1 Translation and Validation in Latin American Countries

The LSAS has been translated and validated for use in Latin American countries, Spain, and Portugal․ Researchers collaborated to ensure cultural adaptation, maintaining the scale’s reliability and validity․ The self-report version (LSAS-SR) demonstrated excellent internal consistency across diverse populations․ Validation studies confirmed its effectiveness in assessing social anxiety disorder (SAD) in these regions․ This adaptation has facilitated cross-cultural research, enabling comparisons of social anxiety manifestations and treatment responses․ The successful translation underscores the LSAS’s global utility in mental health assessments․

6․2 Application in Japanese Populations

The Liebowitz Social Anxiety Scale has been effectively applied in Japanese populations, with studies conducted by institutions such as Tokyo Women’s Medical University; The clinician-administered version (LSAS-CA) is commonly used to assess social anxiety disorder (SAD) in Japan․ Cultural adaptations ensured the scale’s validity and reliability in this population․ The LSAS has been utilized in clinical trials and research to evaluate treatment efficacy for social anxiety in Japanese settings․ Its psychometric properties, including internal consistency, have been validated, making it a valuable tool for cross-cultural mental health assessments․

Self-Report vs․ Clinician-Administered Versions

The LSAS is available in self-report (LSAS-SR) and clinician-administered (LSAS-CA) versions, each offering unique advantages for assessing social anxiety․ The LSAS-SR allows individuals to independently evaluate their symptoms, while the LSAS-CA provides a clinician’s objective assessment, ensuring accuracy and depth in understanding social anxiety severity and treatment response․

7․1 LSAS-SR (Self-Report Version)

The LSAS-SR is a self-report version allowing individuals to independently assess their social anxiety symptoms․ It mirrors the clinician-administered version, covering 24 social interaction and performance scenarios․ Participants rate fear and avoidance on a Likert scale, making it accessible for large-scale studies and personal use․ Its reliability and validity have been established across diverse populations, including Latin American countries, Spain, and Portugal․ The LSAS-SR is often used in research and clinical settings due to its ease of administration and participant-reported insights․

7․2 LSAS-CA (Clinician-Administered Version)

The LSAS-CA is a clinician-administered version of the scale, requiring a trained professional to guide participants through the assessment․ It evaluates fear and avoidance across 24 social scenarios, ensuring accurate and consistent data collection․ Unlike the self-report version, the LSAS-CA allows clinicians to probe for clarifications, enhancing the reliability of responses․ This version is particularly valuable in clinical trials and research settings, where precise symptom measurement is critical․ Its administration ensures a standardized approach, making it a robust tool for diagnosing and monitoring social anxiety disorder․

Accessibility and Availability of the LSAS PDF

The LSAS PDF is accessible for download, offering a convenient tool for assessing social anxiety․ However, its use is subject to copyright restrictions․

8․1 Downloading the LSAS PDF

The LSAS PDF is readily available for download from various academic and clinical websites․ It is often provided as a free resource for researchers and clinicians․ To access the LSAS PDF, users can visit the official publisher’s website or reputable psychological assessment platforms․ Some versions may require registration or purchase due to copyright restrictions․ The PDF format allows easy distribution and use in clinical settings, making it a convenient tool for assessing social anxiety symptoms․ Always ensure compliance with copyright laws when using or sharing the LSAS PDF․

8․2 Copyright and Usage Rights

The Liebowitz Social Anxiety Scale is copyrighted, and its use is restricted under specific terms․ Clinicians and researchers must obtain proper licensing or permission to administer or distribute the scale․ The LSAS is available for clinical and research purposes, but reproduction or modification without authorization is prohibited․ Users must adhere to copyright laws and the publisher’s guidelines to ensure ethical and legal use․ For detailed information, refer to the official publisher’s website or contact the copyright holder directly․

The Liebowitz Social Anxiety Scale remains a cornerstone in assessing social anxiety, with global acceptance․ Future research should focus on enhancing its adaptability for diverse populations and integrating technology for improved accessibility and efficacy in clinical settings․

9․1 Summary of the LSAS Importance

The Liebowitz Social Anxiety Scale (LSAS) is a cornerstone instrument for assessing social anxiety disorder, widely recognized for its reliability and validity․ Its global acceptance stems from its ability to comprehensively evaluate fear and avoidance in social situations․ The scale’s adaptability across cultures and languages, including validated translations for Latin American and Japanese populations, underscores its versatility․ As a key tool in both clinical practice and research, the LSAS has significantly advanced the understanding and treatment of social anxiety, making it indispensable in mental health care․

9․2 Future Research and Improvements

Future research on the LSAS should focus on enhancing its cross-cultural validity and exploring its application in diverse populations․ Advances in digital health could enable online adaptations, improving accessibility․ Additionally, refining the scale to better capture subtle symptoms and individual differences may strengthen its utility․ Integration with emerging technologies, such as artificial intelligence, could further personalize assessments․ Continuous validation in clinical trials and real-world studies will ensure the LSAS remains a robust tool for advancing social anxiety disorder treatment and research globally․

Page 15 of 44

Powered by WordPress & Theme by Anders Norén