exploring anatomy and physiology in the laboratory pdf

This comprehensive laboratory manual provides interactive exercises, digital resources, and practical applications to enhance student understanding of human anatomy and physiology through hands-on learning experiences․

Overview of the Laboratory Manual

The laboratory manual is a comprehensive guide designed for a two-semester anatomy and physiology course․ It includes detailed exercises, digital resources, and practical activities to enhance learning․ With clear illustrations and photographs, the manual focuses on hands-on experiences, such as anatomical terminology, tissue preparation, and dissection․ It also integrates bioinformatics and molecular biology techniques, providing students with a well-rounded understanding of human structure and function through interactive and engaging methods․

Importance of Hands-On Learning in Anatomy and Physiology

Hands-on learning is crucial for understanding complex anatomical structures and physiological processes․ By engaging in dissections, tissue preparation, and experiments, students develop a deeper grasp of human biology․ Interactive activities enhance critical thinking and problem-solving skills, making abstract concepts tangible․ This approach fosters a connection between theoretical knowledge and practical application, preparing students for real-world scenarios in healthcare and research․

Key Exercises and Activities in the Laboratory

Lab exercises include fetal pig dissections, anatomical terminology studies, and physiological measurements, providing practical experiences that reinforce textbook concepts and enhance understanding of human anatomy and physiology․

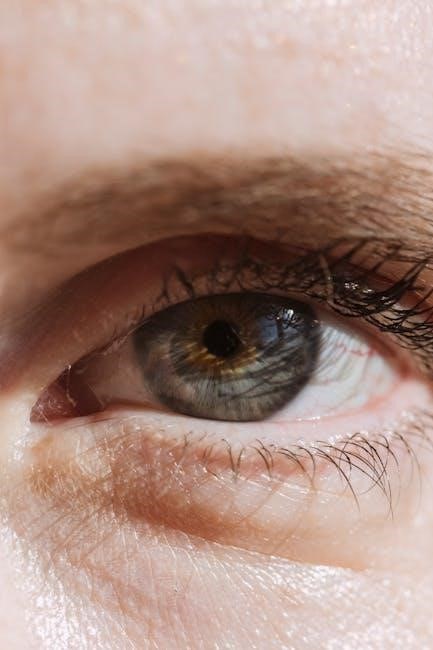
Anatomical Terminology and Directional Terms

Mastering anatomical terminology and directional terms is essential for accurately describing body structures and their relationships․ Terms like anterior, posterior, and medial help locate organs and systems precisely․ Exercises in the lab manual focus on identifying and applying these terms correctly, ensuring a strong foundation for understanding complex anatomical concepts and their clinical relevance․ This section provides interactive activities to reinforce terminology through practical application․

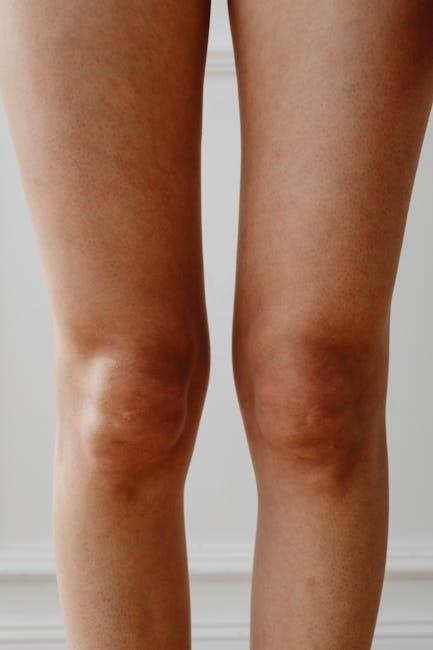
Exploring Body Cavities and Organ Systems

The laboratory manual provides detailed exercises for identifying and understanding body cavities, such as thoracic and abdominal, and their associated organ systems․ Through diagrams, dissections, and virtual simulations, students explore the spatial relationships and functions of organs like the heart and lungs․ This hands-on approach helps visualize complex anatomical structures, reinforcing their roles in maintaining bodily functions and preparing students for real-world applications in healthcare and diagnostics․

Physiological Measurements and Data Analysis

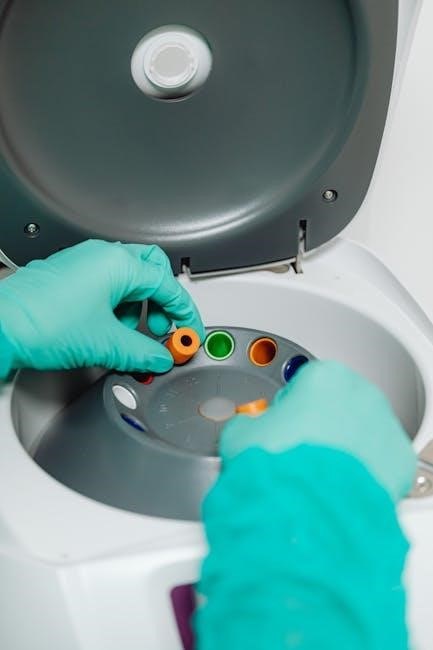
Laboratory exercises focus on measuring physiological parameters such as heart rate, blood pressure, and respiratory rate using specialized equipment like ECG and spirometry․ Students analyze data to understand normal and abnormal trends, correlating findings with anatomical structures․ This hands-on approach enhances comprehension of physiological processes and prepares learners for interpreting real-world clinical data, fostering critical thinking and diagnostic skills essential in healthcare professions․

Histology and Microscopic Anatomy

Exploring tissue samples through microscopy reveals cellular structures, enabling students to identify and understand the organization of tissues and their functional roles in human physiology․

Preparation and Examination of Tissue Samples

Proper preparation of tissue samples, including fixation, sectioning, and staining, is essential for microscopic examination․ Techniques like hematoxylin and eosin (H&E) staining enhance visibility of cellular structures․ Students learn to identify tissue types and their organization, correlating microscopic observations with physiological functions․ This hands-on approach deepens understanding of histological features and their role in overall human anatomy, aligning with laboratory learning objectives․

Identifying Cellular Structures and Tissue Types

Using microscopes, students examine tissue samples to identify cellular structures and classify tissue types, such as epithelial, connective, muscle, and nervous tissues․ Digital tools enhance visualization, while staining techniques like H&E highlight cellular details․ This process aids in understanding tissue organization, function, and their role in human anatomy, fostering a deeper appreciation of histological diversity and its significance in physiology․

Dissection and Exploration of Anatomical Structures

Guided dissection of fetal pigs and other specimens provides hands-on experience, correlating findings with human anatomy and enhancing understanding of internal structures and their functions;

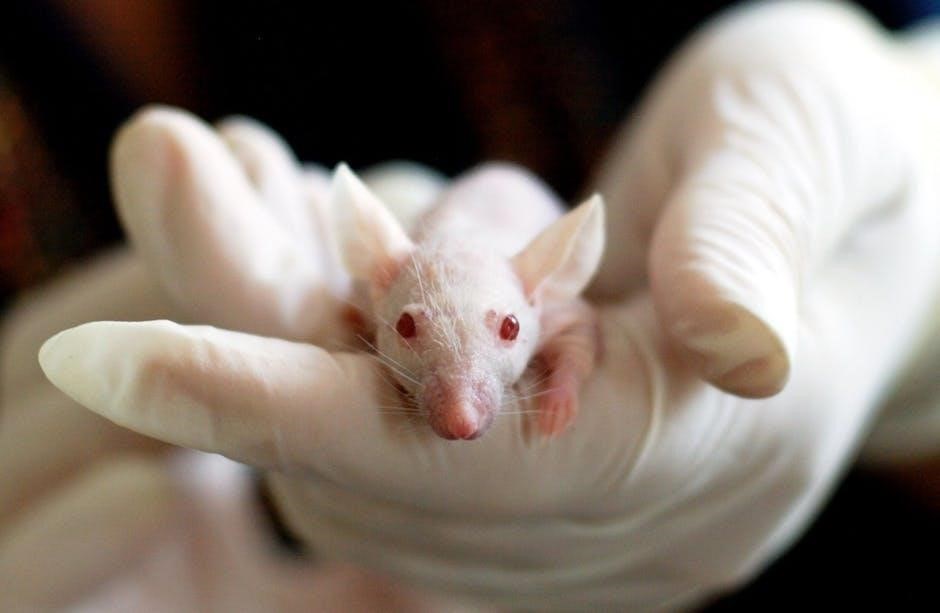
Guided Dissection of Fetal Pigs and Other Specimens

Guided dissection of fetal pigs and other specimens is a cornerstone of anatomy and physiology labs, offering students hands-on experience to explore internal structures․ These exercises provide a detailed understanding of organ systems and their spatial relationships, allowing for direct comparison with human anatomy․ Specimens are carefully prepared and preserved to ensure optimal learning outcomes, making dissection a vital tool for visualizing and grasping complex anatomical concepts in a practical setting․

Correlating Dissection Findings with Human Anatomy

Correlating dissection findings with human anatomy enhances understanding of structural and functional similarities․ Fetal pigs, as models, allow comparison of organ systems and spatial relationships, aiding in mapping anatomical features․ This comparative approach bridges laboratory observations with human applications, deepening comprehension and retention․ It prepares students to apply anatomical knowledge in clinical contexts effectively, making dissection a valuable tool for bridging theory and practice in anatomy and physiology education․

Laboratory Tools and Equipment

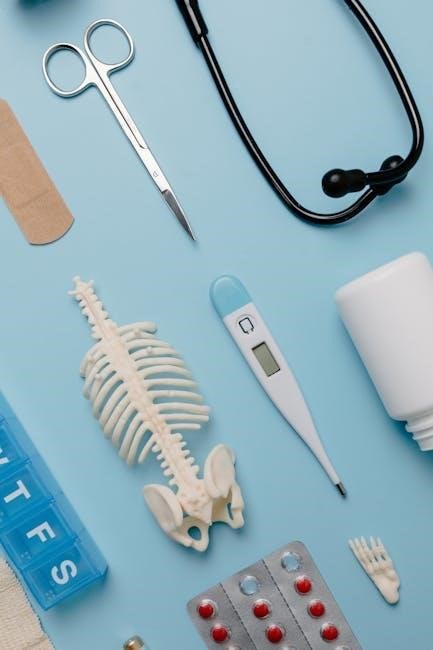
Essential tools include microscopes, dissection kits, and measurement devices․ Digital resources and software enhance learning by providing interactive simulations and anatomical visualizations, enriching the laboratory experience effectively․

Microscopes, Dissection Kits, and Measurement Tools

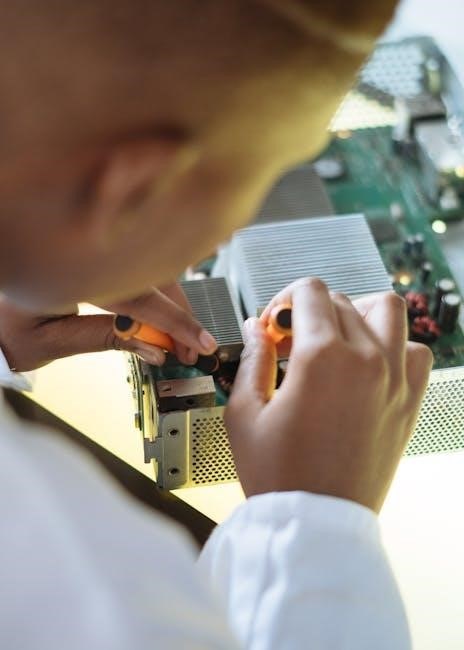
Microscopes enable detailed examination of cellular structures and tissues, while dissection kits provide hands-on experience with anatomical specimens․ Measurement tools, such as calipers and thermometers, allow students to collect physiological data accurately․ These instruments are essential for practical exercises, fostering a deeper understanding of anatomical and physiological concepts through direct observation and experimentation․

Using Digital Resources and Software for Enhanced Learning

Digital resources and software enhance anatomy and physiology education by providing interactive simulations, 3D models, and virtual dissection tools․ These technologies allow students to explore complex structures and processes in detail․ Additionally, online platforms offer real-time data collection and analysis, enabling precise physiological measurements․ Interactive quizzes and multimedia content further engage students, fostering a dynamic and immersive learning environment that complements traditional laboratory exercises and promotes deeper understanding of anatomical and physiological concepts․

Integration of Bioinformatics in Laboratory Studies

Bioinformatics tools enable the analysis of anatomical and physiological data, integrating molecular biology techniques with digital resources to enhance understanding of human systems through data-driven insights․

Using Online Databases for Anatomical and Physiological Data

Online databases provide extensive anatomical and physiological data, supporting molecular studies and bioinformatics․ Tools like PVEGE enable researchers to analyze structural and functional relationships, aiding in precise dissection and experimentation․ These resources are invaluable for laboratory exercises, offering detailed histopathological examinations and real-world applications․ Students can access these databases to prepare for dissections, enhancing their understanding of human anatomy through interactive visuals and datasets from the provided PDF manual․

Application of Molecular Biology Techniques

Molecular biology techniques, such as PCR and gel electrophoresis, are integral to anatomy and physiology labs, enabling detailed analysis of cellular structures and tissue types․ These methods, supported by bioinformatics tools, allow for precise data interpretation and visualization․ Exercises in the lab manual emphasize the practical application of these techniques, fostering a deeper understanding of molecular mechanisms in human anatomy and their role in advancing physiological studies․

Troubleshooting Common Challenges in the Lab

Identifying and addressing difficulties in tissue preparation, dissection, and physiological measurements are crucial․ Techniques include optimizing sample handling and leveraging digital resources for accurate data interpretation and analysis․

Overcoming Difficulties in Tissue Preparation and Dissection

Common challenges include improper tissue fixation, dehydration, and contamination․ Standardized protocols, precise equipment handling, and digital guides help mitigate these issues․ Proper techniques ensure accurate histological observations and successful dissection outcomes, enhancing the learning experience and experimental reliability in anatomy and physiology laboratories․

Interpreting and Correcting Experimental Data

Accurate data interpretation is crucial for valid experimental outcomes․ Common challenges include inconsistent measurements and sample preparation errors․ Techniques like imaging with tools such as Nikon DSLR cameras ensure precise documentation․ Histopathologic examinations and molecular biology methods aid in verifying results․ Adhering to standardized protocols minimizes discrepancies, enabling reliable conclusions․ Correcting errors involves re-evaluating procedures and leveraging digital tools for enhanced accuracy in anatomy and physiology experiments․

Practical Applications of Laboratory Learning

Laboratory learning connects anatomical and physiological concepts to real-world applications, preparing students for careers in healthcare and research by developing practical skills and critical thinking abilities․

Connecting Lab Experiments to Real-World Scenarios

Laboratory experiments in anatomy and physiology bridge the gap between theoretical knowledge and practical applications, enabling students to understand how biological processes apply to real-world healthcare and research scenarios․ By simulating clinical cases and scientific investigations, students gain insight into diagnostics, treatment, and research methodologies․ For instance, molecular biology techniques learned in the lab are directly applicable in genetic testing and personalized medicine, while histopathology exams mirror real-world diagnostic practices in medical settings․

Developing Critical Thinking and Problem-Solving Skills

Laboratory exercises in anatomy and physiology encourage students to analyze data, interpret results, and draw meaningful conclusions․ Hands-on activities, such as tissue preparation and physiological measurements, challenge students to think critically and troubleshoot unexpected outcomes․ These experiences foster problem-solving abilities, enabling students to apply theoretical knowledge to practical scenarios and real-world challenges in healthcare and scientific research․

Future Directions in Anatomy and Physiology Laboratories

Advancements in virtual simulations and 3D modeling are revolutionizing lab learning, offering immersive experiences and enhancing understanding of complex anatomical structures and physiological processes․

Advancements in Virtual and Augmented Reality Tools

Virtual and augmented reality tools are transforming anatomy and physiology education by providing immersive, interactive experiences․ Students can explore 3D models of organs, simulate dissections, and visualize physiological processes in real-time․ These technologies enhance engagement, improve retention, and allow for repetitive practice without the need for physical specimens․ They also enable instructors to create customized learning environments tailored to individual student needs, making complex concepts more accessible and memorable․

Emerging Technologies in Anatomy and Physiology Education

Emerging technologies like AI simulations and interactive software are revolutionizing anatomy and physiology education․ These tools enable students to visualize complex structures and processes in real-time, fostering deeper understanding․ Interactive simulations allow for self-paced learning, while virtual models provide detailed insights into human anatomy․ Such innovations enhance engagement, improve retention, and offer flexible learning opportunities, making anatomy and physiology education more accessible and effective for modern students․

honeywell burner controller manual

Welcome to the Honeywell Burner Controller Manual! This guide provides comprehensive insights into operating and maintaining your burner control system. Designed for efficiency and safety, these controllers offer compatibility with various fuels and advanced monitoring features. Mastering this manual ensures optimal performance and secure operation.

1.1 Overview of Honeywell Burner Controllers

Honeywell burner controllers are advanced, microprocessor-based systems designed to manage industrial burners efficiently. They support gas, oil, and combination fuels, ensuring precise control and safety. These controllers feature automatic sequencing, flame supervision, and diagnostics, making them reliable for various industrial applications. Their robust design and user-friendly interface simplify operation and maintenance.

1.2 Purpose and Scope of the Manual

This manual provides detailed instructions for installing, operating, and maintaining Honeywell burner controllers. It covers setup, operation modes, troubleshooting, and maintenance procedures. Intended for users of all experience levels, the guide ensures safe and effective system operation, optimizing performance and longevity of your burner control system.

Key Features of Honeywell Burner Controllers

Honeywell burner controllers offer compatibility with gas, oil, and combination fuels, programmable settings, advanced safety features, and seamless integration with other Honeywell systems for enhanced efficiency and control.

2.1 Compatibility with Different Fuel Types

Honeywell burner controllers are designed to work with various fuel types, including gas, oil, and combination fuels. This versatility ensures optimal performance across different industrial applications, supporting both single and dual-fuel configurations. The RM7800 series and DBC2000 models, for instance, are engineered to handle gas, oil, or combination fuel systems efficiently and safely.

2.2 Programmable Settings and Customization Options

Honeywell burner controllers offer extensive programmable settings, allowing users to tailor operations to specific needs. Features include adjustable ignition timing, fuel flow rates, and customizable burner sequencing. Advanced models like the RM7800 series provide programmable profiles for precise control, enhancing operational efficiency and adaptability across various industrial applications.

2.3 Safety Features and Protections

Honeywell burner controllers are equipped with robust safety features, including flame supervision and automatic shutdown capabilities. They incorporate fault detection and system status indicators to ensure safe operation. These protections minimize risks and ensure compliance with industry safety standards, offering reliable and secure burner control solutions for various industrial applications.

2.4 Integration with Other Honeywell Systems

Honeywell burner controllers seamlessly integrate with other Honeywell systems, such as thermostats, sensors, and remote monitoring tools. This compatibility enhances system functionality and allows for centralized control and monitoring. Integration ensures optimized performance, streamlined operations, and compatibility with Honeywell’s ecosystem, providing a cohesive and efficient solution for industrial applications.

Installation and Setup Guidelines

This section provides essential steps for installing and setting up your Honeywell burner controller, ensuring safe, efficient operation, and compliance with installation guidelines.

3.1 Pre-Installation Requirements

Before installing the Honeywell burner controller, ensure the system is powered off and compatible with your fuel type. Verify proper ventilation, and check for required sensors and accessories. Review safety guidelines and installation standards to ensure compliance and safe operation.

3.2 Step-by-Step Installation Process

Mount the Honeywell burner controller in a secure, accessible location. Connect power and fuel lines according to specifications. Link sensors and ensure proper wiring. Configure the controller settings for fuel type and operation mode. Test all connections and perform a trial run to verify functionality. Refer to the manual for specific model instructions.

3.3 Connecting Sensors and Accessories

Connect UV scanners, pressure switches, and gas valves to the controller. Ensure proper wiring and polarity for all sensors. Install flame detection devices and verify their alignment. Securely attach accessories like timers and remote controls. Double-check all connections for tightness and accuracy. Refer to the manual for specific sensor compatibility and configuration details.

Operation and Control Modes

This section explains the operation and control modes of Honeywell burner controllers, including automatic and manual operation, burner sequencing, and flame supervision, ensuring optimal performance and safety.

4.1 Automatic vs. Manual Operation

Honeywell burner controllers offer both automatic and manual operation modes. Automatic mode handles burner startup, sequencing, and monitoring, ensuring efficient and safe operation. Manual mode allows for direct control, ideal for troubleshooting or specific operational needs, providing flexibility and precision in burner management.

4.2 Understanding Burner Sequencing

Burner sequencing refers to the controlled process of starting and operating burners in a specific order. Honeywell controllers automate this sequence, ensuring safe ignition, fuel flow, and combustion. Automatic sequencing optimizes efficiency, reduces wear, and prevents unsafe conditions. Manual override is also available for custom control, with clear indicators for each stage of operation.

4.3 Flame Supervision and Monitoring

Flame supervision ensures continuous monitoring of burner operation, verifying proper ignition and combustion. Honeywell controllers use UV scanners or flame rods to detect flame presence, enhancing safety. Real-time monitoring prevents unsafe conditions by detecting anomalies and triggering shutdowns if issues arise, ensuring reliable and secure burner performance at all times.

Troubleshooting Common Issues

This section helps identify and resolve common problems, such as faulty thermostats or air distribution issues. Learn how to reset the burner control unit and address faults effectively for smooth operation.

5.1 Diagnosing Faulty Thermostats

Identify thermostat issues by checking for inconsistent heating or system shutdowns. Ensure proper connections and calibration. Test the thermostat’s functionality by bypassing it temporarily. If issues persist, replace the faulty thermostat to restore optimal burner performance and safety. Always follow safety precautions when handling electrical components.

5.2 Addressing Air Distribution Problems

Check for blockages in air distribution ducts and ensure proper airflow. Verify duct lengths and vent openings meet specifications. Insufficient airflow can cause inefficient burner performance. Consult the manual for guidance on adjusting or cleaning components. If issues persist, contact a qualified technician to ensure safe and optimal system operation.

5.3 Resetting the Burner Control Unit

To reset the burner control unit, switch off the power supply and wait for 30 seconds. Ensure all safety precautions are followed. Restore power and check if the system resumes normal operation. If issues persist, refer to the manual or contact a certified technician for assistance. Always verify the system is cool before restarting.

Maintenance and Safety Best Practices

Regular maintenance ensures optimal performance and safety. Always follow safety protocols, including power cutoff before servicing. Schedule inspections and upgrade firmware as needed for reliability.

6.1 Regular Maintenance Schedule

Adhere to a pre-scheduled maintenance program to ensure optimal performance. Regularly inspect and clean sensors, check fuel connections, and verify flame supervision. Schedule annual professional inspections and ensure firmware updates are installed promptly. Maintain accurate maintenance records for compliance and troubleshooting efficiency. Always follow Honeywell’s recommended guidelines for your specific burner controller model.

6.2 Safety Precautions During Maintenance

Always disconnect power before performing maintenance. Wear protective gear, including gloves and safety glasses. Ensure the system is cool to avoid burns. Follow lockout/tagout procedures strictly. Never bypass safety features or attempt unauthorized modifications. Adhere to local safety regulations and Honeywell’s guidelines to prevent accidents and ensure a safe working environment.

6.3 Upgrading Firmware and Software

Regular firmware and software updates ensure optimal performance and safety. Always download updates from Honeywell’s official portal using compatible tools. Power down the system before starting the update process. Avoid interruptions during installation to prevent errors. Follow the provided guidelines to ensure a smooth upgrade, maintaining system reliability and certification compliance.

Advanced Features of Specific Models

Explore advanced features of Honeywell’s RM7800 Series, DBC2000, and other models, offering enhanced flame supervision, programmable controls, and seamless integration with industrial systems for superior performance and reliability.

7.1 Honeywell RM7800 Series Relay Module

The Honeywell RM7800 Series Relay Module is a microprocessor-based burner control designed for industrial applications. It supports gas, oil, or combination fuel systems, offering automatic burner sequencing, flame supervision, and advanced diagnostics. Compatible with various sensors, it ensures reliable operation and integrates seamlessly with industrial burner systems, meeting UL certifications for safety and performance.

7.2 Honeywell DBC2000 Integrated Burner Controller

The Honeywell DBC2000 is a microprocessor-based integrated burner controller designed for industrial single-burner applications. It supports gas, oil, or combination fuels, offering advanced features like automatic burner sequencing, flame supervision, and system diagnostics; The DBC2000 ensures precise control, high efficiency, and compliance with safety standards, making it a reliable choice for industrial combustion systems.

Diagnostic Tools and Procedures

Honeywell burner controllers feature advanced diagnostic tools, including system status indicators and self-diagnostics, to identify faults quickly. Fault codes provide detailed information for efficient troubleshooting and resolution.

8.1 System Status Indication

The Honeywell burner controller provides clear system status indication through LED lights and digital displays, ensuring real-time monitoring of operational modes, faults, and diagnostics. This feature enables quick identification of issues, such as burner faults or system malfunctions, allowing for prompt resolution and minimizing downtime. Remote diagnostics further enhance troubleshooting efficiency and reliability.

8.2 Self-Diagnostics and Fault Codes

Honeywell burner controllers feature advanced self-diagnostics, identifying system issues like ignition failures or sensor malfunctions. The control unit displays specific fault codes, enabling precise troubleshooting. These codes, stored in memory, provide detailed insights into system performance and aid in resolving issues efficiently, ensuring minimal downtime and optimal operational safety and reliability.

8.3 Remote Monitoring and Control Options

Honeywell burner controllers offer remote monitoring and control capabilities, enabling real-time system supervision through web-based interfaces or dedicated software tools. This feature allows users to monitor performance, adjust settings, and receive alerts from a distance, enhancing operational efficiency and reducing the need for on-site visits, while ensuring seamless system management and control.

Compliance and Certifications

Honeywell burner controllers meet rigorous safety standards and environmental regulations, ensuring compliance with UL certifications and energy efficiency requirements for reliable and eco-friendly performance.

9.1 UL and Other Safety Certifications

Honeywell burner controllers adhere to strict UL safety standards, ensuring reliable performance and protection. They meet certifications for gas, oil, and combination fuel systems, reducing operational risks. Compliance with these standards guarantees safe combustion control, aligning with global safety regulations and industry best practices for industrial applications.

9.2 Environmental and Energy Efficiency Standards

Honeywell burner controllers are designed to meet stringent environmental and energy efficiency standards. They incorporate advanced technologies to minimize emissions and optimize fuel consumption. Compliance with global energy regulations ensures reduced environmental impact while maintaining high performance. These controllers support sustainable combustion control, aligning with modern eco-friendly practices and energy-saving initiatives for industrial and commercial applications.

The Honeywell Burner Controller Manual provides essential guidance for efficient, safe, and environmentally responsible burner operation; Proper usage and maintenance ensure optimal performance and longevity of your system.

10.1 Summary of Key Takeaways

This manual highlights Honeywell burner controllers’ compatibility with various fuels, programmable settings, and advanced safety features. Regular maintenance and adherence to guidelines ensure optimal performance, safety, and compliance with certifications, making these controllers reliable for industrial and commercial applications while promoting energy efficiency and environmental responsibility.

10.2 Importance of Proper Usage and Maintenance

Proper usage and consistent maintenance are crucial for maximizing efficiency, safety, and product lifespan. Adhering to guidelines ensures optimal performance, prevents potential faults, and guarantees compliance with industry standards. Regular checks and updates are vital for reliable operation and long-term durability of Honeywell burner controllers.

summer waves pool manual pdf

The Summer Waves Pool Manual PDF is a comprehensive guide for setting up, maintaining, and troubleshooting your pool. It covers essential safety tips, assembly steps, and chemical guidelines to ensure a safe and enjoyable swimming experience. Designed for both rectangular and round frame pools, this manual provides detailed instructions for various Summer Waves models, helping users make the most of their pool.

Overview of the Summer Waves Pool Manual

The Summer Waves Pool Manual provides a detailed guide for setup, maintenance, and troubleshooting. It covers essential topics like pool assembly, safety precautions, and water treatment. The manual is designed to be user-friendly, ensuring a smooth experience for both new and experienced pool owners. Key sections include step-by-step installation instructions, chemical handling guidelines, and tips for extending the pool’s lifespan. By following the manual, users can enjoy a safe and enjoyable swimming experience while maintaining their pool effectively.

Key Features of the Summer Waves Elite Frame Pool

The Summer Waves Elite Frame Pool stands out for its durable construction and user-friendly design. Its high-quality PVC and polyester walls ensure longevity, while the sturdy metal frame provides stability. The pool is available in various sizes, including rectangular and round models, to fit different spaces and preferences. It comes with a comprehensive manual, making assembly and maintenance straightforward. Additional features like a chemical feeder and filter cartridge system enhance water quality, ensuring a safe and enjoyable swimming experience for the entire family.

Safety Precautions and Warnings

Always follow safety guidelines to avoid accidents. Ensure the pool is installed on a level, non-wooden surface and never overfill it. Keep chemicals out of reach of children and pets.

Important Safety Guidelines for Pool Installation

Ensure the pool site is clear of grass and debris to prevent damage. Avoid installing on wooden surfaces or using sand for leveling. Never overfill the pool beyond the marked water level. Use genuine Summer Waves parts to maintain structural integrity. Keep chemicals away from children and pets, and follow proper handling instructions. Dispose of packaging materials safely. Always consult the manual for model-specific installation tips to ensure a secure and stable setup. Adhering to these guidelines will help prevent accidents and prolong the pool’s lifespan.

Chemical Safety and Handling Instructions

Always follow the chemical guidelines outlined in the manual to ensure safe water conditions. Use disinfectants and sanitizers within the recommended limits, such as up to 1.0 mg/l for disinfectants and 500 mg/l for chlorides. Store chemicals in a cool, dry, well-ventilated area, away from children and pets. Wear protective gloves and eyewear when handling chemicals. Never mix different chemicals, and avoid breathing in fumes during application. Properly dispose of empty chemical containers according to local regulations. Refer to the manual for specific instructions on water treatment and chemical feeder operation to maintain a safe and healthy swimming environment.

Pool Assembly and Setup Instructions

The manual provides step-by-step guides for assembling rectangular and round frame pools, including site preparation, leveling, and frame construction for models like the Elite Frame Pool.

Step-by-Step Guide to Frame Assembly

The manual offers a detailed, step-by-step guide for assembling the pool frame, starting with site preparation and leveling the ground. It outlines how to attach the frame components securely, ensuring stability. Instructions include connecting the pump, filter, and chemical feeder, as well as proper installation of the pool liner. Users are advised to follow the sequence carefully to avoid misalignment. The guide also covers specific assembly tips for rectangular and round frames, referencing the Elite Frame Pool model. Always consult the manual for model-specific instructions to ensure a safe and durable setup.

Rectangular vs. Round Frame Pool Setup Tips

Rectangular frame pools offer larger swimming areas and fit well in yards with specific shapes, while round pools provide better water circulation and easier assembly. For rectangular models, ensure the site is clear of debris and leveled properly. Round pools benefit from a smooth, grass-free surface for optimal liner fit. Both require avoiding wooden surfaces and sand leveling. Follow the manual’s site preparation guidelines for your chosen frame type. Proper alignment and secure connections are crucial for both designs to ensure stability and longevity of the pool structure.

Maintenance and Upkeep

Regular cleaning, filter cartridge replacement, and water treatment are essential for maintaining your pool. Follow the manual’s guidelines for chemical feeding and pump maintenance to ensure optimal performance and safety.

Cleaning and Filter Cartridge Replacement

Regular cleaning and filter cartridge replacement are crucial for maintaining your pool’s hygiene and functionality. Skim debris from the surface daily and clean the pool floor weekly. The filter cartridge should be inspected every two weeks and replaced as needed. Ensure proper rinsing and reinstallation after cleaning; Always use genuine Summer Waves filter cartridges for optimal performance. Refer to the manual for detailed instructions on how to access and replace the cartridge. Regular maintenance ensures clear water, efficient filtration, and a longer lifespan for your pool equipment.

Water Treatment and Chemical Feeder Guidelines

Proper water treatment is essential for maintaining safe and clean pool water. Test the water regularly to ensure pH levels are between 7.2 and 7.8, and chlorine levels are 1-3 ppm. Use the chemical feeder to distribute sanitizer evenly. Follow the manual’s guidelines for adding chlorine or bromine tablets. Avoid over-chlorination, as it can damage equipment or irritate skin. Always consult the manual for specific feeding rates and instructions tailored to your pool model. Regular monitoring and adjustment will ensure optimal water quality and a safe swimming environment throughout the season.

Troubleshooting Common Issues

Identify leaks, filter clogs, or pump malfunctions by referring to the manual. Check for loose connections and ensure proper chemical levels. Contact customer support if unresolved.

Identifying and Solving Leaks or Damage

Check for leaks by inspecting seams, connections, and valves. Tighten loose fittings and apply sealant if necessary. For damage, use the provided patch kit or replace faulty parts. Ensure the pool is not overfilled, as this can cause structural stress; Regularly inspect the liner and frame for signs of wear. Address issues promptly to prevent further damage; Refer to the manual for detailed repair instructions and always use genuine Summer Waves replacement parts for optimal results.

Filter Pump Maintenance and Repair

Regularly clean and replace the filter cartridge with genuine Summer Waves parts to ensure optimal performance. Check for blockages in the pump and pipes, and clear them promptly. Lubricate moving parts annually to prevent wear. If the pump fails to start, inspect the power cord and connections. For persistent issues, consult the troubleshooting guide in the manual or contact customer support. Proper maintenance extends the pump’s lifespan and keeps your pool water clean and safe for swimming.

Warranty and Customer Support

The Summer Waves Pool Manual PDF outlines the warranty terms and customer support options. It provides details on how to file claims and contact assistance for troubleshooting and inquiries, ensuring comprehensive support for pool owners.

Understanding the Summer Waves Pool Warranty

The Summer Waves Pool Warranty provides coverage for defects in materials and workmanship under normal use. Warranty claims must be submitted directly to Polygroup, ensuring adherence to installation and maintenance guidelines. Proper registration of your pool is essential for warranty validation. The warranty does not cover damage caused by improper installation or misuse. For detailed terms and conditions, refer to the warranty section in the manual. Understanding these terms helps ensure your pool remains protected and functional for years to come.

Contacting Customer Service for Assistance

For any questions or issues, Summer Waves customer service is available to assist. Visit support.polygroupstore.com for troubleshooting guides and FAQs. You can also contact them directly at 1 (888) XXX-XXXX or via email. Before reaching out, ensure you have reviewed the Troubleshooting Guide in the manual. Proper documentation, such as proof of purchase, may be required for warranty claims. Their team is ready to help resolve setup or maintenance concerns, ensuring your pool experience remains enjoyable and hassle-free.

Model-Specific Instructions

The Summer Waves Pool Manual PDF offers detailed setup guides for various models, including the Elite Frame, Prism Frame, and Quick Set pools, ensuring accurate installation and optimal performance.

Summer Waves Elite Frame Pool Manual Details

The Summer Waves Elite Frame Pool Manual provides detailed instructions for the 28-page guide, covering assembly, maintenance, and troubleshooting. It includes specific setup tips for rectangular and round frames, ensuring proper installation. The manual emphasizes safety precautions, such as avoiding wooden surfaces and not overfilling the pool. Key sections include chemical handling, filter cartridge replacement, and warranty information. Designed for both novice and experienced users, it offers clear, step-by-step guidance to maximize pool enjoyment while ensuring longevity and safety.

Prism Frame and Quick Set Pool Setup Differences

Understanding the setup differences between Prism Frame and Quick Set pools is crucial for optimal installation. The Prism Frame pool features a durable, three-layer PVC basin with polyester reinforcement, ideal for larger capacities. It requires a more involved assembly process with a metal frame. In contrast, the Quick Set pool is inflatable, offering a faster and simpler setup with no metal parts. Both options provide unique benefits, catering to different user preferences for ease, durability, and pool size, ensuring a tailored swimming experience for every household.

With proper setup and maintenance, enjoy a safe and refreshing pool season. Refer to your Summer Waves Pool Manual PDF for guidance and troubleshooting tips. Happy swimming!

Final Tips for Enjoying Your Summer Waves Pool

For a safe and enjoyable experience with your Summer Waves Pool, ensure regular maintenance and follow all safety guidelines. Clean the filter cartridge frequently and monitor water chemical levels to maintain cleanliness. Avoid overfilling the pool and keep it away from wooden surfaces. Always refer to the manual for troubleshooting and setup tips. By following these steps, you can extend the lifespan of your pool and enjoy countless summer memories with family and friends. Happy swimming!

excel basic formatting 2021 pdf

Master essential Excel formatting techniques to enhance your spreadsheets’ readability and professionalism. Learn how to apply fonts, colors, and alignments effectively to organize data clearly and efficiently.

Overview of Excel Formatting Essentials

Excel basic formatting is crucial for enhancing spreadsheet clarity and professionalism. It involves adjusting fonts, colors, and alignments to make data visually appealing. Conditional formatting highlights data dynamically, while number formatting ensures precision. Page layout tools help prepare files for printing or PDF export. Understanding these essentials allows users to present data more effectively, improving readability and efficiency in analysis and reporting. Proper formatting also aids in maintaining consistency across documents, making it easier to share and collaborate on spreadsheets.

Basic Excel Formatting Tools

Understanding Font, Color, and Alignment Options

Master font styles, color schemes, and alignment tools to enhance spreadsheet readability. These options help organize data effectively, making it visually appealing and easier to interpret for users.

Font styles, such as bold, italic, and underline, help emphasize important data. Colors can highlight key information or differentiate categories. Alignment options, like left-align, center, or right-align, ensure text is neatly organized. Proper use of these tools enhances readability and makes spreadsheets more professional. Consistent formatting across sheets improves clarity and reduces confusion. Learning these basics is essential for creating visually appealing and functional Excel worksheets. These features are fundamental for organizing and presenting data effectively in any Excel document.

Number Formatting in Excel

Excel offers various number formatting options to enhance data presentation. Customize numbers as currency, percentages, dates, or scientific notation to improve readability and accuracy in your spreadsheets.

How to Apply Custom Number Formats

To apply custom number formats in Excel, select the cells you want to format, right-click, and choose Format Cells. In the Number tab, select a category like Number, Currency, or Date. Use custom codes for specific formats, such as `0.00` for decimals or `MM/DD/YYYY` for dates. This feature enhances readability and ensures consistency in data presentation. For advanced customization, explore Excel’s built-in styles or create your own formats to suit your needs. Proper formatting makes data easier to interpret and aligns with professional standards.

Conditional Formatting

Conditional formatting highlights cells based on specific data rules, making spreadsheets more dynamic and visually informative for better data analysis and decision-making processes.

Setting Up Rules for Dynamic Cell Formatting

Conditional formatting allows you to set dynamic rules for cell formatting. For instance, you can highlight cells based on their values, such as coloring cells containing dates after a specific year or formatting cells with numbers above a certain threshold. To apply these rules, navigate to the Home tab, select “Conditional Formatting,” and choose from options like “Highlight Cells Rules” or “New Rule.” This feature enhances data visualization by making trends and anomalies instantly noticeable, improving your spreadsheet’s clarity and usability.

Page Layout and Printing

Adjust page setup for PDF export by setting margins, orientation, and print areas. Use the Page Layout ribbon to ensure consistent formatting before printing or exporting files.

Adjusting Page Setup for PDF Export

To ensure your Excel files export correctly as PDFs, adjust the page setup by selecting the correct paper size, orientation, and margins. Use the Page Layout ribbon to set these preferences. Reset page breaks under the Breaks option to remove unwanted dotted lines. Properly configure headers and footers to maintain consistency. These adjustments guarantee that your spreadsheet appears professional and well-formatted when exported as a PDF, making it ideal for sharing or printing.

Using Formulas and Functions

Master essential Excel formulas and functions to perform calculations and data analysis. Use SUM, AVERAGE, and COUNT for basic operations, and explore advanced functions for complex computations.

Essential Formulas for Basic Data Analysis

Discover the fundamental formulas and functions in Excel for data analysis. Learn to use SUM for totals, AVERAGE for averages, and COUNT for tallying items. Explore conditional functions like IF for logical tests and VLOOKUP for data retrieval. Understand how to apply formulas for basic arithmetic, statistical calculations, and text manipulation. Mastering these essentials will streamline your workflow and enhance your ability to extract insights from data efficiently. Practice with real-world examples to solidify your skills in formula application and troubleshooting.

Data Visualization Basics

Learn to create simple charts and graphs in Excel to visualize data effectively. Understand how to select the right chart type for your data and customize it for clarity and impact.

Creating Simple Charts and Graphs

Start by selecting your data range in Excel. Go to the Insert tab and choose a chart type that best represents your data, such as a bar chart, line graph, or pie chart. Use the Chart Design tools to customize colors, titles, and labels for clarity. Adjust the axis settings if needed and ensure the chart accurately reflects your data. You can also add data labels or legends for better understanding. Finally, resize or move the chart to fit your worksheet layout perfectly.

Exporting to PDF

Use Excel’s PRINT function to export spreadsheets as PDFs, ensuring formatting remains consistent. This method maintains the layout and style of your worksheet for professional output.

Best Practices for Printing Excel Files as PDF

For consistent PDF output, use Excel’s PRINT function instead of “Save as PDF” to preserve formatting. Adjust page layout, margins, and breaks beforehand. Ensure fonts and colors are consistent across sheets. Reset page breaks via the Page Layout ribbon to avoid unwanted dotted lines. Preview your PDF before finalizing to catch formatting issues. This method ensures professional and accurate representation of your Excel data in PDF format.

Common Formatting Issues

Unexpected formatting changes, infinite loops, and page break issues are frequent challenges. Use the PRINT function to maintain formatting and reset page breaks for consistent PDF output.

Troubleshooting Tips for Excel Formatting

Encounter formatting issues? Start by checking page breaks in the Page Layout ribbon. Resetting breaks can eliminate unwanted dotted lines. For PDF exporting, use the PRINT function instead of saving as PDF to preserve formatting. Fix infinite loops in functions by avoiding circular references. Ensure formulas use correct cell references—relative or absolute. Lastly, test conditional formatting rules to prevent unexpected results, and use Excel’s built-in troubleshooters for quick resolutions. These tips help maintain consistency and prevent errors in your spreadsheets.

Advanced Formatting Techniques

Use styles and themes to ensure consistency across your spreadsheet. These tools help maintain a professional look and simplify formatting, saving time for complex data presentations.

Using Styles and Themes for Consistency

Styles and themes in Excel offer a seamless way to maintain uniformity in your spreadsheets. By applying predefined styles, you can ensure consistent font sizes, colors, and alignments across sheets. Themes provide a cohesive look with coordinated colors and effects, enhancing the visual appeal of your data. This approach not only saves time but also reduces formatting errors, making your work more professional and easier to interpret. Regular use of these tools will elevate your spreadsheet’s overall presentation quality significantly.

Formatting for Readability

Enhance spreadsheet readability by organizing data with clear fonts, spacing, and alignment. Use consistent styles to make information easy to scan and understand at a glance.

Improving Data Presentation in Excel

Effective data presentation in Excel involves organizing information clearly and concisely. Use consistent formatting, such as uniform fonts and colors, to maintain professionalism. Proper alignment and spacing ensure readability, while conditional formatting highlights key data points. Employing styles and themes enhances visual consistency across sheets. Simplify complex datasets with charts and graphs for better comprehension. These techniques make your spreadsheets more engaging and easier to interpret, improving overall efficiency in data communication and analysis.

Mastering basic Excel formatting enhances productivity and efficiency in data presentation. These essential skills are vital for clear and professional communication. Continuously practice to refine your Excel skills for better outcomes.

Mastering Basic Excel Formatting for Efficiency

Mastering basic Excel formatting is crucial for enhancing productivity and presenting data effectively. By understanding essential tools like font, color, and alignment, you can organize and highlight key information. Conditional formatting adds dynamic rules to emphasize trends or anomalies, while proper number formatting ensures clarity in numerical data. Efficient page layout and printing settings, including PDF export, help in creating professional outputs. Regular practice and troubleshooting common issues will refine your skills, making you more efficient in managing and presenting data in Excel.

alchemik pdf

“Alchemik PDF” offers a convenient digital reading experience of Paulo Coelho’s timeless masterpiece. This format enhances accessibility, allowing readers to explore Santiago’s transformative journey anytime, anywhere, with ease and clarity.

1.1 Overview of the Book and Its Popularity

“Alchemik PDF” is a widely popular digital version of Paulo Coelho’s iconic novel. The story follows Santiago, a young shepherd, on his spiritual journey to fulfill his Personal Legend. This timeless tale of self-discovery, love, and spirituality has captivated readers globally, making it one of the most translated and bestselling books in history, resonating with diverse cultures and generations alike through its universal themes and profound messages.

1.2 Importance of the PDF Format in Modern Reading

The PDF format has become essential in modern reading due to its convenience and accessibility. It allows readers to access books like “Alchemik” on various devices, ensuring portability and ease of use. PDFs maintain formatting, making the reading experience consistent. Additionally, they enable quick searches and easy sharing, catering to the fast-paced digital lifestyle while preserving the original content’s integrity and appeal for readers worldwide.

The Plot Summary of “Alchemik”

“Alchemik” follows Santiago, a young shepherd, on a journey of self-discovery and spiritual exploration. His quest for treasure leads to profound life lessons and transformation.

2.1 The Journey of Santiago: A Young Shepherd’s Quest

Santiago, a young shepherd, embarks on a transformative journey driven by recurring dreams of treasure. Leaving his peaceful life in Spain, he ventures into the unknown, encountering challenges and mentors. His quest for material wealth evolves into a spiritual exploration, revealing life’s deeper truths and his Personal Legend, guiding him toward self-discovery and fulfillment.

2.2 Key Themes and Symbolism in the Story

The narrative explores themes of spirituality, self-discovery, and the pursuit of dreams. Alchemy symbolizes personal transformation, while Santiago’s journey reflects the universal quest for meaning. The concept of a “Personal Legend” underscores the idea of fulfilling one’s destiny. Symbols like the desert, the Pyramids, and the alchemist himself serve as metaphors for life’s challenges, guidance, and the transformative power of belief and perseverance.

The Author: Paulo Coelho

Paulo Coelho, a celebrated Brazilian novelist, crafted The Alchemist, a timeless tale set in Andalusia. His writing blends simplicity with profound philosophical insights, resonating globally.

3.1 Biographical Background of Paulo Coelho

Paulo Coelho, born in Rio de Janeiro in 1947, grew up in a traditional Catholic family. His early life was marked by a rebellious streak, leading to confinement in a mental institution. He later studied law but abandoned it to pursue writing, initially composing song lyrics. His unique spiritual and philosophical approach in The Alchemist reflects his diverse life experiences and inner transformations, solidifying his status as a global literary icon.

3.2 His Writing Style and Philosophical Approach

Paulo Coelho’s writing is marked by simplicity, depth, and a blend of spirituality with everyday life. His philosophical approach explores themes of self-discovery, destiny, and the universe’s interconnectedness. Drawing from his own experiences, Coelho crafts stories that resonate universally, making complex ideas accessible. His use of parables, symbolism, and universal truths creates a profound impact, fostering introspection and inspiring readers to pursue their personal legends with courage and faith.

Cultural and Historical Context

The novel is set in Andalusia, a region rich in cultural history influenced by diverse civilizations. This backdrop shapes the story’s themes of spirituality and self-discovery, reflecting historical alchemical traditions.

4.1 The Influence of Alchemy on the Narrative

Alchemy serves as the narrative’s central metaphor, guiding Santiago’s journey. The pursuit of the Philosopher’s Stone symbolizes his quest for spiritual enlightenment and self-discovery. Alchemical processes mirror his transformations, emphasizing the harmony between material and spiritual worlds. This thematic backbone enriches the story, blending historical alchemical practices with universal truths about destiny and personal growth, making it a profound allegory for life’s journey.

4;2 The Setting of Andalusia and Its Significance

The story unfolds in Andalusia, a region rich in cultural and historical heritage. This setting provides a vivid backdrop for Santiago’s journey, blending the simplicity of pastoral life with the mysticism of the landscape. Andalusia’s diverse influences—Christian, Islamic, and Gypsy—shape the narrative’s spiritual undertones, offering a unique environment for Santiago’s transformation and exploration of universal truths about destiny and personal growth.

The Alchemist as a Modern Classic

The Alchemist has transcended time, resonating globally with its timeless themes. Its universal appeal has made it a modern classic, cherished by readers of all generations.

5.1 The Book’s Reception and Global Impact

The Alchemist initially faced slow sales but soon became a global phenomenon. Its universal themes resonated deeply, making it a bestseller in numerous countries. With translations in 88 languages and over 65 million copies sold, it is one of the most widely read books in history. The PDF format has further amplified its reach, enabling millions to access Santiago’s inspiring journey digitally, solidifying its status as a modern literary classic.

5.2 Translations and Sales Figures

The Alchemist has been translated into 88 languages, with over 65 million copies sold worldwide. Its digital version, including the Alchemik PDF, has further boosted accessibility. The book’s enduring popularity is evident in its consistent sales, making it one of the best-selling books in history. Its widespread reach underscores its universal appeal and the timeless nature of its message.

Reading “Alchemik” in PDF Format

Alchemik PDF offers a convenient and accessible way to experience Paulo Coelho’s masterpiece. The digital format ensures clarity and readability, making Santiago’s journey easily portable and engaging for modern readers.

6.1 Advantages of Digital Reading

Digital reading offers unparalleled convenience, with PDFs easily accessible on multiple devices. Adjust font sizes for comfort, and carry entire libraries without added weight. Enhanced search features simplify finding key passages. The portability and accessibility of Alchemik PDF make it ideal for modern readers seeking flexibility and convenience in their reading experiences, ensuring Santiago’s journey is always within reach.

6.2 Availability and Sources for Download

The Alchemik PDF is widely available online, with various sources offering free and paid downloads. Popular platforms include digital libraries, e-book repositories, and file-sharing sites. Readers can access the PDF in multiple languages, ensuring global accessibility. Additionally, many websites provide direct links to download the file, making it easy to obtain a digital copy of Paulo Coelho’s beloved novel. Always verify the source for a secure download experience.

Themes and Symbols

“Alchemik PDF” explores profound themes like self-discovery, spirituality, and the pursuit of dreams. Symbols such as the desert, alchemy, and the Philosopher’s Stone enrich Santiago’s transformative journey, offering deep philosophical insights.

7;1 The Concept of Personal Legend

The concept of Personal Legend in “Alchemik PDF” signifies an individual’s unique destiny or purpose. Santiago’s journey embodies this idea, as he learns to listen to his heart and fulfill his spiritual mission. Coelho emphasizes that each person has a unique path to follow, highlighting the importance of self-discovery and perseverance in achieving one’s dreams and aspirations in life.

7.2 The Role of Destiny and Universal Language

In “Alchemik PDF”, destiny is portrayed as an inevitable force guiding individuals toward their Personal Legend. The Universal Language symbolizes a deeper, intuitive understanding of the world, enabling Santiago to interpret omens and connect with nature. This concept underscores the idea that the universe communicates through signs, urging individuals to embrace their unique path and trust in the harmony of existence, ultimately fulfilling their intended purpose in life.

The Main Characters

Santiago, a young shepherd, embarks on a journey to fulfill his Personal Legend; The Alchemist serves as his mentor, guiding him toward spiritual and material fulfillment, while the Crystal Merchant and Fatima represent pivotal influences in his life, shaping his path and decisions.

8.1 Santiago: The Protagonist’s Transformation

Santiago, a young shepherd, evolves from a simple life in Andalusia to a world of spiritual discovery. His journey, driven by recurring dreams, challenges him to embrace the unknown. Through trials and encounters, he learns to listen to his heart and trust the Universal Language. Santiago’s transformation is marked by courage, self-discovery, and the pursuit of his Personal Legend, ultimately leading him to fulfill his destiny and find true purpose.

8.2 The Alchemist: A Mentor and Guide

The Alchemist serves as a wise mentor, guiding Santiago toward understanding the Soul of the World and the art of alchemy. With profound wisdom, he teaches Santiago to listen to his heart and trust the Universal Language. The Alchemist’s teachings transcend the literal act of turning base metals into gold, focusing instead on the transformation of the self. His guidance illuminates Santiago’s path, helping him decipher life’s mysteries and fulfill his destiny, embodying the essence of spiritual mentorship in the journey of self-discovery.

“Alchemik PDF” remains a timeless tale of inspiration, offering universal lessons on spirituality and self-discovery. Its availability in digital formats ensures its enduring legacy, reaching readers globally.

9.1 The Lasting Legacy of “Alchemik”

“Alchemik” remains a modern classic, inspiring millions with its timeless themes of spirituality and self-discovery. Its universal appeal transcends cultures, making it a global phenomenon. The book’s legacy endures through its digital formats, ensuring accessibility for future generations. As Paulo Coelho’s most celebrated work, it continues to resonate, guiding readers on their own journeys of personal growth and understanding life’s deeper mysteries.

9.2 Final Thoughts on the Book’s Message

“Alchemik” leaves readers with a profound message about spirituality, self-discovery, and trusting the universe. Santiago’s journey symbolizes the universal quest for meaning and destiny. The book encourages listeners to embrace simplicity, listen to their hearts, and pursue their personal legends. Its enduring relevance and accessibility in PDF format ensure its timeless wisdom continues to inspire global audiences, making it a cherished modern classic.

oster toaster oven instruction manual

Welcome to the Oster Toaster Oven Instruction Manual! This guide provides essential information to help you use your appliance safely and effectively. Read carefully to understand its features, operation, and maintenance for optimal performance.

Overview of the Manual

This manual serves as a comprehensive guide for your Oster Toaster Oven, detailing essential information for safe and effective use. It covers product features, safety precautions, operating instructions, and maintenance tips. Additionally, troubleshooting advice and warranty details are included to ensure optimal performance. The manual is designed to help you understand your appliance thoroughly, enabling you to make the most of its capabilities while adhering to important safety guidelines. Reading this manual carefully will ensure a safe and enjoyable cooking experience with your Oster Toaster Oven.

Importance of Reading the Manual

Reading this manual is crucial for safe and efficient use of your Oster Toaster Oven. It provides essential safety precautions, detailed operating instructions, and troubleshooting tips. Understanding the features and guidelines ensures optimal performance and longevity of the appliance. By following the manual, you can avoid potential hazards and make the most of your cooking experience. It also helps you identify common issues and solutions, ensuring you get the best results from your Oster Toaster Oven while maintaining safety and satisfaction in your kitchen.

Safety Precautions and Guidelines

Cleaning and Maintenance

Regular cleaning ensures optimal performance. Unplug the oven, let it cool, and wipe with a damp cloth. Avoid immersion in water to prevent damage and ensure longevity.

General Safety Tips

Always unplug your Oster Toaster Oven before cleaning or maintenance. Avoid touching hot surfaces; use oven mitts or tongs. Keep children away while in operation. Ensure the oven is placed on a stable, heat-resistant surface. Never immerse electrical parts in water. Follow recommended cooking times and temperatures to prevent overheating. Regularly inspect the power cord for damage. Do not operate the oven if it malfunctions. Store food and utensils safely to avoid accidents. Adhere to these guidelines to ensure safe and efficient use of your appliance.

Electrical Safety Instructions

Always unplug the Oster Toaster Oven before cleaning or performing maintenance to avoid electrical hazards. Never submerge the appliance or its electrical components in water. Use the oven on a stable, heat-resistant surface away from water sources. Ensure the power cord is kept away from hot surfaces and avoid overloading circuits. Do not modify the plug or attempt repairs yourself. If issues arise, contact Oster Customer Service at 1-800-334-0759. Follow these guidelines to ensure safe electrical operation and prevent potential risks.

Product Features and Components

The Oster Toaster Oven features a digital control panel, convection baking, and a large capacity for versatile cooking. Its components include a baking pan, rack, and crumb tray for easy food preparation and cleanup.

Key Features of the Oster Toaster Oven

The Oster Toaster Oven offers a range of impressive features, including digital controls, convection baking, and an extra-large capacity for cooking multiple dishes. It also includes preset settings for various cooking modes, such as toasting, baking, and broiling. The oven’s intuitive interface allows for easy temperature and timer adjustments. Additional features like a stainless steel exterior and interior lighting enhance user experience. These features make the Oster Toaster Oven a versatile and convenient addition to any kitchen, perfect for both casual and advanced cooking tasks.

Understanding the Control Panel

The Oster Toaster Oven’s control panel is designed for intuitive operation. It features a digital display for clear visibility of settings and a user-friendly interface. The panel includes buttons for selecting cooking modes, adjusting temperature, and setting timers. A dial or touch controls allow precise adjustments. Indicators light up to show the active functions. Familiarize yourself with each button’s purpose, such as the start/stop button, to ensure smooth operation. Refer to the manual for detailed explanations of specific controls and their functions to maximize your cooking experience.

Operating the Oster Toaster Oven

Plug in the oven, preheat if needed, and select your desired cooking mode. Use the control panel to set temperature, timer, and functions. Monitor cooking progress for perfect results.

Basic Controls and Functions

The Oster Toaster Oven features a user-friendly control panel with intuitive buttons and dials. The power button turns the oven on/off, while the function buttons select modes like bake, toast, and convection. Use the temperature dial to adjust heat settings, and the timer buttons to set cooking duration. The LCD display shows current settings for easy monitoring. Press Start to begin cooking and Cancel to stop. These controls ensure precise adjustments for consistent results, making it easy to achieve your desired cooking outcomes safely and efficiently.

Cooking Modes and Settings

The Oster Toaster Oven offers versatile cooking modes, including Bake, Toast, Convection, Broil, Roast, and Reheat. Each mode is designed for specific tasks, such as even baking, crispy toasting, or faster cooking with convection; Adjust settings like temperature (150°F–450°F) and timer (up to 90 minutes) to tailor cooking to your recipe. Use the preset buttons for quick access to common settings, ensuring perfectly cooked dishes every time. These modes and settings provide flexibility and precision for a variety of culinary needs, making the oven adaptable to your cooking style.

Temperature and Timer Instructions

Set the temperature between 150°F and 450°F using the digital controls for precise cooking. The timer can be adjusted up to 90 minutes, with an automatic shut-off feature for safety. Always preheat the oven for 5-10 minutes before cooking for even heat distribution. Use the + and ― buttons to adjust settings, and press Start to begin. Ensure the timer is set correctly to avoid overcooking. Regularly check the display to monitor progress and adjust as needed for optimal results.

Always unplug the oven and let it cool before cleaning. Wipe interior and exterior with a damp cloth; avoid immersion in water. Clean after each use to prevent food buildup. Regular maintenance ensures longevity and optimal performance. Follow these steps to keep your Oster Toaster Oven in excellent condition for years of reliable service.

Step-by-Step Cleaning Instructions

To clean your Oster Toaster Oven, start by unplugging it and allowing it to cool completely. Remove the racks and trays and wash them with warm soapy water. For the interior, wipe down surfaces with a damp cloth, avoiding harsh chemicals. Use a soft brush to scrub away food residue. For tougher stains, mix baking soda and water to create a paste, apply it, and let it sit before wiping clean. Clean the exterior with a damp cloth to maintain its appearance. Regular cleaning prevents food buildup and ensures optimal performance.

Regular Maintenance Tips

Regular maintenance ensures your Oster Toaster Oven performs optimally. After each use, clean the interior and exterior to prevent food residue buildup. Check and replace worn-out parts like racks or trays. Descale the oven periodically if you live in areas with hard water. Ensure proper ventilation by keeping the oven at least 4 inches away from walls. Store it in a cool, dry place when not in use. By following these tips, you extend the lifespan of your appliance and maintain its efficiency for years to come.

Troubleshooting Common Issues

If your Oster Toaster Oven isn’t functioning properly, check for common issues like uneven heating or malfunctioning timers. Ensure proper power supply and clean the oven regularly for smooth operation.

Identifying Common Problems

Common issues with your Oster Toaster Oven may include uneven heating, malfunctioning timers, or power supply problems. Check for faulty electrical connections or damaged heating elements. Ensure the oven is clean, as food residue can affect performance. Verify that the timer and temperature controls are set correctly. If the oven does not turn on, confirm it is properly plugged in and the outlet is functioning. Consult the manual for troubleshooting steps before contacting customer support for assistance.

Solutions for Frequently Encountered Issues

If your Oster Toaster Oven experiences uneven heating, ensure proper air circulation and clean food residue. For timer malfunctions, reset the device and check power connections. If the oven does not turn on, verify the outlet is working and the oven is properly plugged in. For faulty heating elements, contact customer support. Regular cleaning prevents performance issues. Always unplug the oven before troubleshooting to ensure safety. Refer to the manual for detailed solutions or reach out to Oster’s customer service for professional assistance.

Warranty and Customer Support

Your Oster Toaster Oven is backed by a one-year limited warranty covering manufacturing defects. For inquiries or service, visit www.oster.com or call 1.800.334.0759 for assistance.

Understanding the Warranty Coverage

Your Oster Toaster Oven is covered by a one-year limited warranty, protecting against manufacturing defects in materials and workmanship. This warranty ensures repairs or replacements for faulty parts during the specified period. Coverage begins from the purchase date and applies to the original owner only. Misuse or unauthorized modifications may void the warranty. For detailed terms and conditions, refer to the warranty section in your manual. Contact customer service at 1.800.334.0759 or visit www.oster.com for assistance with warranty claims or inquiries.

Contacting Oster Customer Service

For assistance with your Oster Toaster Oven, contact customer service at 1.800.334.0759 or visit www.oster.com. Representatives are available to address questions, warranty claims, and repair inquiries. Online support includes downloadable manuals, troubleshooting guides, and product registration. Ensure to have your model number and purchase date ready for efficient service. Oster’s dedicated team is committed to resolving issues promptly and ensuring your satisfaction with their appliances.

By following this manual, you’ll master your Oster Toaster Oven’s features, ensuring safe and efficient cooking. Happy cooking and enjoy exploring its versatile capabilities!

Final Tips for Optimal Use

For optimal performance, always preheat your Oster Toaster Oven before cooking. Use the correct baking pans and avoid overcrowding the oven. Regularly clean the interior to maintain hygiene and efficiency. Experiment with different cooking modes to achieve desired results. Refer to the manual for specific temperature and timer settings. Ensure the oven cools down completely before cleaning. By following these tips, you’ll extend the lifespan of your appliance and enjoy consistent cooking results.

Encouragement to Explore More Features

Take full advantage of your Oster Toaster Oven by exploring its versatile features. Experiment with convection baking, toasting, and broiling to elevate your cooking. Refer to the manual for guidance on using advanced settings like precise temperature control and timer functions. Don’t hesitate to try new recipes and techniques to maximize your oven’s potential. By familiarizing yourself with all features, you’ll unlock endless culinary possibilities and enjoy a superior cooking experience with your Oster Toaster Oven.

bagel bites microwave instructions 12 count

Welcome to your guide for microwaving Bagel Bites! This section provides a comprehensive overview of how to prepare 12-count Bagel Bites safely and efficiently.

Overview of Bagel Bites

Bagel Bites are a popular frozen snack that combines the convenience of mini bagels with savory toppings like cheese, pepperoni, and sausage. These bite-sized treats are perfect for quick meals or snacks, offering a delicious blend of flavors in every bite. Available in various counts, including a 12-count box, they cater to both small and larger gatherings. The product is designed for easy preparation, with options for microwaving, baking, or toasting, making them a versatile choice for any craving. Their popularity stems from their simplicity, taste, and the satisfaction they provide in a compact form. Bagel Bites are a favorite among both kids and adults, ensuring a satisfying snack experience every time.

Product Features and 12-Count Packaging

The 12-count box offers a convenient portion size, featuring crispy mini bagels with savory toppings. Each package includes a microwavable crisping tray for easy preparation.

Key Components of the 12-Count Box

The 12-count box is designed for convenience and freshness. It includes 12 individually frozen Bagel Bites, ensuring each bite remains crispy until cooked. The box features a microwavable crisping tray, which helps achieve the perfect texture when heated. This tray is a key component, as it distributes heat evenly and prevents sogginess. Additionally, the packaging includes clear microwave instructions for different quantities, allowing users to customize their cooking time based on preference. The compact design makes storage easy, keeping the Bagel Bites fresh until ready to eat. The box also highlights the product’s features, such as the variety of toppings and the ease of preparation, making it a practical choice for quick snacks.

Safety Precautions for Microwaving Bagel Bites

Always follow microwave guidelines to avoid overheating. Use a microwave-safe plate and ensure the crisping tray is placed shiny side down. Never leave the microwave unattended while cooking. Let Bagel Bites stand for 1 minute after cooking to prevent burns from steam.

Important Safety Guidelines

When microwaving Bagel Bites, it’s crucial to follow specific safety measures. Always use a microwave-safe plate and ensure the crisping tray is placed shiny side down to prevent food from sticking and promote even cooking. Avoid overheating, as this can cause burns or damage to the microwave. Never leave the microwave unattended while cooking, especially around children. After cooking, let the Bagel Bites stand for one minute to allow steam to escape, reducing the risk of burns. Handle the tray and Bagel Bites with care, as they may be hot after microwaving. Adhering to these guidelines ensures a safe and enjoyable snacking experience;

Microwave Cooking Instructions for 12 Bagel Bites

Place the 12-count Bagel Bites on the crisping tray, shiny side up. Microwave on high for 3 minutes. Let stand 1 minute before serving.

Step-by-Step Microwave Process

Remove the crisping tray from the 12-count Bagel Bites box and take off the plastic wrapper. Place the tray shiny side up in the microwave. Arrange the frozen Bagel Bites evenly on the tray. For 12 Bagel Bites, microwave on high for 3 minutes. If cooking fewer, adjust the time: 55 seconds for 4 bites, 2 minutes 20 seconds for 9 bites, and 3 minutes for 12 bites. After microwaving, let the Bagel Bites stand for 1 minute to allow the cheese to set and the bites to cool slightly. Carefully remove the tray from the microwave and serve warm. For crispier results, consider baking in the oven or toaster oven instead.

Alternative Cooking Methods

Bake Bagel Bites in a preheated oven at 400°F for 12-14 minutes or use a toaster oven for a crispy texture. Ideal for larger batches or preference.

Oven and Toaster Oven Instructions

For a crispy texture, preheat your oven to 400°F (200°C). Place the frozen Bagel Bites on a parchment-lined baking sheet, leaving space between each for even cooking. Bake for 12–14 minutes, or until the cheese is melted and the edges are golden brown. For a toaster oven, follow the same temperature but reduce the cooking time by about 1–2 minutes. Ensure the Bagel Bites are arranged in a single layer on the oven tray for optimal results. Let them cool for a minute before serving. This method is ideal for achieving a crunchier exterior compared to microwaving, perfect for those who prefer a firmer bite.

Storage and Reheating Tips

Keep Bagel Bites frozen until ready to use. Reheat in the microwave for 20–30 seconds on high. Let stand for 1 minute to retain heat evenly.

Best Practices for Maintaining Freshness

To keep Bagel Bites fresh, store them in the freezer until ready to cook. Avoid refrigerating, as it can dry out the dough. For reheating, use the microwave or oven to preserve texture. Place frozen bites on a microwavable plate or crisping tray for even heating. Reheat for 20–30 seconds on high power, then let stand for 1 minute to ensure cheese melts evenly. If thawed, refrigerate or freeze promptly to prevent sogginess. Always follow the package instructions for optimal results. Proper storage and reheating ensure Bagel Bites remain crispy on the outside and soft inside, delivering the best flavor and texture every time.

Cooking Time Variations

Cooking times vary based on quantity and preference. For 12 Bagel Bites, microwave on high for 3 minutes. Adjust time for fewer or more bites as needed.

Adjustments for Different Quantities and Preferences

When microwaving Bagel Bites, adjust cooking times based on quantity and desired crispiness. For 9 bites, cook on high for 2 minutes. For 12 bites, cook for 3 minutes. For 20 bites, cook for 4 minutes. If you prefer a softer texture, reduce cooking time by 10-15 seconds. Conversely, for crisper bites, increase time by 10-15 seconds. Always monitor the bites to avoid overcooking, as microwave power levels can vary; Adjustments ensure the perfect texture tailored to your preference, whether you like them soft or crunchy. This flexibility makes Bagel Bites a convenient snack for any craving.

Troubleshooting Common Issues

If Bagel Bites are undercooked or overcooked, check cooking times and adjust for microwave power. Ensure even spacing and cover bites to promote even melting and crispiness.

Resolving Undercooked or Overcooked Bagel Bites

Undercooked or overcooked Bagel Bites can be resolved by adjusting microwave time. For undercooked bites, add 10-15 seconds; for overcooked, reduce time by 5-10 seconds. Ensure even spacing on the tray to promote uniform cooking. Covering bites with a paper towel can help retain moisture and prevent burning. If using the crisping tray, check placement and shiny side orientation for optimal results. Always refer to the recommended cooking chart for accurate timings based on quantity. Experiment with short intervals to achieve the perfect crispiness and cheese melt. Proper adjustment ensures a delicious snack every time without waste.

Enhancing Your Bagel Bites Experience

To elevate your Bagel Bites, try adding marinara sauce or garlic butter for extra flavor. For a crispy texture, bake them in the oven or toaster oven. Pair with a fresh green salad or crunchy chips for a complete snack. Experiment with dipping sauces like ranch or salsa for a twist. Consider adding fresh herbs like parsley or oregano for a burst of freshness. For a fun twist, let kids create their own mini pizzas with additional toppings. Always ensure the crisping tray is used for optimal results. Enjoy your Bagel Bites as a quick, satisfying snack or light meal any time of day!

samsung refrigerator rs265tdrs manual

Welcome to the Samsung RS265TDRS Refrigerator Manual guide, your comprehensive resource for understanding and maintaining your appliance. This manual covers essential features, troubleshooting, and maintenance tips to ensure optimal performance and longevity of your refrigerator.

1.1 Overview of the Samsung RS265TDRS Model

The Samsung RS265TDRS is a side-by-side refrigerator designed for efficient cooling and spacious storage. It features advanced temperature control, a door alarm, and a demo mode for retail displays. With a large capacity, it suits families needing ample space for groceries. The model is known for its reliability and modern design, making it a popular choice for home use. You can find detailed specifications and troubleshooting tips in the official manual, available online for easy access.

1.2 Importance of the User Manual for Proper Usage

The user manual is essential for understanding the Samsung RS265TDRS refrigerator’s features, troubleshooting error codes, and maintaining optimal performance. It provides detailed guidance on resolving cooling issues, disabling demo mode, and adjusting settings. Referencing the manual ensures safe and efficient operation, helping you address common problems like door alarms or temperature adjustments. Regularly consulting it prevents misunderstandings and extends the appliance’s lifespan.

Key Features and Specifications

The Samsung RS265TDRS refrigerator offers advanced cooling systems, spacious storage solutions, and smart features for efficient operation. Its design ensures optimal performance and user convenience.

2.1 Design and Capacity of the RS265TDRS

The Samsung RS265TDRS features a sleek side-by-side design, offering ample storage space for groceries and beverages. With a large capacity, it provides sufficient shelves and compartments for organized food storage. Its modern aesthetic complements various kitchen styles, while its advanced design ensures efficient cooling and easy access to contents.

2.2 Advanced Cooling and Storage Solutions

The Samsung RS265TDRS is equipped with advanced cooling technologies, including dual evaporators to maintain optimal humidity levels and prevent freezer odors from affecting fresh food. Its spacious interior features adjustable shelves and ample door storage for efficient organization. The refrigerator also includes through-the-door ice and water dispensers, enhancing convenience. These innovative solutions ensure consistent cooling performance and versatile storage options for everyday needs.

Troubleshooting Common Issues

Diagnose issues using error codes and address common problems like cooling failures or unusual noises. Refer to the manual for step-by-step solutions to restore optimal performance.

3.1 Understanding Error Codes on the RS265TDRS

The RS265TDRS displays error codes to indicate specific issues, such as “OF” for freezer or fridge malfunctions. These codes help identify problems like temperature sensors or ice maker faults. Referencing the manual provides detailed explanations and solutions for each code, ensuring quick diagnosis and resolution. Regularly checking and addressing these codes helps maintain your refrigerator’s performance and prevents further complications.

3.2 Resolving Cooling Problems in the Freezer and Fridge

Cooling issues in the RS265TDRS can often be resolved by checking vent blockages or ensuring proper door seals. If error codes like “OF” appear, verify temperature settings and sensor functionality. Ensure the appliance is level and power supply is stable. If problems persist, consult the manual for advanced troubleshooting or contact Samsung support for professional assistance to restore optimal cooling performance.

Maintenance and Care

Regular maintenance ensures your RS265TDRS operates efficiently. Clean the condenser coils, replace the water filter every 6 months, and wipe down shelves and drawers. Proper care extends the appliance’s lifespan and maintains performance.

4.1 How to Replace the Water Filter in the RS265TDRS

To replace the water filter in your Samsung RS265TDRS, locate it in the upper right corner of the fridge. Turn the filter counterclockwise to remove it, then discard the old one. Soak the new filter in water for a few minutes before installation. Align the new filter and turn it clockwise until it clicks. Run 2-3 gallons of water through the dispenser to flush the system. Reset the filter indicator for optimal performance. Ensure all connections are secure to prevent leaks.

4.2 Cleaning and Maintaining the Refrigerator’s Exterior and Interior

Regular cleaning ensures your Samsung RS265TDRS runs efficiently and maintains hygiene. Wipe the exterior with a soft cloth and mild detergent, avoiding abrasive cleaners. For the interior, remove shelves and compartments and wash them with warm soapy water. Dry thoroughly before reinstalling. Clean door seals with a damp cloth to maintain a tight seal. Schedule deep cleaning every 2-3 months to eliminate odors and bacteria, ensuring optimal performance and freshness.

Operational Guides

This section provides essential guidance for daily operations, including setting temperature controls and managing door alarms. Refer to the subheadings for detailed step-by-step instructions.

5.1 How to Turn the Door Alarm On and Off

To manage the door alarm on your Samsung RS265TDRS refrigerator, locate the alarm button on the control panel. Press and hold it for 3-5 seconds to toggle the alarm on or off. This feature ensures you’re notified if the door is left open, helping maintain optimal cooling; The alarm can be deactivated if needed, providing flexibility for your usage preferences.

5.2 Adjusting Temperature Settings for Optimal Performance

To adjust the temperature settings on your Samsung RS265TDRS refrigerator for optimal performance:

Locate the Controls: Find the temperature control buttons on the digital display panel, typically located inside the fridge or on the exterior.

Check Current Settings: Press the display button to view the current temperatures for both the refrigerator and freezer sections.

Ideal Temperature Ranges:
⎯ Refrigerator: Set between 37°F and 40°F.
⏤ Freezer: Set at 0°F or below.

Adjust the Settings:
⎯ Use the up or down arrows to increase or decrease the temperature as needed.
⏤ Ensure the settings are in Fahrenheit if that’s your preference.

Verify Adjustments: Wait a few hours for the temperatures to stabilize, then use an appliance thermometer to confirm the internal temperatures.

Consider Energy Efficiency: Check for energy-saving modes or eco settings to optimize energy usage without compromising performance.

Check for Proper Functioning: Ensure door seals are tight and air vents are unobstructed to maintain proper cooling and airflow.

Avoid Overcooling: Be cautious not to set temperatures too low to prevent unnecessary energy consumption and potential freezing of items in the fridge.

By following these steps, you can efficiently adjust the temperature settings to keep your food fresh and your refrigerator running optimally.

Advanced Settings and Modes

Explore the advanced settings and modes on your Samsung RS265TDRS refrigerator, including demo mode, special features, and energy-saving options, to maximize its performance and efficiency.

6.1 How to Exit Demo Mode on the RS265TDRS

To exit demo mode on your Samsung RS265TDRS, press and hold the Energy Saver and Ice Maker buttons simultaneously for 3-5 seconds. This will reset the display and disable demo mode. If the issue persists, ensure all buttons are functioning correctly and restart the refrigerator. For further assistance, refer to the manual or contact Samsung support.

6.2 Understanding and Using Special Features

The Samsung RS265TDRS offers advanced features like through-the-door ice and water, quick cooling mode, and a door alarm. To use these, locate the control panel and select the desired option. For ice and water, ensure the dispenser is activated. The quick cooling mode rapidly lowers temperatures for fresh food storage. The door alarm sounds if the door is left open, preventing energy waste. Explore these features to enhance your refrigeration experience.

Diagnostic and Repair Information

This section provides a guide to diagnose and repair common issues with your Samsung RS265TDRS. Check error codes, perform DIY fixes, or determine when professional help is needed. Always follow proper repair techniques to ensure safety and prevent further damage to your appliance.

7.1 Diagnosing Issues with the Evaporator Fan

Diagnosing issues with the evaporator fan in your Samsung RS265TDRS refrigerator involves checking for blockages, error codes, and fan operation. Ensure the fan is free from ice buildup and debris. If the fan isn’t running, check for error codes like “E” or “EF,” which may indicate fan-related problems. Inspect wiring and connections for damage or faults. If the fan is noisy, it could signal worn bearings or debris. Consult the manual or contact Samsung support for further assistance if needed.

7.2 Tips for DIY Repairs and When to Call a Professional

For minor issues with your Samsung RS265TDRS, DIY repairs can save time and money. Start by referencing the user manual for troubleshooting guides and simple fixes, such as replacing water filters or resetting error codes. However, for complex problems like compressor malfunctions or electrical issues, it’s best to contact a certified Samsung technician. DIY repairs can sometimes worsen issues if not done correctly, so prioritize professional help when dealing with critical components.

Warranty and Safety Information

Understand your Samsung RS265TDRS warranty coverage and safety guidelines to ensure safe and proper usage. Adhering to safety precautions prevents accidents and maintains warranty validity. Always refer to the manual for detailed information on both aspects to protect your appliance and users.

8.1 Understanding the Warranty Coverage for the RS265TDRS

The Samsung RS265TDRS warranty typically covers parts and labor for one year from purchase, with extended coverage for certain components. Register your appliance to activate the warranty. Misuse or unauthorized repairs may void coverage. Refer to the manual for specific terms and conditions to ensure compliance and maintain warranty validity for your refrigerator.

8.2 Safety Precautions and Guidelines for Usage

Always follow safety guidelines to ensure safe operation of your Samsung RS265TDRS refrigerator. Avoid overloading shelves and keep flammable materials away. Ensure proper ventilation and place the appliance on a stable, level surface. Never modify or tamper with electrical components. Keep children away from moving parts and ensure doors are closed securely. Refer to the manual for detailed safety instructions to prevent accidents and maintain optimal performance.

Downloading and Accessing the Manual

Access the Samsung RS265TDRS manual online through Samsung’s official website or authorized dealers. Download the PDF for free and save it for future reference easily.

9.1 Where to Find the RS265TDRS Manual Online

The Samsung RS265TDRS manual can be found on Samsung’s official website or through authorized dealers like Sears Parts Direct. Visit the support section, search for your model, and download the PDF for free.

9.2 How to Download and Save the Manual for Future Reference

To download the Samsung RS265TDRS manual, visit Samsung’s official website or authorized dealers like Sears Parts Direct. Search for your model, then click the download link to save the PDF. For easy access, save it to your device’s “Documents” or “Manuals” folder. This ensures you have a handy reference for troubleshooting and maintenance whenever needed.

Additional Resources and Support

For further assistance, visit Samsung’s official website or authorized dealers like Sears Parts Direct and PartSelect for manuals, parts, and expert support. Samsung Support and authorized dealers provide reliable resources to address your appliance needs effectively.

10.1 Contacting Samsung Support for Assistance

To contact Samsung Support, visit their official website or call their customer service. Live chat and email options are also available for convenience. Support is accessible 24/7 to address inquiries, troubleshoot issues, or schedule repairs. For the RS265TDRS model, ensure to have your model number ready for efficient assistance. Visit Samsung Support for detailed contact information and regional support options.

10.2 Finding Parts and Manuals Through Authorized Dealers

Authorized dealers like Sears Parts Direct offer genuine parts and manuals for the Samsung RS265TDRS. Visit Samsung’s official support website to download the manual or find authorized dealers near you. Ensure to use the model number RS265TDRS when searching for specific parts or documentation. This ensures compatibility and authenticity. For more information, visit Samsung Support.

This manual serves as your detailed guide for the Samsung RS265TDRS refrigerator, covering features, troubleshooting, and maintenance. Refer to it regularly for optimal performance and longevity.

11.1 Summary of Key Takeaways from the Manual

The Samsung RS265TDRS manual provides essential guidance on operational features, troubleshooting, and maintenance. Key takeaways include proper temperature adjustments, resolving error codes, and maintaining cleanliness; Regular water filter replacement and understanding demo mode are highlighted. Safety precautions and warranty details are also emphasized, ensuring users optimize performance and longevity. Referencing the manual regularly helps address common issues and enhances overall user experience.

11.2 Encouragement to Refer to the Manual for Ongoing Usage

Regularly referencing the Samsung RS265TDRS manual ensures optimal performance and extends the appliance’s lifespan. It provides clear instructions for advanced features, maintenance, and troubleshooting, helping you avoid potential issues. By following the guidelines, you can enhance energy efficiency, preserve food quality, and maintain safety. Keep the manual handy for proactive care and to address any concerns promptly, ensuring your refrigerator operates at its best for years to come.

time management for nurses pdf

Effective time management is essential for nurses to balance multiple tasks, ensuring patient safety and reducing stress. It enhances productivity, patient outcomes, and overall job satisfaction while maintaining professionalism and work efficiency.

Why Time Management is Crucial in Nursing

Time management is crucial in nursing as it directly impacts patient care quality, stress levels, and job satisfaction. Nurses juggle multiple tasks, from administering medications to documenting care, requiring precise prioritization. Effective time management ensures patient safety, reduces errors, and enhances efficiency. It also helps nurses handle unexpected situations without compromising care quality. By mastering time management, nurses can minimize burnout and improve overall well-being, ultimately benefiting both patients and the healthcare organization.

Overview of Time Management Skills for Nurses

Time management skills for nurses involve prioritizing tasks, organizing workflows, and efficiently allocating time to ensure high-quality patient care. These skills include planning shift schedules, delegating tasks, and using tools like templates or mnemonics to stay organized. Effective time management enables nurses to handle multiple responsibilities, minimize delays, and adapt to unexpected situations. By mastering these skills, nurses can enhance productivity, reduce stress, and improve job satisfaction while maintaining professionalism and delivering optimal care. These abilities are vital for thriving in the demanding healthcare environment.

Key Components of Effective Time Management

Time management skills for nurses include prioritizing tasks, organizing workflows, and efficiently allocating time to ensure high-quality patient care. These skills involve planning shift schedules, delegating tasks, and using tools like templates or mnemonics to stay organized. Effective time management enables nurses to handle multiple responsibilities, minimize delays, and adapt to unexpected situations. By mastering these skills, nurses can enhance productivity, reduce stress, and improve job satisfaction while maintaining professionalism and delivering optimal care. These abilities are vital for thriving in the demanding healthcare environment.

Understanding Task Prioritization

Task prioritization is critical for nurses to manage their workload effectively. It involves identifying and categorizing tasks based on urgency and importance, ensuring patient safety and efficient care delivery. Using mnemonics like Walton and Reeves’ approach can help nurses prioritize tasks systematically. Time management templates also play a key role by allowing nurses to list patients, assign tasks, and allocate specific time slots for each activity. This structured approach helps reduce stress, minimize delays, and enhance overall efficiency, enabling nurses to focus on high-priority tasks and deliver quality care consistently.

Mastering Organizational Skills

Organizational skills are vital for nurses to streamline their workflow and maintain order amid chaos. Tools like time management templates, shift sheets, and digital calendars help nurses structure tasks, allocate time blocks, and track progress. Effective organization reduces stress, prevents missed tasks, and enhances patient care quality. Nurses can customize templates to fit their shifts, list patient assignments, and note handover details. Strong organizational habits also improve communication and collaboration with the healthcare team, ensuring seamless care delivery and better patient outcomes.

Strategies and Techniques for Nurses

Nurses can employ tools like mnemonics, task prioritization, and time-blocking to enhance efficiency. These strategies help organize workflows, reduce stress, and ensure timely completion of patient care tasks effectively.

Using Time Management Templates and Tools

Time management templates and tools are invaluable for nurses to organize tasks efficiently. PDF templates for day, evening, and night shifts provide structured hourly blocks to list patient tasks and handover notes. These tools help nurses prioritize activities, delegate effectively, and maintain clear records. Customizable templates allow nurses to adapt to their specific workload, ensuring all tasks are completed safely and on time. By using these resources, nurses can enhance productivity, reduce stress, and improve patient care outcomes, making them indispensable for modern nursing practice.

Implementing Mnemonic Devices for Task Organization

Mnemonic devices are powerful tools that help nurses organize tasks efficiently. Techniques like acronyms or rhymes aid in remembering priorities and workflows. For instance, Walton and Reeves (1996) suggest using mnemonics to categorize tasks by urgency and complexity. Additionally, games like “Nurse Life” incorporate time management strategies, rewarding efficient task completion. These devices simplify complex workflows, enhance memory retention, and reduce stress, ensuring nurses stay focused on critical responsibilities while maintaining high standards of patient care and operational efficiency throughout their shifts.

Time Management for Nurse Managers

Nurse managers must master time management to balance staff supervision, patient care, and administrative tasks. Effective prioritization and delegation are crucial for optimizing team performance and efficiency.

Setting Clear Goals and Priorities

Setting clear goals and priorities is fundamental for effective time management in nursing. Prioritizing tasks based on urgency and impact ensures that critical patient care needs are met first. This helps reduce stress and enhances overall efficiency. Nurse managers should establish clear objectives for their team, aligning tasks with organizational goals. By focusing on high-priority activities, nurses can delegate effectively and manage their workload seamlessly. Tools like mnemonics or templates can aid in organizing tasks, ensuring a structured approach to daily responsibilities.

Effective Delegation of Tasks

Effective delegation is crucial for nurse managers to optimize team performance and reduce workload. By assigning tasks based on team members’ skills and expertise, nurses ensure efficient care delivery. Clear communication of expectations and feedback fosters accountability and trust. Delegation allows nurses to focus on high-priority tasks while empowering others to grow professionally. This approach not only enhances patient care quality but also reduces stress and burnout, promoting a more balanced and productive work environment for the entire healthcare team.

Impact of Individual and Organizational Factors

Individual traits like age and experience, along with organizational dynamics, significantly influence time management skills among nurses, affecting task prioritization and overall efficiency in healthcare settings.

How Demographics and Experience Influence Time Management

Demographic factors such as age and gender, along with professional experience, significantly impact a nurse’s ability to manage time effectively. Experienced nurses often develop stronger prioritization skills, while younger nurses may adapt more quickly to new tools and technologies. Studies show that nurses with more years of experience tend to allocate tasks more efficiently, reducing stress and improving patient care. Additionally, individual traits like organizational habits and adaptability play a crucial role in how well nurses navigate their workload, highlighting the importance of tailoring time management strategies to personal and professional backgrounds.

Role of Healthcare Organization Type in Time Management

The type of healthcare organization significantly influences nurses’ time management skills. Studies indicate that nurses in private hospitals often face more challenges with time management compared to those in government hospitals. Factors such as resource availability, workload distribution, and institutional policies vary across organizations, impacting how nurses allocate their time. Understanding these differences helps nurses adapt their strategies and institutions improve efficiency, ultimately enhancing patient care and workplace satisfaction.

Reducing Stress and Burnout Through Time Management

Effective time management is proven to reduce stress and burnout among nurses by enhancing task efficiency, allowing better work-life balance, and improving overall job satisfaction.

Link Between Time Management and Stress Reduction

Effective time management significantly reduces stress by enabling nurses to prioritize tasks, allocate time wisely, and minimize interruptions. By organizing workflows, nurses can address critical duties first, reducing feelings of overwhelm. Proper scheduling allows for breaks and self-care, further lowering stress levels. Studies show that improved time management correlates with decreased burnout and enhanced job satisfaction, creating a healthier work environment for nurses to thrive in their roles while providing quality patient care.

Preventing Burnout by Enhancing Efficiency

Enhancing efficiency through effective time management is a cornerstone in preventing burnout among nurses. By prioritizing tasks, minimizing non-essential activities, and leveraging tools like time management templates, nurses can reduce work overload. Delegation and clear communication further streamline workflows, allowing nurses to focus on high-priority tasks. Improved efficiency not only reduces stress but also fosters a sense of control and accomplishment, creating a healthier work environment. This proactive approach helps mitigate burnout, ensuring nurses can maintain their well-being while delivering high-quality patient care consistently.

Effective time management is essential for nurses to enhance patient care and reduce burnout. Downloadable PDF resources like time management templates and workbooks provide practical tools to improve efficiency and organization, ensuring nurses can deliver high-quality care while maintaining their well-being.

Effective time management is crucial for nurses to balance multiple tasks, ensuring patient safety, and reducing stress. Key strategies include prioritizing tasks, using organizational tools, and implementing mnemonic devices. Time management enhances productivity, patient outcomes, and job satisfaction. It also helps in reducing burnout by improving efficiency. Nurses should leverage resources like PDF templates, workbooks, and games to refine their skills. By mastering time management, nurses can deliver high-quality care while maintaining their well-being and professionalism.

Recommended PDF Resources for Nurses

Several PDF resources are available to help nurses master time management. The Time Management Template for Nurses offers structured sheets for organizing tasks during shifts. The Management Workbook provides exercises to improve prioritization and efficiency. Additionally, books like Time Management for Nurses and Nursing Time Management Strategies offer practical tips and tools. These resources are accessible via platforms like ResearchGate, healthcare marketplaces, and professional nursing websites, ensuring nurses can enhance their skills effectively.

access tv channel guide pdf

The Access TV Channel Guide PDF offers a comprehensive overview of available channels, helping viewers navigate live TV, on-demand content, and personalized viewing experiences efficiently.

1.1 Overview of Access TV Channel Guide

The Access TV Channel Guide PDF provides a detailed listing of channels, including live TV, on-demand content, and personalized options. It integrates with platforms like Roku and YouTube TV, offering a user-friendly interface for navigating channels. The guide mimics traditional cable TV experiences while incorporating modern streaming features. It includes major networks, special interest channels, and local stations, ensuring diverse content accessibility for all viewers.

1.2 Importance of a Channel Guide for Viewers

A channel guide is essential for viewers as it simplifies content discovery, saving time and enhancing the overall viewing experience. It allows users to easily navigate through live TV, on-demand options, and personalized recommendations. With a well-organized guide, viewers can quickly find their favorite shows or explore new channels, ensuring they never miss out on trending or niche content tailored to their preferences.

Features of the Access TV Channel Guide

The guide includes live TV listings, on-demand content integration, and a personalized viewing experience, making it easy to navigate and discover new channels and shows.

2.1 Live TV Channel Lineup

The Access TV Channel Guide PDF provides a detailed live TV channel lineup, featuring real-time updates and scheduling for all available channels. Users can easily browse channel numbers, descriptions, and airing times. Popular networks like FOX, CBS, and ABC are prominently listed, along with special interest channels such as ESPN and MTV. The lineup also includes local stations, ensuring a diverse viewing experience. This feature simplifies finding favorite shows and discovering new content, making it a go-to resource for live TV enthusiasts.

2.2 On-Demand Content Integration

The Access TV Channel Guide PDF seamlessly integrates on-demand content, allowing users to explore a vast library of movies, TV shows, and sports. This feature enhances the viewing experience by providing easy access to both live and pre-recorded content. Viewers can browse titles, filter by genre, and stream directly without switching platforms. The guide also highlights trending and recommended content, making it a versatile tool for entertainment discovery and planning.

2.3 Personalized Viewing Experience

The Access TV Channel Guide PDF offers a personalized viewing experience, enabling users to customize their channel lineup and content preferences. Viewers can set favorite channels, filter by genres, and create watchlists for easy access. This feature ensures a tailored entertainment experience, catering to individual preferences and enhancing overall satisfaction. The guide also provides recommendations based on viewing habits, making it a user-friendly tool for discovering new shows and movies.

How to Access the TV Channel Guide

Access the TV Channel Guide by downloading the PDF or navigating online. Both methods offer a user-friendly experience to explore and manage your channel preferences effectively.

3.1 Downloading the PDF Guide

To download the Access TV Channel Guide PDF, visit the official website and navigate to the “Support” or “Channel Guide” section. Click the download link, select your preferred format, and save the file. This PDF provides a detailed list of channels, programming schedules, and tips for maximizing your viewing experience. It’s a convenient way to plan your TV time offline and access information anytime, anywhere.

3.2 Navigating the Guide Online

Navigating the Access TV Channel Guide online is straightforward. Users can browse channels alphabetically or by genre, and filter options allow quick access to favorites. The guide includes features like live TV listings, on-demand content, and personalized recommendations. Interactive elements, such as search bars and channel sorting, enhance the user experience, making it easy to find and enjoy your preferred programming directly from the website without needing to download the PDF.

Popular Channels Available on Access TV

Access TV features major networks like ABC, CBS, FOX, and NBC, along with sports, movies, and news channels, offering diverse entertainment for all viewer preferences.

4.1 Major Networks (ABC, CBS, FOX, NBC)

Access TV includes major networks like ABC, CBS, FOX, and NBC, providing viewers with popular primetime shows, live sports, and breaking news. These channels are staples in many households, ensuring access to top-tier programming. With their widespread availability, they remain essential for viewers seeking high-quality entertainment and information. This lineup caters to diverse interests, making it a cornerstone of the Access TV experience.

4.2 Special Interest Channels (Sports, Movies, News)

Access TV offers a variety of special interest channels, including sports networks like FOX Sports 2 and ESPN Deportes, movie channels such as MTV Live HD, and news outlets like BBC News and CNN. These channels cater to specific audiences, providing live events, movies, and real-time news updates. This diverse lineup ensures viewers can enjoy content tailored to their preferences, enhancing their overall entertainment experience with Access TV.

4.3 Local and Regional Stations

Access TV features an extensive selection of local and regional stations, ensuring viewers stay connected to their communities. Channels like FOX 5 Atlanta, FOX 2 Detroit, and CW KASW provide local news, sports, and events. These stations cater to specific geographic areas, offering tailored content that resonates with local audiences. This feature enhances the viewing experience by allowing users to access programming relevant to their region, alongside national channels, through the Access TV channel guide.

Live TV and Streaming Features

Access TV offers a seamless live TV experience with integrated streaming features, including Roku’s Live TV Guide and YouTube TV updates, enhancing viewer accessibility and convenience.

5.1 Roku Live TV Guide

Roku’s Live TV Guide provides an intuitive platform for viewers to access over 100 free channels, including live and on-demand content, without additional app installations. This feature mimics traditional cable TV, offering a familiar channel-flipping experience. Users can easily browse and discover new channels, enhancing their viewing experience with streamlined navigation and instant access to live programming.

5.2 YouTube TV Channel Guide Updates

YouTube TV has introduced a redesigned channel guide, aligning its interface with Google TV’s Live tab for a cleaner, more user-friendly experience. The updated guide addresses previous issues, such as channel switching when reopening the guide, providing smoother navigation. These enhancements ensure viewers can effortlessly browse and enjoy live TV channels, improving overall satisfaction with the service.

Customizing Your Channel Guide

Customizing your channel guide allows you to tailor your viewing experience by managing preferences, organizing channels, and enhancing accessibility for a personalized entertainment experience.

6.1 Filtering Channels by Genre

Filtering channels by genre simplifies content discovery, allowing users to focus on their favorite types of programming, such as sports, movies, or news. This feature enhances navigation and saves time by displaying only relevant channels, ensuring a more tailored and enjoyable viewing experience tailored to individual preferences.

6.2 Setting Favorites for Quick Access

Setting favorites streamlines access to preferred channels, enabling quick navigation and minimizing search time. Users can mark their go-to channels, creating a personalized list for easy access. This feature enhances convenience, ensuring that viewers can swiftly tune into their favorite shows or networks without browsing through the entire channel lineup, making the viewing experience more efficient and enjoyable overall.

Comparing Access TV with Other Services

Access TV stands out for its diverse channel lineup and user-friendly interface, offering a cost-effective alternative to Spectrum TV and DirecTV, with unique features.

7.1 Spectrum TV Channel Lineup

Spectrum TV offers an extensive channel lineup, including major networks like ABC, CBS, FOX, and NBC, along with premium options such as ESPN, HBO, and Showtime. Its basic package includes over 125 channels, while higher tiers add more sports, movies, and international content, catering to diverse viewer preferences. This variety ensures a wide range of entertainment options for subscribers.

7.2 DirecTV Channel Guide

DirecTV offers a diverse channel lineup, featuring popular networks like FOX, FX, Discovery, and ESPN, with channel numbers assigned for easy navigation. Its packages include a mix of entertainment, sports, and premium options, such as HBO and Showtime. Subscribers can access over 200 channels, with HD options available for enhanced viewing quality, ensuring a wide range of content to suit various preferences and viewing habits.

Troubleshooting the Channel Guide

Common issues include outdated channel guides or missing listings. Refreshing the guide or restarting the app often resolves these problems. Updating ensures access to new channels.

8.1 Common Issues and Solutions

Common issues with the Access TV Channel Guide include outdated listings or missing channels. To resolve this, users can refresh the guide or restart their app. Ensuring the guide is updated regularly helps maintain accurate channel information. Additionally, clearing the app cache or reinstalling the software can often fix persistent problems, ensuring a smooth viewing experience. Regular updates also prevent errors and improve functionality.

8.2 Updating the Guide for New Channels

Updating the Access TV Channel Guide for new channels ensures viewers access the latest content. Users can refresh the guide within the app or download the latest PDF version online. Regular updates add new channels, improve listings, and fix errors. Enabling auto-update features or checking for updates manually keeps the guide current, ensuring viewers never miss new channels or programming additions.

The Access TV Channel Guide PDF is an essential resource for viewers, offering a comprehensive lineup of live and on-demand channels. Its user-friendly interface and regular updates ensure an enhanced viewing experience, making it a valuable tool for all audiences.

9.1 Final Thoughts on Access TV Channel Guide

The Access TV Channel Guide PDF provides a comprehensive and user-friendly resource for viewers, offering a detailed lineup of live TV channels, on-demand content, and customization options. Its ability to integrate with popular platforms like Roku and YouTube TV enhances convenience. Regular updates ensure access to the latest channels and features, making it an indispensable tool for a seamless and personalized viewing experience.

9.2 Future Updates and Enhancements

Future updates to the Access TV Channel Guide PDF will likely include expanded channel listings, enhanced search functionality, and improved integration with streaming platforms. New features such as personalized recommendations and real-time updates are expected, ensuring viewers stay informed about their favorite shows. Regular enhancements will focus on user experience, making the guide more intuitive and accessible across devices. These updates aim to keep the guide aligned with evolving viewer preferences and technological advancements.

Page 26 of 44

Powered by WordPress & Theme by Anders Norén