wallet pattern pdf

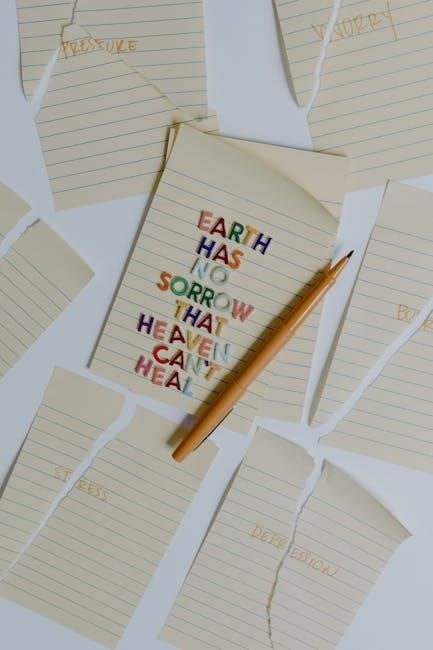
Wallet patterns have gained popularity as a creative DIY project, offering customization and functionality. PDF patterns provide detailed instructions, making wallet sewing accessible for all skill levels.

1.1 Overview of Wallet Patterns

Wallet patterns are versatile templates designed for creating custom wallets. They include various styles like trifold, bifold, and slimline wallets, offering options for different needs. These patterns often feature multiple pockets, card slots, and compartments for organization. Available as PDF downloads, they provide precise measurements and step-by-step instructions, making it easy for sewers of all skill levels to create functional and stylish wallets.

1.2 Popularity of DIY Wallet Sewing

DIY wallet sewing has become a popular trend, offering a creative outlet and practical skill. With accessible PDF patterns and video tutorials, sewers of all levels can craft custom wallets. The satisfaction of creating a functional accessory, combined with the freedom to choose materials and designs, has made wallet sewing a favorite among DIY enthusiasts and handmade craft lovers worldwide.

1.3 Uses and Benefits of Custom Wallets

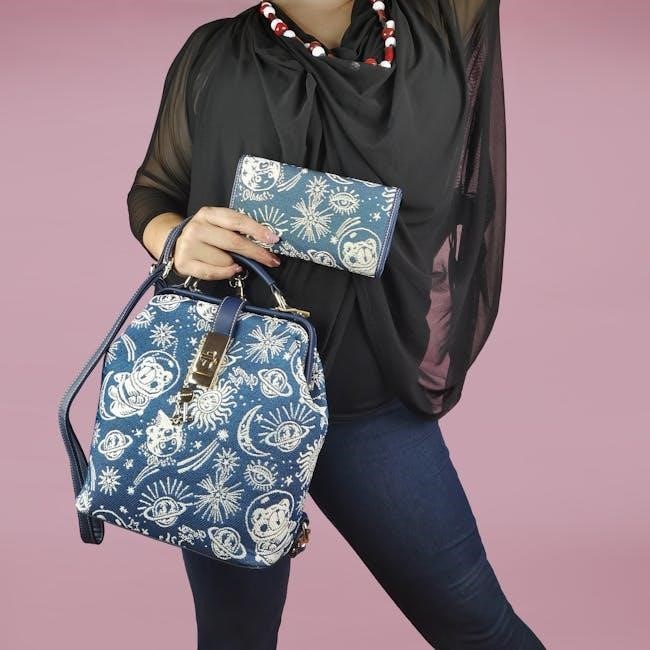
Custom wallets offer personalization, durability, and functionality. They can be tailored to specific needs, such as adding card slots or coin pouches. PDF patterns enable precise designs, ensuring a professional finish. Handmade wallets make thoughtful gifts or personal accessories, providing a sense of accomplishment and individuality that mass-produced items often lack.

Types of Wallet Patterns

Wallet patterns vary, offering designs like trifold, bifold, card holders, coin purses, and slimline wallets. Each type caters to different needs, ensuring functionality and style.

2.1 Trifold Wallet Patterns

Trifold wallet patterns are popular for their compact design and multiple compartments. They offer ample space for cards, cash, and receipts while remaining sleek. Ideal for both beginners and experienced sewers, these patterns often include step-by-step guides and video tutorials. The trifold design allows for customization, enabling users to add pockets or modify sizes. Suitable for various materials like fabric, leather, or vinyl, trifold wallets are a practical and stylish DIY project.

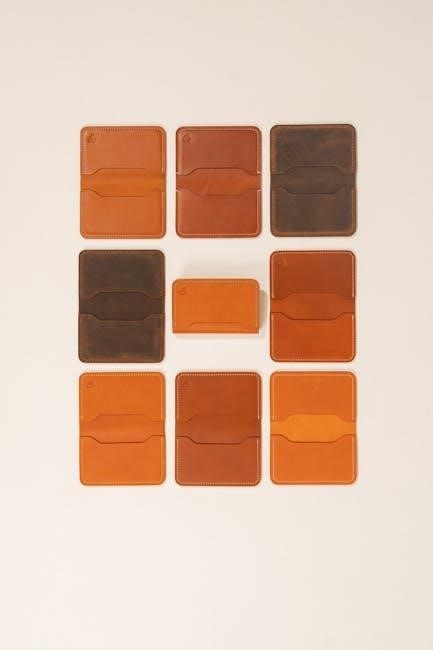
2.2 Card Holder Wallet Patterns

Card holder wallet patterns are perfect for minimalists, offering a sleek design for carrying essential cards. These patterns typically feature multiple card slots and a cash compartment. Ideal for beginners, they require minimal fabric and hardware. Available in various styles, card holders are versatile for both fabric and leather. Their simplicity makes them a quick project, with many PDF patterns including video tutorials for easy assembly.

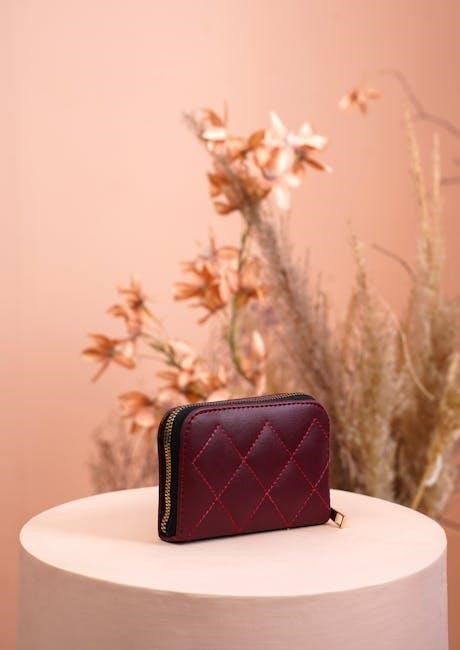
2.3 Bifold Wallet Patterns

Bifold wallet patterns are a classic choice, offering a timeless design with ample space for cards and cash. These patterns typically include multiple card slots and a central compartment for bills. Suitable for leather or fabric, bifold wallets are durable and versatile. PDF patterns provide detailed instructions, making them accessible for both beginners and experienced sewers. Customizable and practical, bifold wallets remain a popular choice for everyday use.

2.4 Coin Purse Wallet Patterns

Coin purse wallet patterns blend functionality and style, offering a compact design for carrying coins, cards, and small essentials. These patterns often feature multiple compartments and a secure closure. Ideal for scrap fabric or leather, they are durable and easy to sew. PDF patterns provide step-by-step guides, making them perfect for beginners. Customize your coin purse wallet with embellishments or contrasting threads for a personalized touch.

2.5 Slimline Wallet Patterns

Slimline wallet patterns offer a minimalist design, perfect for carrying essentials like cards and cash. These patterns are ideal for those who prefer a sleek, modern look. Featuring a detachable keychain and multiple card slots, slimline wallets are both functional and stylish. PDF patterns provide detailed instructions, making it easy to sew a professional-looking wallet. They are suitable for leather, fabric, or vinyl, ensuring durability and a polished finish.

Materials for Sewing Wallets

Sewing wallets requires a variety of materials, including fabric, leather, and vinyl, each offering durability and unique aesthetics. Choose materials based on the desired look and skill level.

3.1 Fabric Wallets

Fabric wallets are a popular choice for DIY projects due to their versatility and customization options. They can be made from various fabrics, including cotton, canvas, or even upcycled materials. Fabric wallets are lightweight, easy to sew, and offer a unique, personalized touch. Many PDF patterns provide detailed instructions for fabric wallets, making them accessible for sewers of all skill levels. They are also scrap-friendly, allowing crafters to use leftover fabric creatively. Fabric wallets can feature multiple pockets, card slots, and compartments, making them both practical and stylish. With the right fabric choice, they can be durable and long-lasting, perfect for everyday use or as gifts.

3.2 Leather Wallets

Leather wallets are renowned for their durability and classic appeal. PDF patterns offer detailed instructions for crafting leather wallets, ensuring a professional finish. Suitable for various leather types, including full-grain or faux leather, these wallets can be designed in multiple styles, from card holders to long wallets. Sewing leather wallets requires basic tools and intermediate skills, but the result is a timeless, high-quality accessory with a luxurious feel.

3.3 Vinyl Wallets

Vinyl wallets are a practical choice, offering water resistance and a sleek appearance. PDF patterns provide step-by-step guides for sewing vinyl wallets, making them ideal for beginners. Vinyl fabric is durable and easy to clean, perfect for modern designs. These wallets are versatile, accommodating cards, cash, and coins while maintaining a slim profile, making them a great alternative to traditional leather or fabric wallets.

Importance of PDF Patterns in Sewing

PDF patterns offer convenience and precision for sewing projects. They provide detailed instructions, measurements, and visual guides, making it easier to create professional-quality wallets at home.

4.1 Why Use PDF Patterns?

PDF patterns are ideal for sewing projects due to their convenience and accessibility. They provide detailed instructions, measurements, and visual guides, ensuring accuracy and ease of use. PDFs are instantly downloadable, saving time and effort. They often include step-by-step tutorials and photographic instructions, making them perfect for both beginners and experienced sewers. PDF patterns also allow for scalability, catering to various project sizes and customization needs.

4.2 Benefits of PDF Sewing Patterns

PDF sewing patterns offer numerous benefits, including instant access and cost-effectiveness. They provide detailed instructions, measurements, and visual guides, ensuring precision and ease. Many patterns are free or affordable, making them accessible to all. PDFs also allow users to print only the necessary pages, reducing waste. They are environmentally friendly and ideal for customization, catering to various skill levels and project requirements.

Downloading and Printing the Wallet Pattern PDF

Downloading and printing a wallet pattern PDF is straightforward. Most PDFs are instant downloads, compatible with various devices. Print on standard paper for easy reference and sewing preparation.

5.1 Steps to Download the PDF Pattern

To download a wallet pattern PDF, select your desired design and click the download link. Ensure you have a stable internet connection and a compatible device. Most patterns are instant downloads, requiring no additional software beyond Adobe Acrobat Reader for viewing. Follow on-screen instructions to complete the download, ensuring the file is saved securely for future access. This process is quick and straightforward, providing immediate access to your sewing template.

5.2 Printing the Pattern

Once downloaded, open the PDF file using Adobe Acrobat Reader. Ensure the printer is set to 100% scale for accuracy. Print the pattern on standard paper or cardstock for durability. Verify all pages are printed correctly and align properly before cutting. Gather all printed pieces and organize them according to the instructions provided in the PDF. This ensures a smooth sewing process.

Tools Needed for Sewing a Wallet

A sewing machine, sharp scissors, heavy-duty needles, and measuring tape are essential. Optional tools include rotary cutters and mats for precise fabric cutting.

6.1 Basic Sewing Tools

A sewing machine is essential for stitching wallet seams. Sharp fabric scissors or rotary cutters with mats are ideal for precise cutting. Heavy-duty needles, suitable for thick materials like leather or vinyl, are recommended; A measuring tape or ruler ensures accurate pattern alignment. Ironing tools, like a ironing board and press cloth, help in flattening seams. Basic tools like pins, seam ripper, and thread are also necessary for a smooth sewing process.

6.2 Specialized Tools for Wallet Sewing

Specialized tools enhance wallet sewing precision. An edge beater or similar tool helps press small seams. A bone folder is useful for sharp creases. A Teflon foot aids in sewing smooth edges. Interfacing adds stability. Rivets or snaps are alternatives to sewing closures. Precision cutting tools like rotary cutters ensure accurate pattern alignment. A walking foot handles thick materials. These tools elevate wallet craftsmanship.

Step-by-Step Instructions for Sewing a Wallet

Follow detailed guides with photo tutorials and video sew-alongs. Patterns include cutting fabric, sewing pockets, and attaching hardware. Instructions ensure a professional finish for all skill levels.

7.1 Sewing Process

The sewing process begins with cutting fabric according to the PDF pattern. Next, pockets and card slots are stitched, followed by assembling the wallet’s structure. Interfacing or stabilizers may be added for durability. Edges are then sealed, and hardware like snaps or zippers is attached. Finally, the wallet is turned right side out, and seams are reinforced for a professional finish.

7.2 Attaching Hardware

Attaching hardware like snaps, rivets, or zippers requires precision. Mark positions on fabric using the PDF pattern as a guide. Punch holes for rivets or snaps, ensuring alignment is accurate. Secure hardware firmly using tools like a leather punch or rivet setter. For zippers, sew along edges carefully. Proper hardware attachment ensures functionality and durability, enhancing the wallet’s professional finish and usability.

Video Tutorials for Wallet Sewing

Video tutorials provide step-by-step guidance, complementing PDF patterns with visual instructions. They cover sewing techniques, hardware attachment, and troubleshooting, making the process easier for beginners and experienced sewists alike.

8.1 Available Video Resources

Video tutorials for wallet sewing are widely available online, offering step-by-step guidance for various wallet patterns. Platforms like YouTube feature sewalongs for trifold wallets, card holders, and coin purses. Many PDF patterns include links to video tutorials, providing visual instructions for sewing techniques, hardware attachment, and troubleshooting. These resources are ideal for beginners and experienced sewists, ensuring a smooth and successful sewing process.

8.2 Benefits of Video Tutorials

Video tutorials provide clear, visual guidance for sewing wallets, complementing PDF patterns. They demonstrate complex steps in real-time, making projects easier to follow. Videos are particularly helpful for beginners, offering tips and troubleshooting. They also cater to different learning styles, allowing sewists to pause, rewind, and practice techniques. This enhances understanding and confidence, ensuring a polished finish for custom wallets.

Customizing Your Wallet Pattern

Customizing your wallet pattern allows for personal touches like unique fabrics, embroidery, or appliqué. Add pockets, zippers, or compartments to suit your needs and style preferences easily.

9.1 Choosing Fabric

Choosing the right fabric for your wallet is crucial for both durability and aesthetics. Options include leather, vinyl, or sturdy fabrics like canvas. Leather offers a classic, professional look, while vinyl is easy to clean. Fabric choices can add personality, with patterns or colors reflecting your style. Consider the wallet’s intended use and desired texture when selecting materials to ensure functionality and visual appeal.

9.2 Adding Extra Features

Enhance your wallet by adding extra features like zippered pockets, card slots, or a snap fastener. Consider including a detachable keychain or reinforced stitching for durability. Custom embroidery or monograms can add a personal touch. These additions not only improve functionality but also allow for creative expression, making your wallet truly unique and tailored to your needs or preferences.

Choosing the Right Fabric for Your Wallet

Choosing the right fabric ensures durability and style. Consider leather, vinyl, or sturdy cotton. Durable materials offer long-lasting use, while scrap-friendly options promote sustainability and creativity.

10.1 Suitable Fabrics

Leather, vinyl, and durable fabrics like cotton or canvas are ideal for wallet sewing. Leather offers a classic look and durability, while vinyl provides water resistance. Cotton and canvas are sturdy yet flexible, making them perfect for scrap-friendly projects. These materials are easy to sew, allowing for both functional and stylish designs. They ensure long-lasting use and adapt to various wallet patterns, enhancing both practicality and aesthetics.

10.2 Tips for Selecting Fabric

Choose fabrics that are durable and suitable for wallet sewing, such as leather, vinyl, or sturdy cotton. Consider thickness and texture for functionality. Pre-wash fabric to ensure shrinkage control. Match fabric type to the wallet pattern’s requirements for a professional finish. Balance aesthetics with practicality, ensuring the material complements the design while providing long-lasting use. Always opt for high-quality fabrics to enhance both durability and style.

adkar change management model pdf

The ADKAR Change Management Model, developed by Prosci’s Jeff Hiatt in 1996, is a goal-oriented framework focusing on individual change. It includes five stages: Awareness, Desire, Knowledge, Ability, and Reinforcement, designed to help organizations manage transitions effectively.

1.1 Overview of the ADKAR Framework

The ADKAR Framework is a structured approach to guide individuals through change, focusing on awareness, desire, knowledge, ability, and reinforcement. It provides a clear pathway for managing transitions, ensuring individuals adapt successfully. This model is part of Prosci’s broader change management methodology, offering a repeatable and adaptable process to address barriers and ensure sustainable change outcomes.

1.2 Origins and Development of the ADKAR Model

The ADKAR Model was developed by Jeff Hiatt, founder of Prosci, in 1996, following extensive research on change patterns in over 700 organizations. Focused on individual change management, ADKAR provides a structured approach to guide employees through transitions. Its development emphasizes understanding how people experience change, making it a cornerstone of Prosci’s change management methodology.

1.3 Importance of Individual Change Management

Individual change management is crucial as it directly impacts organizational success. The ADKAR Model focuses on personal transitions, ensuring employees adopt and sustain changes. Without addressing individual needs, resistance arises, hindering initiatives. Effective individual management fosters readiness, reduces barriers, and ensures smooth implementation, making it vital for achieving strategic goals and maintaining competitiveness in dynamic environments.

Breakdown of the ADKAR Model Components

The ADKAR Model consists of five critical components: Awareness, Desire, Knowledge, Ability, and Reinforcement. Each stage addresses specific individual needs to ensure successful change adoption and sustainability.

2.1 Awareness: Understanding the Need for Change

Awareness is the initial stage of the ADKAR Model, focusing on helping individuals recognize the necessity for change. Effective communication from leadership is crucial to clearly articulate the reasons behind the change. This stage involves creating a shared understanding through various channels like meetings, emails, and training sessions to ensure comprehension and alignment. Tools such as gap analyses can identify organizational needs, and feedback mechanisms can verify understanding. Leadership plays a key role in setting the tone and communicating the vision, while surveys or focus groups can assess the level of Awareness. Tailoring messages for different groups and addressing existing resistance are essential challenges in this foundational stage, ensuring everyone is aligned before progressing.

2.2 Desire: Creating the Willingness to Change

Desire involves fostering the motivation and willingness to embrace change. Leadership plays a crucial role in inspiring commitment by clearly communicating the benefits and addressing personal concerns. Engaging stakeholders through open dialogue and incentives can strengthen their desire to participate. This stage focuses on overcoming resistance by aligning individual goals with organizational objectives, ensuring a collective commitment to the change initiative.

2.3 Knowledge: Acquiring the Necessary Skills and Information

Knowledge is the foundation for successful change implementation. This stage focuses on providing individuals with the necessary skills, information, and training to understand and execute the change effectively. Clear communication, practical tools, and accessible resources ensure that everyone involved has the clarity and confidence to move forward, bridging any knowledge gaps that might hinder progress.

2.4 Ability: Developing the Skills to Implement Change

The Ability stage focuses on equipping individuals with the practical skills and tools needed to implement change effectively. This involves targeted training, hands-on practice, and ongoing support to ensure confidence and competence. By addressing skill gaps and providing resources, individuals can apply their knowledge and successfully transition to the new state, ensuring sustainable change adoption and improved performance.

2.5 Reinforcement: Sustaining the Change Over Time

Reinforcement ensures that change is sustained by embedding new behaviors and practices into the organizational culture. This stage involves recognizing and rewarding desired behaviors, monitoring progress, and addressing any lingering resistance. Continuous feedback and ongoing support are crucial to prevent regression and solidify the change, making it a lasting part of the organization’s operations and identity.

Benefits of Using the ADKAR Model

The ADKAR Model enhances individual and organizational change adoption by addressing barriers, fostering readiness, and ensuring sustainability; It aligns with Prosci’s methodology, offering a structured approach to managing transitions effectively.

3.1 Enhanced Individual and Organizational Change Adoption

The ADKAR Model strengthens both individual and organizational adaptability by guiding employees through each stage of change. It ensures alignment with organizational goals, fostering a culture of acceptance and commitment. By addressing personal and collective barriers, ADKAR facilitates smoother transitions and higher success rates in change initiatives across all levels of the organization.

3.2 Identification and Mitigation of Change Barriers

The ADKAR Model excels in identifying and addressing barriers to change by breaking them down into manageable components. It helps organizations pinpoint resistance, communication gaps, or skill deficits early in the process. By focusing on individual and collective challenges, ADKAR enables tailored strategies to overcome obstacles, ensuring smoother transitions and higher acceptance of change initiatives across the organization.

3.3 Alignment with Prosci’s Change Management Methodology

The ADKAR Model seamlessly aligns with Prosci’s broader Change Management Methodology, which provides a structured approach to managing change at both individual and organizational levels. ADKAR serves as a foundational framework within Prosci’s methodology, focusing on individual transitions, while the methodology addresses the overall change process. Together, they offer a holistic approach to achieving successful and sustainable organizational change.

Practical Application of the ADKAR Model

The ADKAR Model is applied through a step-by-step guide, enabling organizations to manage change effectively. It includes tools like the ADKAR Checklist and resources for successful implementation.

4.1 Step-by-Step Implementation Guide

The ADKAR Model is implemented through a structured approach, beginning with raising Awareness about the need for change. This is followed by cultivating Desire to participate, providing Knowledge and building Ability to implement change, and finally ensuring Reinforcement to sustain it over time. This guide helps organizations systematically navigate each stage, ensuring a smooth transition for individuals and teams.

4.2 Tools and Resources for Effective Change Management

Prosci offers a range of tools, such as the ADKAR Checklist, to identify gaps in individual change management. The Prosci ADKAR Model Template and ADKAR Personal Worksheet provide structured frameworks for tracking progress. Additionally, resources like the Prosci Methodology and training programs equip teams with practical skills to implement change effectively, ensuring a seamless transition at every stage of the ADKAR process.

4.3 Case Studies and Real-World Examples

Real-world applications of ADKAR include its use in implementing e-government systems and e-catalogue integration. Case studies highlight how organizations reduced resistance and improved efficiency by applying ADKAR principles. For instance, a university successfully transitioned to online learning using the ADKAR framework, demonstrating its effectiveness in managing individual and organizational change in diverse industries.

The Role of Leadership in the ADKAR Model

Leaders play a pivotal role in the ADKAR Model by setting the vision, guiding employees through transitions, and fostering commitment to change initiatives.

5.1 Sponsorship and Active Involvement

Effective sponsorship is crucial in the ADKAR Model, as leaders champion change initiatives, allocate resources, and demonstrate commitment. Active involvement ensures alignment with organizational goals, builds trust, and motivates employees to embrace transitions. Leaders set the vision, communicate benefits, and engage stakeholders to foster a culture of change readiness and accountability.

5.2 Communicating the Vision and Benefits of Change

Leaders play a pivotal role in articulating a clear vision and highlighting the benefits of change. Effective communication ensures alignment, builds enthusiasm, and addresses concerns. By sharing the rationale behind the change and its impact, leaders foster engagement and commitment, making the transition smoother and more sustainable for individuals and the organization as a whole.

5.3 Addressing Resistance and Building Commitment

Leaders must identify and address resistance by actively listening to concerns and providing support. Building commitment involves fostering engagement and ownership of the change. By aligning the change with individual and organizational goals, leaders can create a sense of purpose, reducing skepticism and encouraging sustained participation. Reinforcement strategies further ensure long-term acceptance and commitment to the change initiative.

Integration with Other Change Management Frameworks

The ADKAR model complements frameworks like Bridges Transition Model and Kubler-Ross Change Curve, offering a holistic approach to managing change transitions and emotional phases effectively.

6.1 Comparison with the Bridges Transition Model

The ADKAR model and Bridges Transition Model differ in focus. ADKAR emphasizes individual change stages: Awareness, Desire, Knowledge, Ability, and Reinforcement. Bridges focuses on emotional transitions: Ending, Neutral Zone, and New Beginning. While ADKAR is structured for practical application, Bridges addresses psychological phases, making them complementary tools for holistic change management strategies.

6.2 Alignment with the Kubler-Ross Change Curve

While the ADKAR model focuses on structured change stages, the Kubler-Ross Change Curve explores emotional transitions during change: Denial, Anger, Bargaining, Depression, and Acceptance. Both frameworks address individual responses to change but differ in approach. ADKAR provides actionable steps, whereas Kubler-Ross highlights emotional phases, offering complementary insights for managing resistance and fostering acceptance in change processes.

Measuring Success with the ADKAR Model

Success with ADKAR is measured through individual and organizational readiness assessments, tracking progress against KPIs, and ensuring sustainable change adoption and performance improvement over time.

7.1 Key Performance Indicators (KPIs) for Change Management

KPIs for ADKAR measure change success, tracking milestones like awareness levels, desire engagement, knowledge acquisition, ability demonstration, and reinforcement sustainability. Metrics include adoption rates, productivity improvements, and employee feedback, ensuring alignment with organizational goals and individual readiness. These indicators help identify gaps and validate the effectiveness of change initiatives, enabling adjustments for long-term success.

7.2 Assessing Individual and Organizational Readiness

Assessing readiness involves evaluating both individual and organizational preparedness for change. Tools like the ADKAR Checklist and Prosci’s 3-Phase Change Management Process help identify gaps. Individual readiness is measured through surveys and interviews, while organizational readiness is assessed via audits and benchmarking. This ensures alignment with business goals and fosters a culture of change readiness, enabling successful implementation and sustainability of initiatives.

Continuous Improvement and Reinforcement

Continuous improvement involves refining processes and reinforcing change through feedback, training, and leadership support, ensuring long-term sustainability and adaptability in managing organizational transitions effectively always.

8.1 Strategies for Long-Term Sustainability

Implementing consistent communication, ongoing training, and recognition programs ensures sustained change. Regular feedback sessions and leadership engagement foster a culture of continuous improvement, embedding changes into daily operations and promoting lasting adaptability within the organization.

8.2 Monitoring and Adjusting the Change Management Plan

Regularly tracking metrics and gathering feedback ensures the change management plan remains effective. Leadership oversight and adaptive adjustments are crucial for long-term success. Utilizing tools like dashboards and surveys provides real-time insights, enabling timely corrections and fostering a culture of continuous improvement and adaptability.

Training and Certification in ADKAR

Prosci offers Certified Change Practitioner training, empowering professionals with practical ADKAR tools and resources to effectively manage change and support organizational success.

9.1 Prosci’s Certified Change Practitioner Program

Prosci’s Certified Change Practitioner Program provides in-depth training on the ADKAR model, equipping professionals with tools and resources to manage change effectively. The program offers hands-on experience, practical frameworks, and real-world applications, enabling participants to guide individuals and organizations through successful transitions. It is designed for change managers, HR professionals, and project leaders seeking to master Prosci’s proven methodology.

9.2 Resources for Ongoing Development

Prosci offers extensive resources, including PDF guides, webinars, and articles, to support ongoing development in ADKAR-based change management. Tools like the ADKAR Personal Worksheet and change management templates enable practitioners to apply the model effectively. Additionally, Prosci’s online community and forums provide a platform for sharing experiences and staying updated on best practices, ensuring continuous learning and growth in change management expertise.

Common Challenges and Solutions

Common challenges include resistance to change and skill deficits. Solutions involve fostering awareness and desire, providing knowledge and ability, and reinforcing changes to ensure sustainability.

10.1 Overcoming Resistance to Change

Overcoming resistance to change involves addressing emotional and cognitive barriers. By fostering awareness and desire through clear communication, organizations can reduce fear and build commitment. Providing knowledge and ability through training and support helps individuals adapt. Leadership plays a crucial role in reinforcing change and ensuring sustainability. Effective sponsorship and active involvement are essential to drive successful transitions and minimize resistance at both individual and organizational levels.

10.2 Addressing Knowledge Gaps and Skill Deficits

Addressing knowledge gaps and skill deficits is critical for successful change adoption. The ADKAR model emphasizes the importance of providing targeted training and resources to equip individuals with the necessary skills. By fostering a learning environment and ensuring access to tools, organizations can bridge knowledge gaps and build confidence. Leadership support and continuous development opportunities further reinforce the ability to implement and sustain change effectively.

The ADKAR model is a powerful tool for managing individual and organizational change, emphasizing awareness, desire, knowledge, ability, and reinforcement. Its proven framework ensures sustainable transitions and long-term success.

11.1 Summary of Key Takeaways

The ADKAR model, developed by Prosci, offers a structured approach to individual and organizational change. It focuses on five key stages: Awareness, Desire, Knowledge, Ability, and Reinforcement. By addressing these elements, the model helps individuals transition smoothly, ensuring sustainable change. Its practical framework aligns with Prosci’s methodology, making it a valuable tool for managing resistance and fostering commitment. The ADKAR model has proven effective in various industries, enhancing change adoption and long-term success.

11.2 The Future of Change Management with ADKAR

The ADKAR model remains a cornerstone of change management, offering a timeless framework for navigating organizational transitions. As industries evolve, ADKAR’s focus on individual adaptation will continue to resonate, ensuring sustainable change. Its integration with emerging technologies and methodologies will further enhance its relevance, solidifying its role in shaping the future of change management practices globally.

bible family tree adam to jesus pdf

The Bible family tree traces from Adam to Jesus, connecting humanity to God. It highlights key figures like Abraham and David, showing the divine plan through generations and emphasizing the importance of lineage in understanding biblical history and Jesus’ heritage.

1.1 Importance of Genealogy in the Bible

Genealogy in the Bible is crucial for understanding lineage, inheritance, and divine plans. It traces Jesus’ heritage back to Adam, emphasizing His connection to humanity. Biblical genealogies validate covenants, reveal God’s promises, and establish spiritual identity; They also highlight key figures like Abraham and David, showing their roles in God’s plan. This structured record-keeping reflects the importance of family and heritage in biblical culture, providing a historical and spiritual framework for faith. Genealogy bridges the gap between creation and redemption, illustrating God’s steadfast purpose across generations.

1.2 Purpose of Tracing the Lineage from Adam to Jesus

Tracing the lineage from Adam to Jesus illustrates humanity’s connection to the divine plan. It establishes Jesus as the fulfillment of God’s promise to Adam, emphasizing His role as the ultimate savior. This lineage also reveals the continuity of God’s covenant, starting with Adam and unfolding through key figures like Abraham and David. By linking Jesus to Adam, the Bible underscores His universal relevance and the redemption of humanity from sin. This lineage serves as a theological bridge, connecting creation to redemption and highlighting Jesus’ mission to restore humanity’s relationship with God.

The Creation Story: Adam and Eve

Adam, the first man, and Eve, the first woman, were created in God’s image. Their disobedience in Eden introduced sin, shaping humanity’s spiritual journey and the need for redemption.

2.1 Adam as the First Man in the Bible

Adam is depicted as the first man created by God in Genesis, formed from dust and given life through divine breath. He was placed in the Garden of Eden to care for it and received the command not to eat from the tree of knowledge of good and evil. Adam’s role as the first human establishes the foundation of humanity’s relationship with God, emphasizing themes of creation, stewardship, and the introduction of sin through his disobedience.

2.2 Eve and the Early Descendants

Eve, the first woman, was created by God to be Adam’s companion and partner. Together, they had three sons: Cain, Abel, and Seth. Cain and Abel’s story highlights the consequences of sin and faith, while Seth becomes the ancestor of Noah, preserving the righteous line; Eve’s role as the “mother of all living” underscores her significance in the biblical narrative, linking humanity’s origins to the divine plan. Her descendants shape the early chapters of the Bible, establishing the foundation for the lineage leading to Jesus.

The Lineage from Adam to Noah

The lineage from Adam to Noah includes Seth, Enosh, and other righteous descendants, preserving the holy line despite sin’s presence. Noah, a righteous man, survived the flood.

3.1 Cain and Abel: The First Brothers

Cain and Abel, the first brothers, represent the earliest human conflict. Cain, a farmer, and Abel, a shepherd, offered sacrifices to God. Abel’s offering was favored, leading to Cain’s jealousy and the tragic murder of Abel. This event highlights the consequences of sin and envy, marking a pivotal moment in the Bible’s narrative. Their story underscores the moral struggles of humanity and the divine judgment that followed, shaping the early chapters of the biblical family tree and its spiritual themes.

3.2 Seth and the Righteous Line

After Abel’s tragic death, Seth became the righteous successor, continuing Adam’s godly lineage. As Eve’s third son, Seth was seen as a divine replacement, embodying hope and redemption. His descendants, including Enoch, walked faithfully with God, forming a righteous line that contrasted with Cain’s rebellious path. Seth’s lineage emphasized obedience and trust in God, setting a spiritual foundation for humanity. This righteous line ultimately contributed to the messianic heritage leading to Jesus, highlighting God’s plan to restore humanity through a faithful and chosen lineage.

3.3 Noah and the Flood

Noah, a righteous man, stood out in a corrupt world, faithfully obeying God’s command to build an ark. The flood, a divine judgment, devastated the earth, saving only Noah, his family, and two of every animal; After the flood, God established a covenant with Noah, promising never to destroy the earth again. Noah’s descendants, including Shem, Ham, and Japheth, repopulated the earth, continuing the lineage that would eventually lead to Jesus. The flood story symbolizes redemption and renewal, underscoring God’s mercy and plan for humanity’s salvation through Noah’s obedient faith.

The Patriarchs: Abraham, Isaac, and Jacob

Abraham, Isaac, and Jacob are central figures in the biblical lineage, each fulfilling crucial roles in God’s covenant, leading to the birth of Jesus Christ.

4.1 Abraham: The Father of Nations

Abraham, known as the father of nations, holds a pivotal role in the biblical family tree. His faith and obedience to God established a covenant, making him the ancestor of countless descendants. Through his son Isaac, the lineage continued, leading to Jacob and the twelve tribes of Israel. Abraham’s trust in God’s promises set the foundation for the Messiah’s arrival, making him a cornerstone in the lineage connecting Adam to Jesus. His story emphasizes faith, divine promises, and the beginnings of God’s plan for humanity.

4.2 Isaac: The Promised Son

Isaac, the son of Abraham and Sarah, is central to the biblical family tree as the promised child of God’s covenant. Born through faith despite Sarah’s barrenness, Isaac symbolizes God’s faithfulness. His marriage to Rebekah and their sons, Esau and Jacob, further extend the lineage. Isaac’s story highlights trust in God’s promises, even during challenging circumstances. As a key figure, Isaac bridges Abraham’s legacy and Jacob’s future role, ensuring the continuation of God’s plan through the generations leading to Jesus. His life exemplifies divine providence and the unfolding of sacred history.

4.3 Jacob: The Father of the Twelve Tribes

Jacob, son of Isaac and Rebekah, is renowned for his cunning in obtaining the birthright from Esau. His pivotal moment came when he wrestled with God, earning the name Israel. Jacob’s twelve sons—Reuben, Simeon, Levi, Judah, Dan, Naphtali, Gad, Asher, Issachar, Zebulun, Joseph, and Benjamin—founded the twelve tribes of Israel. This lineage is central to the biblical narrative, shaping the nation’s identity and connecting to God’s covenant with Abraham. Jacob’s role as the father of these tribes underscores his significance in the family tree leading to Jesus, highlighting divine providence in Israel’s history.

The Genealogy Through King David

King David, Israel’s second king, is a pivotal figure in the Bible’s royal lineage. His descendants form the ancestral line connecting to Jesus, emphasizing divine kingship.

5.1 David: The King of Israel

David, the second king of Israel, established Jerusalem as the capital and united the tribes. His reign marked a golden age, with significant religious and political reforms. As a descendant of Judah, David’s lineage was crucial in the messianic prophecy. The Bible highlights his faith and leadership, despite his imperfections, making him a central figure in the lineage leading to Jesus. His story exemplifies God’s grace and the fulfillment of divine promises through human vessels.

5.2 The Royal Lineage Leading to Jesus

The royal lineage from David to Jesus is a pivotal part of biblical genealogy. David’s descendants, including Solomon and Nathan, formed a divine lineage that culminated in Jesus. This line was crucial for fulfilling messianic prophecies, as Jesus, as the Messiah, was destined to inherit David’s throne. The lineage highlights God’s faithfulness in maintaining the royal line, ensuring Jesus’ rightful place as King of Kings. This lineage underscores the continuity of God’s plan from Adam to Jesus, emphasizing Jesus’ role as the ultimate redeemer of humanity.

The Genealogy of Jesus in the New Testament

The New Testament presents Jesus’ genealogy in Matthew and Luke, tracing His lineage to confirm His identity as the Messiah. Matthew starts with Abraham, while Luke traces back to Adam, emphasizing Jesus’ universal significance and fulfillment of biblical promises.

6.1 Matthew’s Genealogy: From Abraham to Jesus

Matthew’s genealogy begins with Abraham, tracing Jesus’ lineage through King David and his descendants. This structure emphasizes Jesus’ role as the Messiah, fulfilling Old Testament promises. The list includes key figures like Isaac, Jacob, Judah, and Solomon, highlighting the royal lineage. It concludes with Joseph, Mary, and Jesus, underscoring the legal and divine right to David’s throne. Matthew’s account is concise, omitting some names to fit the 14-generation structure, symbolizing perfection and completeness in God’s plan. This genealogy connects Jesus to Israel’s history, reinforcing His identity as the Savior of God’s people.

6.2 Luke’s Genealogy: From Adam to Jesus

Luke’s genealogy traces Jesus’ lineage back to Adam, emphasizing His universal humanity. Starting with Jesus, it lists descendants through Joseph, connecting to key figures like Noah, Abraham, and David. This broader scope highlights Jesus as the Savior for all people, not just the Jews. Luke’s account includes 77 names, offering a more extensive family tree than Matthew’s. It underscores Jesus’ connection to humanity’s origins, symbolizing His role as the “Second Adam” and the ultimate redemption of humanity through His divine mission. This genealogy bridges creation and redemption in God’s plan.

6.3 Differences Between Matthew and Luke’s Accounts

Matthew and Luke present distinct genealogies of Jesus. Matthew starts with Abraham, tracing through David to Jesus, focusing on His Jewish heritage and royal lineage. Luke begins with Adam, emphasizing Jesus’ connection to humanity. Matthew lists 42 generations, while Luke includes 77, with differences in names after David. These variations reflect their audiences—Matthew for Jews, Luke for Gentiles. Both accounts validate Jesus’ legitimacy, with Matthew highlighting kingship and Luke stressing universal salvation, together providing a comprehensive view of His divine and human identity.

The Historical and Cultural Significance

The Bible family tree from Adam to Jesus highlights the importance of genealogy in establishing identity and authority, reflecting God’s divine plan and cultural heritage.

7.1 The Role of Genealogies in Biblical Times

In biblical times, genealogies served as vital records, establishing identity, inheritance, and cultural heritage. They verified tribal affiliations and legitimacy, particularly for leaders like priests and kings, ensuring adherence to divine covenants. Genealogies also facilitated the preservation of history and the transmission of spiritual traditions. The meticulous recording of lineages underscores their significance in maintaining societal order and religious continuity, reflecting a deep-rooted understanding of community and purpose rooted in God’s plan.

7.2 The Spiritual Implications of Jesus’ Lineage

Jesus’ lineage, tracing from Adam, underscores humanity’s redemption through Him. As the “Last Adam,” Jesus fulfills the divine plan, bridging the gap caused by Adam’s sin. His lineage highlights God’s promise of salvation, reinforcing His role as the Messiah and Savior. The genealogy symbolizes spiritual continuity, linking Old Testament promises to their fulfillment in Christ, emphasizing His divine mission to restore humanity’s relationship with God through grace and redemption.

The Bible family tree from Adam to Jesus illustrates God’s divine plan, fulfilling promises and revealing His grace through generations, connecting humanity to eternal salvation and redemption.

8.1 Reflection on the Bible Family Tree

Reflecting on the Bible family tree from Adam to Jesus reveals God’s divine plan and fulfillment of promises. It underscores the connection between humanity and redemption, showing how Jesus, as the “Last Adam,” restores what was lost. This lineage highlights God’s grace, sovereignty, and purpose, bridging the gap between creation and salvation. The tree also emphasizes the importance of lineage in biblical culture and its role in tracing Jesus’ heritage, ultimately pointing to the eternal significance of His mission and humanity’s reconciliation with God.

8.2 The Eternal Significance of the Lineage from Adam to Jesus

The lineage from Adam to Jesus holds profound eternal significance, illustrating God’s redemptive plan. Adam, as the first man, represents humanity’s fall, while Jesus, the “Second Adam,” embodies redemption. The genealogies in Matthew and Luke link Jesus to humanity, emphasizing His role as the Messiah. This lineage underscores God’s faithfulness, sovereignty, and love, revealing His eternal purpose to reconcile humanity through Jesus Christ. The Bible family tree from Adam to Jesus is a testament to God’s divine plan, highlighting the connection between creation, redemption, and eternal life through faith in Christ.

equivalent ratios worksheet pdf

Equivalent ratios represent fractions that simplify to the same value, enabling comparison and scaling of quantities․ They are fundamental in mathematics for problem-solving and real-world applications like cooking and science․

1․1 Definition of Equivalent Ratios

Equivalent ratios are fractions or proportions that simplify to the same value, meaning they represent the same relationship between quantities․ They are created by multiplying or dividing both parts of a ratio by the same number․ For example, 2:3 and 4:6 are equivalent because they both simplify to 2/3․ Understanding equivalent ratios is essential for scaling quantities and solving proportion problems in mathematics․ They are a foundational concept in ratios and proportions, enabling comparison and adjustment of quantities efficiently․

1․2 Importance of Equivalent Ratios in Mathematics

Equivalent ratios are foundational in mathematics, enabling the simplification and scaling of quantities․ They are crucial for solving proportion problems, comparing quantities, and understanding relationships between numbers․ Mastery of equivalent ratios enhances problem-solving skills and prepares students for advanced concepts like algebra and geometry․ They also have practical applications in science, engineering, and real-world scenarios, making them a vital tool for mathematical literacy and critical thinking․

1․3 Role of Equivalent Ratios in Problem-Solving

Equivalent ratios play a pivotal role in problem-solving by allowing individuals to simplify complex comparisons and scale quantities effectively․ They enable the identification of proportional relationships, aiding in the solution of word problems and real-world applications․ By mastering equivalent ratios, learners can approach diverse mathematical challenges with confidence, whether in academics or practical scenarios, fostering analytical and logical thinking skills essential for success․

Types of Problems in Equivalent Ratios Worksheets

Equivalent ratios worksheets include problems like writing equivalent ratios, determining if ratios are equivalent, and finding unknown values․ These exercises enhance critical thinking and mathematical proficiency․

2․1 Writing Equivalent Ratios

Writing equivalent ratios involves scaling up or down by multiplying or dividing both terms by the same number․ This skill is essential for comparing quantities and solving real-world problems, such as mixing ingredients or adjusting recipe sizes․ Worksheets often provide practice with numerical and word-based problems, ensuring students master this foundational concept in ratios and proportions․

2․2 Determining if Ratios are Equivalent

Determining if ratios are equivalent involves comparing their simplified forms or using cross-multiplication․ Worksheets often include numerical and word problems to practice identifying equivalent ratios, such as checking if 2:9 is equivalent to 7:1 or finding equivalent ratios for given values․ This skill is crucial for problem-solving and real-world applications like cooking and science, where proportional relationships are essential․

2․3 Using Equivalent Ratios to Find Unknown Values

Using equivalent ratios to find unknown values involves setting up proportional relationships․ Worksheets provide exercises where students solve for missing quantities by scaling ratios up or down․ For instance, if a recipe requires a 2:3 ratio of ingredients, students can find the missing amount needed to maintain proportionality, enhancing their problem-solving skills in practical scenarios like cooking or mixing․

Educational Benefits of Equivalent Ratios Worksheets

Equivalent ratios worksheets enhance problem-solving skills, deepen understanding of proportions, and prepare students for advanced math concepts․ They foster critical thinking and practical application in real-world scenarios․

3․1 Developing Problem-Solving Skills

Equivalent ratios worksheets enhance problem-solving abilities by providing practical exercises that require critical thinking․ Students learn to identify and create equivalent ratios, apply them to real-world scenarios like cooking or science, and solve for unknown values․ These exercises improve mathematical reasoning and logical thinking, essential for tackling complex problems in academics and everyday life․

3․2 Enhancing Understanding of Ratios and Proportions

Equivalent ratios worksheets deepen students’ comprehension of ratios and proportions by providing hands-on practice․ Through exercises like simplifying ratios, identifying equivalent ones, and solving word problems, students gain a clearer understanding of how ratios relate to real-world scenarios․ Visual aids and step-by-step guides in these worksheets further enhance learning, helping students grasp the fundamental concepts of ratios and their practical applications in mathematics and beyond․

3․3 Preparing for Advanced Mathematical Concepts

Equivalent ratios worksheets play a crucial role in preparing students for advanced mathematical concepts․ By mastering ratio equivalency, students build a strong foundation for understanding proportions, fractions, and algebraic relationships․ These skills are essential for tackling complex topics like trigonometry, geometry, and calculus․ Regular practice with equivalent ratios enhances problem-solving abilities and critical thinking, making advanced math more accessible and manageable in the future․

How to Use Equivalent Ratios Worksheets Effectively

Teachers can use equivalent ratios worksheets to support lessons, while students can practice independently․ Start with simple problems, gradually increasing difficulty․ Use answer keys for self-assessment and feedback to ensure mastery․ Incorporate visual aids and real-world examples to enhance understanding and engagement, making learning interactive and effective for all skill levels․

4․1 Step-by-Step Guide to Completing Worksheets

Start by understanding the concept of equivalent ratios․ Read each problem carefully, identify the given ratios, and determine the task․ Simplify ratios by dividing both terms by their greatest common divisor․ Use cross-multiplication to check equivalence or solve for unknowns․ Apply the same method to word problems by converting them into numerical ratios․ Always verify your answers using the provided solution keys to ensure accuracy․ Regular practice will enhance your problem-solving skills and build confidence in handling ratio-related questions effectively․

4․2 Tips for Teachers and Students

Teachers should introduce equivalent ratios with visual aids and real-world examples to enhance understanding․ Encourage students to practice regularly, starting with simple problems and gradually moving to complex ones․ Students should use cross-multiplication to verify equivalence and seek help when stuck․ Reviewing mistakes and maintaining an organized workspace can improve problem-solving skills․ Incorporate group activities to foster collaborative learning and ensure all students grasp the concept effectively․

Common Mistakes and Misconceptions

Students often incorrectly simplify ratios or misunderstand equivalent ratios in word problems․ They may divide one part but not the other or fail to scale both parts equally․

5․1 Simplifying Ratios Incorrectly

One common mistake is incorrectly simplifying ratios by not dividing both parts by the same number․ For example, simplifying 4:6 by dividing only one term leads to incorrect ratios․ Students often forget that equivalent ratios require proportional scaling of both terms․ This error can result in ratios that are not truly equivalent, leading to incorrect conclusions in problem-solving scenarios․ Proper simplification ensures both parts of the ratio are adjusted equally․

5․2 Misunderstanding Equivalent Ratios in Word Problems

A common misconception is misapplying equivalent ratios in word problems by not identifying the correct quantities to compare․ Students often confuse ratios with fractions or fail to recognize when scaling is needed․ For instance, mixing incorrect quantities in recipes or miscalculating proportions in science experiments can lead to errors․ Understanding the context and accurately setting up ratios is crucial for solving real-world applications effectively and avoiding misleading results․

Real-World Applications of Equivalent Ratios

Equivalent ratios are essential in cooking, mixing, and science, where precise proportions ensure desired outcomes․ They simplify scaling recipes, chemical concentrations, and engineering designs, making them practical tools for everyday life․

6․1 Ratios in Cooking and Mixing

Cooking and mixing rely heavily on equivalent ratios to ensure recipes scale accurately․ For instance, adjusting ingredient proportions without altering flavor or texture is crucial․ Whether doubling a batch or halving it, maintaining equivalent ratios guarantees consistency․ This application teaches practical math skills, making equivalent ratios worksheets invaluable for both culinary enthusiasts and professionals aiming for precise, reproducible results in the kitchen․

6․2 Ratios in Science and Engineering

Ratios are essential in science and engineering for precise calculations․ In chemistry, equivalent ratios simplify understanding of concentrations, such as parts per million, and chemical compound compositions․ Engineers use ratios to design structures, ensuring scalability and safety․ These applications highlight how equivalent ratios provide a foundational tool for problem-solving in technical fields, enabling accurate predictions and efficient solutions․

How to Create Your Own Equivalent Ratios Worksheet

Design effective problems by incorporating visual aids, word problems, and varying difficulty levels․ Ensure the worksheet is clear, well-organized, and includes an answer key for self-assessment․

7․1 Designing Effective Problems

Designing effective equivalent ratio problems involves creating tasks that challenge students to apply their understanding․ Start with simple matching exercises where students identify equivalent ratios․ Include fill-in-the-blank exercises and word problems to enhance critical thinking․ Use visual aids like grids or diagrams to help students visualize ratios․ Ensure problems are practical and relevant, such as mixing ingredients or scaling recipes․ Vary difficulty levels to cater to different learning stages, progressing from basic to complex scenarios․ This approach helps students grasp the concept comprehensively․

7․2 Incorporating Visual Aids and Word Problems

Incorporate visual aids like grids and diagrams to help students visualize equivalent ratios․ Word problems, such as mixing ingredients or scaling recipes, make learning practical and engaging․ Use shaded squares or real-world scenarios to illustrate ratio concepts․ Combine visual and textual elements to reinforce understanding and application․ This dual approach ensures students grasp both the theoretical and practical aspects of equivalent ratios effectively․

Answer Keys and Solutions

Answer keys provide essential feedback, enabling self-assessment and accuracy verification․ Detailed solutions guide students through complex problems, fostering understanding and correcting common errors effectively․

8․1 Importance of Answer Keys for Self-Assessment

Answer keys are crucial for self-assessment, allowing students to verify their work and understand mistakes․ They provide clear feedback, enabling learners to identify areas needing improvement․ By comparing their answers with the correct ones, students gain confidence and clarity․ Teachers also benefit, as answer keys streamline grading and ensure consistency․ Including answer keys in equivalent ratios worksheets enhances their educational value, making them a comprehensive tool for both practice and assessment․

8․2 Detailed Solutions for Complex Problems

Detailed solutions for complex problems provide step-by-step explanations, helping students understand how to approach and solve challenging ratio questions․ These solutions clarify misunderstandings and offer learning opportunities by breaking down problems into manageable parts․ They also serve as valuable resources for self-assessment and homework completion․ Additionally, detailed solutions enable teachers to save time and ensure consistent, accurate feedback for their students․ This support enhances overall learning outcomes and mathematical proficiency․

Equivalent ratios worksheets are invaluable tools for mastering ratio concepts, enhancing problem-solving skills, and preparing students for advanced mathematical challenges․ Regular practice fosters confidence and proficiency in handling proportions and real-world applications, making them essential for a strong foundation in mathematics․

9․1 The Value of Equivalent Ratios Worksheets in Math Education

Equivalent ratios worksheets are essential tools in math education, enhancing students’ understanding of proportions and problem-solving skills․ They provide structured practice, fostering mastery of ratio concepts and their practical applications․ By enabling students to explore scaling, simplifying, and comparing ratios, these resources build a strong foundation for advanced mathematical reasoning and real-world problem-solving, ensuring long-term academic success and confidence in handling complex proportional relationships․

9․2 Encouraging Practice and Mastery

Equivalent ratios worksheets encourage consistent practice, helping students achieve mastery over proportional relationships․ By solving various problems, learners develop fluency in scaling ratios, identifying equivalency, and applying concepts to real-world scenarios․ Regular practice builds confidence and reinforces mathematical reasoning, ensuring students are well-prepared for advanced topics․ These exercises, supported by answer keys, foster self-assessment and continuous improvement, making them indispensable tools for math education and long-term skill development․

ho’oponopono prayer pdf

Hooponopono is an ancient Hawaiian practice of forgiveness and reconciliation, aiming to restore balance and harmony within oneself and relationships․ The Hooponopono Prayer PDF guides users through specific chants and meditations, such as the I Am the I opening prayer and Morrnah’s Prayer, to promote emotional healing and self-love․

1․1․ Origin and Significance of Hooponopono

Hooponopono, an ancient Hawaiian practice, translates to “correction” or “to make things right․” Rooted in Hawaiian culture, it was traditionally used by families and communities to resolve conflicts, heal relationships, and restore balance․ This sacred ritual emphasizes mutual forgiveness, releasing guilt, and cleansing negative energies․ Its significance lies in its holistic approach to healing, addressing spiritual, emotional, and physical well-being․ Today, Hooponopono is practiced globally, offering a powerful path to reconciliation and self-love, aligning with its original intent of fostering harmony and peace․

1․2․ Purpose of the Hooponopono Prayer

The Hooponopono Prayer serves as a spiritual tool for cleansing and renewal, aiming to release negative patterns and restore inner peace․ Its purpose is to promote self-love, forgiveness, and reconciliation, allowing individuals to let go of guilt and blame․ By reciting the prayer, practitioners seek to align with their higher self and resolve conflicts within and with others․ The prayer also fosters gratitude and humility, essential for emotional healing and spiritual growth․ Ultimately, it guides individuals toward a state of harmony, balance, and divine connection, embodying the Hawaiian philosophy of making things right and living in unity․

Key Components of Hooponopono Prayer

The Hooponopono Prayer includes three core elements: the I Am the I opening prayer, Morrnah’s Prayer, and the Peace of I closing prayer, each serving specific roles in cleansing and renewal․

2․1․ The I Am the I Opening Prayer

The I Am the I opening prayer is a foundational element of the Hooponopono practice․ It is designed to create a sacred space for the practitioner, invoking the presence of the Divine․ The prayer begins with the words, “I am the I,” signifying self-acknowledgment and unity with the universe․ This prayer is believed to open the heart and mind, allowing for a deeper connection to one’s inner self and the spiritual realm․ By reciting this prayer, individuals prepare themselves for the healing and cleansing process that follows․ It is often performed at the start of a Hooponopono session to set intentions and seek guidance from higher consciousness․

2․2․ Morrnah’s Prayer

Morrnah’s Prayer is a central component of the Hooponopono practice, designed to facilitate healing, forgiveness, and reconciliation․ It is attributed to Morrnah Simeona, a Hawaiian kahuna who popularized the modern version of Hooponopono․ The prayer is a heartfelt plea to the Divine for guidance, forgiveness, and cleansing․ It emphasizes taking full responsibility for one’s actions and seeking healing for oneself and others․ The prayer is often recited to release negative energies, unresolved conflicts, and emotional blockages․ By reciting Morrnah’s Prayer, practitioners believe they can restore balance, harmony, and love within themselves and their relationships․ It is considered a powerful tool for spiritual growth and inner peace, deeply rooted in Hawaiian spiritual traditions․

2․3․ The Peace of I Closing Prayer

The Peace of I Closing Prayer is a serene and uplifting conclusion to the Hooponopono practice, fostering inner peace and connection to the Divine․ It is designed to seal the healing process initiated by the previous prayers, ensuring that the energy of forgiveness and love is fully integrated․ The prayer emphasizes unity with the self, others, and the universe, promoting a sense of harmony and balance․ By reciting this prayer, practitioners affirm their commitment to letting go of negativity and embracing divine guidance․ It serves as a powerful reminder of the transformative power of love and forgiveness, leaving the practitioner in a state of profound peace and spiritual renewal․

Steps Involved in Hooponopono Practice

Hooponopono practice involves identifying and repenting for past wrongs, seeking forgiveness, expressing gratitude, and releasing negative patterns․ These steps promote healing and inner peace through self-reflection and love․

3․1․ Repentance and Forgiveness

Repentance and forgiveness are central to Hooponopono, involving acknowledgment of past wrongs and seeking pardon․ This step encourages individuals to take full responsibility for their actions, releasing guilt and negativity; By expressing sincere regret and asking for forgiveness, practitioners aim to cleanse their minds and spirits․ The process also involves letting go of grudges and tensions, fostering reconciliation within oneself and with others․ This step is believed to restore balance and harmony, promoting emotional and spiritual healing․ Through repentance and forgiveness, Hooponopono helps individuals release burdens, creating space for peace and inner clarity․ This practice is deeply rooted in Hawaiian traditions, emphasizing the importance of self-reflection and compassion․

3․2․ Gratitude and Release

Gratitude and release are essential components of Hooponopono, fostering a mindset of appreciation and liberation from negativity․ Practitioners express thanks for life’s blessings and acknowledge the universe’s support․ This step involves releasing attachments to past hurts, emotions, and limiting beliefs, allowing for spiritual renewal․ By letting go, individuals create space for positive energy and abundance․ Gratitude chants, such as “Thank you” and “I love you,” are often used to amplify this process․ These practices help cultivate inner peace, harmony, and a deeper connection to oneself and the world․ Through gratitude and release, Hooponopono encourages a shift from resistance to acceptance, promoting emotional and spiritual well-being․

Benefits of Hooponopono Prayer

Hooponopono Prayer fosters emotional healing, balance, and improved relationships by promoting forgiveness, gratitude, and self-love․ It helps restore harmony, inner peace, and overall well-being through its transformative practices․

4․1; Emotional Healing and Balance

Hooponopono Prayer PDF offers a powerful pathway to emotional healing and balance by encouraging self-reflection and forgiveness․ Through its chants and meditations, individuals can release negative emotions and guilt, fostering a deeper sense of inner peace and harmony․ The practice helps to cleanse the mind of limiting beliefs and programming, allowing for spiritual growth and emotional clarity․ Regular use of the prayer can lead to a calmer and more centered state of being, enabling individuals to face life’s challenges with resilience and positivity․ This emotional balance is foundational to the holistic healing that Hooponopono provides, making it a transformative tool for personal well-being․

4․2․ Improved Relationships

Hooponopono Prayer PDF fosters improved relationships by promoting mutual forgiveness and understanding․ This ancient Hawaiian practice encourages reconciliation, helping to release grudges and tensions between individuals․ By focusing on self-responsibility and love, it heals not only personal relationships but also connects with ancestors and the divine․ The Peace of I prayer, included in the PDF, enhances harmony and balance, allowing for deeper, more meaningful connections․ Regular practice of Hooponopono can transform conflicts into opportunities for growth, fostering empathy and compassion․ This holistic approach to relationships creates a foundation of trust and unity, making it a powerful tool for nurturing healthy and fulfilling interactions with others․

Practical Tips for Using Hooponopono Prayer PDF

Practice daily with the Hooponopono Prayer PDF, incorporating meditations and chants like the Peace of I prayer․ Use it during morning routines or stressful moments to foster balance and harmony in daily life, enhancing emotional and spiritual well-being through consistent practice and reflection․

5․1․ Daily Practice and Meditation

Daily practice with the Hooponopono Prayer PDF involves reciting specific chants and meditations to foster balance and harmony․ Begin with the I Am the I opening prayer to clear your mind and connect with your inner self․ Incorporate Morrnah’s Prayer to focus on forgiveness and reconciliation, followed by the Peace of I closing prayer to seal your intentions․ Set aside a quiet moment each day to practice, using deep breathing to enhance mindfulness․ Regular meditation helps release emotional blockages, promoting self-love and inner peace․ Consistency is key to experiencing the transformative power of Hooponopono, allowing you to navigate life’s challenges with greater clarity and resilience․

5․2․ Incorporating Hooponopono in Daily Life

Incorporating Hooponopono into daily life involves integrating its principles of forgiveness, gratitude, and self-love into everyday activities․ Use the Hooponopono Prayer PDF as a guide to practice the four core phrases: “I’m sorry,” “Please forgive me,” “Thank you,” and “I love you․” Repeat these mantras during moments of stress or conflict to promote harmony․ Apply the practice in personal and professional relationships by silently reciting the phrases to resolve tensions․ Carry the Hooponopono Prayer PDF as a reminder to stay mindful and grounded․ By making it a habit, you cultivate emotional resilience and foster a more peaceful and loving environment around you, aligning with the ancient Hawaiian wisdom of balance and reconciliation․

whitney simmons workout plan pdf

Whitney Simmons’ workout plan is a comprehensive fitness approach combining strength training, cardio, and mindfulness․ Designed for a balanced routine, it offers a 5-day split targeting all major muscle groups․ Her Alive app provides customizable workouts, ensuring variety and progress for users at all fitness levels․

Overview of Whitney Simmons and Her Fitness Philosophy

Whitney Simmons is a fitness influencer and creator of the Alive app, which offers structured workout programs․ Her philosophy revolves around holistic well-being, blending strength training, cardio, and mindfulness․ Simmons emphasizes functional movement and balanced routines, catering to all fitness levels․ Her approach is rooted in empowerment, encouraging individuals to embrace their fitness journeys with confidence․ By integrating diverse training methods, she ensures a comprehensive approach to physical and mental health․ Simmons’ methodology is designed to be adaptable, providing customizable plans that evolve with users’ progress․ Her focus on community and support fosters a positive environment for achieving wellness goals․ This philosophy has made her program a popular choice for those seeking sustainable, transformative results․

Structure of the Whitney Simmons Workout Plan

The Whitney Simmons workout plan is structured as a 5-day split, targeting different muscle groups each day․ It includes full-body, upper body, lower body, core, and active recovery sessions․ The plan combines strength training with cardio and flexibility exercises, ensuring a well-rounded fitness routine․ Each day focuses on specific muscle groups, allowing for balanced development and recovery․ This structured approach helps users achieve their fitness goals efficiently and sustainably․

5-Day Split Routine Explanation

Whitney Simmons’ workout plan follows a 5-day split routine, designed to target all major muscle groups while allowing for proper recovery․ Each day focuses on a specific area: full-body, upper body, lower body, core and HIIT, and active recovery․ This structured approach ensures balanced development and prevents overtraining․ The full-body day includes compound movements like squats and deadlifts, while upper and lower body days focus on isolation exercises for targeted growth․ Core and HIIT days combine strength with cardio for fat loss and endurance․ Active recovery emphasizes stretching and mobility to improve flexibility and reduce muscle soreness․ This routine is customizable, making it suitable for individuals at various fitness levels, ensuring consistent progress and overall well-being․

Muscle Groups Targeted Each Day

Whitney Simmons’ 5-day split targets specific muscle groups daily, ensuring balanced development․ Day 1 focuses on full-body exercises, engaging major muscles like legs, chest, and back․ Day 2 emphasizes upper body, targeting shoulders, biceps, and triceps․ Day 3 concentrates on lower body, working quads, hamstrings, and glutes․ Day 4 combines core exercises with HIIT, targeting abs and obliques while enhancing cardiovascular fitness․ Day 5 is for active recovery, stretching all muscle groups to improve flexibility and reduce soreness․ This systematic approach ensures each muscle group receives attention, promoting overall strength and toning without overtraining․ The plan’s structure allows for effective recovery and muscle growth, making it ideal for those seeking a well-rounded fitness routine․

Day 1: Full-Body Workout

Day 1 focuses on compound movements like squats, deadlifts, and bench presses to engage multiple muscle groups, promoting overall strength and calorie burn․

Key Exercises and Sets

The full-body workout includes compound exercises like squats, deadlifts, and bench presses, targeting multiple muscle groups․ Typically, 4-6 sets of 8-12 reps are recommended for each exercise, allowing for progressive overload․ Rest periods of 60-90 seconds between sets are suggested to maintain intensity․ Accessory exercises such as lunges, pull-ups, and overhead presses are also incorporated to ensure balanced development․ The focus is on proper form and engaging the correct muscles to maximize results․ This structured approach ensures a comprehensive full-body workout, promoting strength and endurance․ The plan emphasizes consistency and gradual progression to achieve long-term fitness goals effectively․

Day 2: Upper Body Focus

Day 2 targets the upper body with exercises like push-ups, overhead presses, and rows․ It includes 4-6 sets of 8-12 reps per exercise, focusing on strength and form․

Strength Training Exercises

Whitney Simmons’ upper body workout includes exercises like push-ups, dumbbell shoulder presses, bent-over rows, and bicep curls․ These exercises are designed to build strength and definition in the chest, shoulders, and arms․ Each exercise typically involves 4-6 sets of 8-12 reps, focusing on progressive overload and proper form․ The plan emphasizes compound movements to engage multiple muscle groups simultaneously, ensuring efficiency and effectiveness․ Variations are provided to cater to different fitness levels, allowing users to adjust weights or modify exercises as needed․ The strength training component is balanced with cardio and flexibility work, creating a well-rounded routine that promotes overall fitness and muscle development․ Alive app users can follow along with demonstrations to ensure proper technique and maximize results․

Day 3: Lower Body Emphasis

Day 3 focuses on building leg and core strength with exercises like squats, lunges, and deadlifts․ These compound movements target multiple muscle groups for efficient results․

Building Leg and Core Strength

Day 3 of Whitney Simmons’ workout plan is dedicated to lower body exercises that enhance leg and core strength․ The routine includes compound movements like squats, deadlifts, and lunges, which effectively target multiple muscle groups simultaneously․ These exercises are structured in sets of 3-4, with 8-12 repetitions per set, ensuring both strength and endurance are built․ The focus is on proper form to maximize results and prevent injury․ Additionally, core-strengthening exercises like planks and leg raises are incorporated to improve stability and overall athleticism․ This day’s workout is designed to create a strong foundation, essential for daily activities and advanced training․ The Alive app provides video guidance, helping users maintain perfect form and progress seamlessly through the program․

Day 4: Core and HIIT Training

Day 4 combines core-strengthening exercises like planks and Russian twists with HIIT cardio bursts, such as sprints and burpees, to boost endurance and burn fat efficiently․

Combining Strength with Cardio

Whitney Simmons’ workout plan seamlessly integrates strength training with cardio exercises, creating a balanced approach to fitness․ On Day 4, the focus is on core-strengthening exercises like planks and Russian twists, which improve stability and posture․ These are paired with HIIT (High-Intensity Interval Training) workouts, such as sprints, burpees, and jump squats, designed to elevate heart rates and burn fat․ The combination of strength and cardio not only enhances muscular endurance but also boosts metabolism, allowing for a more efficient calorie burn even after the workout․ This blend of disciplines ensures a full-body challenge, promoting both physical and mental resilience․ The structure is designed to keep the routine dynamic and engaging, making it easier to stick to long-term fitness goals․

Day 5: Active Recovery

Day 5 focuses on active recovery, incorporating stretching, yoga, and gentle movements to enhance flexibility and aid muscle recovery․ This day emphasizes rest and mindfulness․

Importance of Rest and Flexibility

Rest and flexibility are integral to Whitney Simmons’ workout plan, ensuring muscle recovery and preventing injury․ Active recovery days promote blood flow and repair, while stretching improves mobility․ This approach supports overall well-being and mental health, allowing the body to recharge․ By prioritizing flexibility, individuals enhance their range of motion and reduce muscle tension․ Whitney emphasizes that recovery is as crucial as training, fostering long-term fitness progress and sustainability․ Incorporating activities like yoga or light cardio on recovery days helps maintain consistency without overexertion․ This balanced approach ensures the body heals and adapts, making it stronger and more resilient over time․

understanding by design wiggins and mctighe pdf

Understanding by Design (UbD) is a curriculum framework co-authored by Grant Wiggins and Jay McTighe, emphasizing backward design for meaningful student learning and understanding․

Overview of the Framework

Understanding by Design (UbD) is a curriculum framework emphasizing backward design, focusing on learning experiences that lead to deep understanding․ It involves three stages: identifying big ideas, determining evidence of understanding, and designing engaging experiences․ This approach prioritizes understanding over mere knowledge, ensuring meaningful, transferable learning․ By aligning assessments with learning goals, UbD helps educators create cohesive, effective curricula that foster student engagement and achievement․

Key Principles and Objectives

The core principle of UbD is backward design, focusing on clear learning goals․ It emphasizes understanding over rote knowledge, fostering transferable skills․ Key objectives include identifying big ideas, essential questions, and evidence of understanding; UbD promotes deep learning, critical thinking, and authentic assessments, ensuring students connect new knowledge to real-world applications․ This framework aims to create purposeful, engaging curricula that prioritize enduring understanding and student-centered instruction․

Grant Wiggins and Jay McTighe: Authors and Contributors

Grant Wiggins and Jay McTighe are renowned educators who co-authored the influential book Understanding by Design․ Their work revolutionized curriculum design and teaching practices worldwide․ Wiggins, a leading expert in curriculum design, and McTighe, a respected educational consultant, introduced the concept of backward design, focusing on clear learning objectives and authentic assessments․ Their contributions have significantly impacted modern education, emphasizing understanding and student-centered learning․

Biographical Background

Grant Wiggins (1950-2015) was a prominent educator and curriculum designer, known for his work in understanding-based education․ Jay McTighe, his collaborator, is an educational consultant with extensive experience in curriculum design and professional development․ Both authors brought deep expertise in teaching and learning to their work, shaping the UbD framework․ Their collaboration led to groundbreaking approaches in education, focusing on meaningful learning and assessment․ Their contributions continue to influence educators globally․

Contributions to Education

Grant Wiggins and Jay McTighe revolutionized education with the Understanding by Design (UbD) framework, emphasizing backward design and meaningful learning․ Their work, including books like Understanding by Design and The Understanding by Design Guide to Creating High-Quality Units, has shaped curriculum design, assessment, and teaching practices globally․ They advocated for focusing on deep understanding, essential questions, and performance tasks, transforming how educators approach student learning and achievement․

Understanding vs․ Knowledge: Core Concepts

Understanding involves applying knowledge, making connections, and transferring learning to new contexts, while knowledge focuses on recall and information retention, as emphasized in UbD․

Defining Understanding

Understanding, as defined by Wiggins and McTighe, is the ability to apply knowledge in meaningful ways, demonstrating insight, and transferring learning to real-world situations․ It involves critical thinking and problem-solving, moving beyond mere recall․ True understanding requires students to connect ideas, evaluate evidence, and communicate their thinking clearly․ This concept is central to the UbD framework, which prioritizes deep comprehension over surface-level knowledge acquisition․

Importance of Understanding in Education

Understanding is crucial in education as it enables students to apply knowledge meaningfully, engage in critical thinking, and transfer learning to new contexts․ It fosters deeper comprehension, promoting problem-solving and effective communication․ By prioritizing understanding, educators ensure students develop skills essential for real-world challenges, moving beyond rote memorization to genuine intellectual engagement and lifelong learning․ This approach aligns with the UbD framework’s focus on meaningful, transferable knowledge․

The Backward Design Process

Performance Tasks and Their Significance

Performance tasks in UbD are authentic assessments requiring students to demonstrate understanding through real-world applications․ They engage students in complex, meaningful work, fostering critical thinking and problem-solving․ These tasks provide comprehensive insights into student learning, enabling educators to assess deep understanding and transfer of knowledge․ Performance tasks are integral to UbD, promoting engagement and ensuring students can apply learning in diverse contexts․

Stage 1: Identifying Big Ideas and Essential Questions

Stage 1 of the Backward Design Process involves identifying enduring understandings and essential questions․ These “big ideas” are central to the curriculum, ensuring deep, transferable learning․ Essential questions provoke critical thinking, guiding students to explore key concepts and make meaningful connections․ This stage focuses on what matters most for long-term understanding, providing a clear foundation for the rest of the design process․

Stage 2: Determining Evidence of Understanding

Stage 2 involves defining assessments to measure if students have achieved desired understandings․ This includes both formative and summative assessments, such as quizzes, projects, and performances․ Rubrics clarify expectations, ensuring consistency in evaluating student work․ Evidence of understanding must align with the big ideas and essential questions identified in Stage 1, ensuring assessments accurately reflect what matters most for learning․

Stage 3: Designing Learning Experiences

Stage 3 focuses on crafting engaging, learner-centered experiences aligned with big ideas and evidence of understanding․ Teachers design activities, discussions, and tasks that promote deep learning and connection-making․ Instructional strategies are selected to ensure equity, engagement, and scaffolding․ This stage emphasizes active learning, critical thinking, and opportunities for students to apply and demonstrate their understanding in authentic ways, preparing them for real-world applications․

Curriculum Design and Assessment in UbD

UbD integrates assessment into curriculum design, ensuring alignment with learning goals․ It emphasizes formative and summative assessments to measure understanding and performance tasks for authentic application․

Integrating Assessment into the Framework

UbD emphasizes the integration of assessment to ensure alignment with learning goals․ Formative assessments identify student needs, while summative assessments evaluate mastery․ Performance tasks, such as projects and presentations, allow students to demonstrate understanding authentically․ By embedding assessment throughout the design process, educators can monitor progress and adjust instruction, ensuring that learning objectives are met effectively and meaningfully․

Role of Formative and Summative Assessments

Formative assessments monitor student progress during learning, providing insights to adjust instruction․ Summative assessments evaluate mastery at the end of a unit․ Both align with UbD’s focus on understanding, ensuring that assessments measure deep learning rather than mere recall․ Performance tasks often serve as summative assessments, offering authentic ways for students to demonstrate understanding․ Together, these approaches help educators refine teaching and improve student performance․

Performance tasks are authentic assessments requiring students to apply knowledge and skills to real-world scenarios․ They emphasize critical thinking, problem-solving, and communication, reflecting UbD’s focus on understanding․ These tasks help educators evaluate students’ ability to transfer learning to new contexts, ensuring deeper comprehension․ By designing meaningful performance tasks, teachers align instruction with intended outcomes, fostering student engagement and long-term retention of essential understandings․

Understanding by Design and the Common Core State Standards

UbD aligns with Common Core by emphasizing critical thinking, problem-solving, and deep understanding․ It supports educators in designing units that meet rigorous standards while fostering meaningful learning․

Alignment and Synergy

Understanding by Design (UbD) aligns seamlessly with the Common Core State Standards by emphasizing critical thinking, problem-solving, and real-world application․ Both frameworks prioritize deep understanding over mere content coverage, fostering students’ ability to transfer learning․ UbD’s focus on essential questions, performance tasks, and backward design complements Common Core’s rigor, ensuring educators can create coherent, goal-aligned instruction․ This synergy enables educators to design units that meet standards while promoting meaningful, enduring understanding․

Implementing UbD with Common Core

Implementing UbD alongside Common Core involves aligning curriculum design with both frameworks’ emphasis on deep understanding and transferable skills․ Educators should use UbD’s backward design to identify learning targets that align with Common Core standards; Essential questions and performance tasks should reflect both frameworks’ focus on critical thinking and real-world application․ Formative assessments and ongoing feedback ensure students meet rigorous expectations, while professional development supports educators in integrating these approaches effectively․

Practical Applications and Tools

UbD offers templates, rubrics, and strategies for curriculum design, enabling educators to create coherent, engaging units focused on deep understanding and transferable skills․

Templates and Strategies for Educators

UbD provides educators with practical templates and strategies to design curriculum units․ These tools include unit design guides, rubrics, and frameworks to focus on big ideas․ Educators can use these resources to create engaging lessons and assessments․ The templates help structure learning experiences, ensuring alignment with learning goals․ Additionally, strategies for integrating formative assessments and performance tasks support deeper understanding․ These tools are detailed in Wiggins and McTighe’s publications, offering clear guidance for implementation․

Case Studies and Successful Implementations

Case studies demonstrate successful UbD implementations across various schools and districts․ These examples highlight improved student performance and engagement through focused curriculum design․ Wiggins and McTighe’s work includes detailed case studies showcasing effective unit designs and assessments․ Educators have reported enhanced learning outcomes, with students demonstrating deeper understanding․ These real-world applications validate UbD’s effectiveness in transforming teaching practices and achieving educational goals․ The case studies provide valuable insights for educators seeking to implement UbD in their own classrooms․

Impact and Benefits of Using UbD

UbD enhances student performance, fosters deeper understanding, and improves teaching practices by focusing on meaningful learning experiences and effective curriculum design․

Improved Student Performance and Engagement

UbD fosters improved student performance by emphasizing understanding over mere knowledge retention․ By focusing on meaningful learning experiences, students engage deeply with content, leading to better retention and application of skills․ The framework’s emphasis on real-world applications and performance tasks increases student motivation and participation, creating a more active and engaged learning environment․ This approach ensures students are prepared to demonstrate their understanding authentically, enhancing overall academic achievement and readiness for future challenges․

Enhanced Teaching Practices

UbD enhances teaching practices by encouraging educators to design intentional, goal-oriented instruction․ Teachers focus on aligning assessments and activities with learning objectives, ensuring a coherent and purposeful approach․ This framework shifts teaching from activity-driven to outcome-driven, fostering deeper understanding and critical thinking․ By emphasizing big ideas and essential questions, educators create meaningful learning experiences, resulting in more effective and engaging instruction that supports student success and intellectual growth․

Challenges and Considerations

Implementing UbD requires shifting from traditional methods, which can be challenging for educators․ Resistance to change and the effort to redesign curriculum can be significant hurdles․

Common Challenges in Implementation

Implementing UbD can pose challenges, such as resistance to shifting from traditional teaching methods and the time-intensive process of redesigning curriculum․ Educators may struggle with collaboration and the complexity of assessing deep understanding․ Additionally, the framework’s emphasis on backward design requires a significant mindset shift, which can be met with skepticism․ These challenges highlight the need for professional development and support to ensure successful adoption of the UbD framework․

Addressing educator Concerns

Educators may face concerns such as time constraints, curriculum complexity, and shifting instructional paradigms․ Wiggins and McTighe advocate for professional development, collaboration, and practical tools to ease transitions․ Templates and structured frameworks help educators design effectively, while ongoing support and resources mitigate challenges․ By addressing these concerns, UbD empowers educators to focus on fostering deep understanding and meaningful learning experiences for students․

Resources for Further Learning

Key resources include Wiggins and McTighe’s seminal book, “Understanding by Design,” and their guide to creating high-quality units, offering practical tools for curriculum design․

Key PDFs and Publications by Wiggins and McTighe

Wiggins and McTighe’s seminal work, “Understanding by Design,” provides a comprehensive framework for curriculum design․ Their expanded 2nd edition and “The Understanding by Design Guide to Creating High-Quality Units” offer practical tools for educators․ These resources emphasize backward design, assessment strategies, and performance tasks, helping educators create meaningful learning experiences․ They are essential for understanding the UbD framework and its application in modern education․

Recommended Books and Courses

Educators seeking deeper insights into UbD can explore books like “Understanding by Design” and “The Understanding by Design Guide to Creating High-Quality Units” by Wiggins and McTighe․ These resources provide practical tools and strategies for curriculum design, instruction, and assessment․ Additionally, online courses and workshops offer hands-on training, helping educators master backward design, performance tasks, and formative assessments, ensuring a comprehensive understanding of the UbD framework and its effective implementation in the classroom․

Understanding by Design, developed by Wiggins and McTighe, revolutionizes education by focusing on backward design and meaningful learning․ By emphasizing understanding over knowledge, it equips educators with practical frameworks to create engaging curricula․ The approach ensures students achieve deeper learning through essential questions and authentic assessments, fostering critical thinking and real-world application, ultimately enhancing educational outcomes and teacher effectiveness in designing purposeful learning experiences․

owner’s manual husqvarna riding mower

Welcome to the Husqvarna riding mower owner’s manual. This guide provides essential information for safe operation, maintenance, and troubleshooting your mower, ensuring optimal performance and longevity.

1.1 Importance of Reading the Manual

Reading the Husqvarna riding mower owner’s manual is crucial for safe and effective operation. It provides detailed safety guidelines, maintenance recommendations, and troubleshooting tips. Understanding the manual ensures you grasp the mower’s features, proper usage, and essential care routines. This helps prevent accidents, extends the mower’s lifespan, and optimizes performance. Take time to review the manual thoroughly before operating your Husqvarna riding mower.

1.2 Key Features and Benefits of Husqvarna Riding Mowers

Husqvarna riding mowers are designed for superior efficiency and comfort. They feature hydrostatic transmissions, adjustable mower decks, and ergonomic controls. These mowers excel at cutting large areas quickly and evenly. The durable construction ensures long-lasting performance, while user-friendly designs make operation straightforward. With models tailored to various needs, Husqvarna mowers offer reliability and versatility for maintaining your lawn effortlessly.

Safety Precautions and Rules

Always follow safety guidelines, wear protective gear, and ensure the area is clear of obstacles. Operate responsibly to ensure safe and effective mowing experiences.

2.1 General Safety Guidelines

Safety is crucial when operating a Husqvarna riding mower. Always wear protective gear, including gloves, safety glasses, and sturdy footwear. Ensure the mowing area is clear of obstacles, children, and pets. Read and follow all safety rules in this manual to minimize risks. Never operate the mower under the influence of alcohol or drugs. Familiarize yourself with controls before starting. Keep bystanders at a safe distance while mowing.

2.2 Safety Rules for Operating the Mower

Always wear protective gear, including gloves, safety glasses, and sturdy footwear. Keep loose clothing tied back and avoid jewelry. Never operate the mower while under the influence of alcohol or drugs. Ensure the mowing area is clear of obstacles, children, and pets. Start the mower on a level surface and use caution on slopes. Never leave the mower unattended while it’s running. Keep children away from the mowing area and ensure the mower deck is properly secured before use.

Understanding Your Husqvarna Riding Mower

Familiarize yourself with your Husqvarna riding mower’s controls, transmission, and mower deck. Understanding these key components ensures ease of operation and optimal mowing performance. This manual provides detailed guidance to help you get the most from your mower.

3.1 Familiarizing Yourself with the Controls

Take time to identify and understand the key components of your Husqvarna riding mower. Locate the control panel, steering controls, and hydrostatic transmission. Compare the illustrations in this manual with your tractor to ensure familiarity with control placements and functions. Check the parts boxes (A, B, C) listed in the manual to confirm all components are included. This step is crucial for safe and effective operation.

3.2 Adjusting the Mower Deck for Optimal Performance

To achieve optimal performance, adjust the mower deck according to the manual’s guidelines. When the mower is in its highest position, ensure the front edge is 1/8 to 1/2 inch lower than the rear. Locate the height adjustment handles on either side of the deck and use a wrench or socket to make precise adjustments. After adjusting, test the mower on a small area to check for even cutting. Regularly clean the deck to prevent grass buildup and sharpen blades for a clean cut. For uneven terrain, adjust the deck to stay level relative to the ground to avoid scalping the lawn. Check belt tension as per manual specifications for smooth operation. Always follow safety precautions, such as turning off the engine and engaging the brake, before making any adjustments. Proper adjustment ensures effective cutting and extends the life of your mower.

Starting and Stopping the Mower

Ensure the parking brake is engaged and the mower is on a level surface. Follow pre-start checks, then turn the key and press the ignition button. To stop, disengage the blades, reduce speed, and turn off the engine. Always refer to the manual for specific starting and stopping procedures.

4.1 Pre-Start Checks

Before starting the mower, ensure the parking brake is engaged and the mower is on a level surface. Check the oil level, fuel level, and ensure the mower deck is clear of debris; Verify that all safety features are functioning properly and that loose clothing or jewelry is secured. Inspect the blades for damage and ensure the cutting deck height is adjusted correctly. Always refer to the manual for detailed pre-start procedures to ensure safe and efficient operation.

4.2 Starting and Stopping Procedures

To start the mower, sit comfortably, ensure the parking brake is engaged, and move the throttle to the start position. Turn the ignition key to the “start” position and release it once the engine begins to run. For stopping, bring the mower to a complete stop, move the throttle to the “stop” position, engage the parking brake, and turn off the ignition. Always allow the engine to cool before leaving the mower unattended.

Maintenance and Servicing

Regular maintenance is crucial for optimal performance. Check oil levels, filters, and blades frequently. Lubricate moving parts and clean the mower deck after use. Schedule servicing every 50 hours for best results. Refer to the manual for detailed procedures and visit authorized Husqvarna service centers for genuine parts and expert assistance.

5.1 Regular Maintenance Tasks

Regular maintenance ensures your Husqvarna riding mower runs efficiently. Check oil levels, air filters, and blade sharpness frequently. Clean the mower deck after use to prevent debris buildup. Lubricate moving parts and inspect belts for wear. Replace filters and sharpen blades every 25 hours. Change oil and gas filters every 50 hours to maintain engine health. Refer to your manual for specific schedules and procedures.

5.2 Oil and Filter Change Procedures

Regular oil and filter changes are crucial for maintaining your Husqvarna riding mower’s engine health. Warm the engine slightly, then drain the oil into a pan. Replace the oil filter with a genuine Husqvarna filter. Refill the engine with the recommended oil type. Check for leaks and dispose of used oil responsibly. Replace the gas filter every 50 hours to ensure proper fuel flow and engine performance.

Troubleshooting Common Issues

Addressing common problems like blade engagement failures and starting difficulties can be resolved by following diagnostic steps outlined in this section for optimal mower functionality.

6.1 Why the Blades May Not Engage

The blades may fail to engage due to a broken or loose drive belt, faulty pulleys, or issues with the PTO (Power Take-Off) switch. Check for worn or damaged belts and ensure all connections are secure. Verify the PTO switch is functioning correctly and consult the manual for belt replacement procedures if necessary. Addressing these common issues promptly ensures proper mowing performance.

6.2 Solving Starting Problems

Starting issues with your Husqvarna riding mower can often be resolved by checking the basics. First, ensure the fuel tank is not empty and that the fuel is fresh. Old or contaminated fuel can prevent the engine from starting. Next, inspect the spark plug for cleanliness and wear. A dirty or worn-out spark plug should be cleaned or replaced. Also, check the air filter for dirt or debris and clean or replace it as needed. If these steps don’t resolve the issue, consider examining the carburetor for potential clogs, which may require cleaning. Additionally, verify the condition of the ignition coil, as a faulty coil can prevent proper spark generation. If the battery is dead, try jumping it or replacing it if necessary. Finally, inspect the fuel line for kinks or blockages that might restrict fuel flow. If none of these solutions work, it may be advisable to consult a professional for further diagnosis and repair.

Husqvarna Customer Support and Resources

Husqvarna offers comprehensive customer support through online resources, including manuals, FAQs, and a dealer locator. Visit their website or contact customer service for assistance with your riding mower.

7.1 Where to Find Manuals and Guides

Husqvarna provides easy access to manuals and guides on their official website. Visit the support section, enter your product model, and download the PDF manual for free. Additionally, use the dealer locator tool to find local service centers for personalized assistance. Digital copies ensure you always have the information needed to maintain and troubleshoot your riding mower effectively.

7.2 Contacting Husqvarna Service Centers

For assistance, visit Husqvarna’s official website and use the dealer locator tool to find your nearest service center. Contact their customer support team directly for troubleshooting, maintenance, or repair inquiries. Local service centers offer personalized help, ensuring your riding mower operates at its best. Reach out for expert advice and reliable service to maintain your equipment’s performance and longevity.

Accessories and Replacement Parts

Explore the range of genuine accessories and replacement parts designed for your Husqvarna riding mower. This section guides you on identifying and ordering the correct components efficiently.

8.1 Identifying Genuine Husqvarna Parts

Identifying genuine Husqvarna parts ensures compatibility and quality. Look for the Husqvarna logo, part numbers, and packaging. Verify the serial number in the manual. Purchase from authorized dealers to avoid counterfeit products. Cross-reference part numbers online or in the manual for accuracy. Genuine parts are designed to maintain performance and safety, ensuring your mower operates as intended. Always double-check before ordering to guarantee authenticity and warranty coverage.

8.2 Ordering Parts Online

To order genuine Husqvarna parts online, visit the official Husqvarna website or authorized dealer portals. Use your mower’s model or part number for accurate searches. Select the desired part, review the description, and proceed to checkout. Ensure the seller is verified to avoid counterfeit items. Track your order and confirm delivery details. Genuine parts ensure warranty coverage and optimal performance, maintaining your mower’s quality and reliability over time.

Tips for Optimal Mowing Performance

Maintain the mower deck at the recommended height and ensure blades are sharp for even cutting. Regularly check and lubricate moving parts to enhance efficiency and prolong lifespan.

9.1 Adjusting the Mower for Different Terrain

Adjust your Husqvarna riding mower to suit various terrains for optimal performance. For hills, ensure the mower deck is level to prevent scalping. On flat ground, raise the deck slightly for even cutting. For uneven terrain, lower the deck cautiously to maintain stability. Always check tire pressure and blade angle before mowing. Consult your manual for specific height recommendations based on grass type and terrain conditions.

9.2 Sharpening and Replacing Blades

Sharpen mower blades every 25 hours of use for optimal cutting performance. Dull blades tear grass, leaving it vulnerable to disease. Use a grinder or file to maintain the original blade angle. Replace blades if they are worn, bent, or damaged. Always install genuine Husqvarna parts for compatibility and safety. Refer to your manual for specific blade sharpening and replacement instructions tailored to your model.

Warranty and Service Information

Understand your warranty coverage for repairs and replacements. Schedule routine service with authorized Husqvarna dealers to maintain warranty validity. Use genuine parts for compliance and optimal performance.

10.1 Understanding Your Warranty Coverage

Your Husqvarna riding mower is backed by a comprehensive warranty program. Coverage varies by model and typically includes repairs or replacements for defective parts during the warranty period. Proper maintenance and use of genuine Husqvarna parts are essential to maintain warranty validity. Review your manual or contact Husqvarna support for detailed terms and conditions. Always ensure service is performed by authorized dealers to uphold coverage.

10.2 Scheduling Routine Service

Regular servicing is crucial for maintaining your Husqvarna riding mower’s performance and longevity. Refer to your owner’s manual for recommended service intervals, typically every 50 hours, including oil changes, filter replacements, and deck cleaning. Use genuine Husqvarna parts and authorized dealers to ensure warranty validity. Proper maintenance ensures optimal mower function and prevents potential issues. Schedule service promptly to keep your mower running efficiently throughout the season.

edmonton movie guide south edmonton common

Edmonton Movie Guide: South Edmonton Common

South Edmonton Common offers a vibrant movie-going experience with diverse showtimes and listings. Explore top theaters, enjoy state-of-the-art screens, and discover a variety of films in a convenient location for entertainment seekers.

South Edmonton Common is a vibrant and expansive retail and entertainment hub located in the heart of Edmonton, Alberta. Known for its diverse offerings, it serves as a premier destination for shopping, dining, and leisure activities. The area is particularly renowned for its state-of-the-art movie theaters, which attract film enthusiasts from across the city. With its convenient location and ample parking, South Edmonton Common is a favorite spot for both locals and visitors. The complex features a wide range of amenities, including restaurants, shops, and entertainment venues, making it a one-stop destination for a memorable day or evening out. Whether you’re a movie buff, a food lover, or simply looking for a fun outing, South Edmonton Common has something for everyone. Its modern facilities and dynamic atmosphere ensure an enjoyable experience for all who visit.

Top Movie Theaters in South Edmonton Common

South Edmonton Common is home to several high-quality movie theaters that cater to film enthusiasts. Among the top options is the Scotiabank Theatre, offering a premium cinematic experience with reclining seats and state-of-the-art sound systems. Another popular choice is the Cineplex Cinemas, which features a wide range of screens, including 3D and VIP options for an enhanced viewing experience. These theaters are equipped with modern amenities, ensuring comfort and entertainment for moviegoers. With a variety of showtimes and the latest blockbusters, these venues provide an ideal setting for catching the newest releases. The theaters also offer a selection of concession stands, serving classic movie snacks and beverages. Their convenient location within South Edmonton Common makes them a central hub for cinematic entertainment in the city. Whether you’re a casual viewer or a dedicated film buff, these theaters promise an unforgettable experience.

Movie Listings and Showtimes

South Edmonton Common offers a wide variety of movie listings and showtimes, catering to all types of film enthusiasts. With multiple theaters in the area, moviegoers can enjoy the latest blockbusters, independent films, and classic screenings. Showtimes are available throughout the day, including matinee and evening screenings, making it easy to fit a movie into your schedule. Many theaters provide online listings, allowing viewers to check schedules in advance and purchase tickets conveniently. Whether you’re a fan of action-packed adventures, romantic comedies, or thought-provoking dramas, there’s something for everyone. The listings often include 3D and IMAX options for an immersive cinematic experience. Stay updated with the latest releases and plan your visit to catch your favorite films on the big screen.

Special Movie Events and Premieres

South Edmonton Common is a hub for exciting special movie events and premieres, offering unique cinematic experiences. Film enthusiasts can enjoy exclusive screenings of highly anticipated movies, often featuring Q&A sessions with directors or cast members. The area also hosts film festivals showcasing independent and international films, providing a platform for emerging talent. Premieres often draw large crowds, creating a buzzing atmosphere for movie lovers. Additionally, some theaters offer themed movie nights, where fans can dress up and immerse themselves in their favorite franchises. Classic movie revivals are another highlight, allowing audiences to revisit iconic films on the big screen. These events are a great way to connect with the local film community and experience cinema beyond the usual offerings. Be sure to check theater listings regularly, as these special events are often announced with limited notice and tend to sell out quickly. They add an extra layer of excitement to the movie-going experience in South Edmonton Common.

Dining and Concession Options

South Edmonton Common offers a variety of dining and concession options to enhance your movie-going experience. Theaters in the area provide a range of snacks, from classic popcorn and nachos to hot dogs and soft drinks. For a more substantial meal, visitors can explore nearby restaurants, which include fast-food chains, casual eateries, and diverse international cuisine options. Many establishments offer convenient meal deals or combo packages, perfect for pairing with your movie ticket. Additionally, some theaters feature premium concession stands with gourmet snacks like artisanal candies, specialty coffees, or even alcohol for adult audiences. The variety of options ensures there’s something for every taste and preference. Whether you’re grabbing a quick bite or indulging in a treat, South Edmonton Common’s dining options make your trip to the movies even more enjoyable. Be sure to check out any special promotions or discounts available at participating locations.

Deals and Discounts

South Edmonton Common offers a variety of deals and discounts to make your movie experience more affordable and enjoyable. Many theaters in the area provide special promotions, such as discounted tickets for students, seniors, and children. Matinee showtimes often feature lower prices, making it a great option for daytime moviegoers. Additionally, some cinemas offer bundle deals that include tickets, popcorn, and drinks at a reduced rate. Loyalty programs are another great way to save, rewarding frequent visitors with points that can be redeemed for future purchases. Seasonal promotions and holiday specials are also common, offering further discounts for movie enthusiasts. Be sure to check the theater’s website or app for the latest deals, as they often update their offers. Contacting the theater directly can also provide insights into any current discounts or special events. Taking advantage of these deals can enhance your movie experience while keeping it budget-friendly.

Accessibility and Facilities

South Edmonton Common takes pride in offering accessible and well-equipped facilities for all moviegoers. The theaters in the area are designed to ensure comfort and inclusivity, with features such as wheelchair-accessible seating, aisles, and restrooms. Many locations also provide assistive listening devices for patrons with hearing impairments. For visually impaired audiences, select showings may include audio descriptions or closed captions. The facilities are modern and well-maintained, offering a clean and comfortable environment for everyone. Additionally, some theaters feature premium formats like IMAX or 3D, enhancing the cinematic experience. Snack bars are fully stocked with a variety of options, including classic concessions and healthier choices. Parking is conveniently located near the theaters, with designated spots for individuals with disabilities. Overall, the combination of accessibility and top-notch facilities makes South Edmonton Common an excellent choice for a hassle-free and enjoyable movie outing.

Family-Friendly Guide

South Edmonton Common is an excellent destination for families seeking an enjoyable movie experience. Theaters in the area offer a variety of family-friendly films, including animated features, kid-friendly blockbusters, and classic favorites. Many locations provide discounted ticket prices for children, making it an affordable outing for families. Additionally, some theaters feature booster seats and play areas to keep younger kids entertained before showtime. Parents will appreciate the convenient amenities, such as stroller-accessible entrances and baby-changing facilities. For families with older children, the diverse movie selection ensures there’s something for every age and interest. Some theaters also host special family movie events, complete with kid-friendly snacks and activities. Overall, South Edmonton Common’s theaters are designed to create a welcoming and fun environment for families to enjoy quality time together at the movies.

Planning Your Visit

Planning a trip to South Edmonton Common for a movie is straightforward and stress-free. Start by checking the latest movie listings and showtimes online to ensure your favorite film is playing at a convenient time. Theaters in the area often offer flexible schedules, including matinee and evening shows, catering to different preferences. It’s advisable to purchase tickets in advance, especially for popular releases, to avoid sold-out screenings. Parking is ample, with accessible spots near the theater entrances. Arrive early to account for ticket collection and concession purchases. Many theaters provide digital kiosks for quick ticket pickup, saving time. Consider the duration of the movie and plan breaks if needed. Additionally, some theaters offer loyalty programs or apps for rewards and exclusive deals. Familiarize yourself with the theater layout beforehand to locate seating, restrooms, and concession stands efficiently. This ensures a smooth and enjoyable experience for moviegoers of all ages.

Reviews and Ratings

The movie theaters in South Edmonton Common have consistently received positive reviews from audiences and critics alike. Many patrons praise the modern facilities, comfortable seating, and high-quality sound systems. Reviewers often highlight the clean and well-maintained environments, making for an enjoyable cinematic experience. The friendly and efficient staff are also frequently commended. On platforms like Google and Yelp, theaters in the area boast high ratings, with many viewers appreciating the variety of movies shown, including blockbusters and independent films. Some critics note the excellent snack options and reasonable pricing compared to other locations. Families particularly enjoy the accessibility and accommodating atmosphere for children. Overall, the theaters in South Edmonton Common are highly recommended for their commitment to quality and customer satisfaction. If you’re looking for a great place to catch the latest films, this area is a top choice for movie enthusiasts. Check out recent reviews to find the perfect theater for your next outing.

South Edmonton Common stands out as a premier destination for movie enthusiasts, offering a blend of excellent theaters, diverse showtimes, and outstanding amenities. With top-tier facilities, delicious dining options, and family-friendly environments, it caters to all types of moviegoers. The area’s commitment to accessibility and affordability, combined with its vibrant atmosphere, makes it a must-visit for anyone seeking a memorable cinematic experience. Whether you’re catching the latest blockbuster or enjoying a cozy night out, South Edmonton Common delivers. Plan your visit, grab some popcorn, and immerse yourself in the magic of the movies in this entertainment hub. Your next great movie experience awaits in South Edmonton Common!

charge code manual

The Charge Code Manual is a standardized guide published by the Missouri State Highway Patrol, providing a structured system for tracking criminal offenses. It ensures uniformity in reporting and categorizing crimes across law enforcement agencies. The manual includes detailed charge codes, modifiers, and instructions for accurate data entry, facilitating efficient criminal justice operations.

1.1 Definition and Purpose

The Charge Code Manual is a standardized guide assigning unique codes to criminal offenses, enabling consistent reporting and classification. Its purpose is to provide a uniform system for law enforcement and criminal justice agencies to track and categorize crimes accurately. Published by the Missouri State Highway Patrol, it ensures clarity and precision in legal procedures and data management, aligning with legal changes and updates.

1.2 Importance in Criminal Justice Systems

The Charge Code Manual is essential for maintaining consistency in criminal justice systems, enabling accurate tracking and reporting of offenses. It standardizes how crimes are classified, ensuring uniformity across law enforcement agencies. This system facilitates efficient data collection, statistical analysis, and legal compliance, while also aiding in the proper administration of justice and public safety efforts.

History and Development of the Charge Code Manual

The Charge Code Manual originated to standardize criminal offense tracking. Published by the Missouri State Highway Patrol, it has evolved over time with periodic updates and expansions.

2.1 Origins and Evolution

The Charge Code Manual was first introduced to create a uniform system for criminal offense classification. It began as a basic catalog of crimes and has since expanded to include detailed modifiers and instructions. Updates are coordinated by the Missouri State Highway Patrol, ensuring the manual remains relevant and accurate for law enforcement and criminal justice agencies.

2.2 Key Milestones in Its Development

The Charge Code Manual has undergone significant updates to enhance accuracy and usability. Key milestones include the 2001 expansion to include NCIC modifiers, the 2015 addition of ordinance comparisons, and the 2024 integration of new codes for emerging crimes like cyber offenses. These updates ensure the manual remains a vital tool for law enforcement and criminal justice agencies.

Structure and Organization of the Charge Code Manual

The Charge Code Manual is organized into sections with charge codes, modifiers, and instructions for accurate reporting. It provides a structured format for law enforcement agencies to classify offenses uniformly.

3.1 Format and Layout

The Charge Code Manual is designed with a clear and consistent format, featuring tables, codes, and detailed descriptions. Each section is organized logically, with headings and subheadings for easy navigation. The layout includes numerical indexing, charge code listings, and instructional notes, ensuring users can quickly locate specific information. The manual’s structured format enhances usability for law enforcement and criminal justice professionals.

3.2 Coding System and Nomenclature

The Charge Code Manual employs a standardized coding system, utilizing a 5-digit code for each offense, followed by a 2-digit NCIC modifier. This nomenclature ensures uniformity in tracking and reporting crimes. Codes are structured to categorize offenses precisely, aiding law enforcement and criminal justice officials in maintaining consistent records. The system’s clarity enhances data management and legal compliance across jurisdictions.

The Charge Code Committee

The Charge Code Committee oversees the development and maintenance of the manual, ensuring codes align with state laws and criminal justice needs. It collaborates with law enforcement and legal experts to update and refine the system, guaranteeing accuracy and relevance in tracking offenses.

4.1 Role and Responsibilities

The Charge Code Committee is responsible for reviewing and approving new codes, ensuring they align with current laws and criminal justice requirements; The committee collaborates with law enforcement agencies and legal experts to maintain the manual’s accuracy and relevance. They also address updates, resolve coding conflicts, and ensure the system remains efficient for tracking and reporting criminal offenses statewide.

4.2 Process for Reviewing and Approving New Codes

New charge codes undergo a rigorous review process to ensure accuracy and relevance. Submissions are evaluated for clarity, consistency, and alignment with existing laws. The committee consults with legal experts and law enforcement agencies before approval. Updates are documented and published quarterly, with annual comprehensive revisions to reflect legislative changes and system improvements, ensuring the manual remains current and effective.

Current Charge Code Manual

The current Charge Code Manual covers August 28, 2024, to August 27, 2025, providing updated codes for criminal offenses. It is published by the Missouri State Highway Patrol and the Office of State Courts Administrator, ensuring accurate tracking and reporting of crimes for law enforcement and criminal justice agencies.

5.1 Publication Details and Coverage Period

The Charge Code Manual is published annually by the Missouri State Highway Patrol and the Office of State Courts Administrator. The current edition covers the period from August 28, 2024, to August 27, 2025. It is available in print and digital formats, with updates reflecting changes in statutes and criminal justice reporting requirements. The manual is accessible on the Missouri State Highway Patrol’s official website.

5;2 Content and Features

The Charge Code Manual contains a comprehensive list of 5-digit charge codes, each corresponding to specific criminal offenses. It includes NCIC modifiers, statutory references, and offense classifications. The manual also features instructions for code usage, updates on new or revised codes, and cross-references for related offenses. Additional resources include ordinance comparisons and a criminal offense pamphlet, ensuring accurate reporting and compliance with legal standards.

5.3 Accessing the Manual

The Missouri Charge Code Manual is published by the Missouri State Highway Patrol and is available on their official website. The manual covers specific periods, such as August 28, 2024, to August 27, 2025. It includes current charge codes, historical editions, and quarterly updates. Users can access PDF versions, retired codes, and related resources, ensuring easy reference for law enforcement and criminal justice officials.

Historical Charge Code Manuals

Archived editions of the Missouri Charge Code Manual are accessible online, covering past years like 2001, 2015-2016, and 2020-2021. These historical manuals provide valuable insights into retired charge codes, updates, and previous reporting structures, aiding research and reference for criminal justice agencies and legal professionals.

6.1 Archives and Past Editions

The Missouri State Highway Patrol maintains an extensive archive of past Charge Code Manual editions, including 2001, 2015-2016, and 2020-2021 versions. These archives are accessible online, offering historical charge codes, updates, and retired codes. They provide valuable insights into the evolution of criminal offense tracking and support legal research and reference needs for criminal justice professionals and researchers.

6.2 Retired Charge Codes

Retired charge codes are archived and accessible through the Missouri State Highway Patrol’s website. These codes, though inactive, remain available for reference and legal purposes. They document historical offenses and updates, ensuring continuity in tracking criminal justice data. Retired codes are essential for understanding changes in criminal statutes and maintaining accurate records for law enforcement and judicial processes.

Charge Code Applications

The Charge Code Manual is primarily used by law enforcement agencies and criminal justice officials for reporting and tracking criminal offenses, ensuring accurate data collection and legal compliance.

7.1 Law Enforcement Agencies

Law enforcement agencies utilize the Charge Code Manual to assign specific codes to criminal offenses, ensuring uniform reporting. This standardized system facilitates accurate crime statistics and legal compliance. The codes enable efficient data sharing with state and federal authorities, aiding in statewide crime analysis and resource allocation. Regular updates ensure agencies have current information.

7.2 Criminal Justice Officials

Criminal justice officials rely on the Charge Code Manual to classify offenses accurately. It ensures legal compliance and uniform data reporting. By using standardized codes, officials maintain consistency in tracking and analyzing crimes. This supports efficient case management and informed decision-making within the criminal justice system.

Charge Code Updates and Revisions

The Charge Code Manual is updated quarterly to reflect legal changes, ensuring accuracy and compliance. Revisions include new codes and removal of repealed laws, maintaining relevance.

8.1 Frequency and Process

The Missouri Charge Code Manual is updated quarterly, aligning with legislative changes and law enforcement needs. The process involves the Charge Code Committee reviewing submissions, ensuring compliance with state laws, and approving new codes. Updates are published on the Missouri State Highway Patrol’s website, providing accessible and timely revisions for criminal justice agencies.

8.2 Recent Changes and Additions

The Missouri Charge Code Manual has recently introduced new codes for emerging offenses, modified existing codes for clarity, and aligned with updated state laws. The latest edition includes additional features for improved data tracking and reporting. Retired codes are now listed for historical reference, ensuring comprehensive documentation and seamless transitions for criminal justice agencies.

Charge Code Manual Training

Training materials, including manuals and guides, are available to ensure accurate and compliant use of the Charge Code Manual. These resources are designed for law enforcement and criminal justice officials, covering updates and alignment with current laws and reporting standards.

9.1 Available Training Materials

The Missouri State Highway Patrol offers comprehensive training materials, including guides, webinars, and interactive tools, to educate users on the Charge Code Manual. These resources are designed to help law enforcement and criminal justice officials understand the coding system, updates, and legal compliance. Materials are accessible online, ensuring easy access for continuous professional development and accurate implementation of charge codes.

9.2 Importance of Training

Training on the Charge Code Manual is essential for ensuring accurate and consistent data reporting. It equips law enforcement and criminal justice officials with the knowledge to apply codes correctly, understand updates, and maintain legal compliance. Proper training enhances data integrity, supports efficient crime tracking, and ensures the fair application of justice across all jurisdictions, making it a critical component of criminal justice operations.

Charge Code Manual and Legal Compliance

The manual ensures alignment with state laws, excluding repealed laws to maintain legal accuracy. Regular updates reflect legislative changes, ensuring compliance and accurate crime reporting across jurisdictions.

10.1 Alignment with State Laws

The Charge Code Manual is carefully aligned with state laws, ensuring that all codes reflect current legislation. Regular updates incorporate new laws and remove repealed ones, maintaining legal accuracy. This alignment ensures that criminal justice agencies can accurately classify offenses, promoting consistency and compliance in crime reporting and legal proceedings across Missouri.

10.2 Handling of Repealed Laws

The Charge Code Manual systematically removes codes for repealed laws, ensuring only active legislation is referenced. This process maintains accuracy in crime reporting and legal compliance. Retired codes are archived to preserve historical data while preventing their misuse in current criminal justice operations.

Accessing Charge Code Information

The Charge Code Manual is accessible online through official websites, offering PDF and Excel formats. Users can search by law descriptions or titles for specific codes.

11.1 Online Resources

The Missouri State Highway Patrol’s website offers the Charge Code Manual in PDF and Excel formats. Users can access current and historical charge codes, search by law descriptions, and view non-fingerprintable and repealed laws. The online resource provides efficient tools for law enforcement and criminal justice officials to track and report offenses accurately. Visit their website for detailed information and support.

11.2 Search and Reporting Features

The Charge Code Manual offers advanced search and reporting tools. Users can search by law description, title, or specific codes to find relevant information quickly. Reports can be generated in PDF or Excel formats, allowing for easy data analysis. Features include filtering options, detailed law descriptions, and access to repealed laws, enhancing efficiency for criminal justice professionals and law enforcement agencies.

The Future of the Charge Code Manual

The Charge Code Manual will evolve with technological advancements, enhancing its digital accessibility and integration with criminal justice systems. Its expanded use beyond law enforcement is anticipated.

12.1 Technological Advancements

The Charge Code Manual is expected to transition into digital platforms, enhancing accessibility and usability. Future updates may include advanced search features, real-time data updates, and integration with law enforcement databases. Mobile accessibility and AI-driven code suggestions could streamline operations, ensuring efficiency and accuracy in criminal justice reporting and tracking systems.

12.2 Expanding Uses Beyond Law Enforcement

Beyond law enforcement, the Charge Code Manual is increasingly used in background checks, regulatory compliance, and data analysis. Its standardized codes aid employers in screening processes and researchers in studying crime trends. This expansion highlights the manual’s versatility and its growing role in supporting decisions across various sectors, enhancing its utility beyond its original purpose.

Page 9 of 44

Powered by WordPress & Theme by Anders Norén