
Welcome to Tarkettna.com’s installation guide, designed to help you successfully install your flooring. This comprehensive resource provides step-by-step instructions, ensuring proper preparation and execution for a flawless finish.
Whether you’re a professional or a DIY enthusiast, these guidelines will walk you through the process, covering tools, materials, and best practices for a long-lasting, attractive floor installation.

Pre-Installation Requirements
Ensure the subfloor is clean, dry, and level. Acclimate flooring materials for at least 24 hours. Maintain a room temperature of 15°C to 27°C (59°F to 81°F) and controlled humidity levels for optimal results.
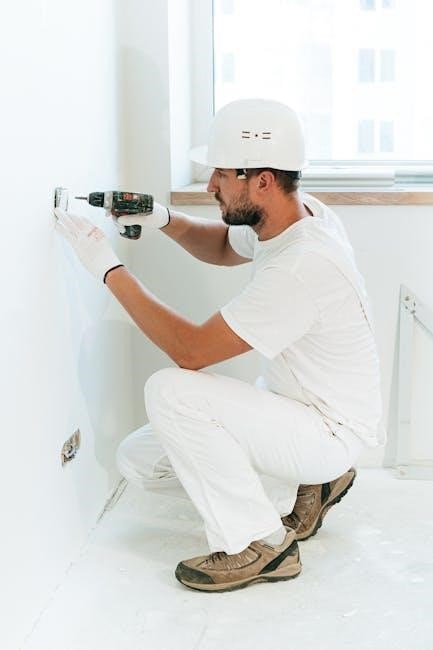
2.1 Subfloor Preparation
Proper subfloor preparation is essential for a successful installation. Ensure the subfloor is clean, dry, and free from debris, old adhesives, or paint. Inspect for cracks or unevenness and fill them with a suitable leveling compound. Allow the compound to dry completely before proceeding.
Check the subfloor for moisture damage or water seepage. Use a moisture meter to ensure the moisture level is within acceptable limits. If necessary, apply a moisture barrier to prevent future issues.
The subfloor must be level and even. Use a spirit level to verify flatness. Sand or grind high spots and fill low areas with a self-leveling compound. Ensure the surface is smooth and stable before installation.
Additionally, ensure the subfloor is structurally sound and securely fastened to the floor joists to avoid movement during installation. Allow the subfloor to acclimate to room temperature and humidity for at least 24 hours before proceeding.
Finally, vacuum the subfloor thoroughly to remove dust and particles. This ensures proper adhesion of the flooring material. Follow these steps to create an ideal surface for your flooring installation.
2.2 Acclimation Period
Before installation, flooring materials must acclimate to the room’s environmental conditions. Place all flooring boxes in the installation area, ensuring they remain in their original packaging.
The acclimation period typically ranges from 24 to 48 hours, allowing materials to adjust to temperature and humidity levels. Maintain a consistent room temperature between 15°C and 20°C during this time.
For certain materials, such as linoleum, the temperature should not drop below 15°C. Check specific product guidelines for exact requirements.
Humidity levels should also be controlled to prevent material expansion or contraction. Avoid exposing flooring to direct sunlight or extreme environmental changes during acclimation.
Once acclimated, carefully unpack the flooring, ensuring it is ready for installation. Proper acclimation prevents post-installation issues like warping or gaps.
Follow manufacturer instructions for specific acclimation periods, as durations may vary depending on material type and environmental conditions.

Tools and Materials Needed
To ensure a successful installation, gather the necessary tools and materials beforehand. Essential tools include a utility knife, measuring tape, pencil, chalk line, carpenter’s square, and a notched trowel for adhesive application.
A rubber mallet, tapping block, and pull bar are useful for aligning and securing planks. Safety gear, such as gloves and goggles, is also recommended.
For materials, use Tarkett-recommended adhesives and underlayment to ensure compatibility and durability. A plywood or cement-based underlayment is ideal for uneven subfloors.
Additional materials include transition strips for seamless floor transitions and silicone sealant for edges. Ensure all products are stored in a dry, temperature-controlled environment before use.
Refer to Tarkett’s product specifications for exact material quantities and compatibility. Proper preparation and the right tools will ensure a professional-grade installation.
Step-by-Step Installation Guide
Begin by unpacking and acclimating the flooring. Lay the first plank along the longest wall, ensuring alignment with chalk lines. Secure it firmly, then proceed to install subsequent planks, using a tapping block and mallet for tight fits.
Maintain expansion gaps around edges and cut planks as needed. Complete the process by sealing edges with silicone sealant and installing transition strips for a polished finish.
4.1 Unpacking and Layout
Start by carefully unpacking the flooring planks, ensuring they are free from damage. Open multiple boxes to ensure a natural color variation distribution across the room.
Lay the planks in a staggered pattern to enhance the visual appeal and structural integrity. Use a chalk line to mark the starting point along the longest wall, ensuring the first plank aligns perfectly.
Allow the planks to acclimate to the room’s temperature and humidity for at least 24 hours prior to installation. This step is crucial for preventing post-installation issues like warping or shrinking.
Before proceeding, inspect the subfloor for any irregularities and ensure it is clean, dry, and level. Address any unevenness to guarantee a smooth installation process.
Finally, double-check the layout plan, considering the room’s dimensions and the direction of natural light to achieve an aesthetically pleasing result.
4.2 Securing the First Plank
Begin by aligning the first plank along the chalk line, ensuring it is straight and level. Use a spirit level to double-check the alignment and secure the plank with adhesive or fasteners as recommended.
Cut the first plank to fit the room dimensions using a utility knife or saw. Apply the adhesive evenly, following the manufacturer’s instructions, and press the plank firmly into place.
Use a tapping block to gently tap the plank into position, ensuring it is flush with the subfloor. Avoid applying too much pressure, which could damage the plank or underlying surface.
Leave a 1/4 inch expansion gap around the perimeter to accommodate thermal movement. Use shims to maintain this gap and ensure the plank is securely fastened.
Double-check the fit and alignment before moving on to the next plank. This step sets the foundation for the rest of the installation, so precision is key.
4.3 Installing Subsequent Planks
After securing the first plank, begin installing subsequent planks by aligning their edges with the previous plank; Use a tapping block to ensure a snug fit and avoid damaging the flooring.
Apply adhesive to the subfloor as specified, spreading it evenly with a notched trowel. Press each plank firmly into place, starting from the long edge and working across the width.
For floating installations, snap the planks together by angling them slightly and pressing down. Ensure the tongue-and-groove joints are fully engaged for a secure fit.
If cutting planks to fit around obstacles, use a utility knife or saw and leave a 1/4 inch gap around fixed objects.
Use shims to maintain even spacing and prevent buckling. Continue installing planks row by row, alternating the starting point of each row for a staggered, professional appearance.
Double-check each plank’s alignment and fit before moving on. Proper installation of subsequent planks ensures a smooth, even surface and long-lasting durability.

Specialized Installation Scenarios
This section addresses unique challenges, such as installing over existing floors and handling obstacles. Proper preparation and additional materials may be required to ensure a secure and visually seamless installation.
5.1 Installing Over Existing Floors
Installing Tarkett flooring over existing floors requires careful preparation to ensure a stable and even surface. Begin by removing all old floor coverings and cleaning the subfloor thoroughly. Check for any unevenness or damage and address these issues before proceeding.
If the existing floor is uneven, consider using a self-leveling compound to create a smooth base. Ensure the surface is dry and free from old adhesives or debris, as this can interfere with the new flooring’s adhesion.
For vinyl or linoleum floors, verify that the existing surface is securely attached and in good condition. If installing over wooden subfloors, ensure they are properly secured and level.
Acclimate the flooring material in the installation area for at least 24 hours before starting. Use recommended underlayment materials to enhance stability and sound reduction. Follow the manufacturer’s guidelines for adhesive application and plank placement.
By following these steps, you can achieve a professional-looking installation even over existing floors. Always refer to Tarkettna.com for the most up-to-date instructions.
5.2 Handling Obstacles and Irregularities
When installing Tarkett flooring, encountering obstacles such as heating vents, pipes, or irregularly shaped rooms requires careful planning. Begin by measuring the obstacle accurately to ensure precise cuts.
Use a utility knife or jigsaw to cut planks around these areas, leaving a small gap for expansion. For rounded edges, consider using a template or compass to achieve a smooth finish.
For uneven subfloors, apply self-leveling compound to create a stable surface. If the floor has old adhesive residue, scrape it off thoroughly before proceeding.
When dealing with angled or slanted walls, use a chalk line to mark the plank’s edge, ensuring alignment. Always acclimate materials before cutting and fit planks tightly around obstacles.
By addressing these challenges methodically, you can achieve a seamless and professional-looking installation. Always refer to Tarkettna.com for detailed guidance.
Post-Installation Care and Maintenance
Proper care and maintenance are essential to preserve the beauty and durability of your Tarkett flooring. Begin with a thorough cleaning immediately after installation to remove dust and debris. Use a neutral pH cleaner and warm water, avoiding abrasive materials that could scratch the surface.
For routine maintenance, sweep or vacuum daily to prevent dirt buildup. Damp mop with a recommended cleaning solution, avoiding excessive water to prevent damage. For stubborn stains, apply a Tarkett-approved cleaning product and rinse thoroughly.
Protect your flooring by placing felt pads under furniture legs to prevent scratching. Avoid dragging heavy objects, as this can cause damage. Regularly inspect and replace worn-out pads to maintain protection.
For long-term care, ensure the room temperature remains stable, as extreme changes can affect the flooring. Avoid using harsh chemicals or wax-based products, as they may damage the finish.
By following these care and maintenance tips, you can enjoy your Tarkett flooring for years to come. Always refer to Tarkettna.com for specific product recommendations and detailed guides.
Troubleshooting Common Issues
During and after installation, common issues may arise that require attention. One of the most frequent problems is gapping between planks, often caused by improper acclimation or uneven subfloor preparation. To resolve this, ensure the flooring has acclimated correctly and check the subfloor for levelness.
If planks are not securing properly, inspect the locking mechanism for dirt or debris. Clean the edges and retry installation. For buckling or unevenness, verify that the subfloor is dry and flat, as moisture or irregularities can cause these issues.
For adhesive-related problems, ensure the subfloor is clean and dry before applying adhesive. If bubbles appear, use a roller to press them out. Always refer to Tarkettna.com for specific troubleshooting guides tailored to your product.
Addressing issues promptly will ensure the longevity and appearance of your flooring. Regular maintenance and inspections can prevent many common problems from escalating.
Leave a Reply
You must be logged in to post a comment.